
How to remove a hard drive partition on your Mac
- sep
- 24

Do you need to get back that extra space you gave up to partition your Mac's hard drive?
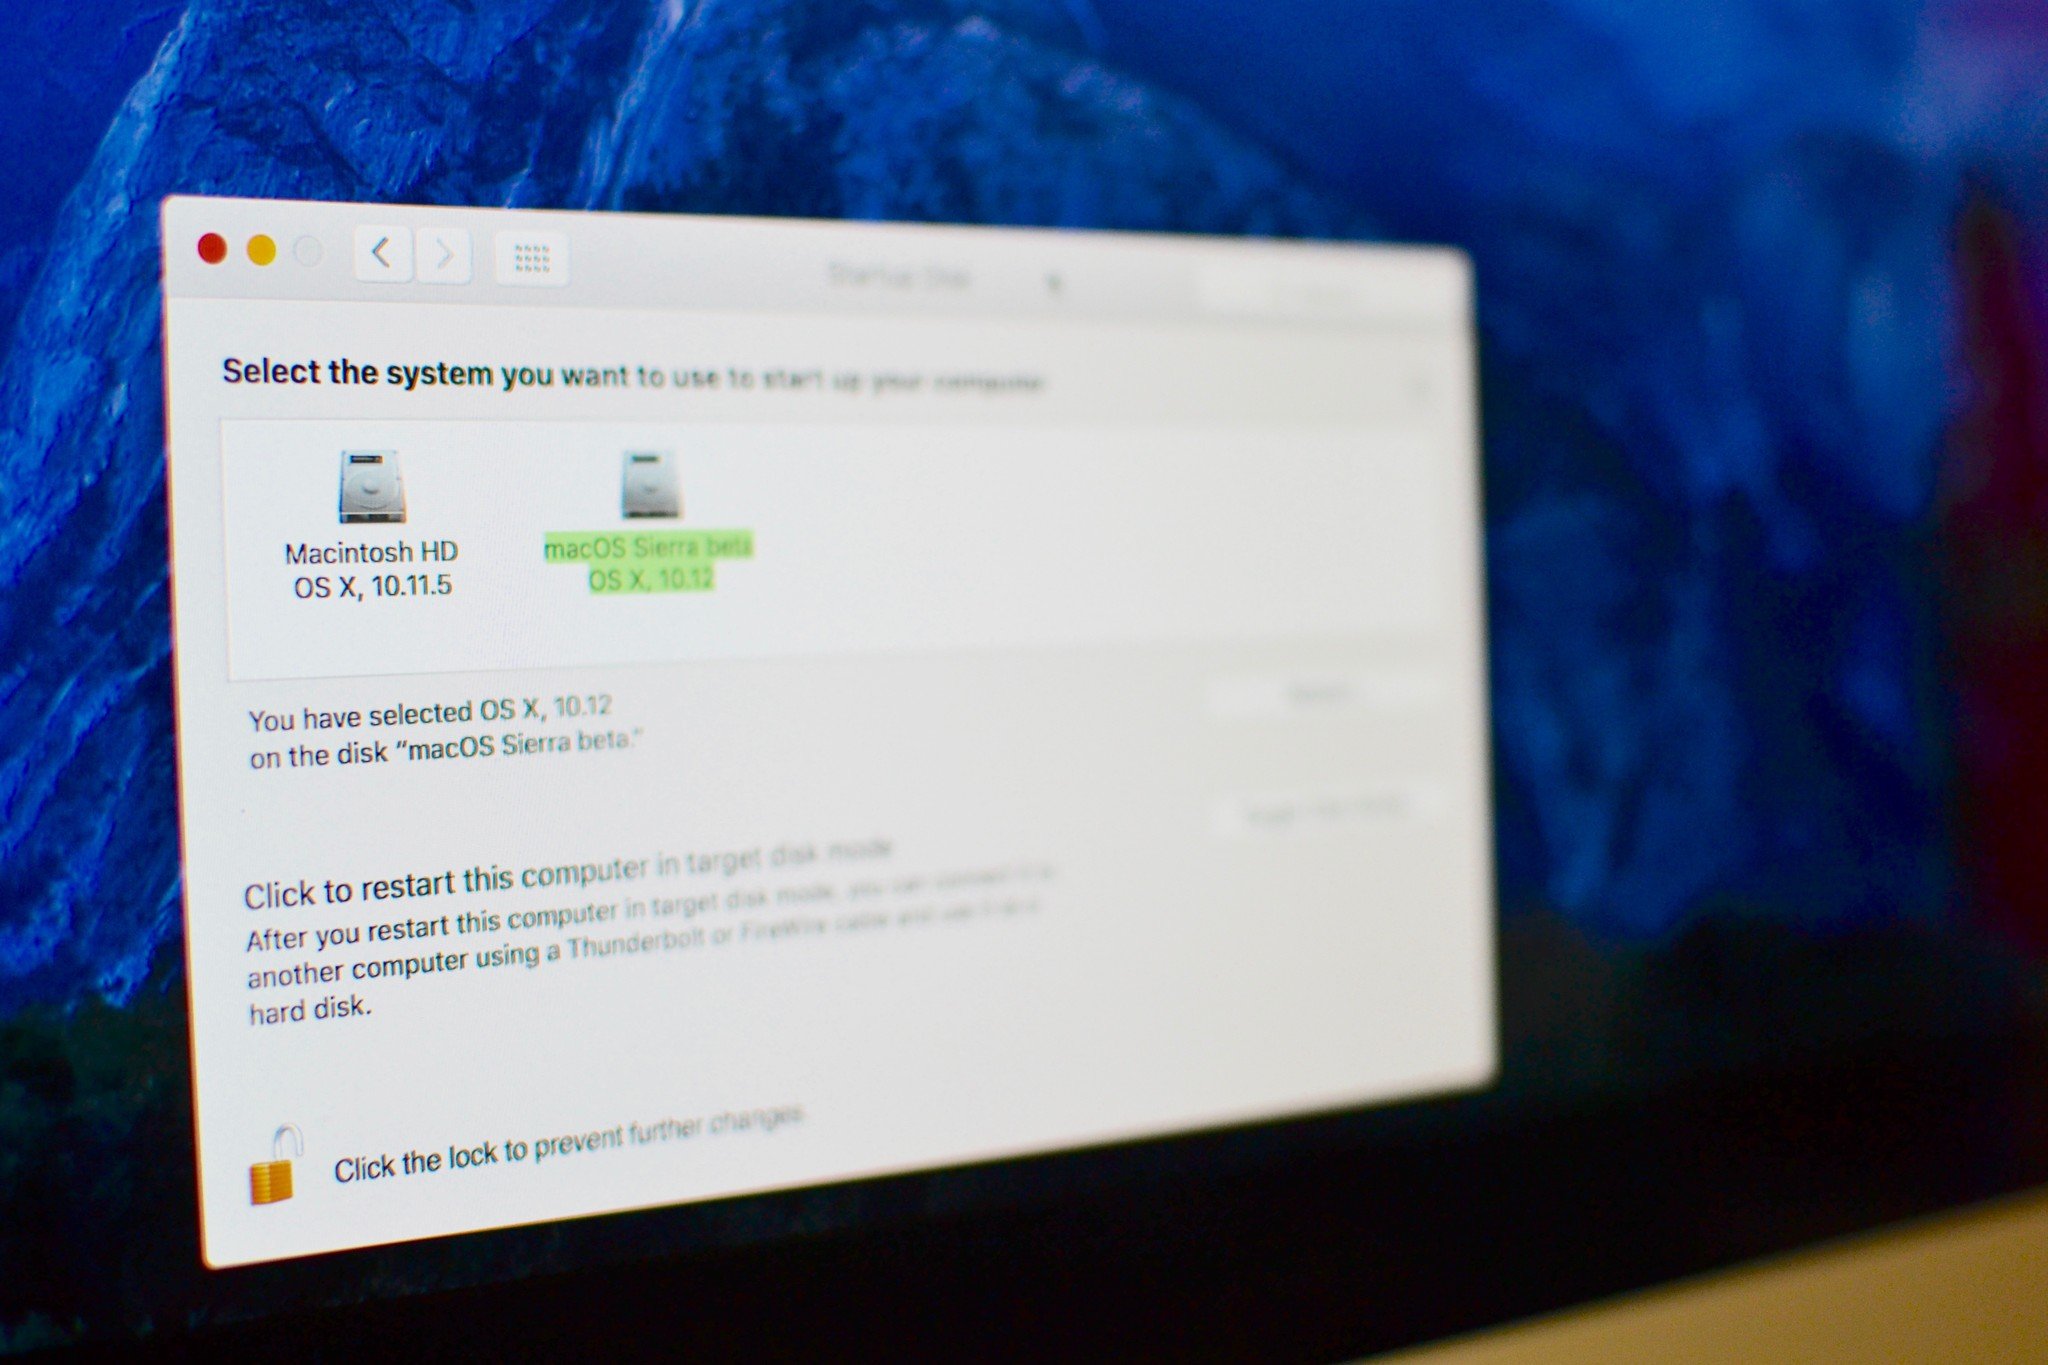
If you have previously partitioned your Mac's hard drive in order to download a macOS beta or install Windows, but now you need that storage space back, you can remove the partition and recapture the much-needed space. Here's how.
Getting rid of a secondary partition on the Mac is a two-step process. After erasing a partition, you can then remove it from your system.
Before you start
The most important thing to do before making any changes to your hard drive is to back it up. Time Machine has the easiest way to back up your data if you don't already have a system in place.
How to erase a partition on your Mac
Make sure to restart your computer in your main partition to erase additional ones.
- Open Finder from your dock.
Select Applications.
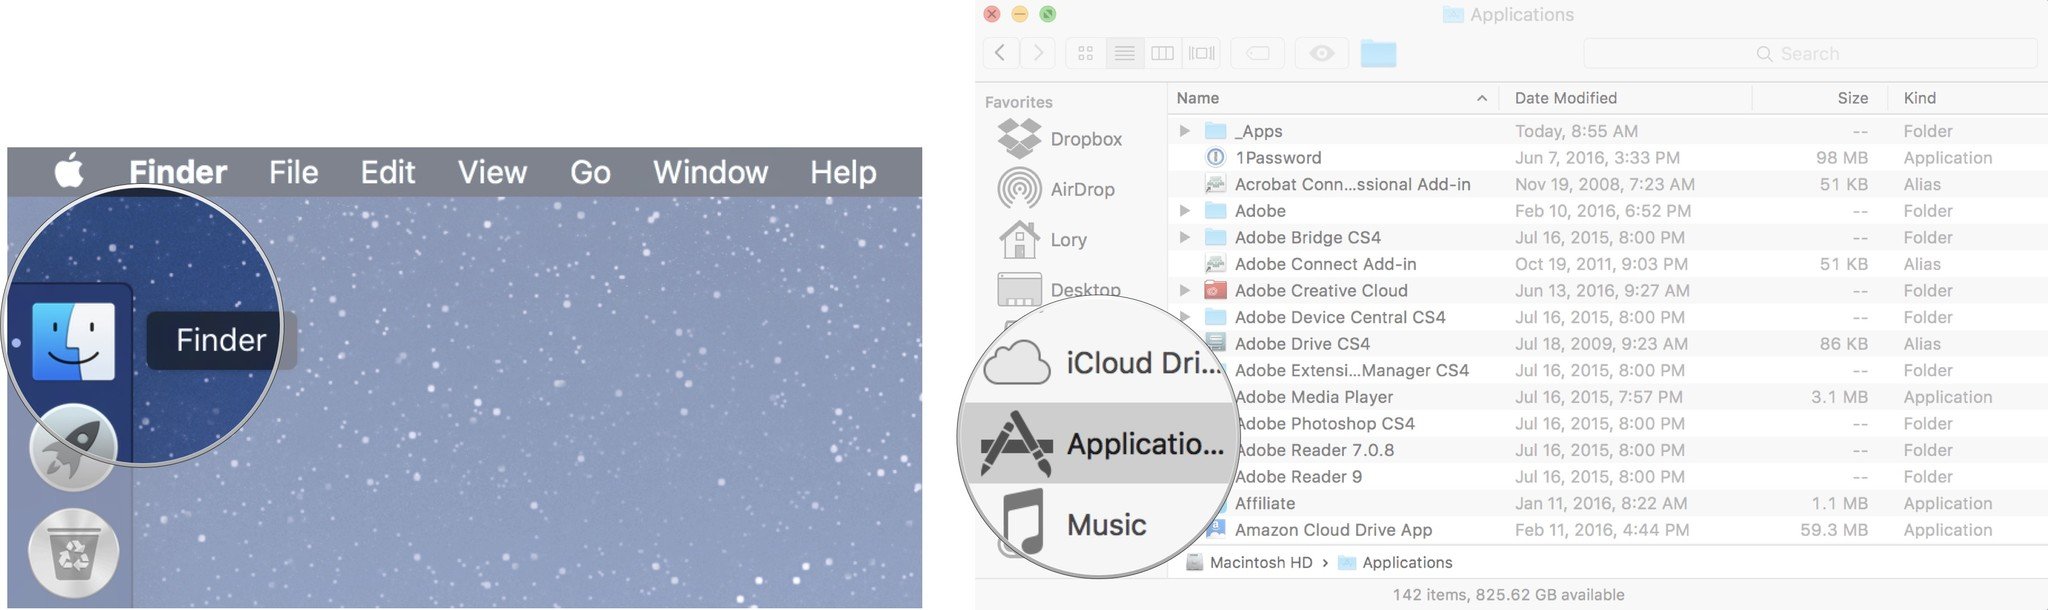
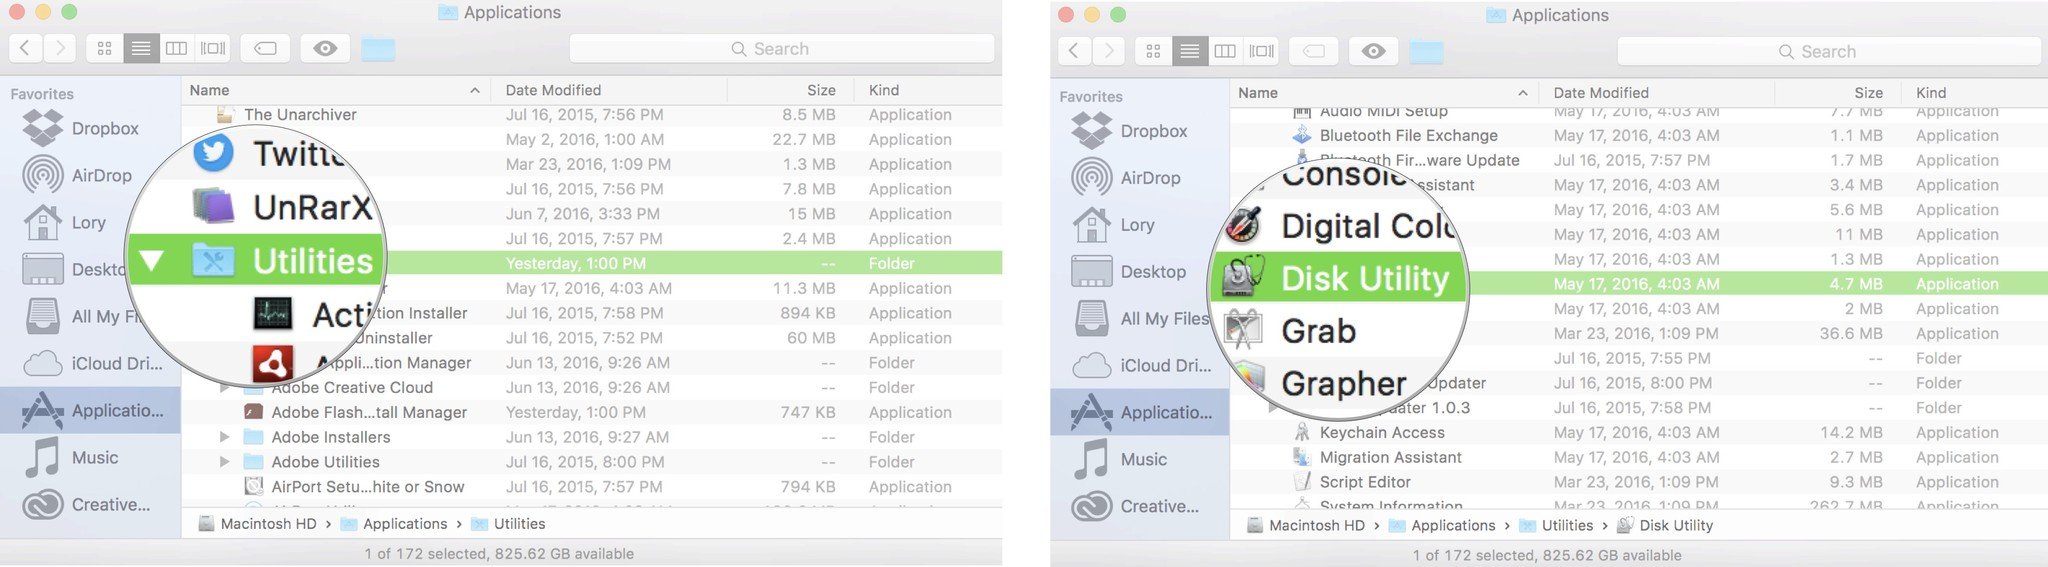
- Scroll down and open the Utilities folder.
Double-click to open Disk Utility.
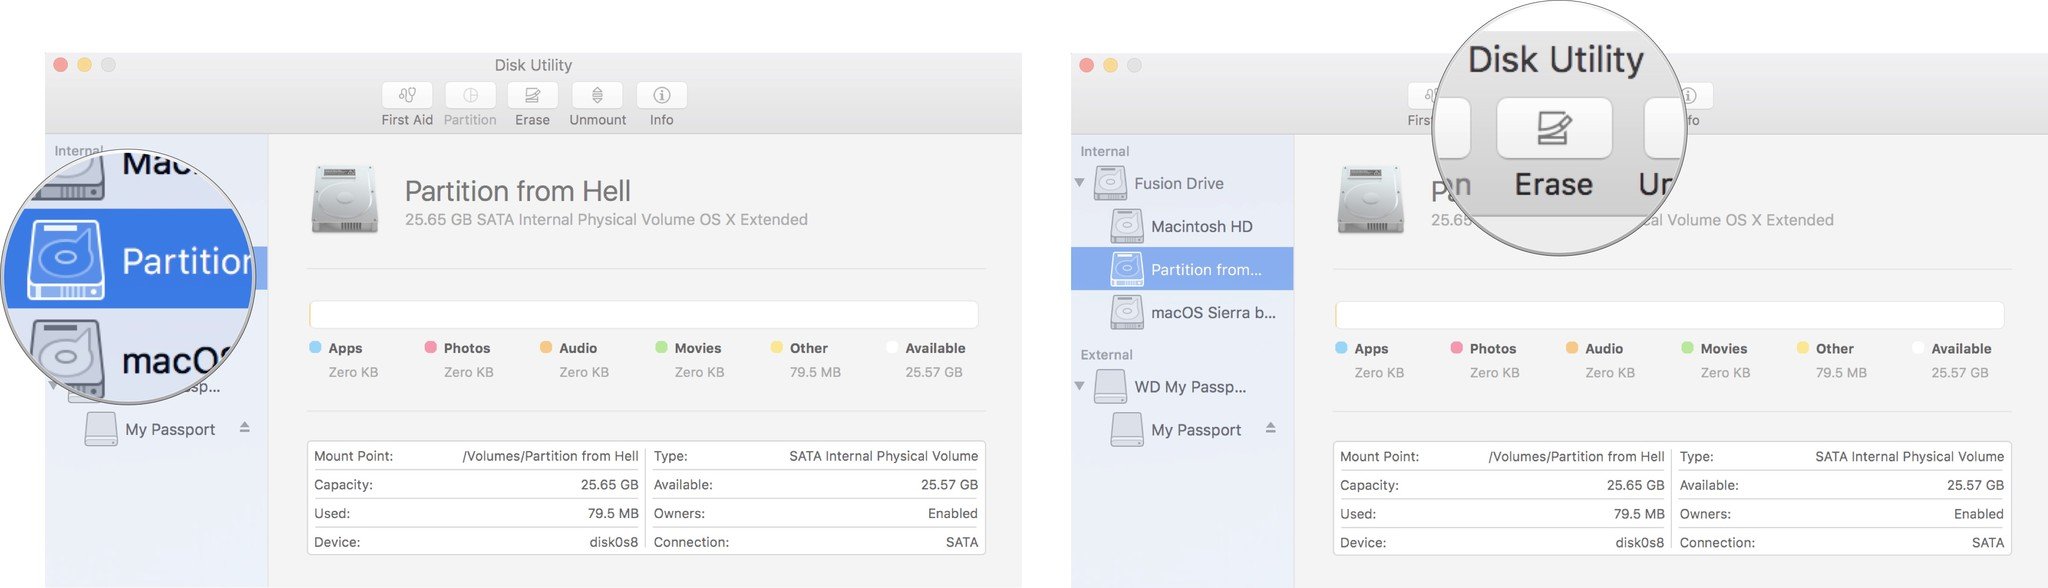
- Select the partition you wish to erase.
- Click Erase.
- Click Erase to confirm you wish to erase the partition.
Click Done to continue.
How to remove a partition on your Mac
After following the steps to erase a partition, you can then remove it from your hard drive.
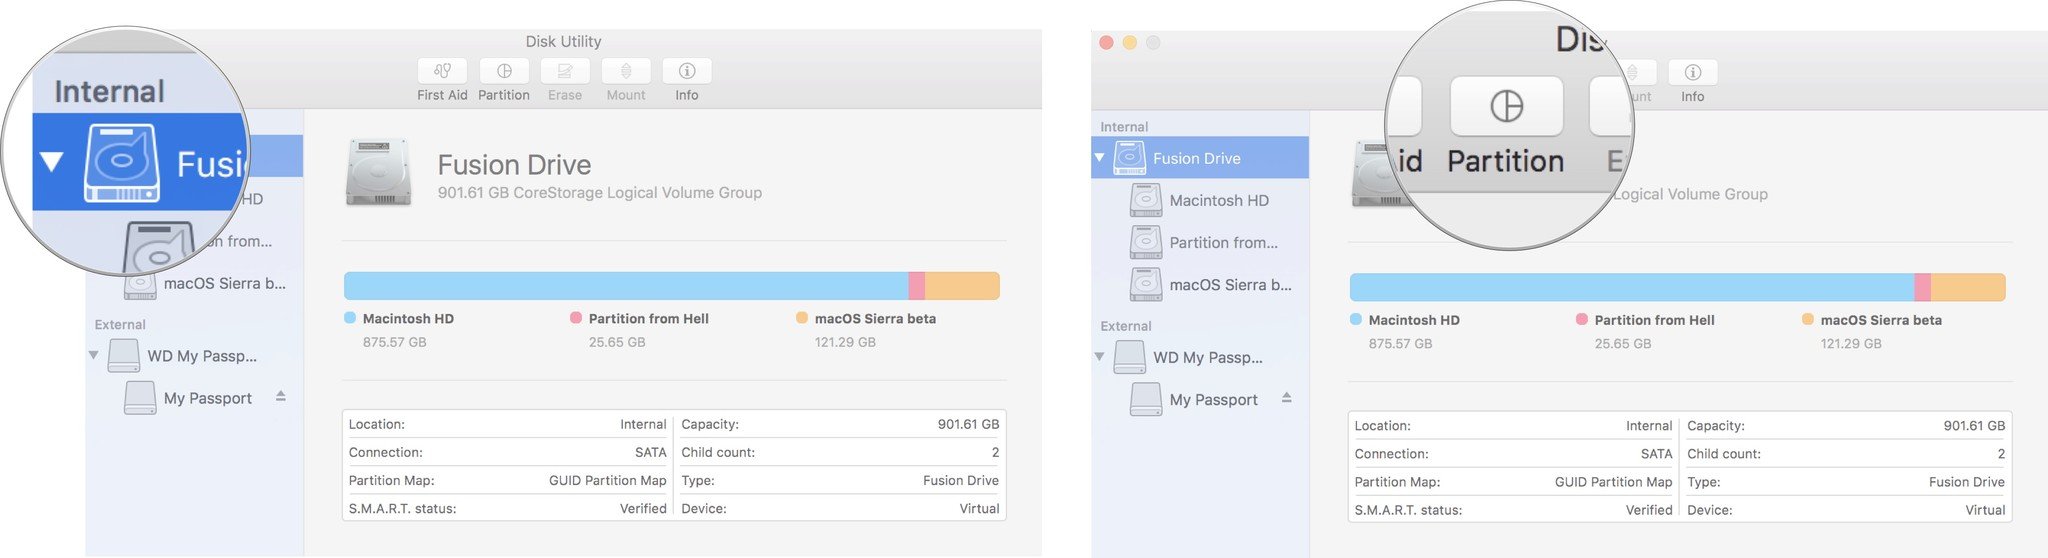
- Select your main partition, which is the first drive on the list. It might be called "Fusion" or "Macintosh HD."
Click Partition.
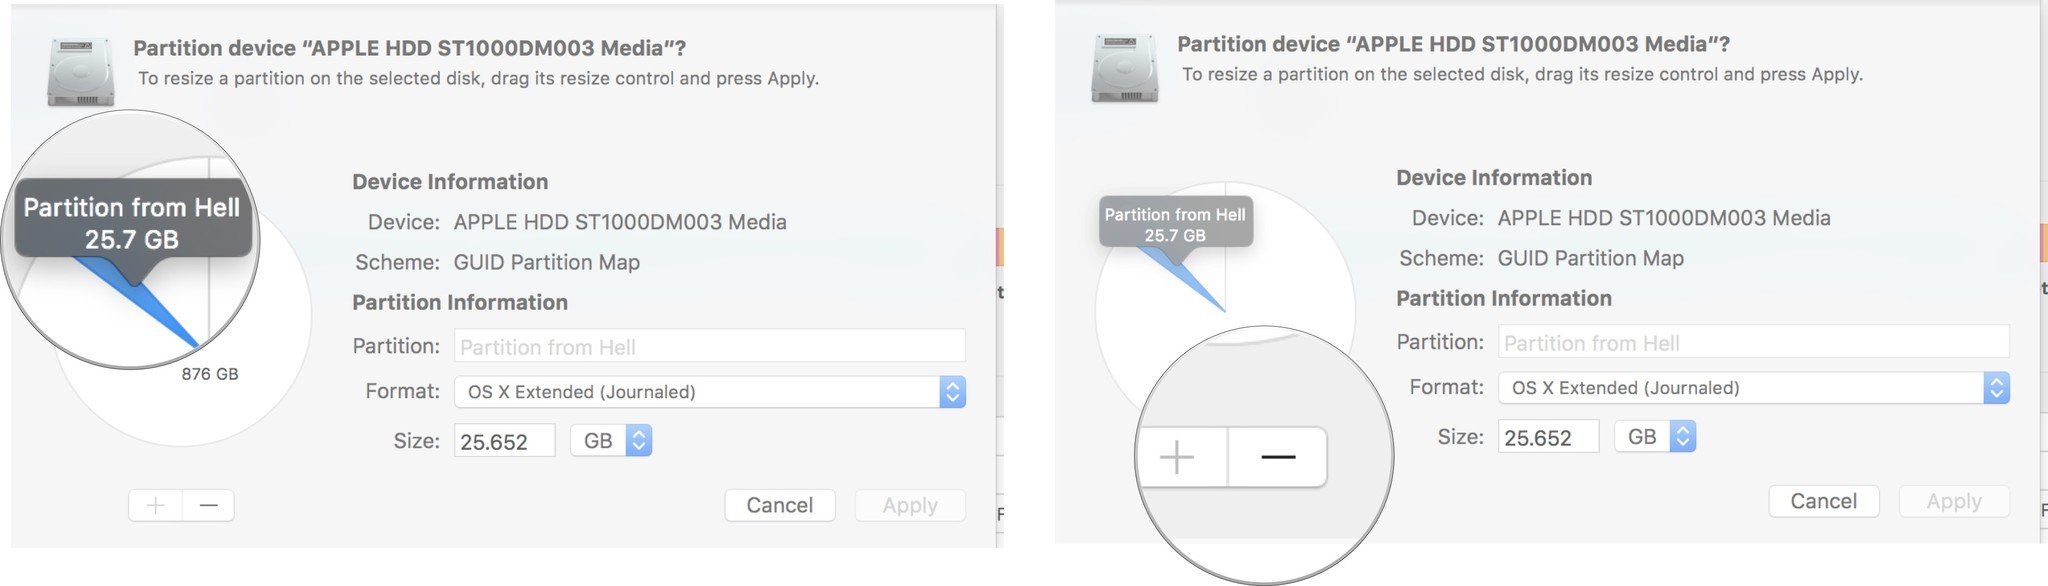
- Select the partition you wish to remove from the graph.
- Click the minus (-) button.
Click Apply.
Disk Utility will check the disk and make changes. This will take several minutes.
Any questions?
Do you have any questions about how to erase and remove a partition on your Mac? Let us know in the comments and we'll help you out.