
How to Speed Up Mail on your Mac Using Automator
- nov
- 23
Use the power of Automator, an easy-to-use app built into your Mac that can handle tasks for you, to help keep Mail running smoothly.
If you use Apple's Mail app on your Mac, you've probably had times when the application slows down. Messages in mailboxes are slow to appear; searches take longer than usual to perform. This can happen when Mail's mailboxes (or folders, if you prefer) accumulate thousands of messages — which is all the more likely if you're among the majority of the human population and you don't discard old email.
The best thing you can do is be ruthless with old email. Once you're finished with a message, move it to the trash and then empty the trash every so often. Try to think about it this way. We all receive tons of junk mail in our physical mailboxes — advertising circulars from the local supermarket, catalogs, credit card applications. If you don't save any of that stuff, why would you hold on to old email, particularly when it takes less effort to press the delete key than it does to carry paper-based mail to the recycle bin?
Still, some of us accumulate email that is valuable and merits keeping. That's fine, too, but over time it still may slow the Mail app down.
Lucky for all of us, there's a solution to the slowdown.
Scripting to the Rescue
There's a built-in tool on your Mac called vacuum that you can use to clean up the database that stores all of your emails. The vacuum command copies the contents of your mail database to a temporary file and rebuilds it so that it uses less space on your disk. The vacuum command eliminates gaps, defragments the data, and cleans up the database file structure.
Normally, the vacuum command is accessible only through the Mac's command-line interface using an app such as Terminal. But thanks to the wonder of Automator, an app that ships with your Mac, you can create a simple three-step script that will run the vacuum tool. And you don't have to know how to write a script, use the command line, or even understand how the vacuum tool works.
Here's how to do it.
Meet Otto
The first thing we'll need to do is open the Automator app which is located in your Mac's Applications folder. Its icon looks like a robot refugee from Earth, circa 2805.
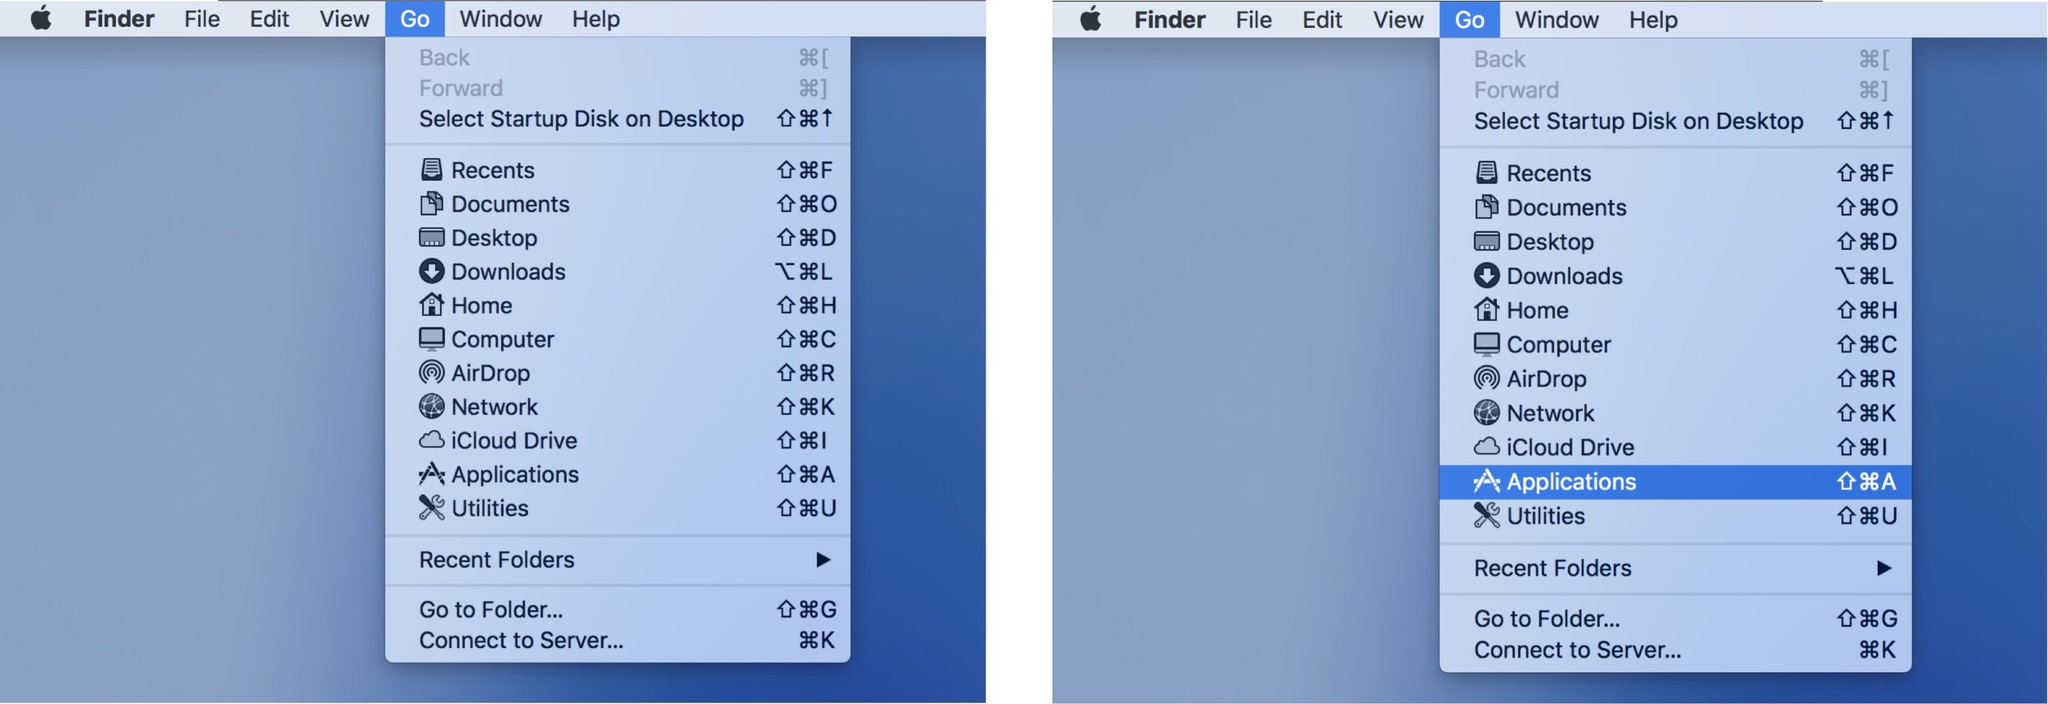
- In the Finder, choose Go
Click on Applications.
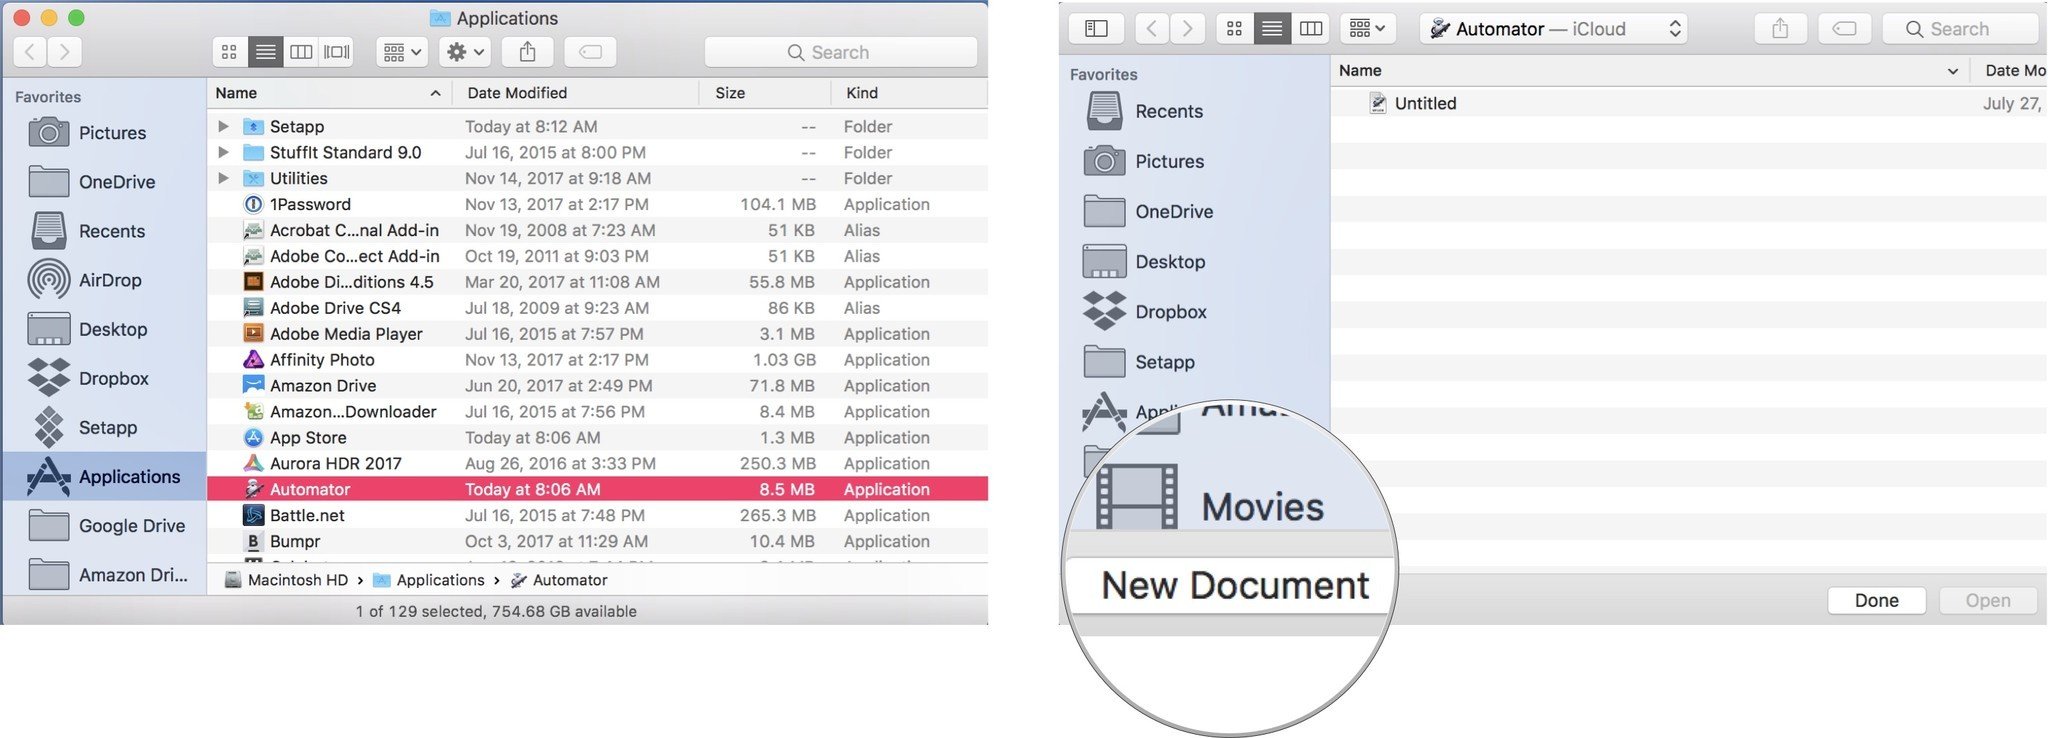
- In the Applications window that appears, locate the Automator app and double-click it to open it.
In the window that appears, click New Document.
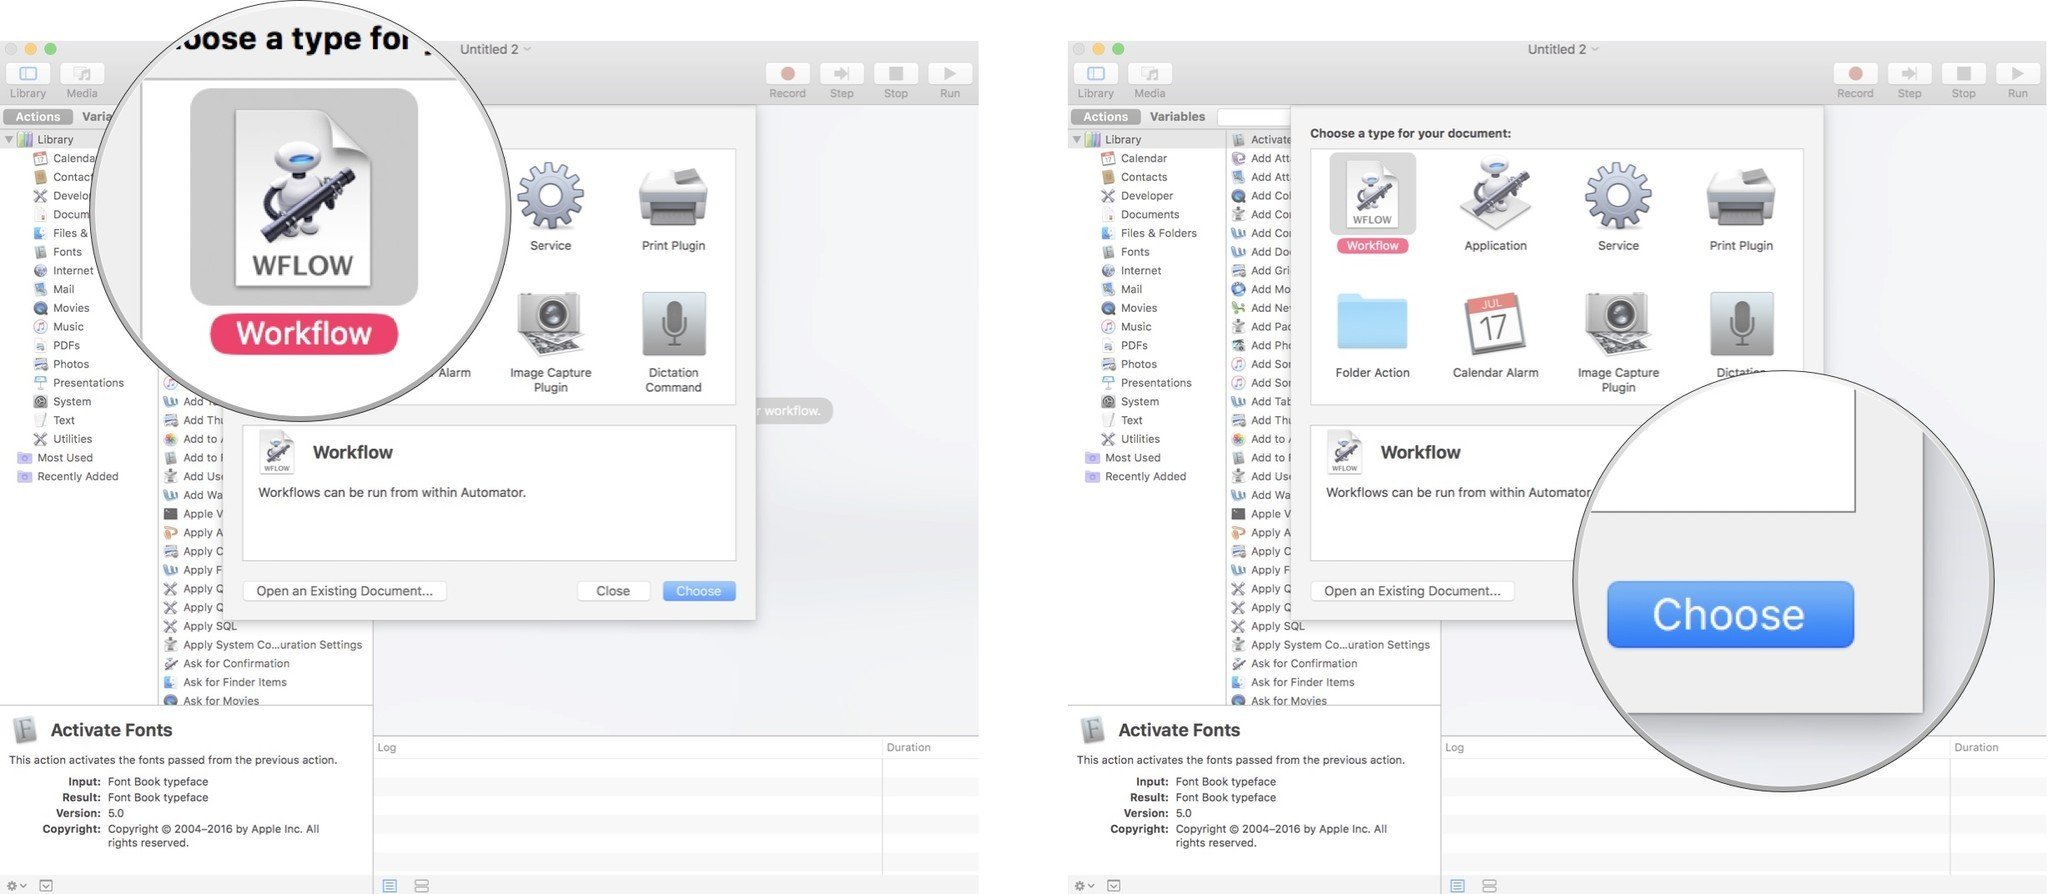
- In the sheet that appears, click Workflow
Click Choose.
An empty Automator document will open. To build our Automator script, we will drag actions from the left side of the window to the right side. As a first step, we want to quit the Mail app if it is open to make sure Mail's database does not change while we are cleaning it up.
- In the search field type the word quit.
Drag and drop the action named Quit Application to the right side of the window.
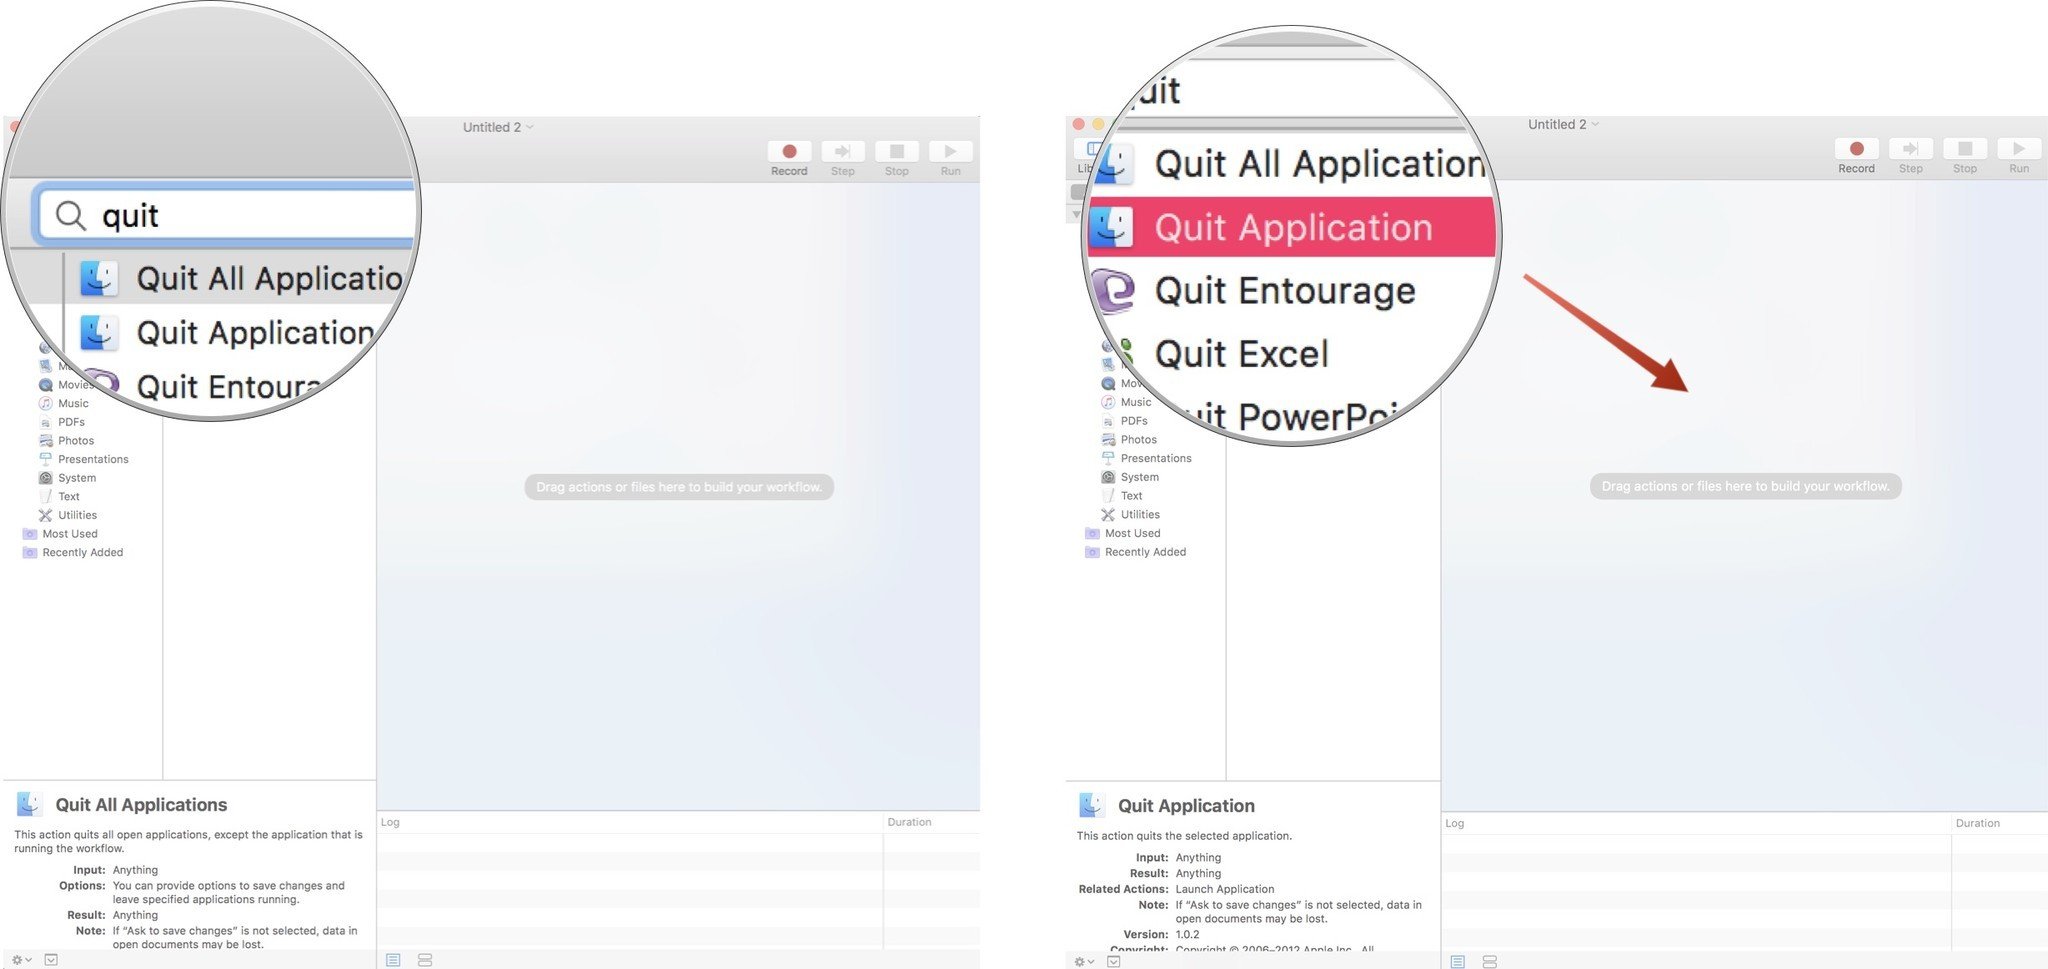
- From the pop-up menu in the Quit Application action, choose Mail.
Clear the search field above the list of actions and type the word run.
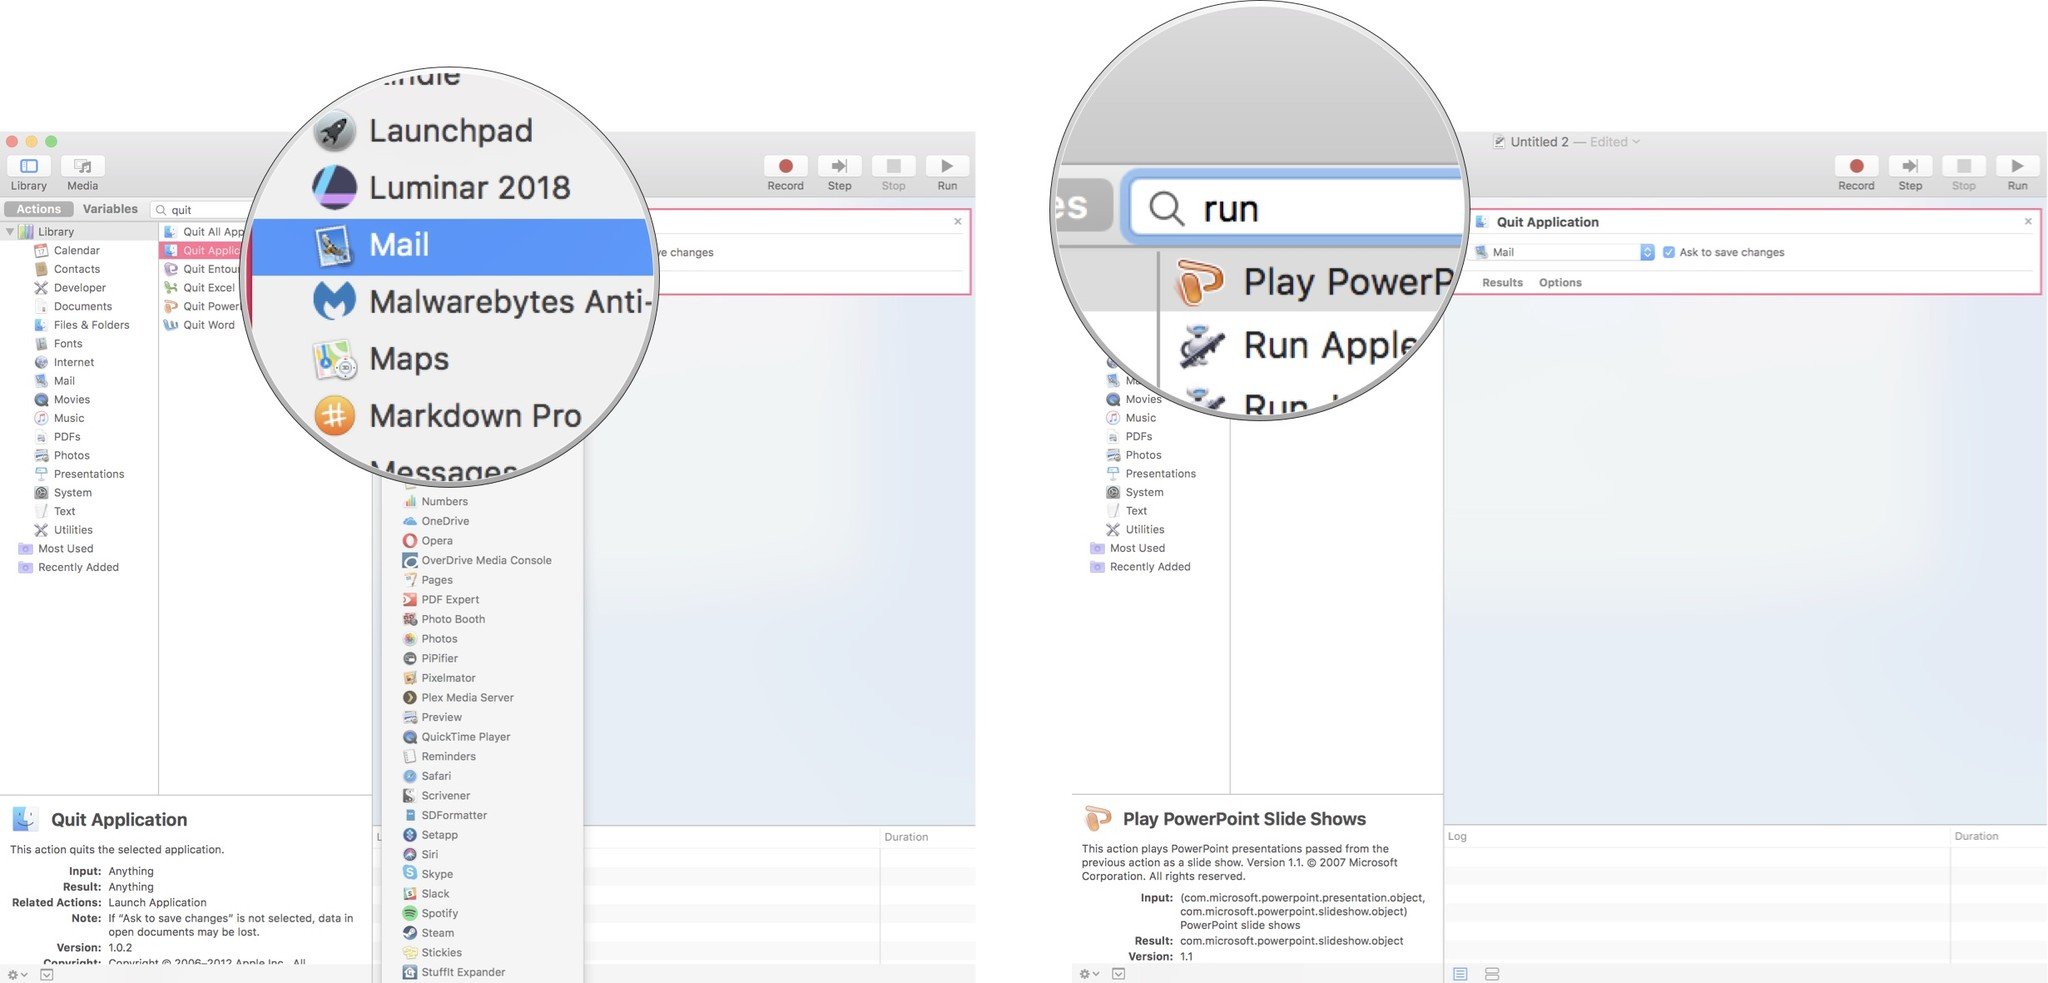
- Drag and drop the action named Run Shell Script beneath the Quit Application action.
- In the empty field in the middle of the Run Shell Script action, copy and paste the command below that corresponds to the version of macOS that is running on your Mac. Don't forget the semi-colon at the end of the line.
- For Snow Leopard (10.6): sqlite3 ~/Library/Mail/Envelope Index vacuum;
- For Lion (10.7), Mountain Lion (10.8), Mavericks (10.9), or Yosemite (10.10): sqlite3 ~/Library/Mail/V2/MailData/Envelope\ Index vacuum;
- For El Capitan (10.11): sqlite3 ~/Library/Mail/V3/MailData/Envelope\ Index vacuum;
- For Sierra (10.12): sqlite3 ~/Library/Mail/V4/MailData/Envelope\ Index vacuum;
For High Sierra (10.13): sqlite3 ~/Library/Mail/V5/MailData/Envelope\ Index vacuum;
 Now we add a call to action for the Mail app.
- Clear the search field above the list of actions and type the word launch.
Drag and drop the action named Launch Application to the right side of the window beneath the Run Shell Script action.
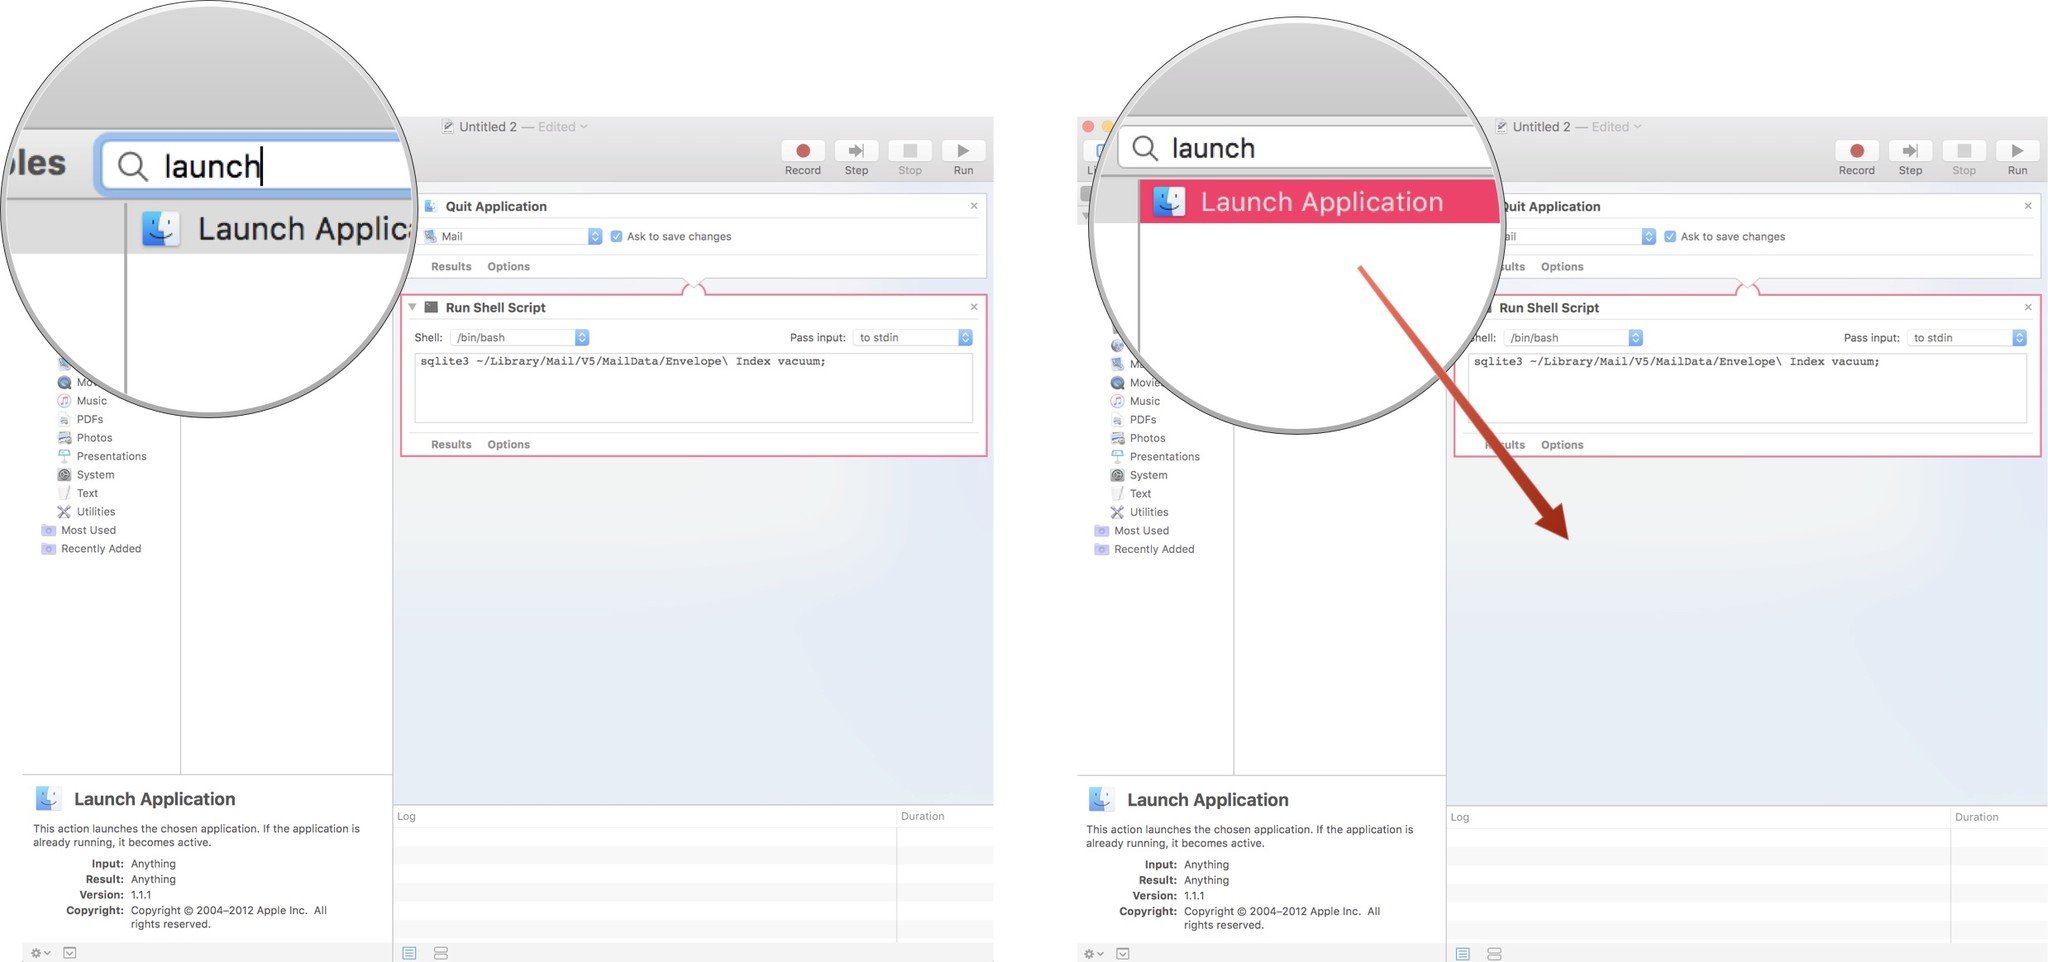
From the pop-up menu in the Launch Application action, choose Mail.
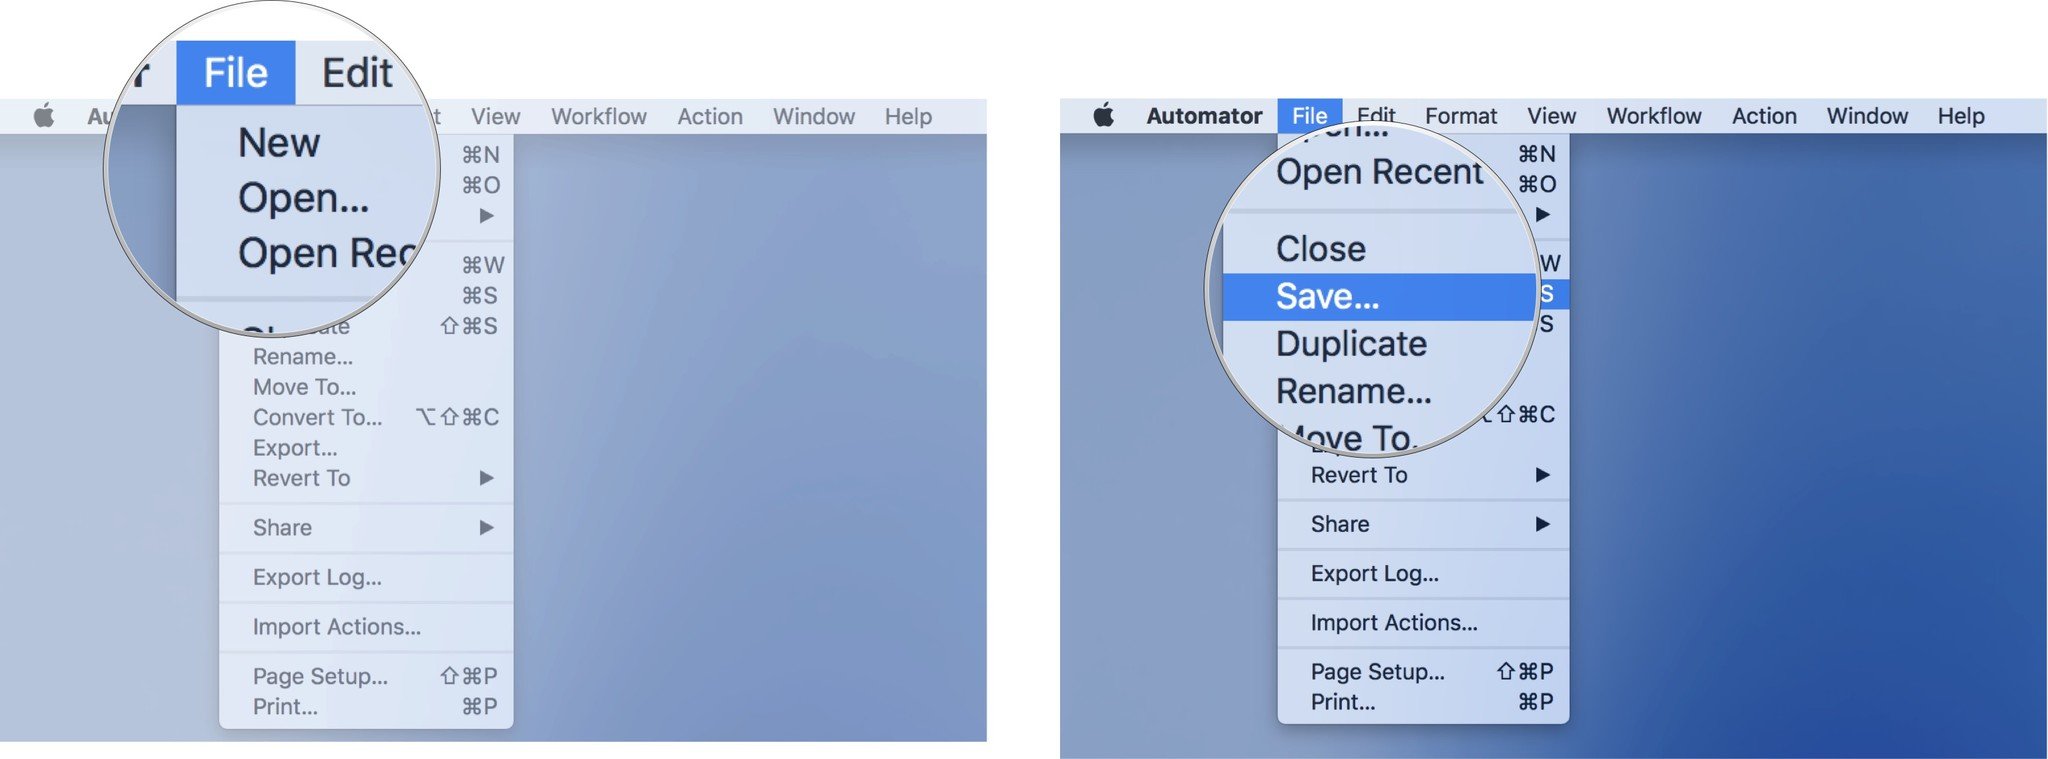
The script is now complete, but you'll need to save it.
- Click on File in the Menu bar.
Choose Save.
- In the sheet that appears, give your workflow a name, and pick a place to save your new Automator script.
To run your new workflow, just open it with Automator and click the Run button in the upper right corner of the script's window. If Mail is running, it will quit, the script will run, and Mail will re-open with a rebuilt database behind the scenes which should lead to improved performance.
Do It For Me
You can run your new script whenever you feel Mail is slowing down. Or you can schedule it to run on a regular schedule using the Calendar app on your Mac. All you have to do is convert your new script into a Calendar Alarm.
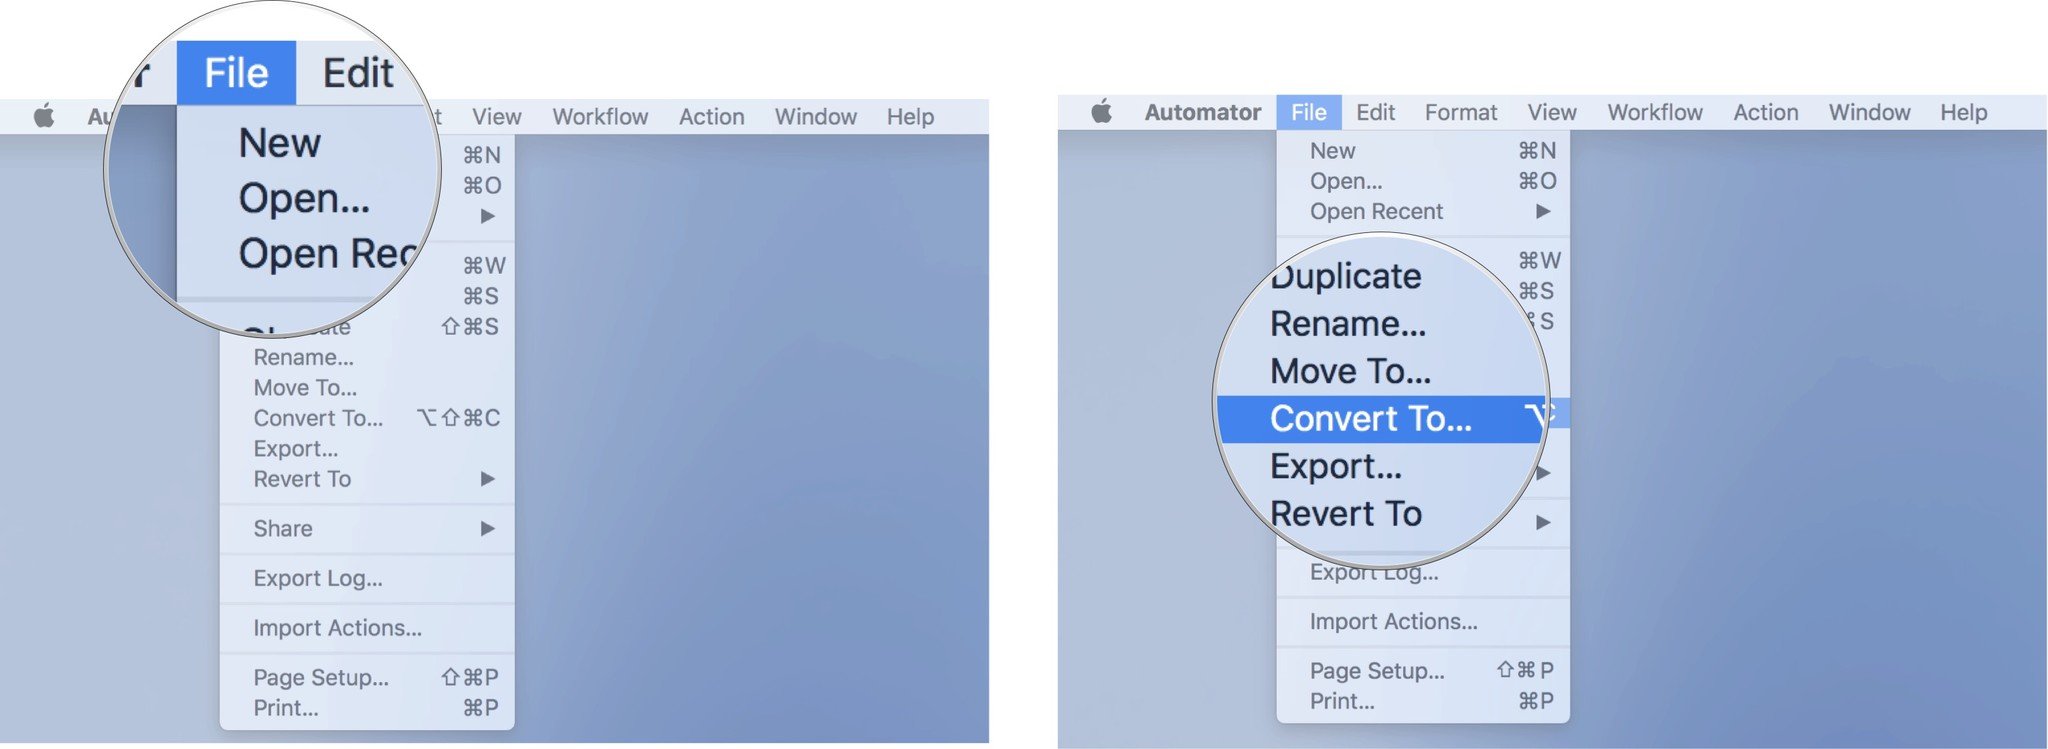
- With the script window open in Automator, click on File in the Menu Bar.
Choose Convert To...
Automator will duplicate your script and open a new window.
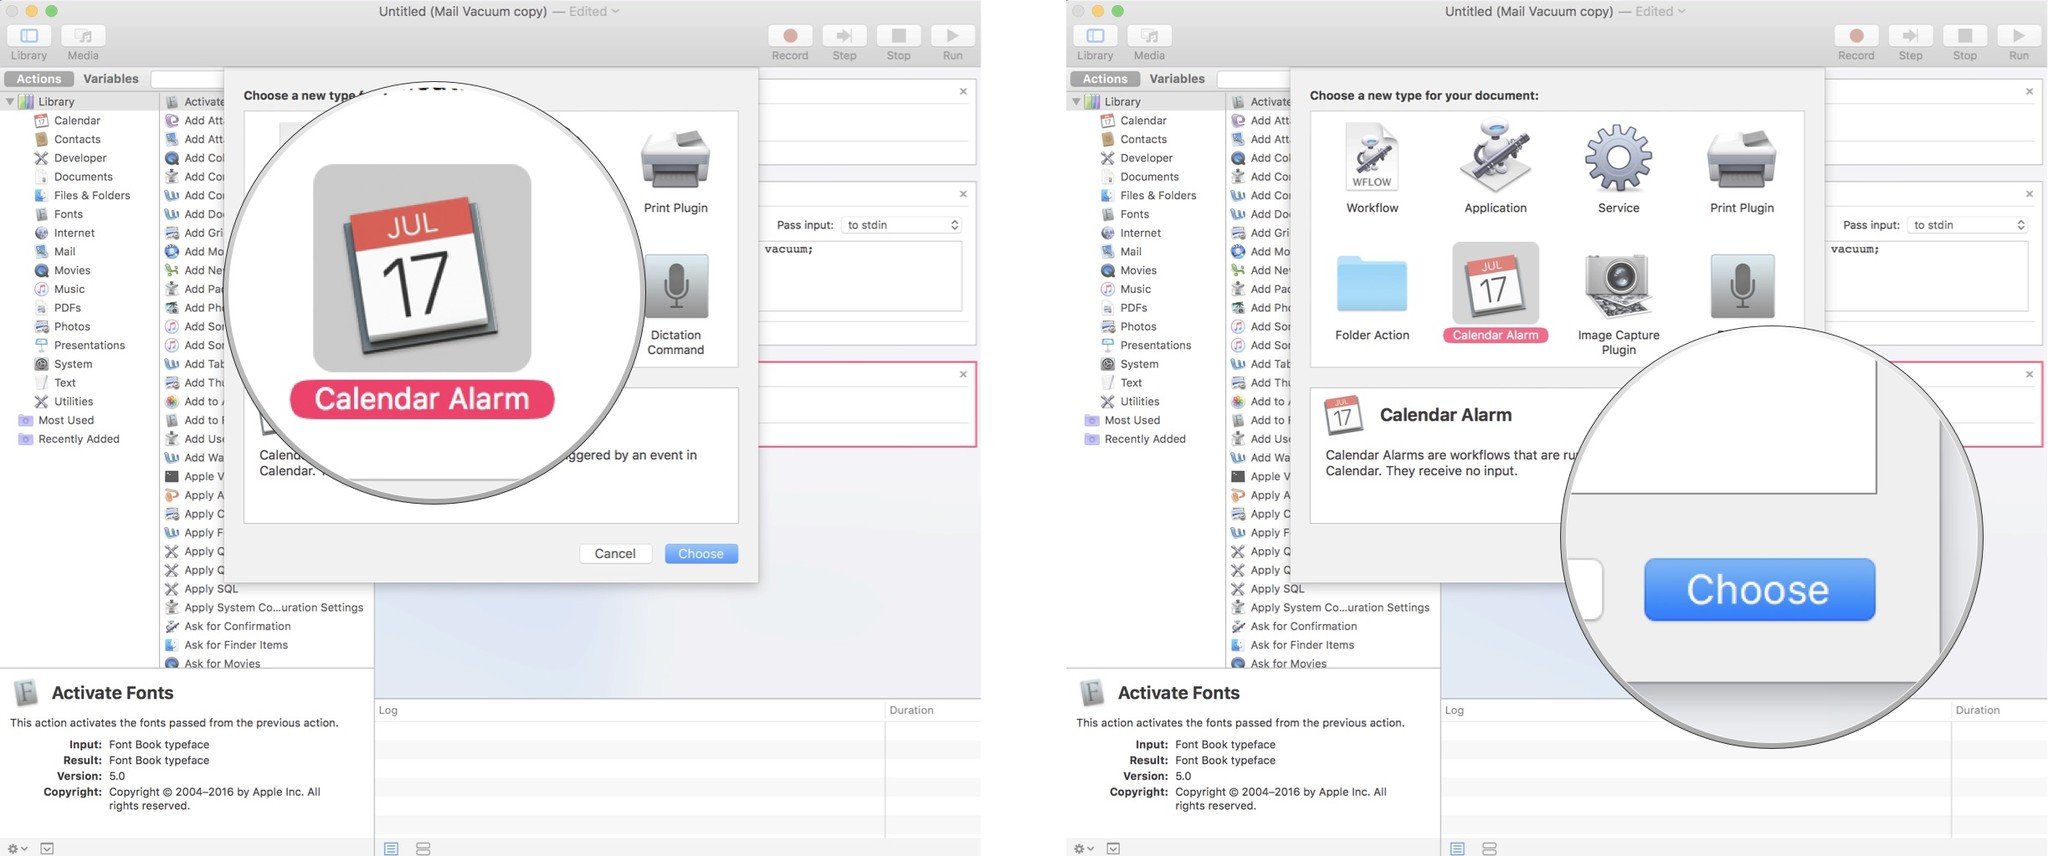
- In the sheet that appears, click Calendar Alarm
Click Choose.
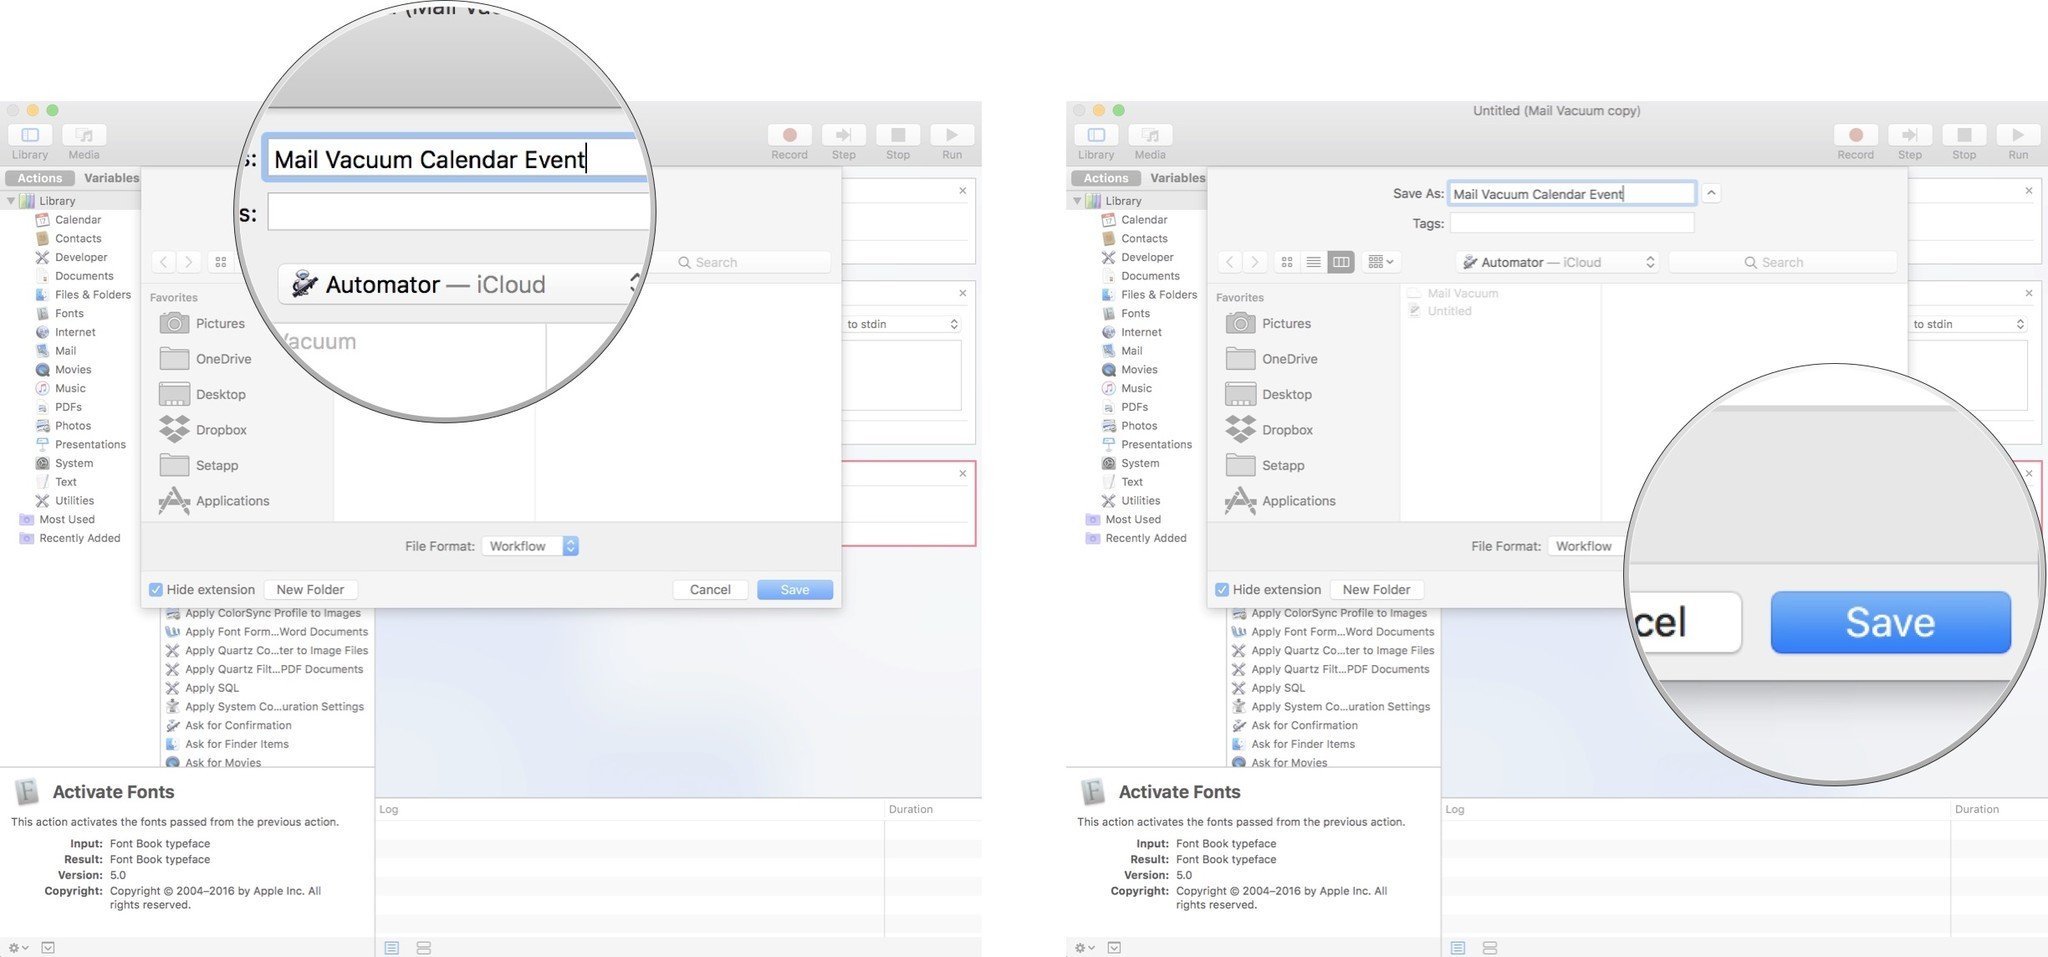
- Click on File in the Menu bar.
Choose Save....
An important caveat: You need to be quick when saving this file. If you wait too long (more than about five seconds) when naming and saving this file, the script will revert to a standard workflow and will not be properly saved as a Calendar Alarm. This appears to be a bug in High Sierra, and possibly earlier versions of macOS as well. Look for the sentence at the top of the workflow that reads: "Calendar Alarm is run when triggered by a Calendar event." If you look long enough, you'll see it disappear, in which case you'll need to repeat Step 3.
In the sheet that appears, name your calendar event and click Save.
A new calendar named Automator will be created in your Calendar app and this new Calendar Alarm will be added to the Automator calendar as an event on the date and time it is created. You can edit this event to run on a regular schedule (say, the first of every month) or move it to another calendar.
Hoover it Up!
Has this easy-to-make Automator action helped with your Mail slowdowns? Let us know in the comments below.
