
How to use Apple Pencil: The Ultimate Guide
- mar
- 31
Getting started with your Apple Pencil is incredibly easy. Here's what you need to know!
The 10.5-inch and 12.9-inch iPad Pro (as well as the older 9.7-inch iPad Pro), and now the 2018 9.7-inch iPad all support Apple Pencil. The Pencil gives you the power to draw and sketch with full pressure sensitivity on your iPad, along with tilt control, side shading, and proper palm rejection. It's also an incredibly smart tool for hand-lettering and writing, letting you take notes at extremely small sizes without line aberrations or lag.
To take full advantage of the Apple Pencil, however, you need to know how to use it. Here's our complete guide to making the most out of your stylus, whether you're a beginning artist, average note-taker, or a total pro.
- Meet the Apple Pencil
- How to pair the Apple Pencil to your iPad
- How to check the battery level on Apple Pencil
- How to charge Apple Pencil
- How to unpair the Apple Pencil from your iPad
- Best Apple Pencil Accessories
- Apple Pencil not working? Here's the fix!
Meet the Apple Pencil
If you've used a stylus on the iPad or other graphics tablets previously, you'll find some aspects of the Apple Pencil familiar — and others very different. Here's a crash course in all things Apple Pencil for you!
Apple Pencil works with both size models of the current iPad Pro (10.5 and 12.9), the older 9.7-inch iPad Pro, and the 2018 9.7-inch iPad.
How to pair your Apple Pencil with your iPad
Before you can start using your Apple Pencil, you'll need to pair it to your iPad or iPad Pro.
- Make sure the iPad you want to use is on and unlocked, then uncap your Pencil.
- Plug in your Pencil to the new iPad.
When the Bluetooth Pairing Request appears, tap Pair.
You can now use your Apple Pencil with your iPad or iPad Pro! If you want to move your Pencil to a different iPad, you need only follow the above steps on the original model.
How to open a compatible app and get started
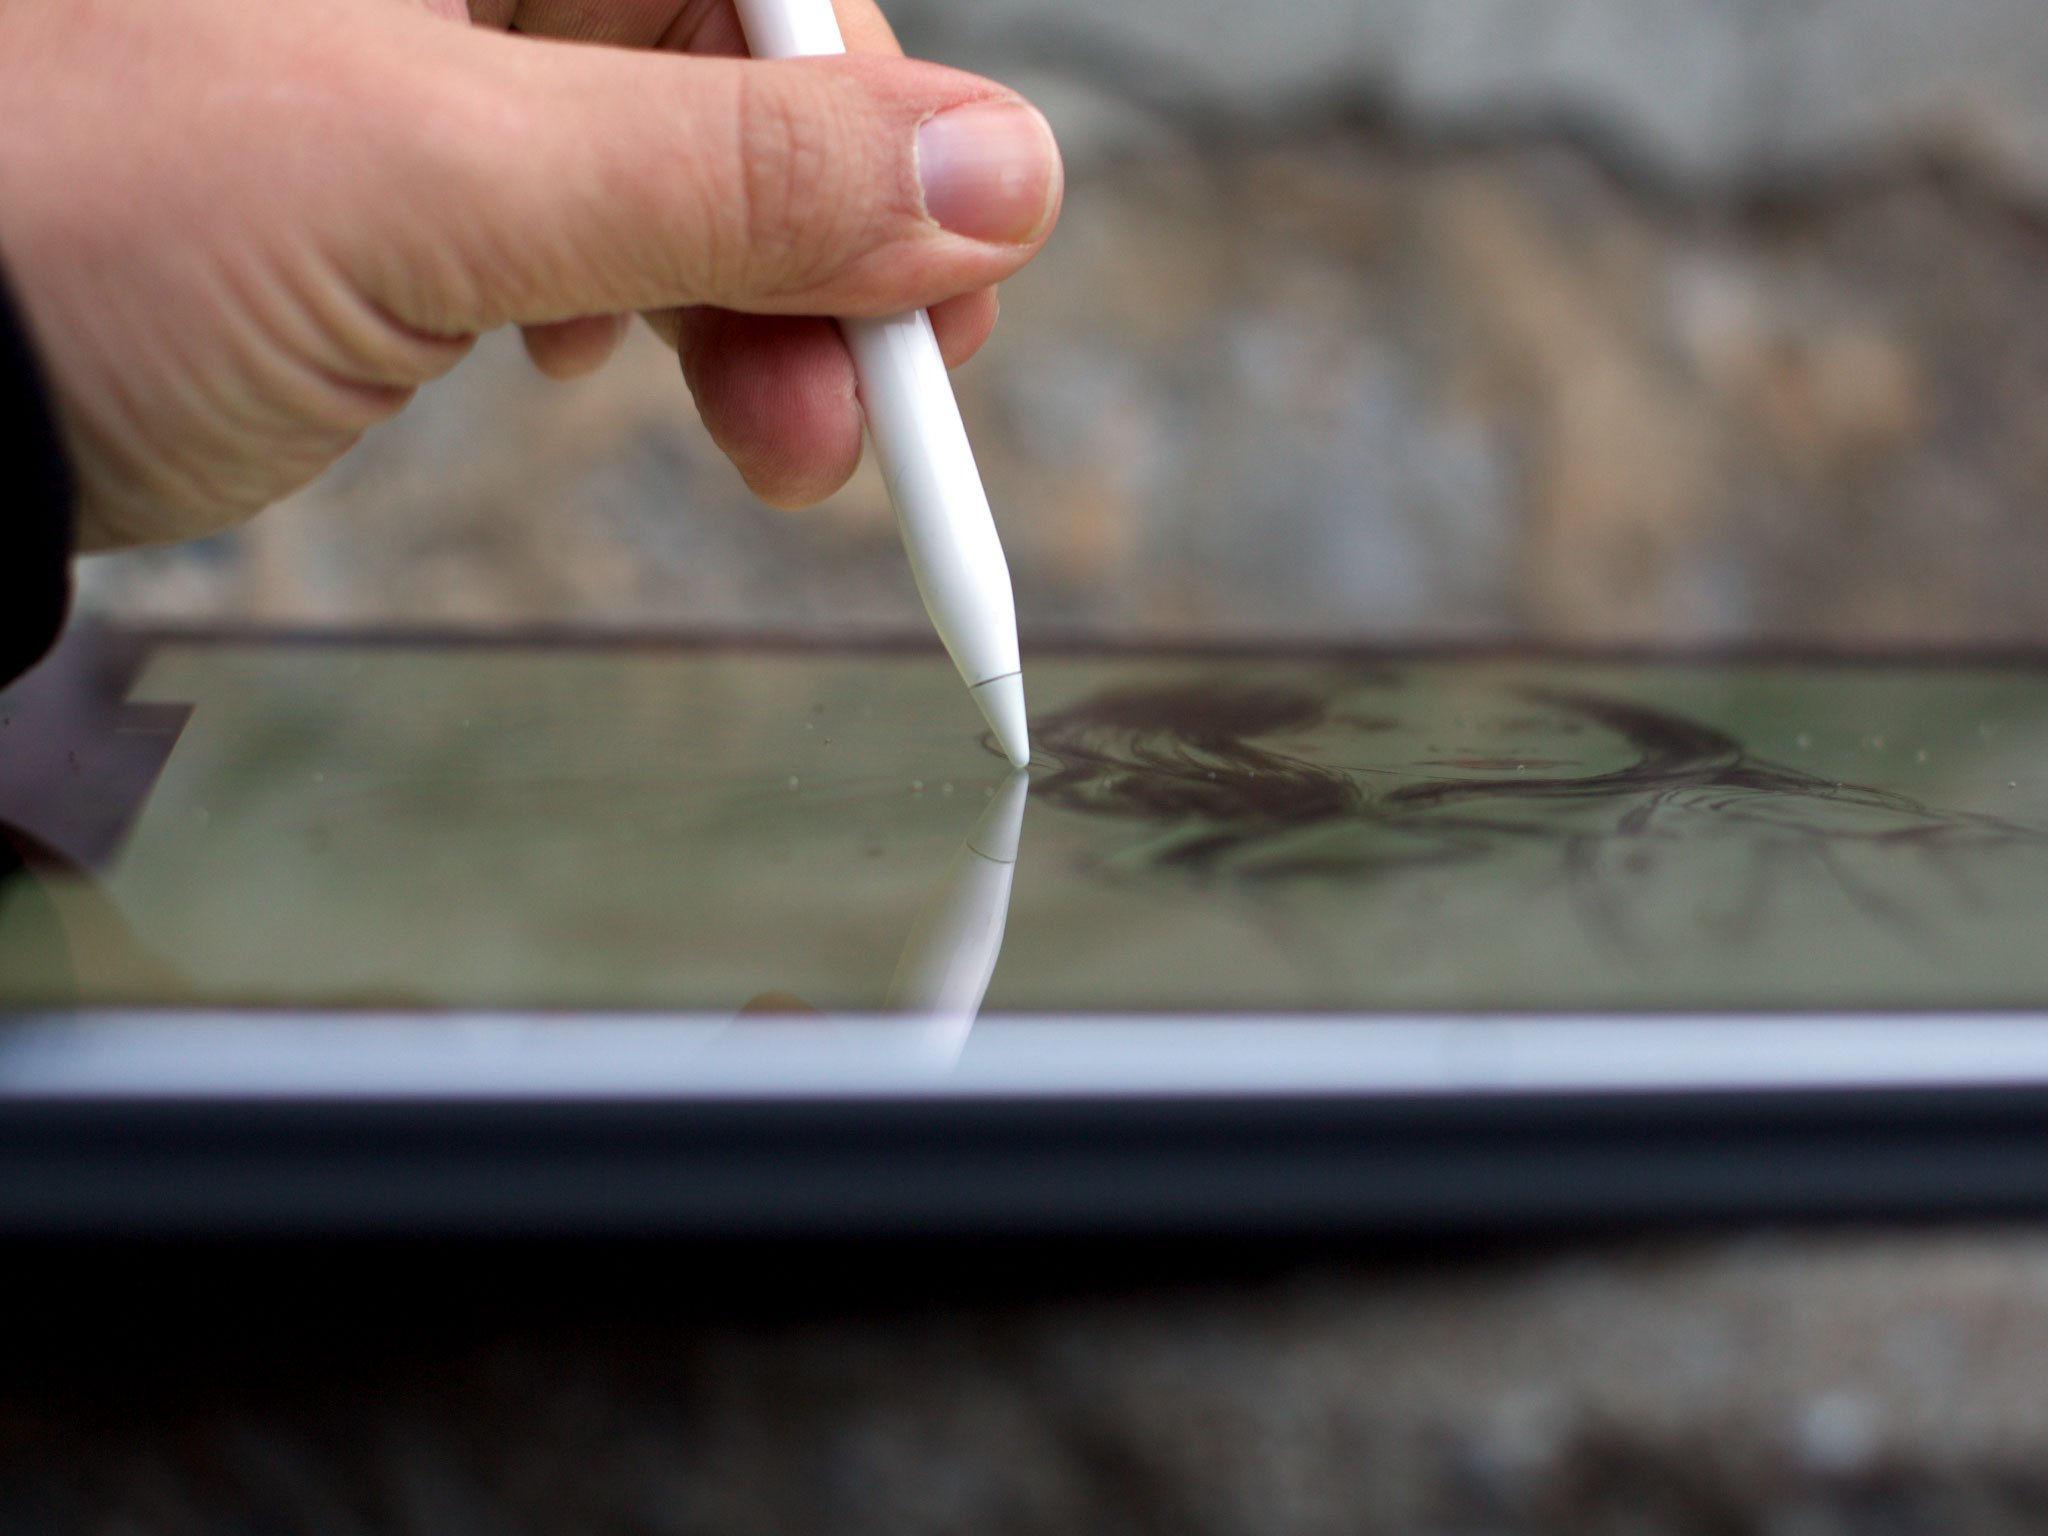
You don't have to engage a special menu or complicated per-app pairing process to use Apple Pencil: Once you've paired it to your iPad or iPad Pro, you're ready to draw, write, sketch, or navigate in any app you choose — just put the Pencil's pen nib to the iPad's glass screen and get to it!
The Apple Pencil doesn't have an eraser or special buttons — but it is fully pressure- and tilt-sensitive
Unlike Wacom's patented styluses, the Apple Pencil doesn't offer an eraser nib or special programmable buttons: All your primary interactions with the iPad's screen happen through the Pencil's white nib.
That's not to say the Pencil doesn't have a few tricks up its sleeve, however: It's fully pressure and tilt-sensitive, which means you can press harder against the screen to get a thicker line, or tilt your Pencil against the screen to virtually "shade" in a drawing or draw calligraphic letters.
Some apps, like Astropad Studio, even offer special combination Pencil-and-touch gestures that have the same uses as function buttons.
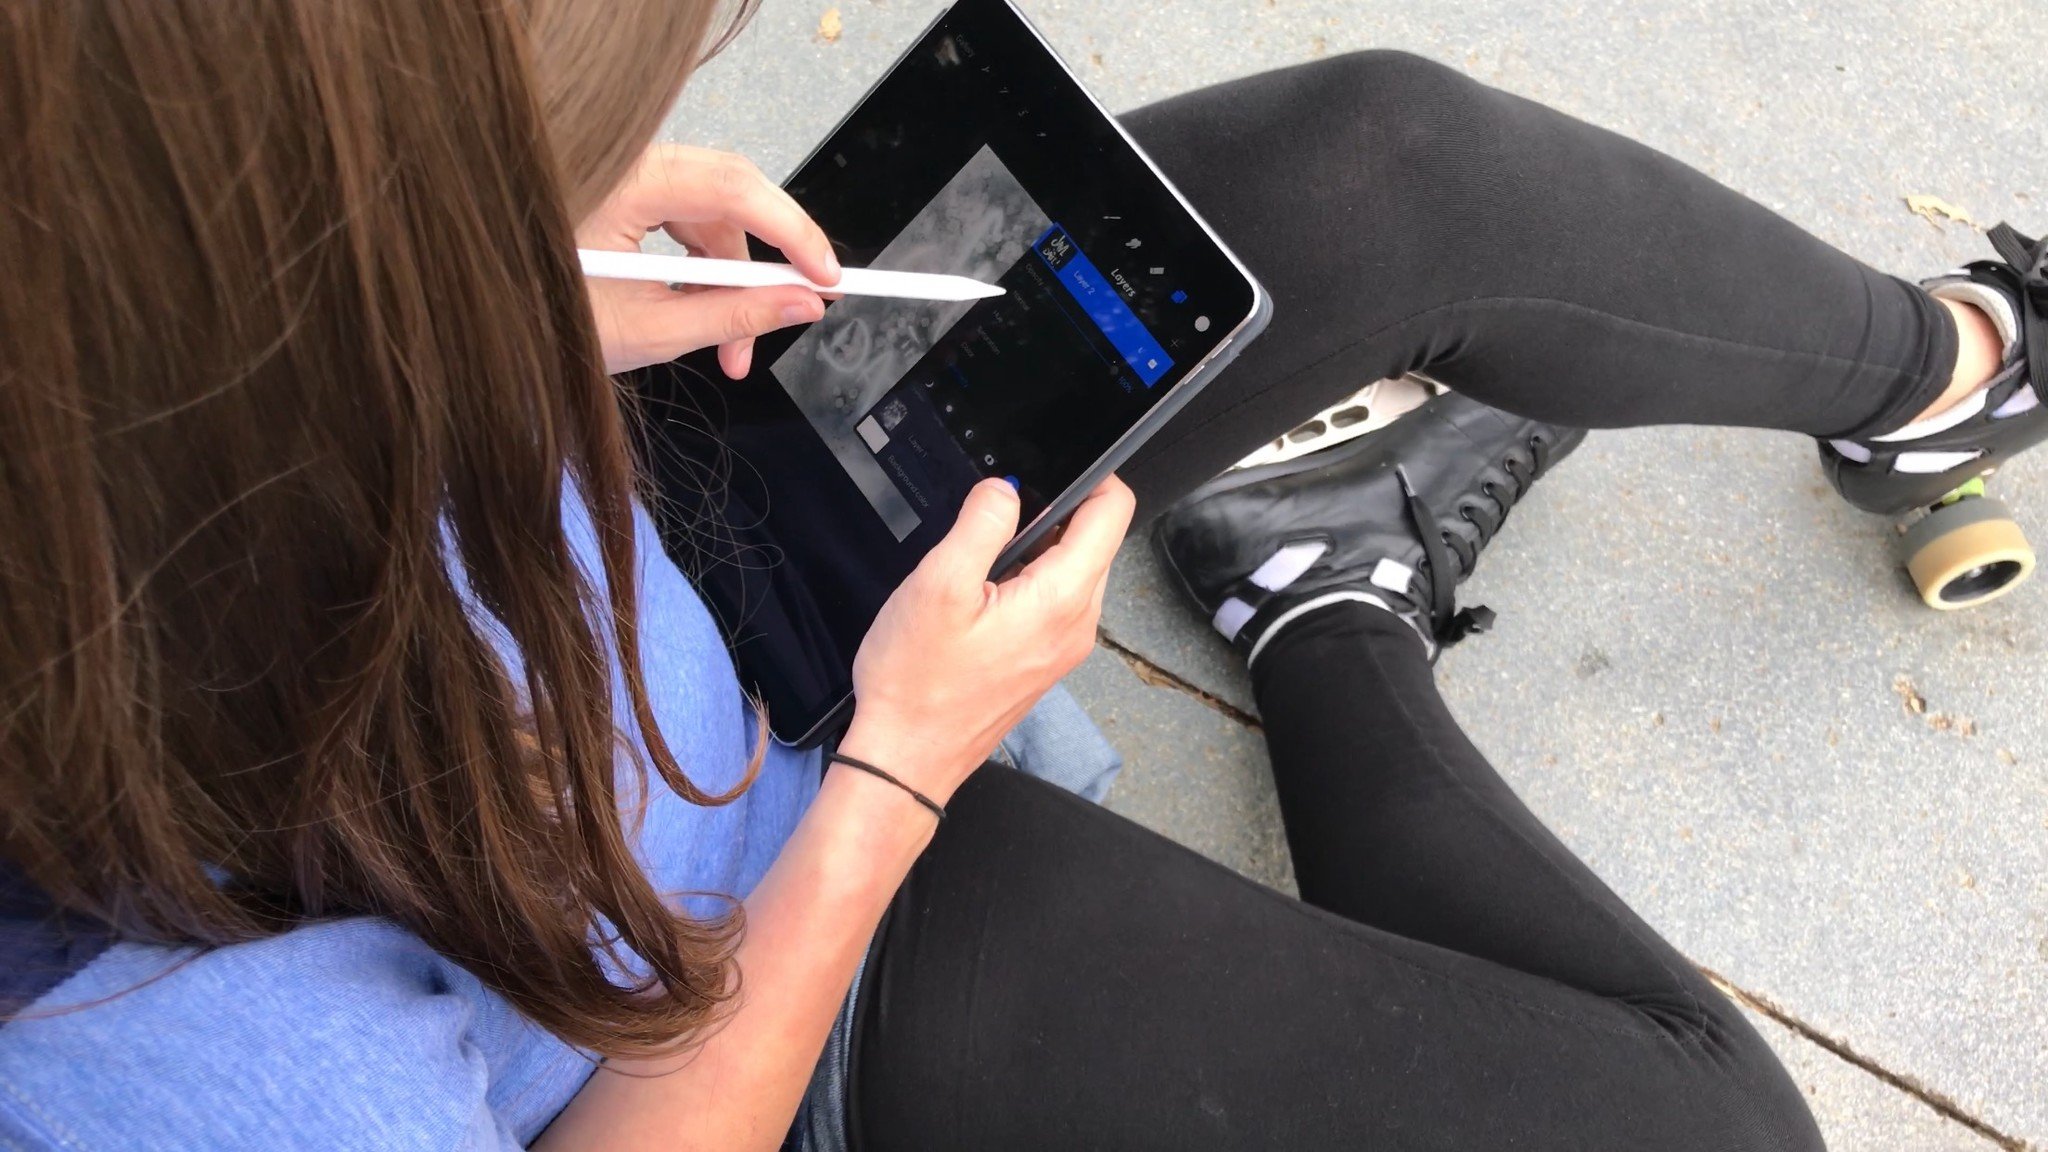
You can use the Apple Pencil to navigate your iPad or iPad Pro
Whether you have RSI issues or just like being able to use a stylus on your tablet in-between drawing or writing sessions, the Apple Pencil supports basic navigational tapping and swiping within iOS. Because multitouch gestures and the Pencil are recognized separately by the iPad's operating system, it may not be supported for advanced gesture-based navigation, like multi-finger operations, in separate apps.
There's an upside to that, however: In certain apps (as in the aforementioned Astropad Studio), you can even use your fingers and Apple Pencil simultaneously. Notes is also a great example of this: Touch two fingers down when drawing in Notes, and you'll get a ruler you can use to draw straight lines with the Apple Pencil.
The Apple Pencil can be used for just about everything
Even if you're barely familiar with sketching, handwriting, or calligraphy, you can do a lot with the Pencil and your iPad. Here are just some of the awesome things you can do:
How to draw and write like a pro with Apple Pencil Check out some ace drawing apps for Apple Pencil Check out some wonderful note-taking apps for Apple Pencil Turn your iPad Pro into a Wacom tablet with Apple Pencil and Astropad A Review of the Apple Pencil — using the Apple Pencil itself!
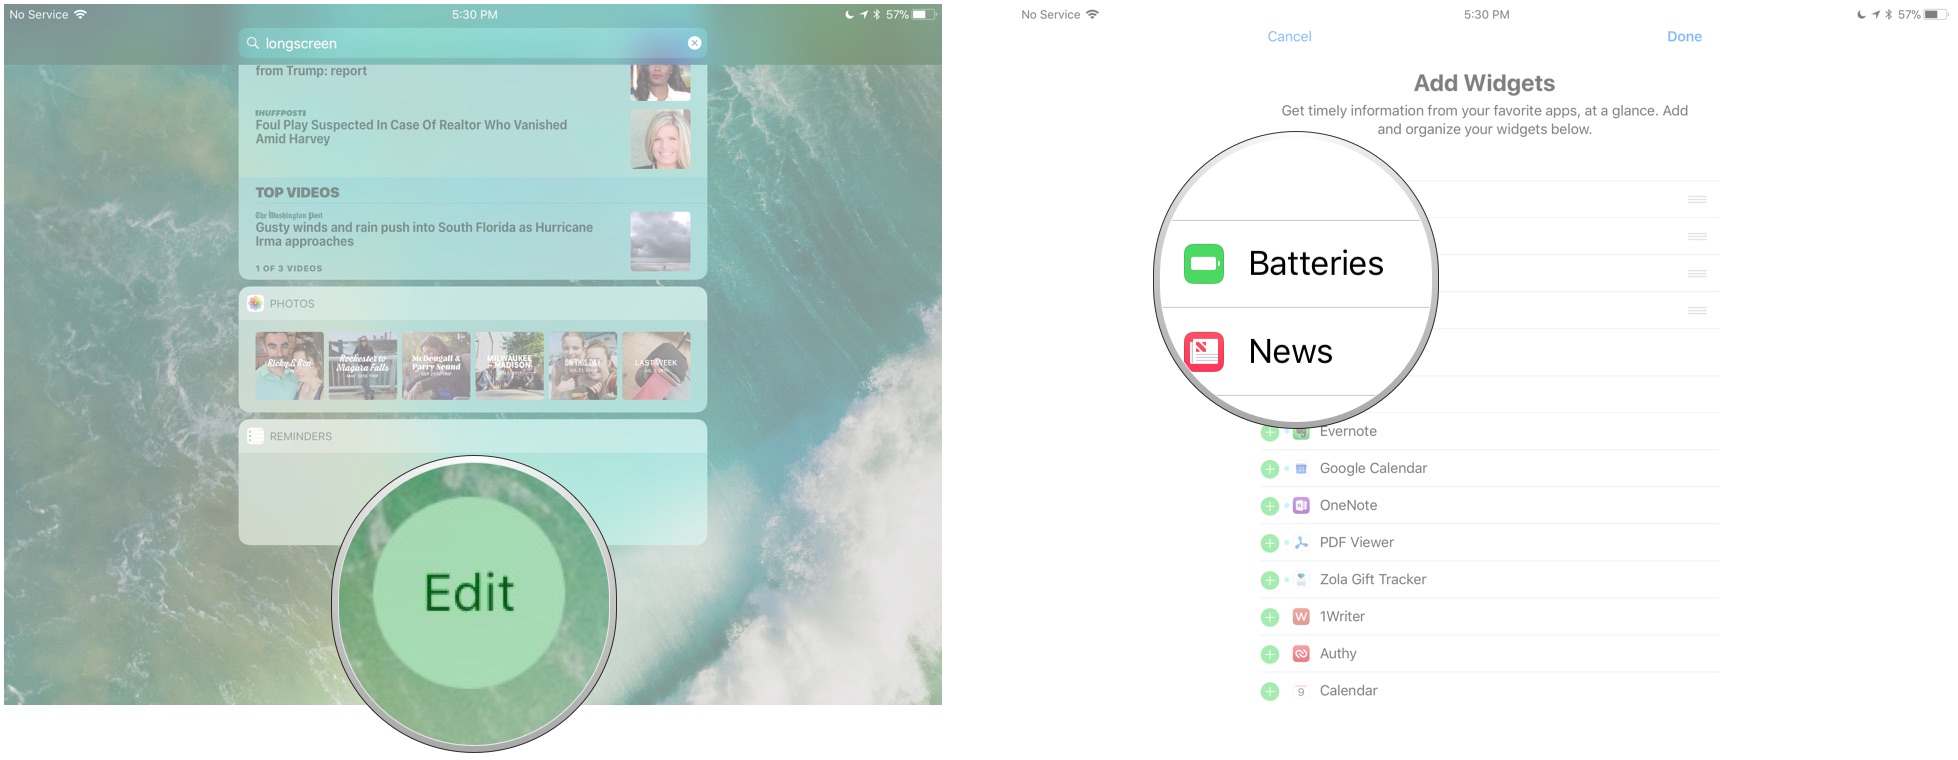
How to check the battery level on Apple Pencil
The Apple Pencil doesn't have a physical charge indicator or LED light on its cylindrical body; instead, you can check its current battery life on your currently-paired iPad or iPad Pro.
- Swipe down from the iPad's top bezel to invoke Notification Center (or turn the iPad on to view the Lock screen).
- Swipe right to see the Widgets screen.
View the Batteries section.
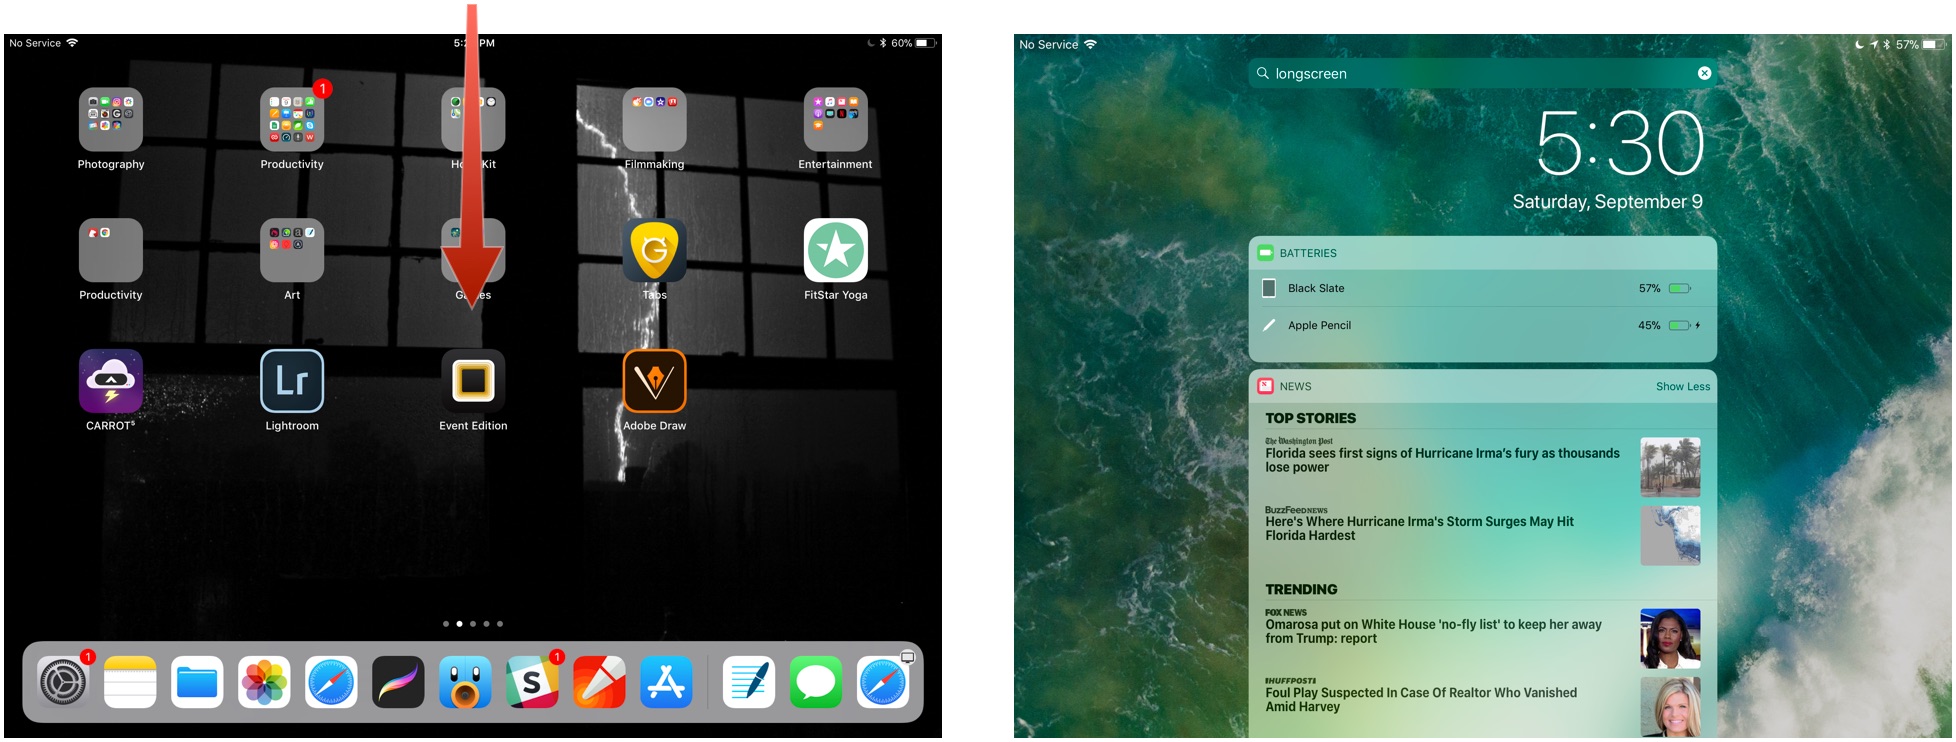
If you don't see the Batteries section, you may first need to tap Edit at the bottom of the Widgets area and tap the green Plus button next to Batteries to add it as an active widget.
How to charge Apple Pencil
When your Apple Pencil hits 20%, 10%, and 5% respectively, it will give you a charge warning. (You can also check your current battery status at any time by bringing up Notification Center.) Whatever your Pencil's current battery life, you can quickly and easily charge it by either using your iPad Pro's Lightning port, or the Lightning to USB adapter the Pencil ships with.
How to charge your Pencil with your iPad Pro
- Remove the cap from your Apple Pencil. (If you're worried about losing the cap during the charging process, you can magnetically attach it to the iPad next to the Home button.)
Insert your Apple Pencil's Lightning connector into your iPad or iPad Pro's Lightning port.
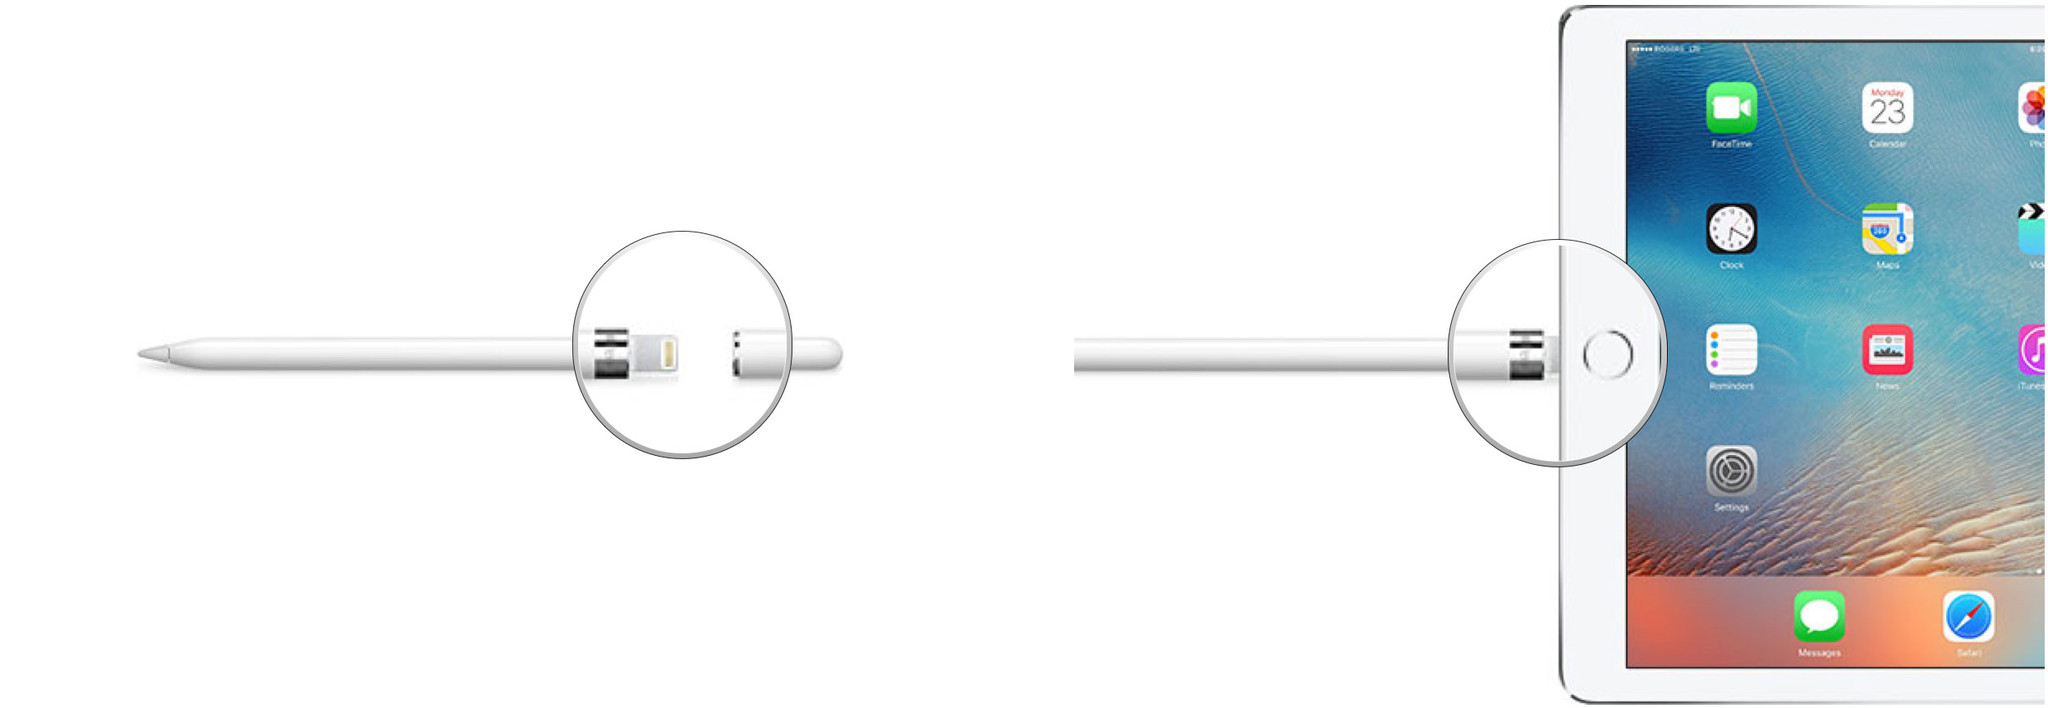
The Apple Pencil's quick-charge technology provides users up to 30 minutes of use after a 15-second charge, but we generally recommend plugging your Pencil in for at least 5-10 minutes — especially if it's under 20% — to avoid having to constantly recharge.
How to charge your Pencil with the Lightning adapter
- Remove the cap from the back of your Apple Pencil.
- Insert your Apple Pencil's Lightning connector into the Lightning adapter.
Plug the Lightning adapter into your Lightning cable.

How to un-pair your Apple Pencil from your iPad
Your Apple Pencil will automatically un-pair from your iPad or iPad Pro if you pair it with a different iPad or you pair a different Apple Pencil with your iPad. You can also manually un-pair if the need arises.
- Launch the Settings app from your iPad's Home screen.
- Tap Bluetooth.
- Tap the Info button to the right of Apple Pencil under My Devices.
Tap on Forget.
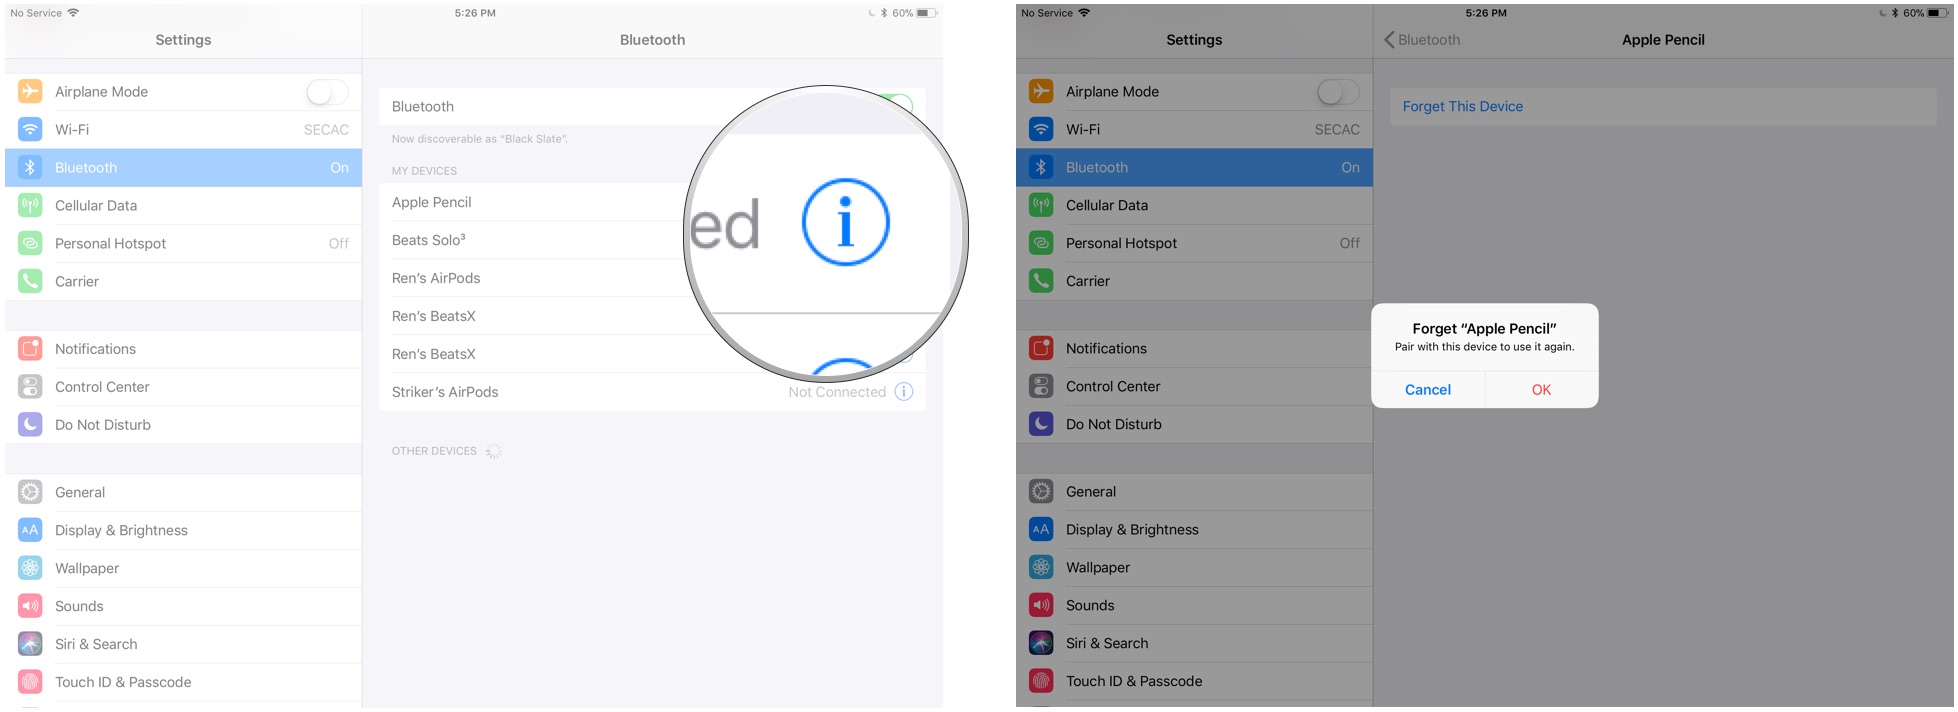
To re-pair your Apple Pencil, simply plug it back into the Lightning port on your iPad or iPad Pro.
Best Apple Pencil Accessories
The Apple Pencil is quickly becoming a necessary companion for iPad users, but an often-lost one. Between its slim cylindrical white body and the removable magnetic cap, it's not hard to lose one or the other to couch cushions or forgetful minds. On the bright side, there are dozens of great Apple Pencil accessories to help keep your Pencil (and cap) safe, secure, and ready to sketch. Here are a few of my favorites!
Apple Pencil not working? Here's the fix!
More often than not, the Apple Pencil just works. But if you're having an issue with Apple's stylus not responding in apps, disappearing from Notification Center's battery menu, or refusing to turn on, we've got some simple tips to help you troubleshoot it back to health.
Other Apple Pencil questions?
Let me know below!
Updated March 2018: Updated to include support for the 2018 9.7-inch iPad.
