
Here’s how you can master your own iCloud Drive
- okt
- 17
Keep all your documents up-to-date and accessible across all your devices with iCloud Drive
iCloud Drive is Apple's solution to document and file management across iPhone, iPad, and Mac. If you have an iCloud account, you can use iCloud Drive.
You automatically get 5GBs of storage for free, but you can choose to increase your storage with a monthly subscription. Subscriptions range from free all the way to $9.99 a month, depending on your storage needs.
If you aren't sure where to start, we can walk you through the setup process and how to start using iCloud Drive!
How to enable iCloud Drive manually on iPhone and iPad
When you set up your iPhone or iPad for the first time you should be prompted on whether or not you'd like to set up to iCloud Drive. If you said yes, you don't need to do anything further and can continue to the next section. However, if you said no, you can enable iCloud Drive with just a few taps.
- Launch the Settings app.
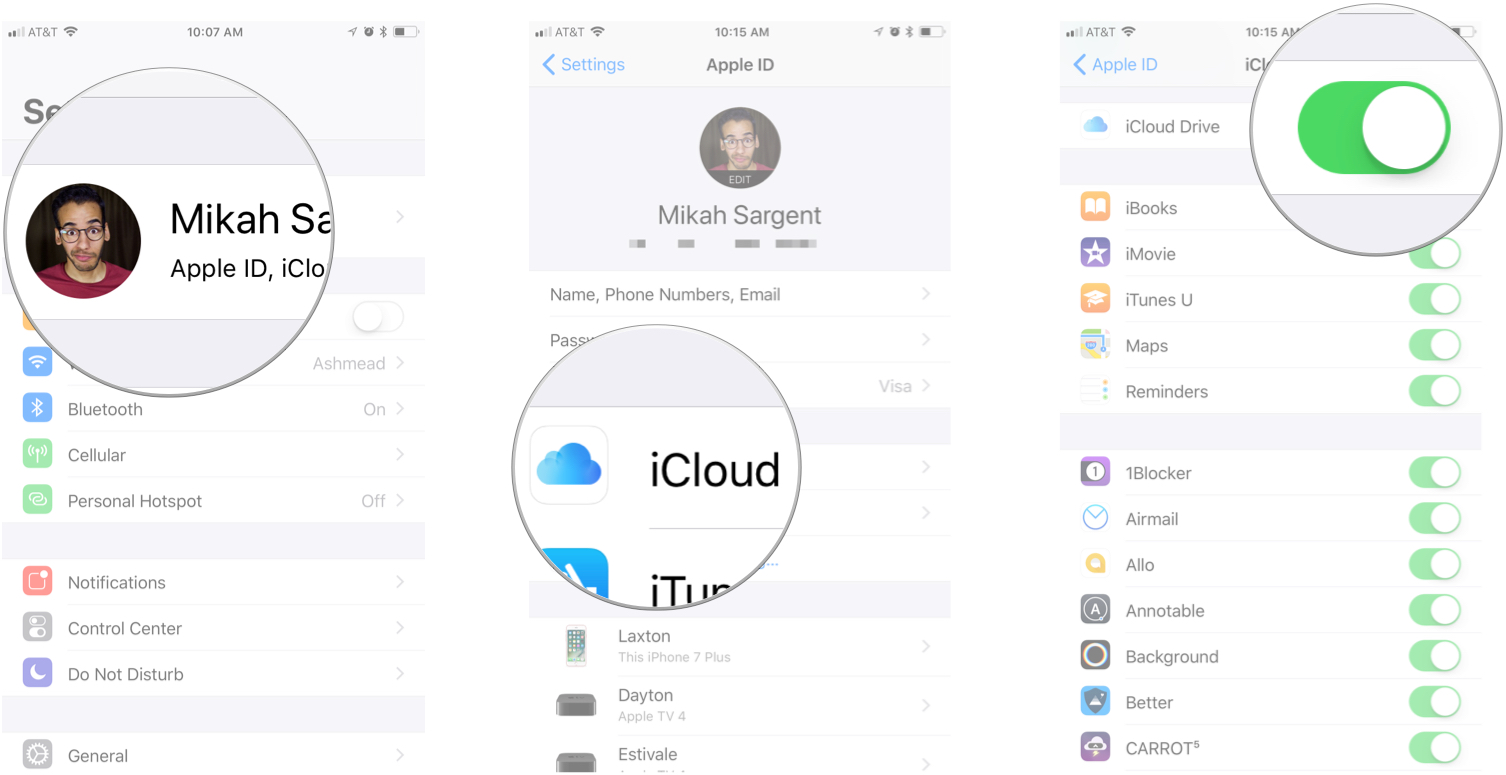
- Tap on the Apple ID banner.
- Tap iCloud.
Scroll down and tap the On/Off button for iCloud Drive.
Remember, if you turn off iCloud Drive, nothing will save to it until you have re-enabled it.
How to increase iCloud Drive storage space on iPhone or iPad
By default, iCloud Drive comes with 5GB of space for free. If you don't feel this is enough, you can subscribe to more storage. Or if you already are paying for an iCloud subscription, you can change it to best fit your current needs.
Not sure how much iCloud storage space you need? Check out our complete guide to choosing the perfect plan.
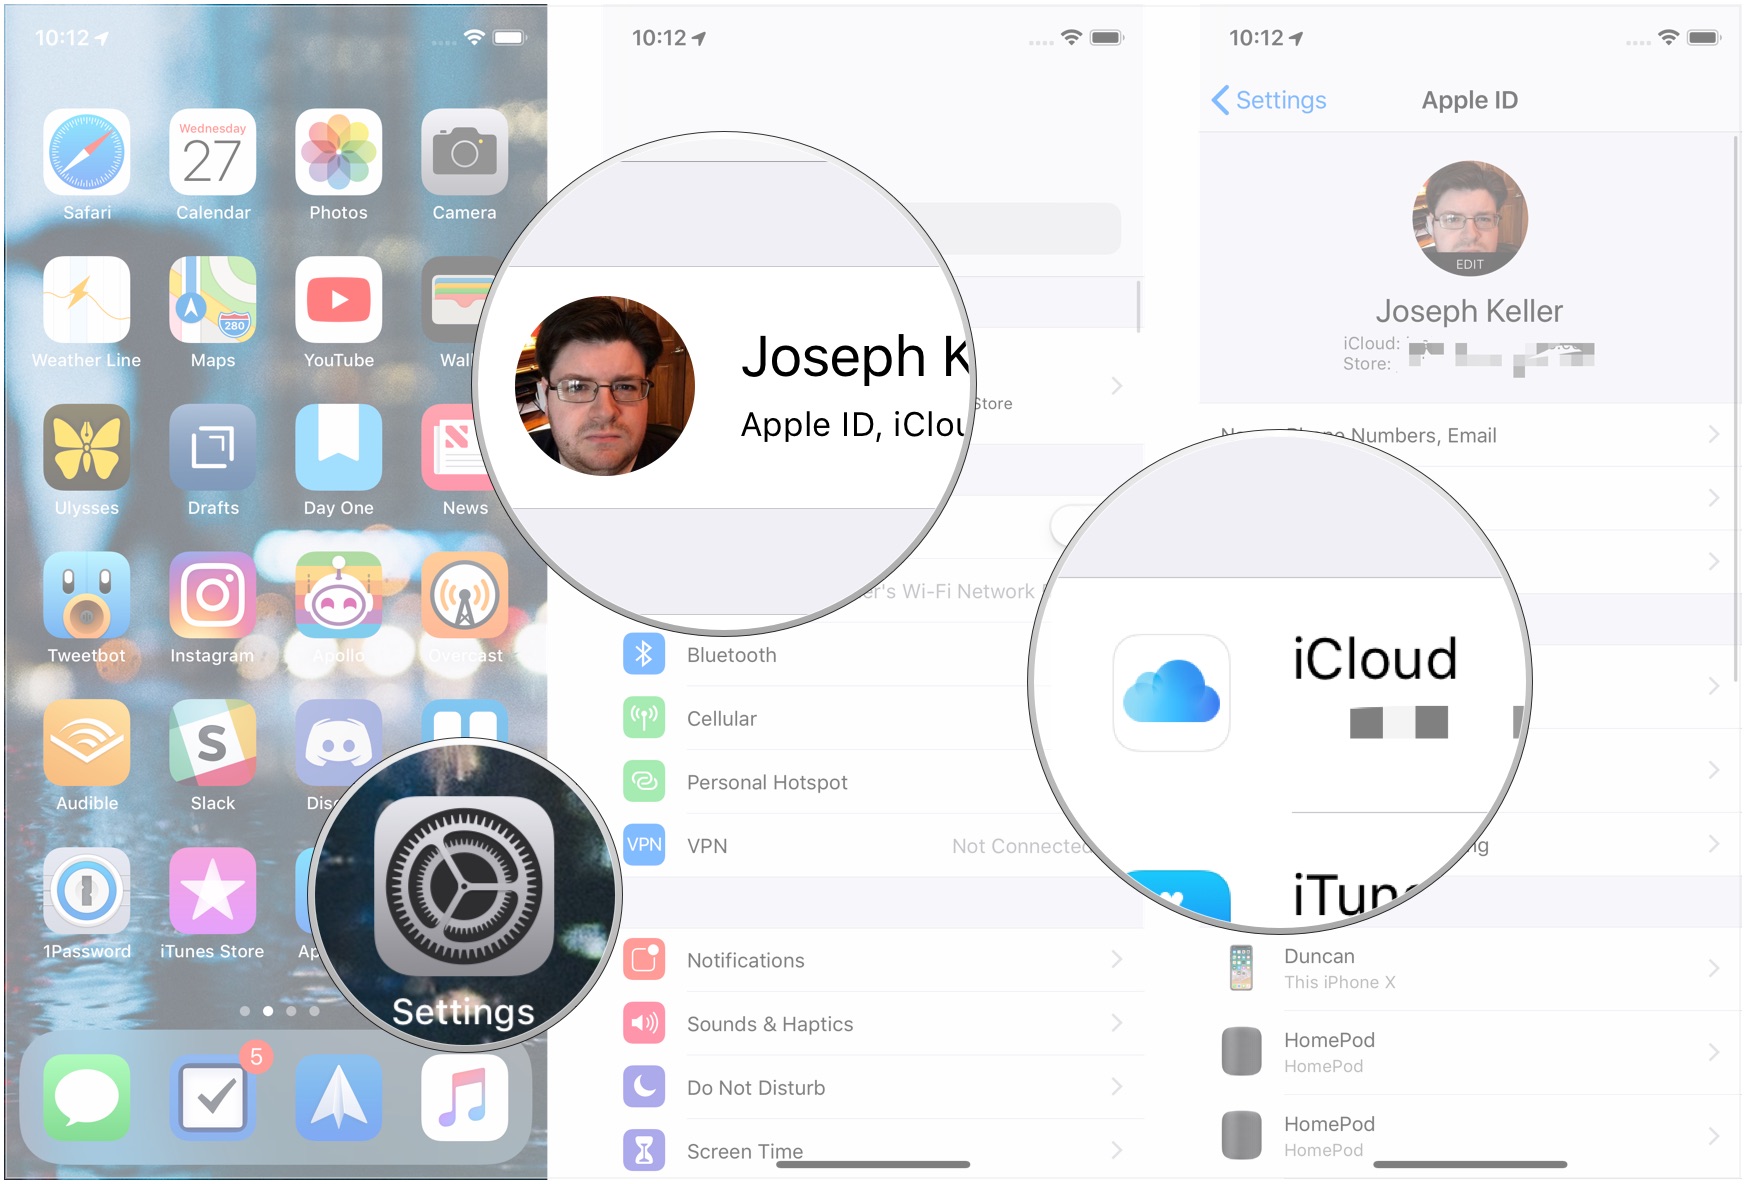
- Launch the Settings app.
- Tap on the Apple ID banner.
Tap iCloud.
Tap Manage Storage.
- Tap Change Storage Plan.
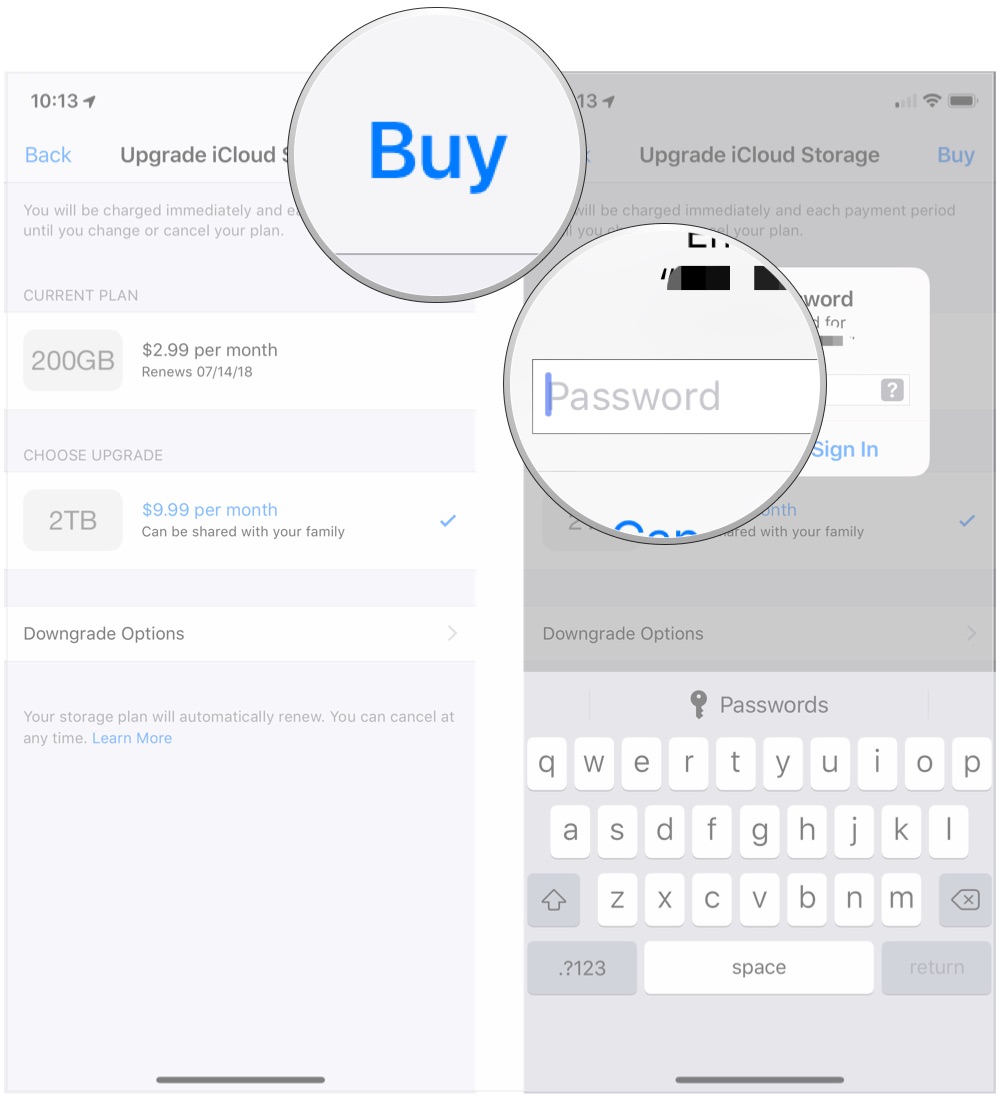
Tap to choose the storage plan that works best for you.

Tap Buy.
Sign in with your Apple ID to confirm the purchase.
How to move files in the Files app on iPhone and iPad
iCloud Drive is stored within the Files app. The Files app opens up many possibilities for storage and file organization on iOS. You needn't stick to app-based folders for organizing content — you can treat the Files app like you would Dropbox or Box.
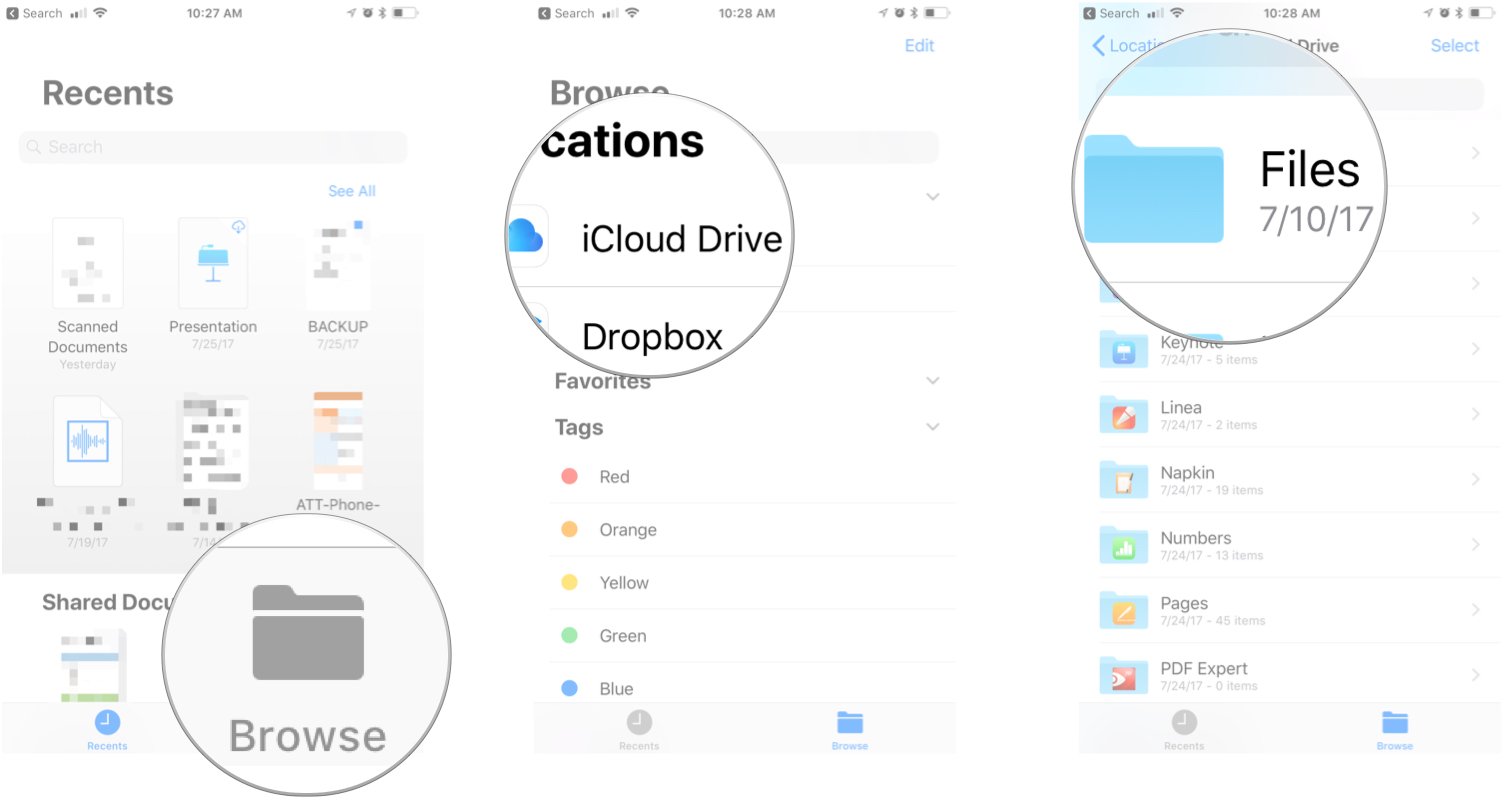
- Launch the Files app
- Tap Browse at the bottom of the screen.
- Tap iCloud Drive in the Locations section.
Tap on a folder to open it.
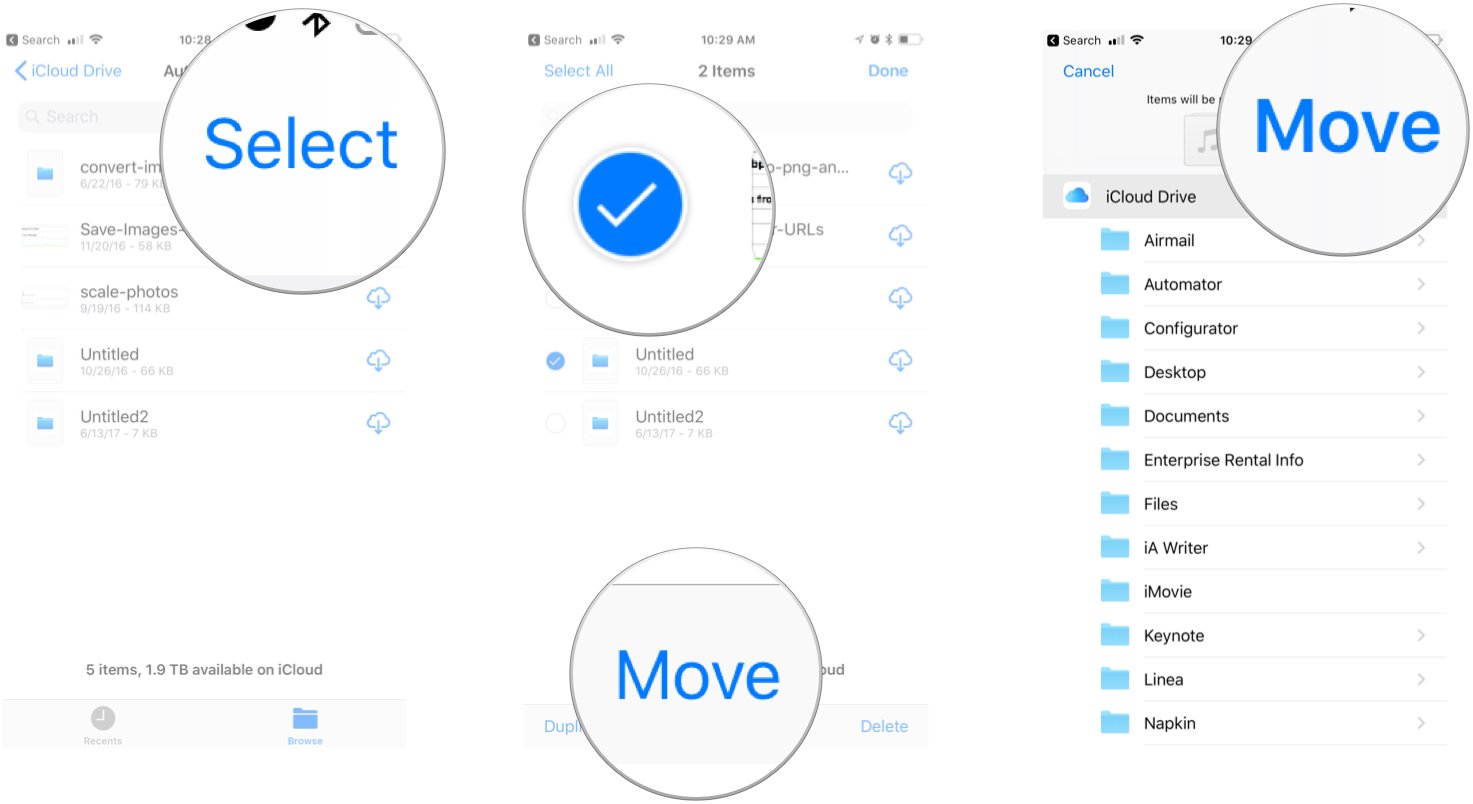
Tap Select in the top right corner of the screen.
- Tap on the files you want to move.
- Tap Move at the bottom of the screen.
- Tap a folder to choose a destination for the files.
Tap Move in the top right corner of the screen.
How to delete files in the Files app on iPhone and iPad
If you find yourself running out of space or just want to declutter, you can easily delete files you don't need anymore.
- Launch the Files app
- Tap Browse at the bottom of the screen.
- Tap iCloud Drive in the Locations section.
Tap on a folder to open it.
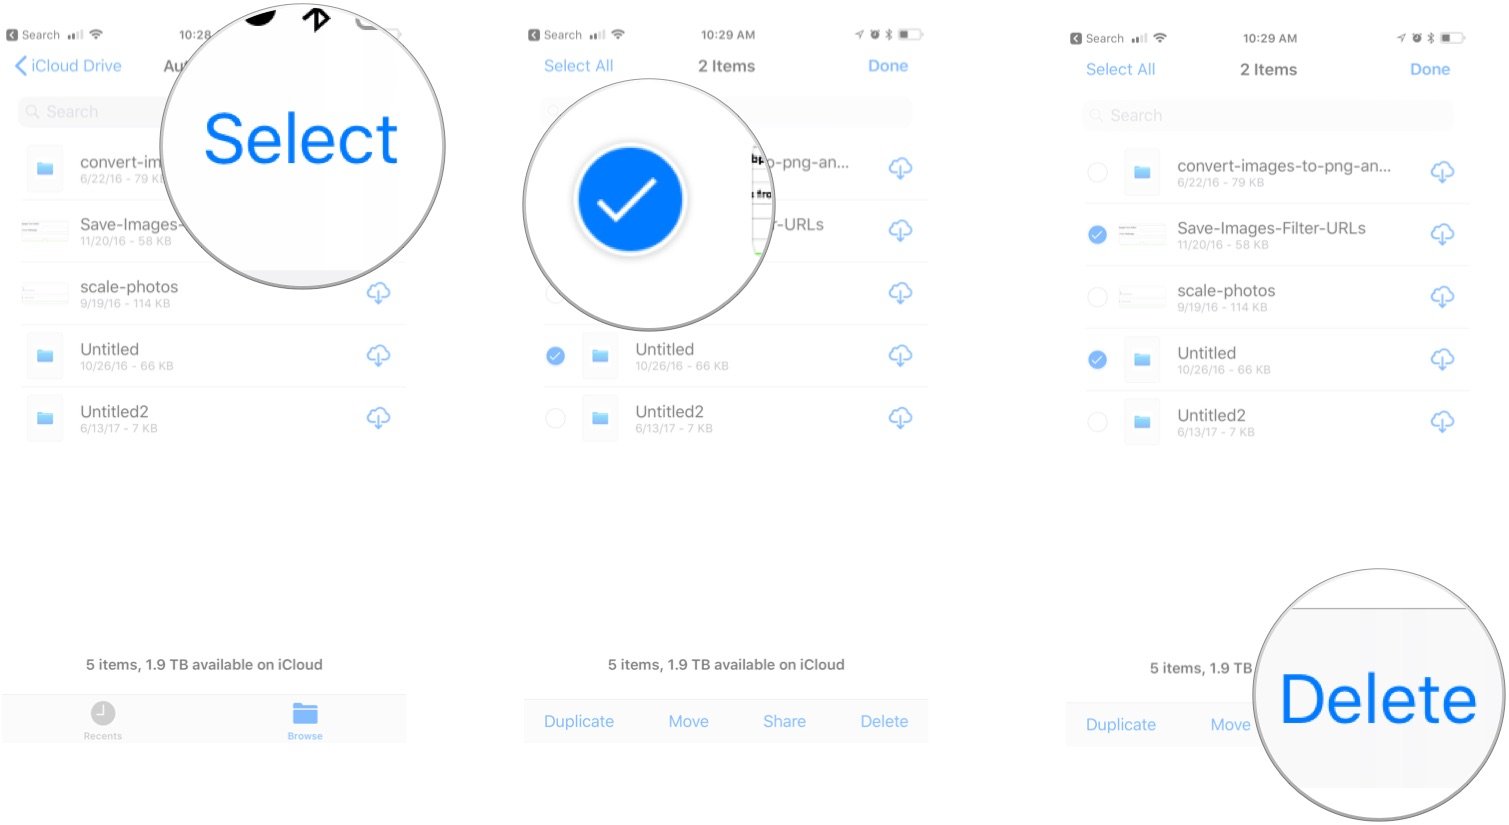
Tap Select in the top right corner of the screen.
- Tap to select the files you want to delete.
Tap Delete in the bottom right hand corner (Note: There is no confirmation step. Deleting the files will mark them for deletion, though they can be recovered in the Recently Deleted location in the Files app).
How to turn cellular data on or off for Files app syncing
If you store a lot of documents in the Files app and you're on a limited data plan, you may want to prevent the app from using cellular data. Here's how!
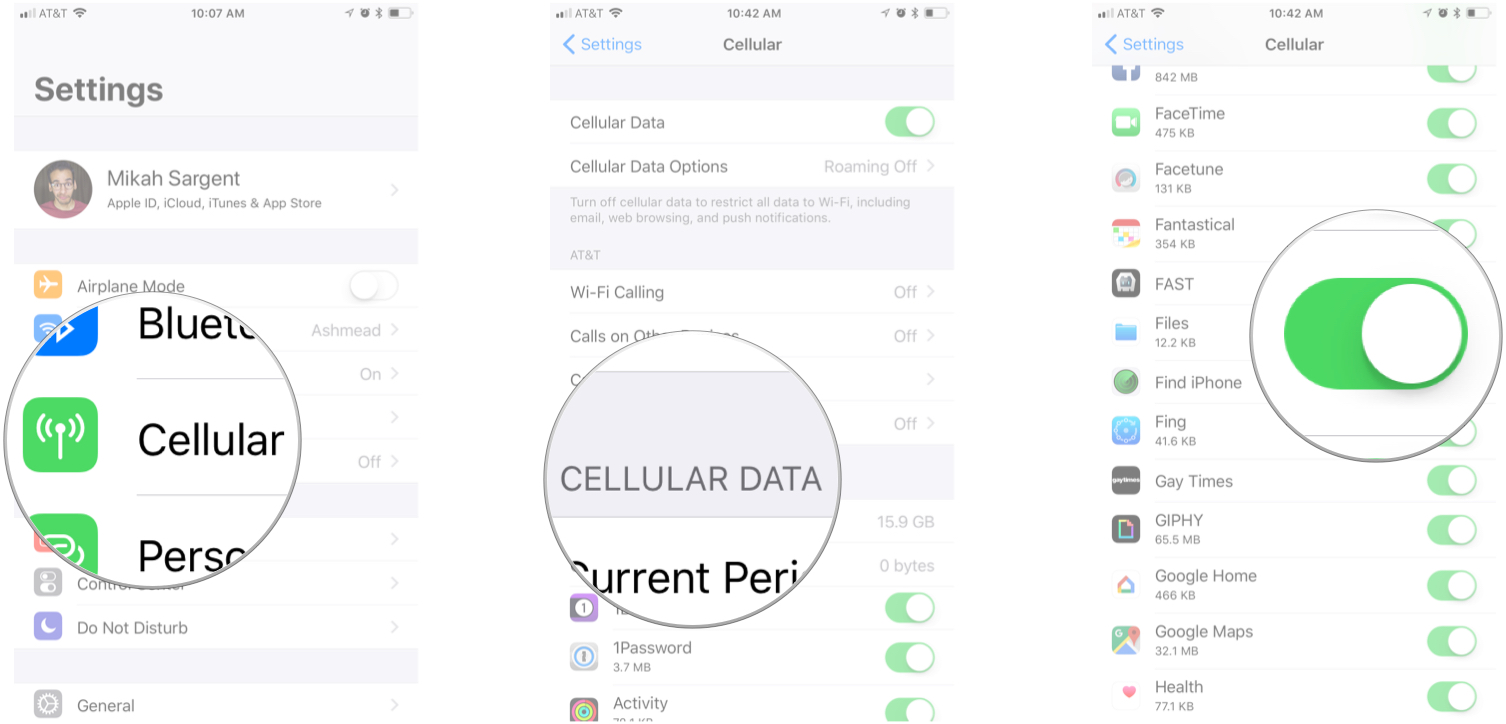
- Launch the Settings app.
- Tap Cellular.
- In the Cellular Data section, scroll down until you find the Files app.
Tap the On/Off switch to toggle cellular data use off.
This will make sure no cell data is used for iCould Drive. Save your money!
Questions?
Do you have any more questions about using iCloud Drive on your iPhone or iPad? Let us know in the comments below!
Updated October 2020: Updated steps according to the latest version of iOS.
