
Get ready to move to a new iPhone by backing up your old one
- okt
- 23
How do you make sure you don't lose your photos, messages, and other data? Back up your iPhone and iPad now!
If you're like a lot of iPhone owners, your phone, and the data is stores, plays a central role in your day-to-day life. It stores your photos, messages, documents, even your health data in a lot of cases. And a lot of the same is true of your iPad, too. The data you store on your devices is important, maybe even essential, and you should treat it as such. To make sure that data stays safe, it's best to back it up, particularly when you download a software update such as iOS 14. Whether you rely on the cloud or swear by local backups on your PC or Mac, it's important to maintain a regular backup routine in case something happens to your iPhone or iPad.
Here's everything you need to know about how to back up your iPhone or iPad.
What is a backup?
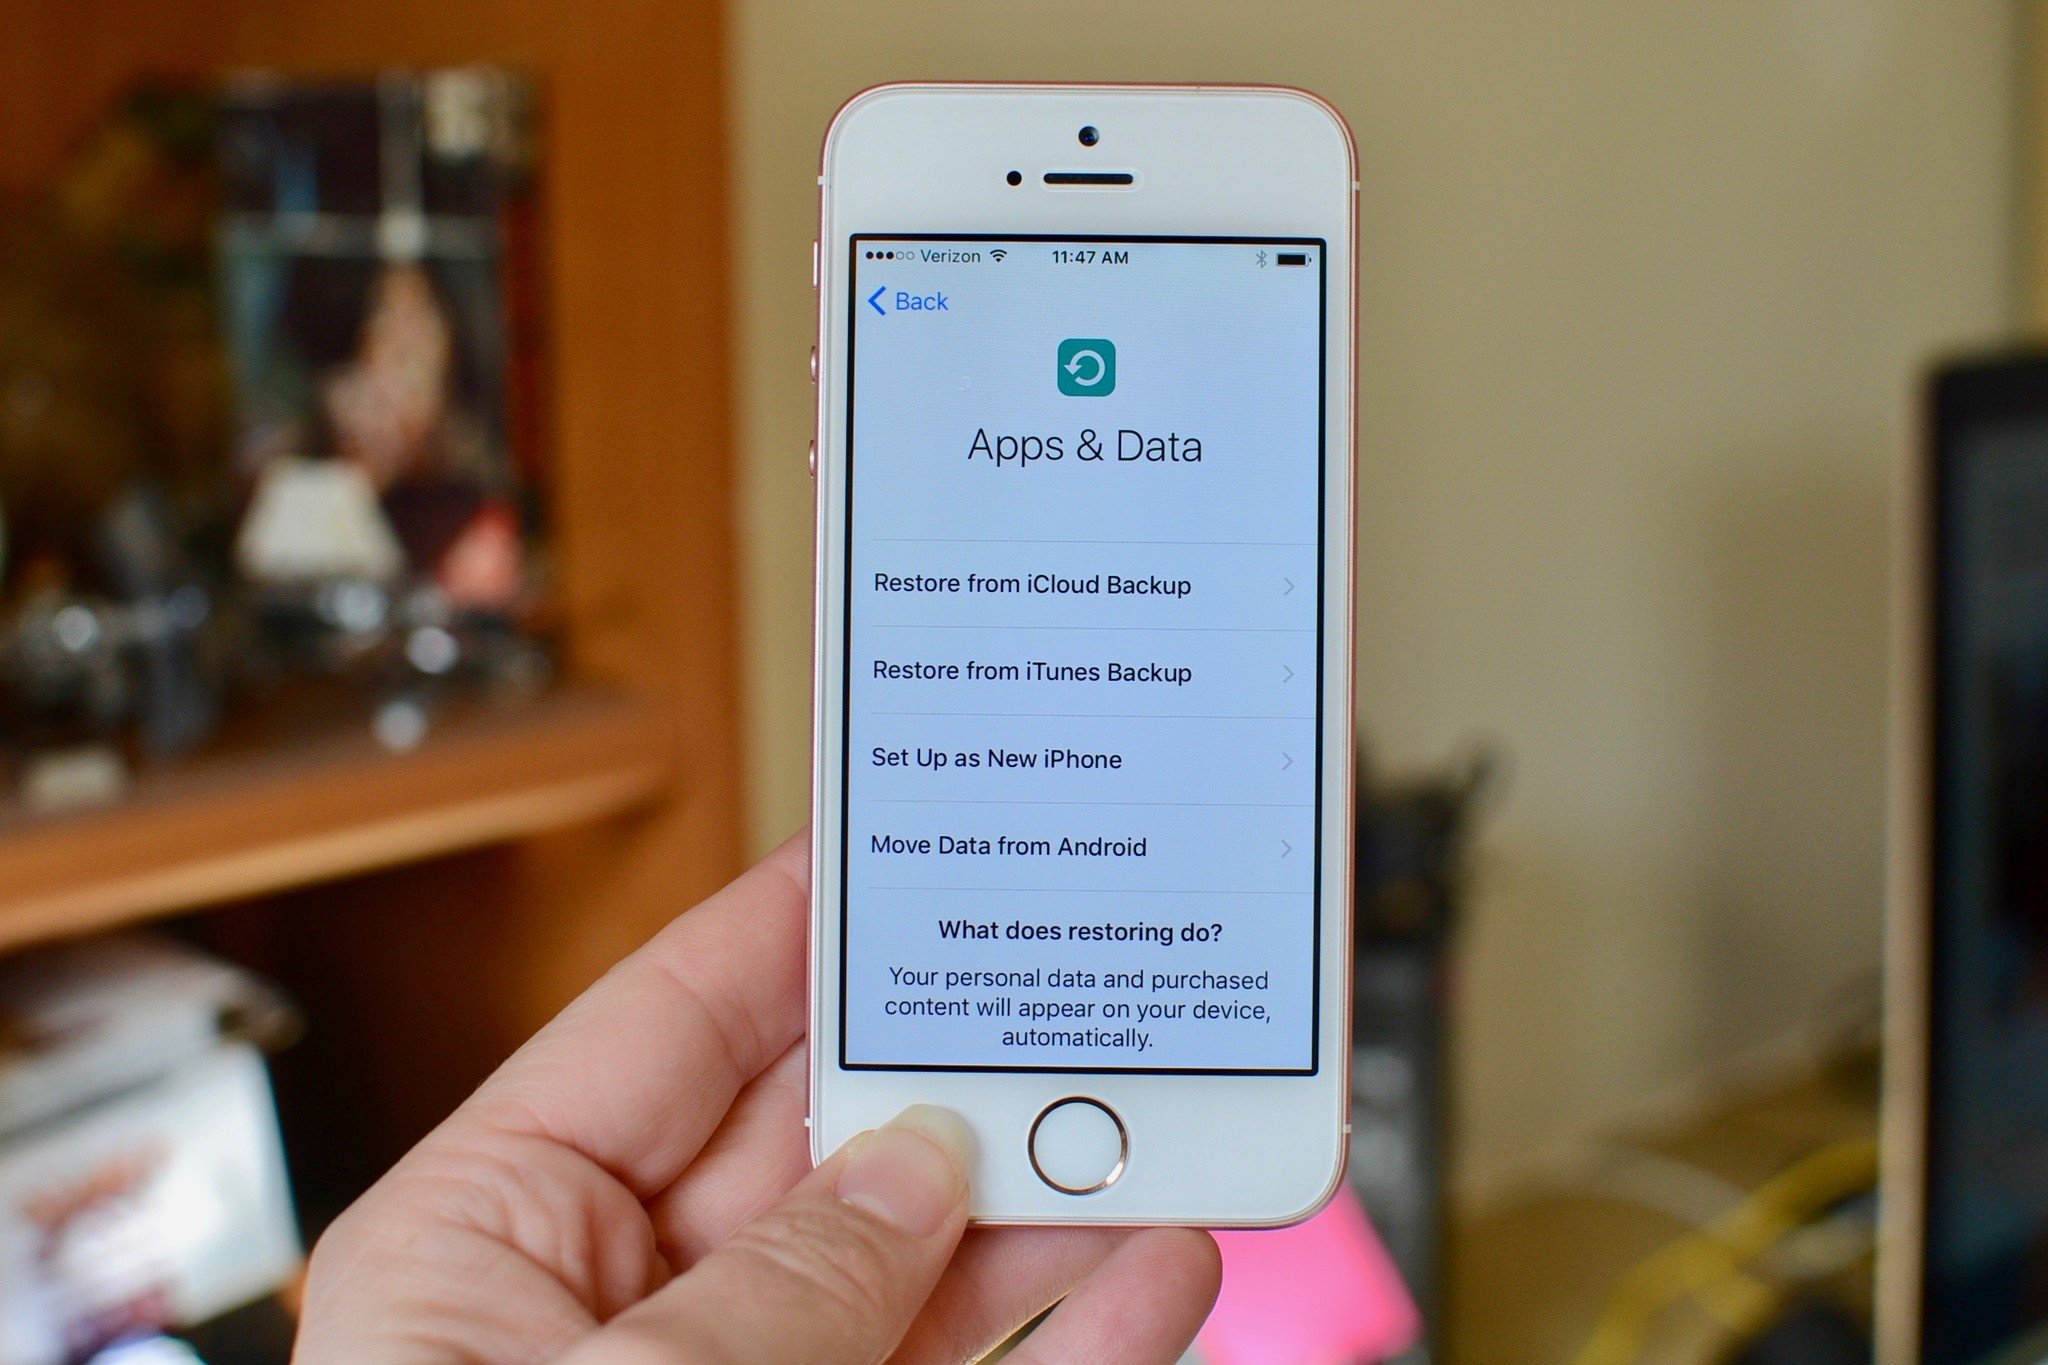
A backup of your iPhone or iPad includes your device settings, app data, Home screen and app organization, iMessages and texts, ringtones, your visual voicemail passcode, health data, and HomeKit configurations. Photos and videos are only backed up if you don't already have iCloud Photo Library enabled on your iPhone, iPad, and Mac.
You can use iCloud to back up your device, or you can connect to iTunes on your computer. It's up to you. The main difference is where your backups are stored. iCloud backups are stored in iCloud and iTunes backups are stored locally on your Mac or PC.
If you back up your iPhone or iPad using iCloud, you'll be able to access and them anywhere using Wi-Fi. If you back up your device using iTunes, you have to use the computer you store the backups on to access them.
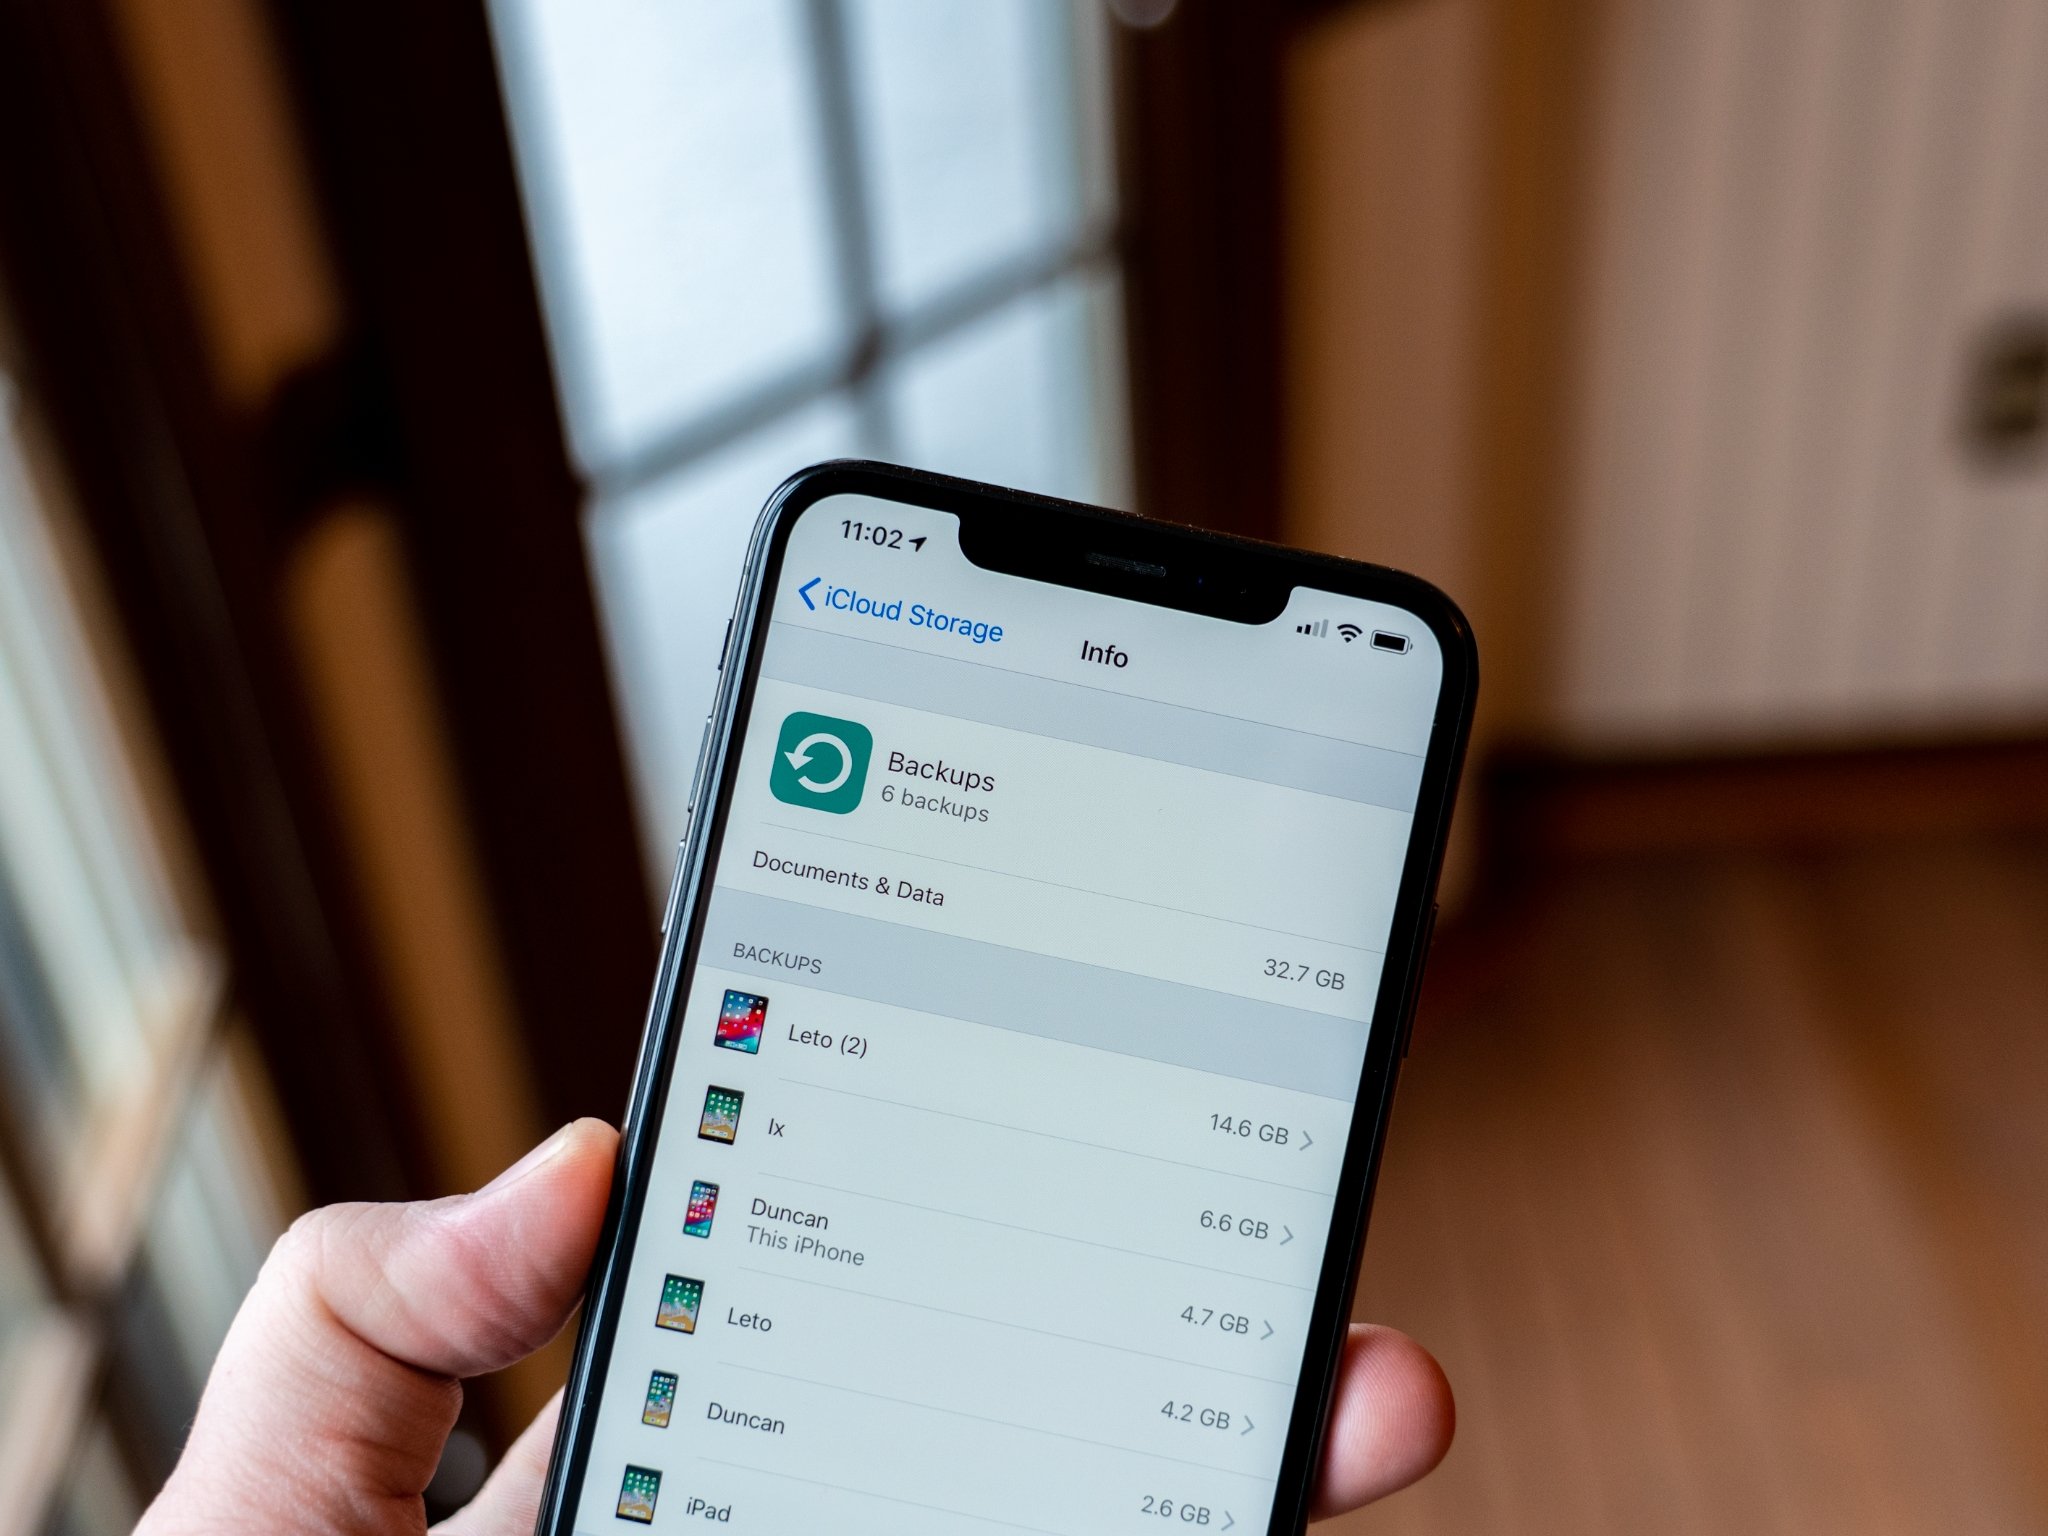
Important to note: because iPhone and iPad backups take up your storage space in iCloud, and 5GB probably isn't going to cut it for most people. If you're wondering just which iCloud storage plan you should get, I'd say that most people should probably go for the 50GB of 200GB plans, while those using Family Sharing should probably spring for the 2TB plan just to be safe.
How to enable iCloud backup on your iPhone or iPad
Using iCloud as a backup location for your iPhone or iPad is a great idea. If anything happens to your phone or tablet, you will have a backup you can access from anywhere with an internet connection.
But before you can start backing up to iCloud, you have to make sure that iCloud backups are enabled on your device.
- Open Settings on your iPhone or iPad.
- Tap your Apple ID at the top of the screen.
Tap iCloud.
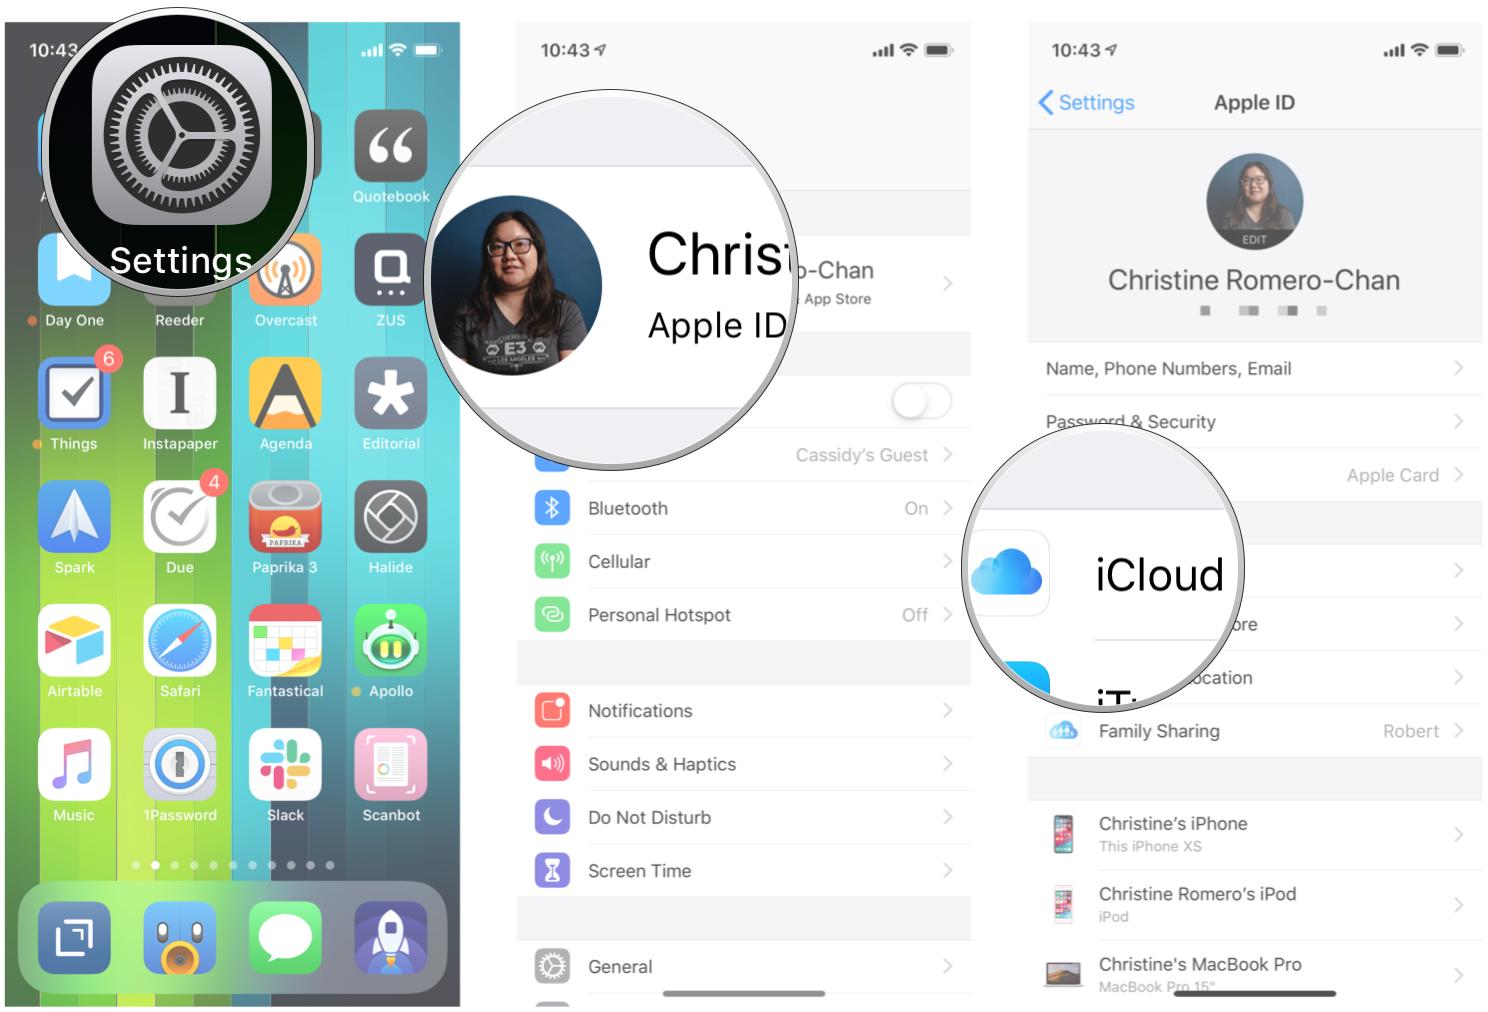
- Tap iCloud Backup.
- Flip the switch next to iCloud Backup on.
Tap OK.

iCloud will attempt to start a backup your data every 24 hours or so, as long as your iPhone or iPad is connected to Wi-Fi and plugged in to charge. Most of the time this will happen while you sleep.
If you've never backed up to iCloud before, the first backup can take a while. After that, iCloud will only upload the changes you've made since the last backup, which is much faster.
Note: Need to delete an older iPhone backup stored in iCloud? Here's how!
How to manually trigger an iCloud backup
iCloud backups should automatically happen at least once a day: They trigger when your iPhone, iPad, or iPod touch is plugged in and on Wi-Fi. That said, here's how to make sure you have an up-to-the-minute backup solution.
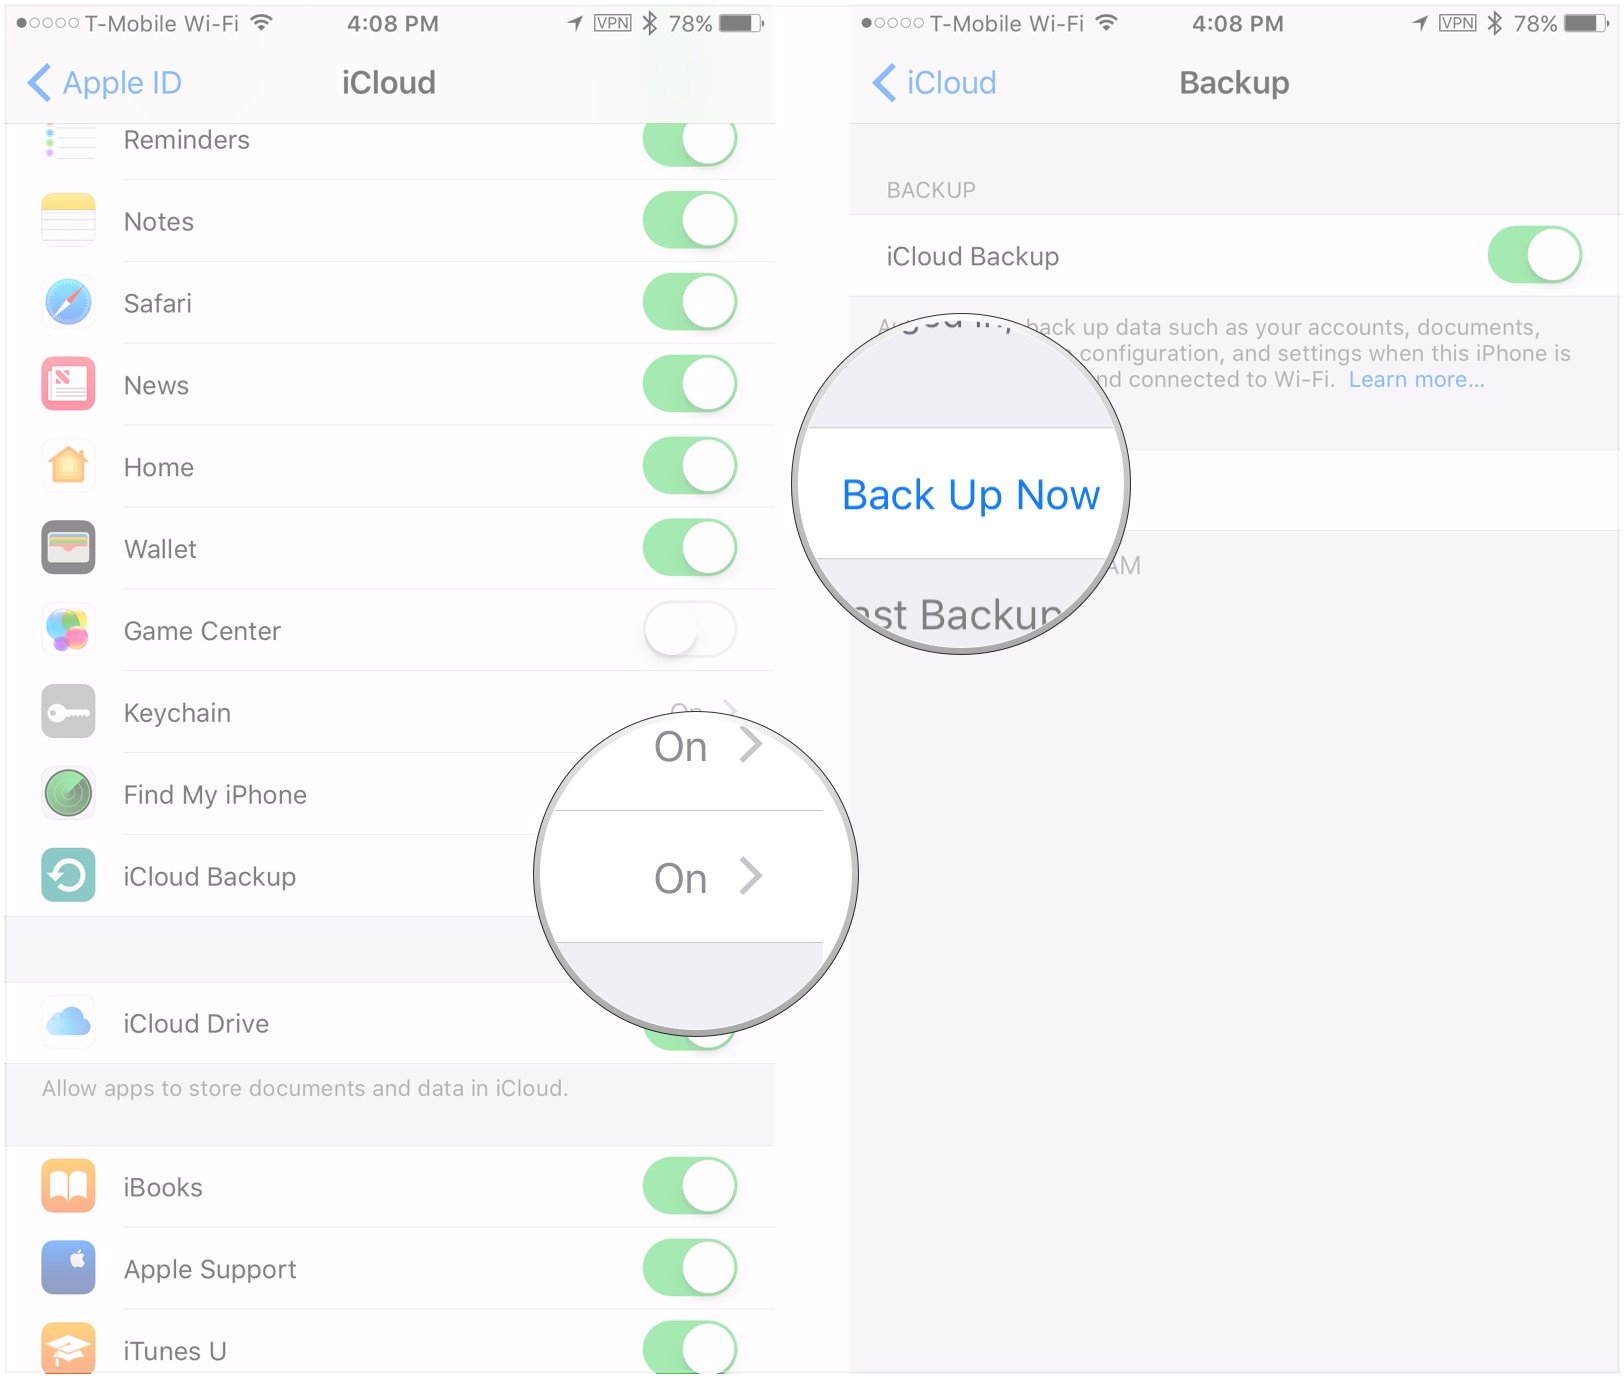
- Open Settings on your iPhone or iPad.
- Tap your Apple ID at the top of the screen.
Tap iCloud.

- Tap iCloud Backup.
Tap Back Up Now.
Keep in mind: If you want to back up your iPhone or iPad to iCloud, you must first have an iCloud account and be signed in to it. If you don't and aren't sure how to make one, here's how to go about doing it.
How to back up your iPhone or iPad manually in macOS
In macOS Catalina, backing up to iTunes is no longer an option, as that app's functions have now been split into the Music, Podcasts, and TV apps. The device backup feature, meanwhile, now resides in Finder on Mac. Here's what you need to do to back up there.
- Connect your device to your Mac.
- Click the Finder icon in the dock.
Click on your device under Locations in the Finder sidebar.

- Click Back Up Now to manually initiate a backup.
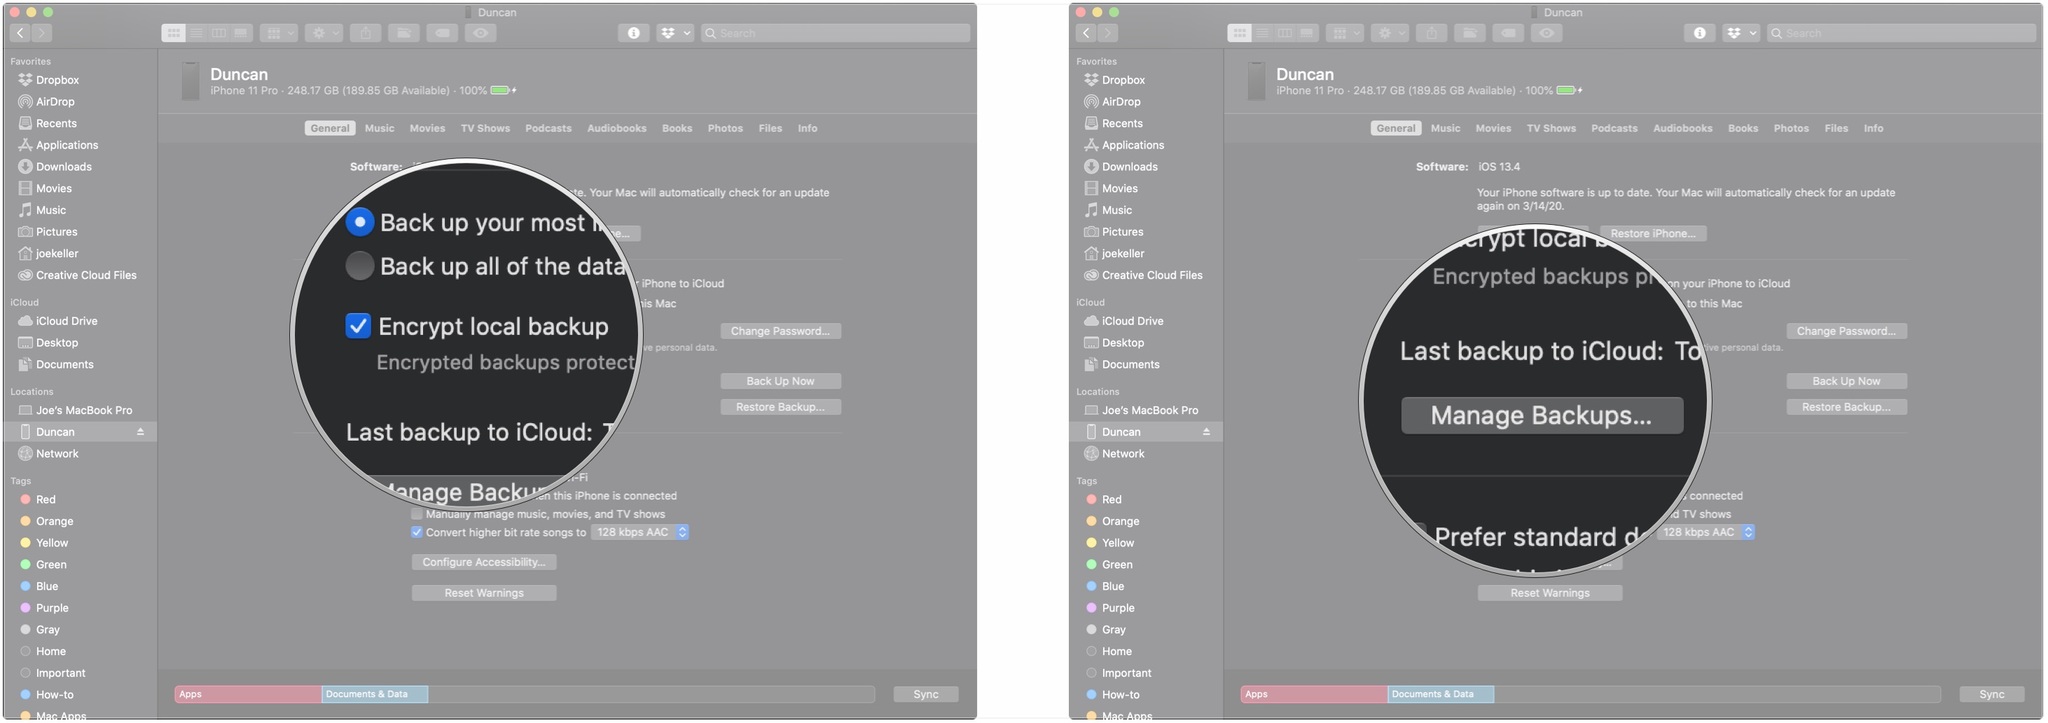
Click the button next to Back up all of the data on your iPhone to this Mac if you want your iPhone to favor backups to your Mac instead of iCloud.
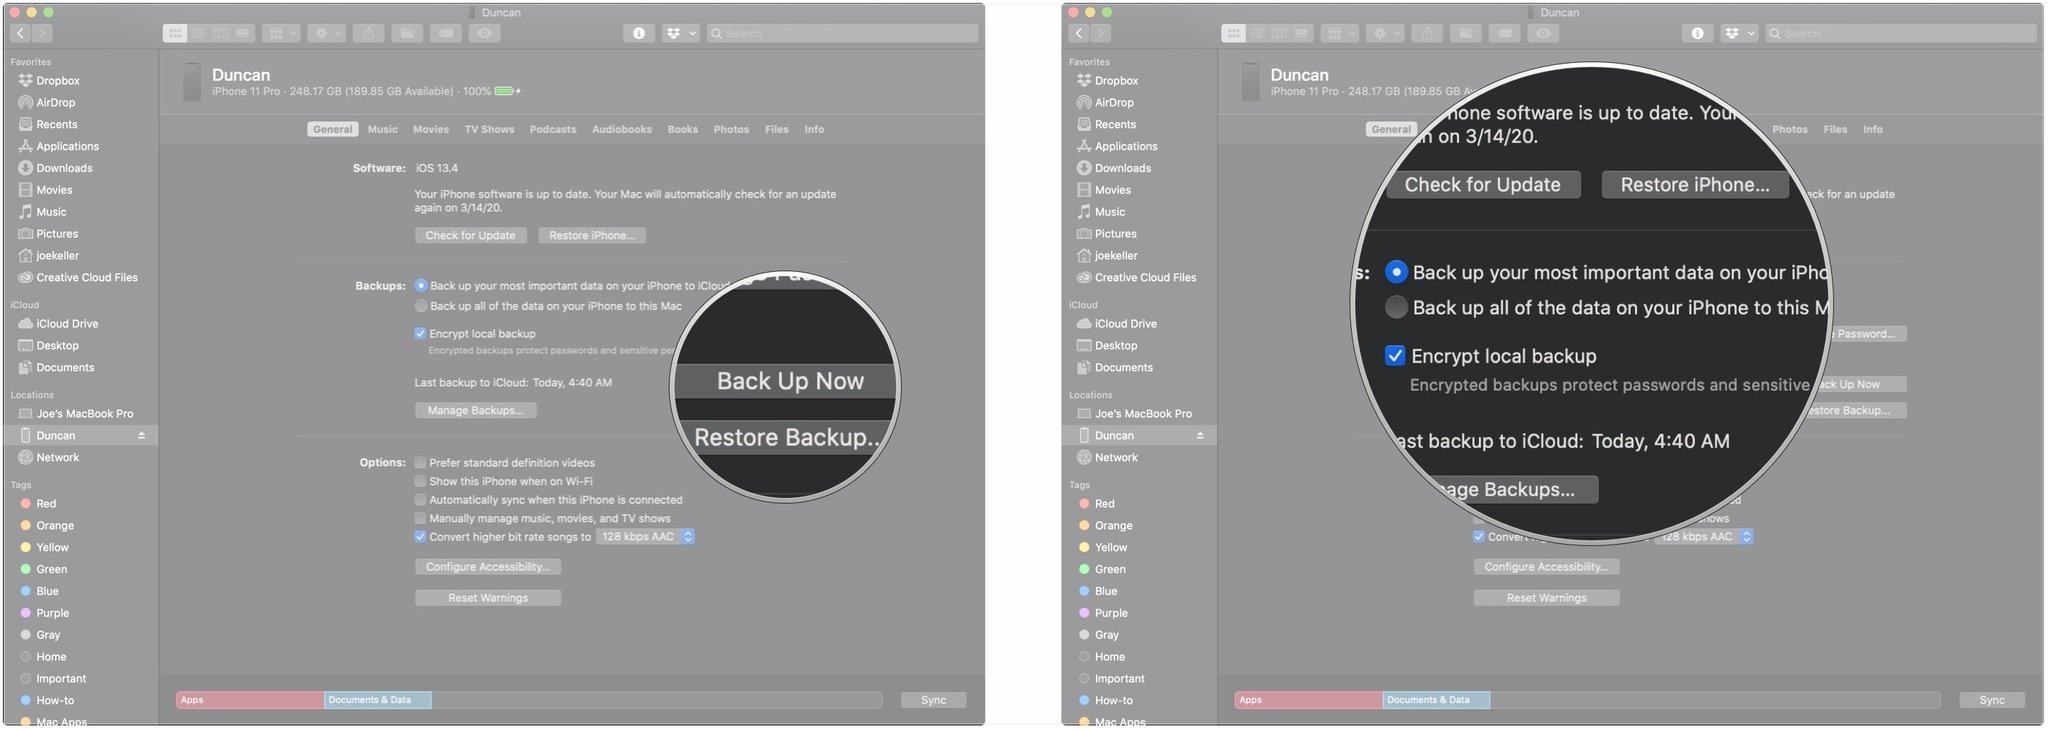
- Click the checkbox to enable or disable encrypting your local backups. It's highly suggested that you do this if you're going to use a local backup to move data to a new iPhone, as some data will be lost if the backup isn't encrypted.
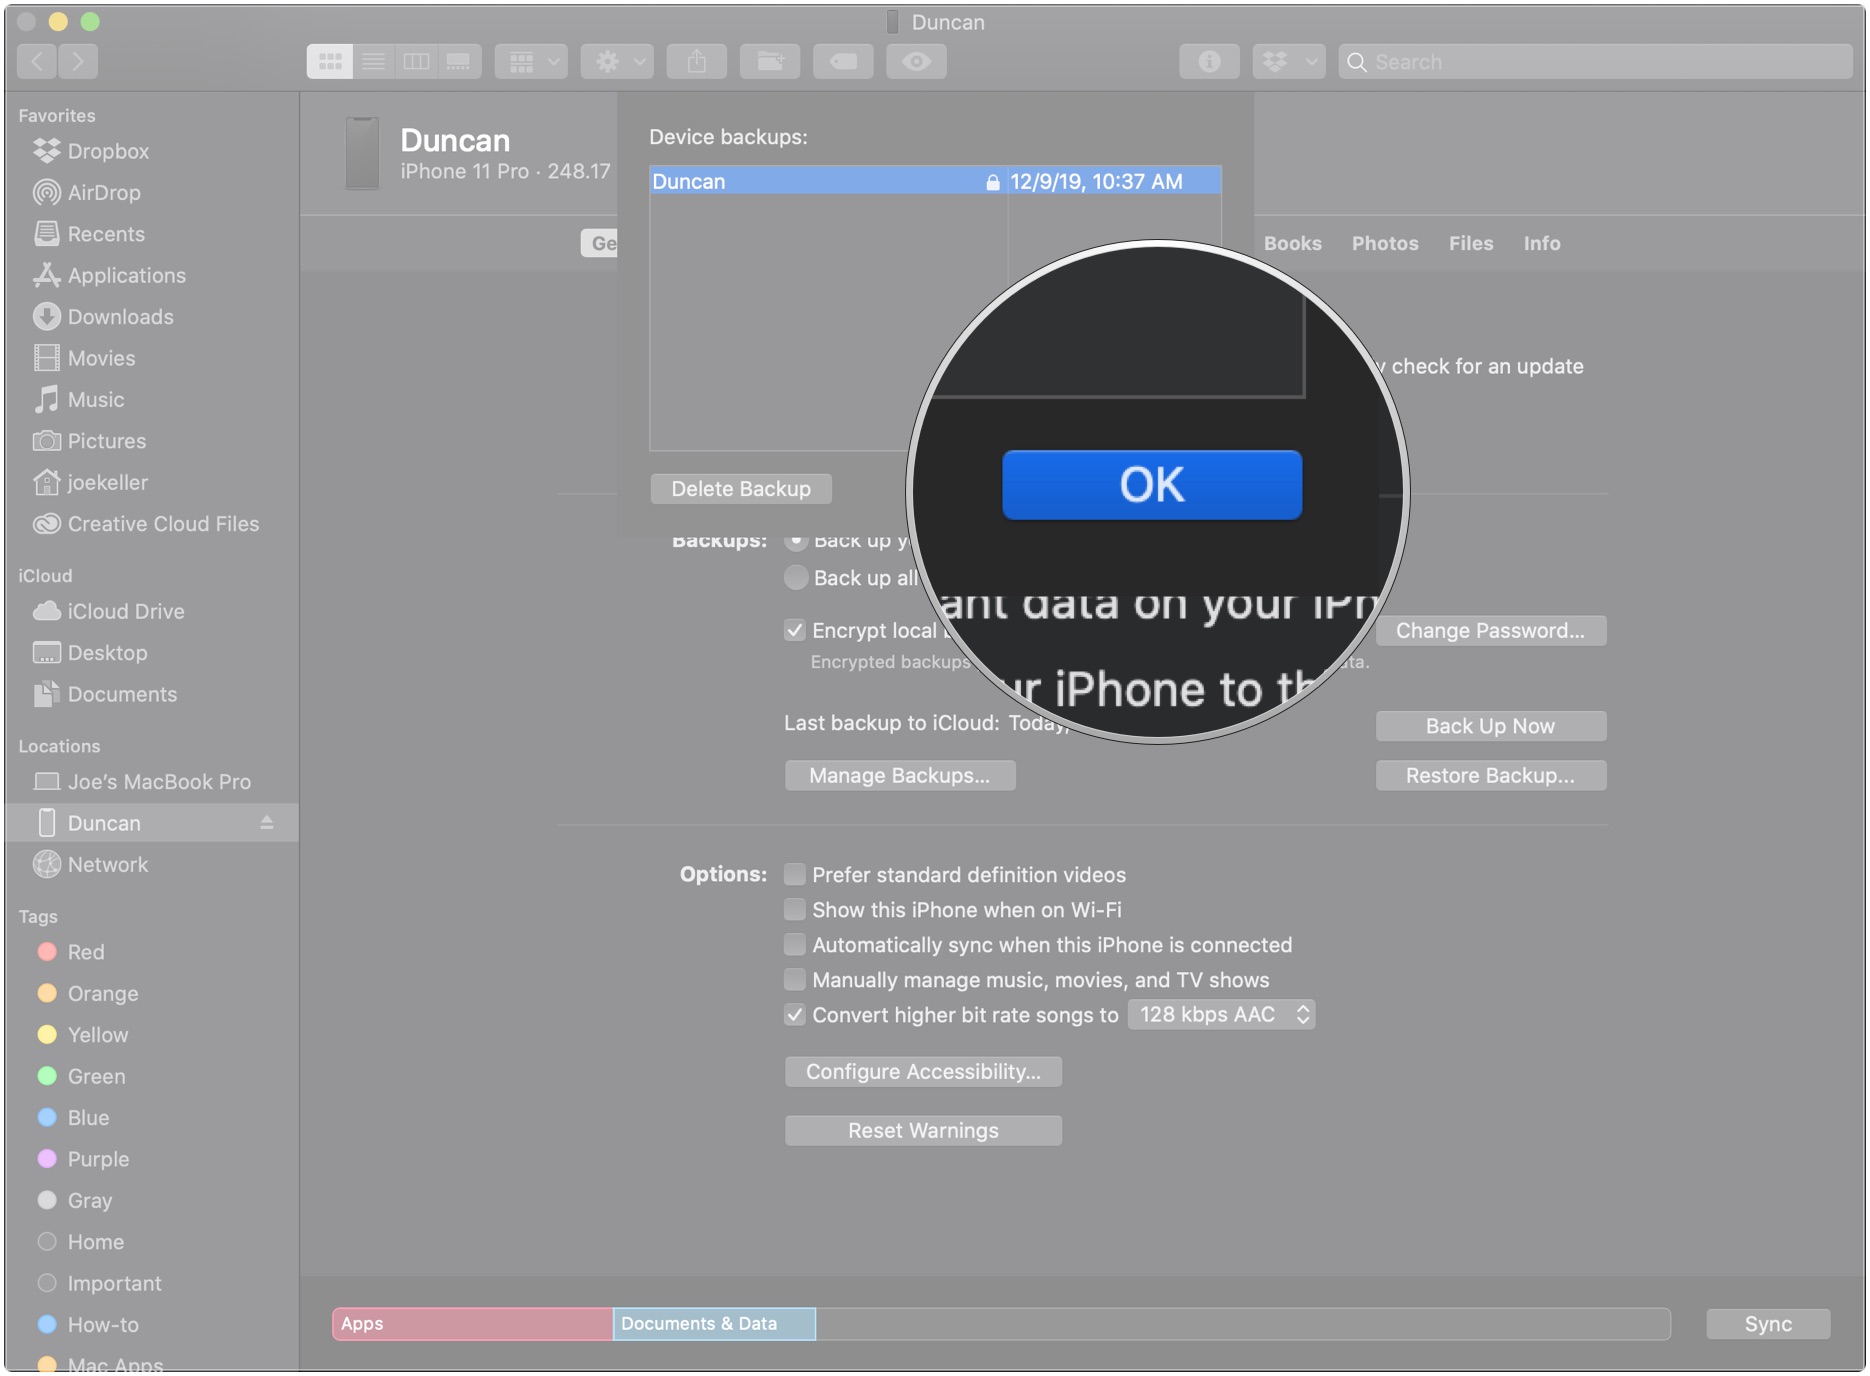
Click Manage Backups... to view all existing device backups.
- Click on any device backup you want to delete.
Click Delete Backup. Be aware that the backup might not disappear until the next time you visit the 'Manage Backups...' view.
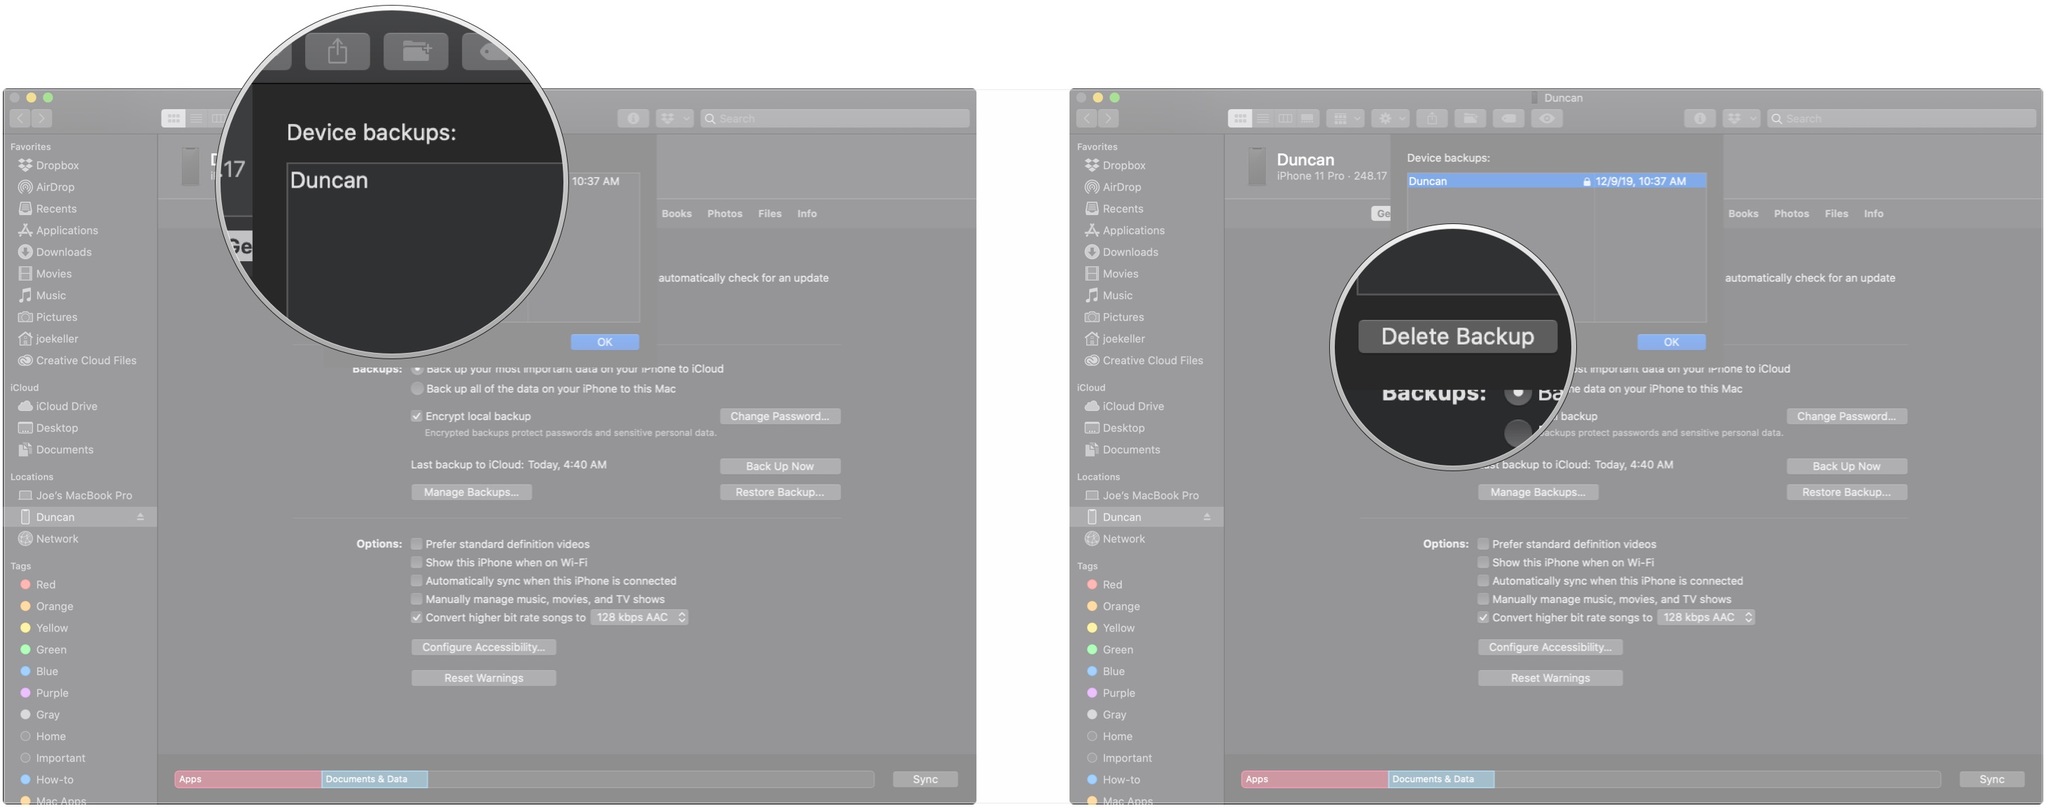
Click OK.
How to back up your iPhone or iPad manually on macOS Mojave and earlier
Here's how to set up and use device backups on your Mac if you're running macOS Mojave and earlier.
- Connect your device to your computer.
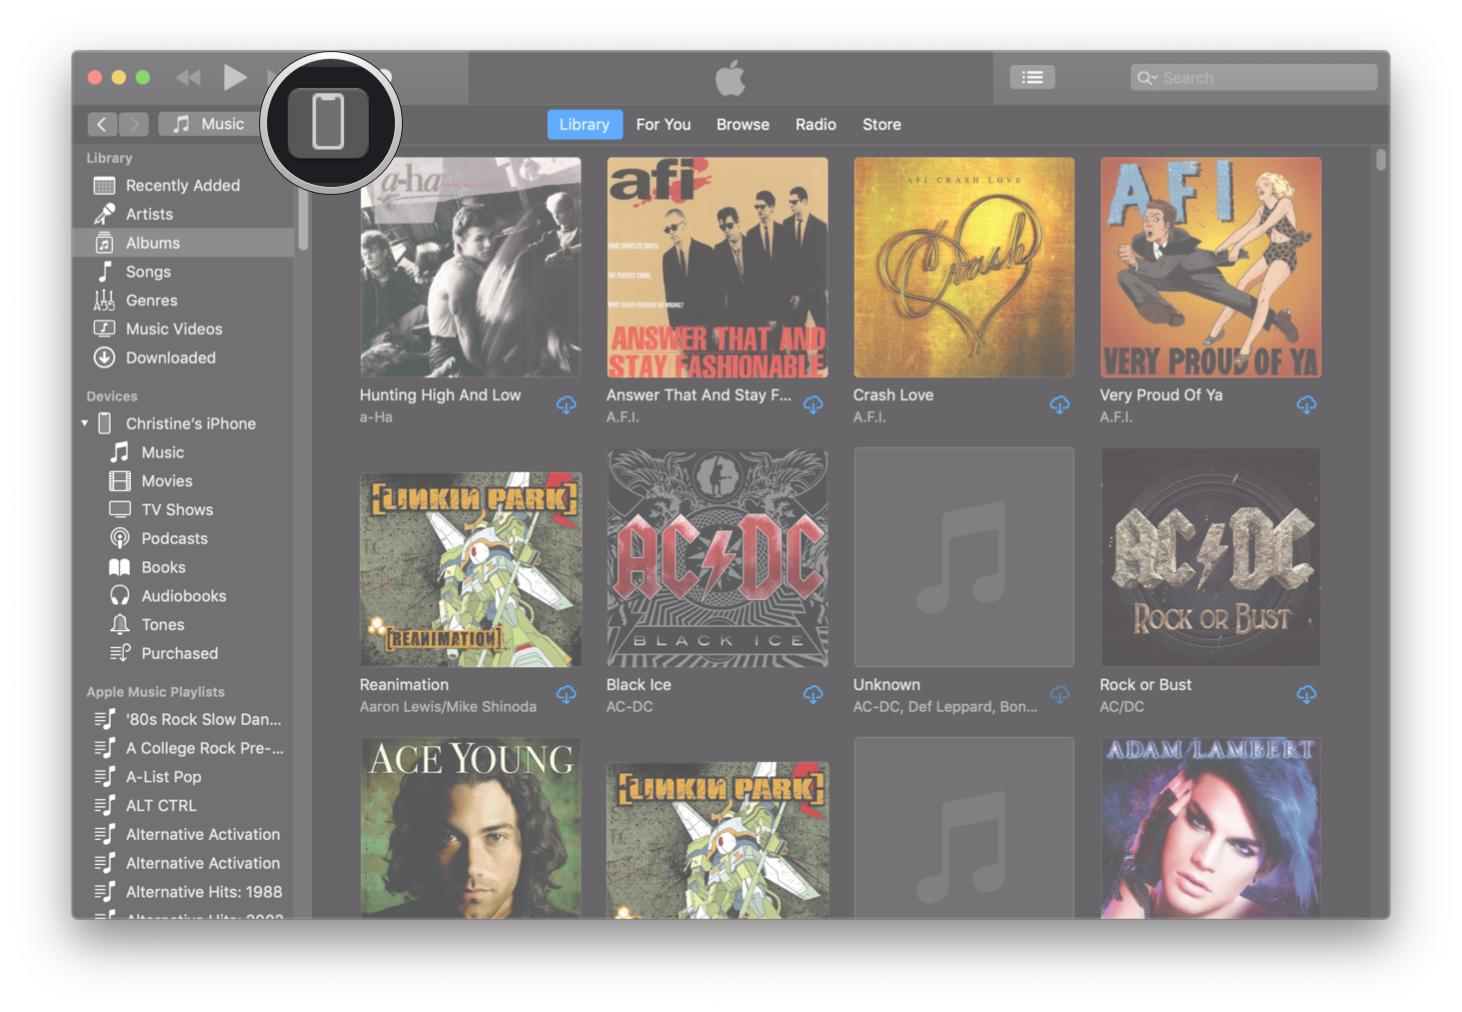
- Open iTunes.
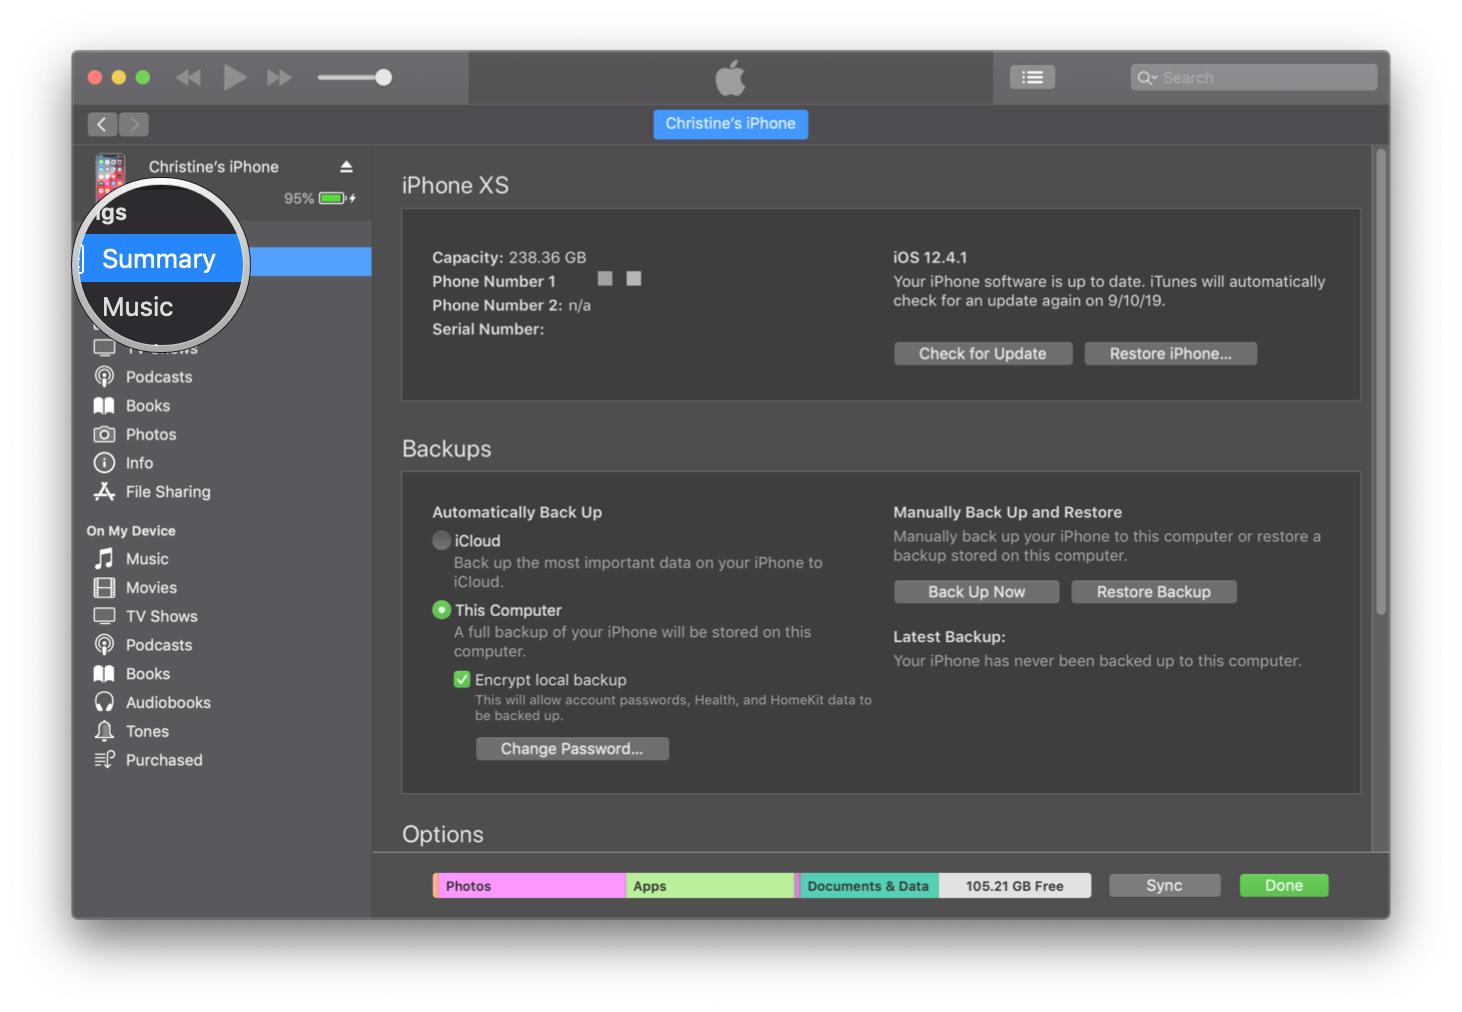
Click on the Device icon next to the category dropdown menu on the left side of the iTunes window.
Select Summary from the sidebar.
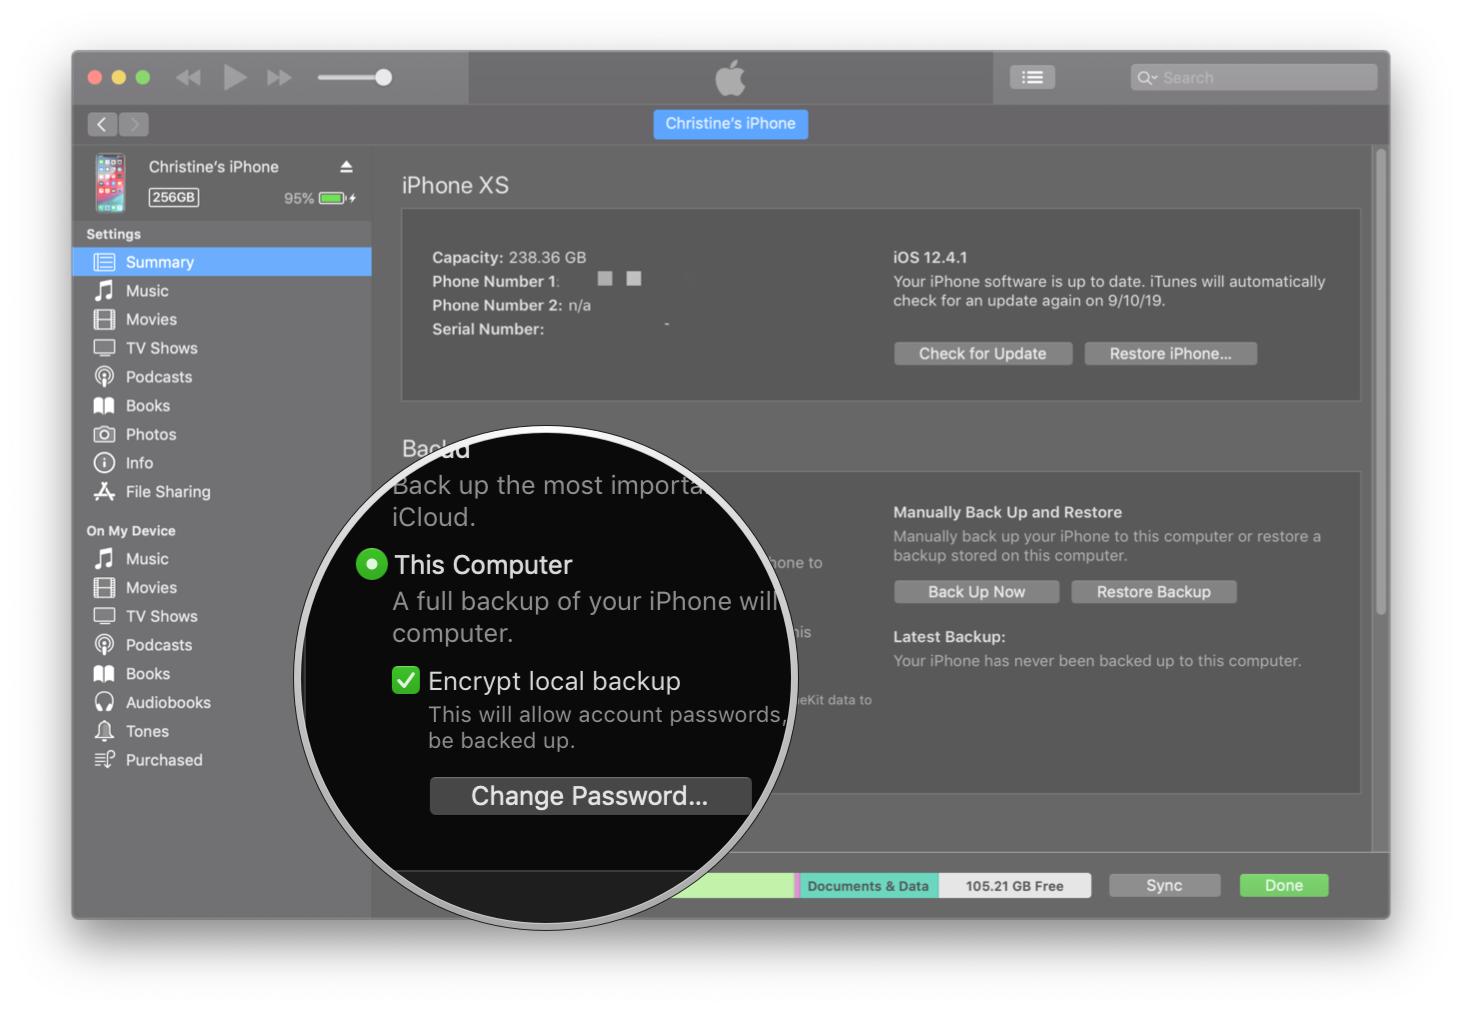
- Select This computer under Automatically Back up.
Tick the box for Encrypt [device] backup to ensure that your passwords, health, and HomeKit data is backed up. You'll have to create a password to protect your encrypted backups. The password will be automatically stored in Keychain.
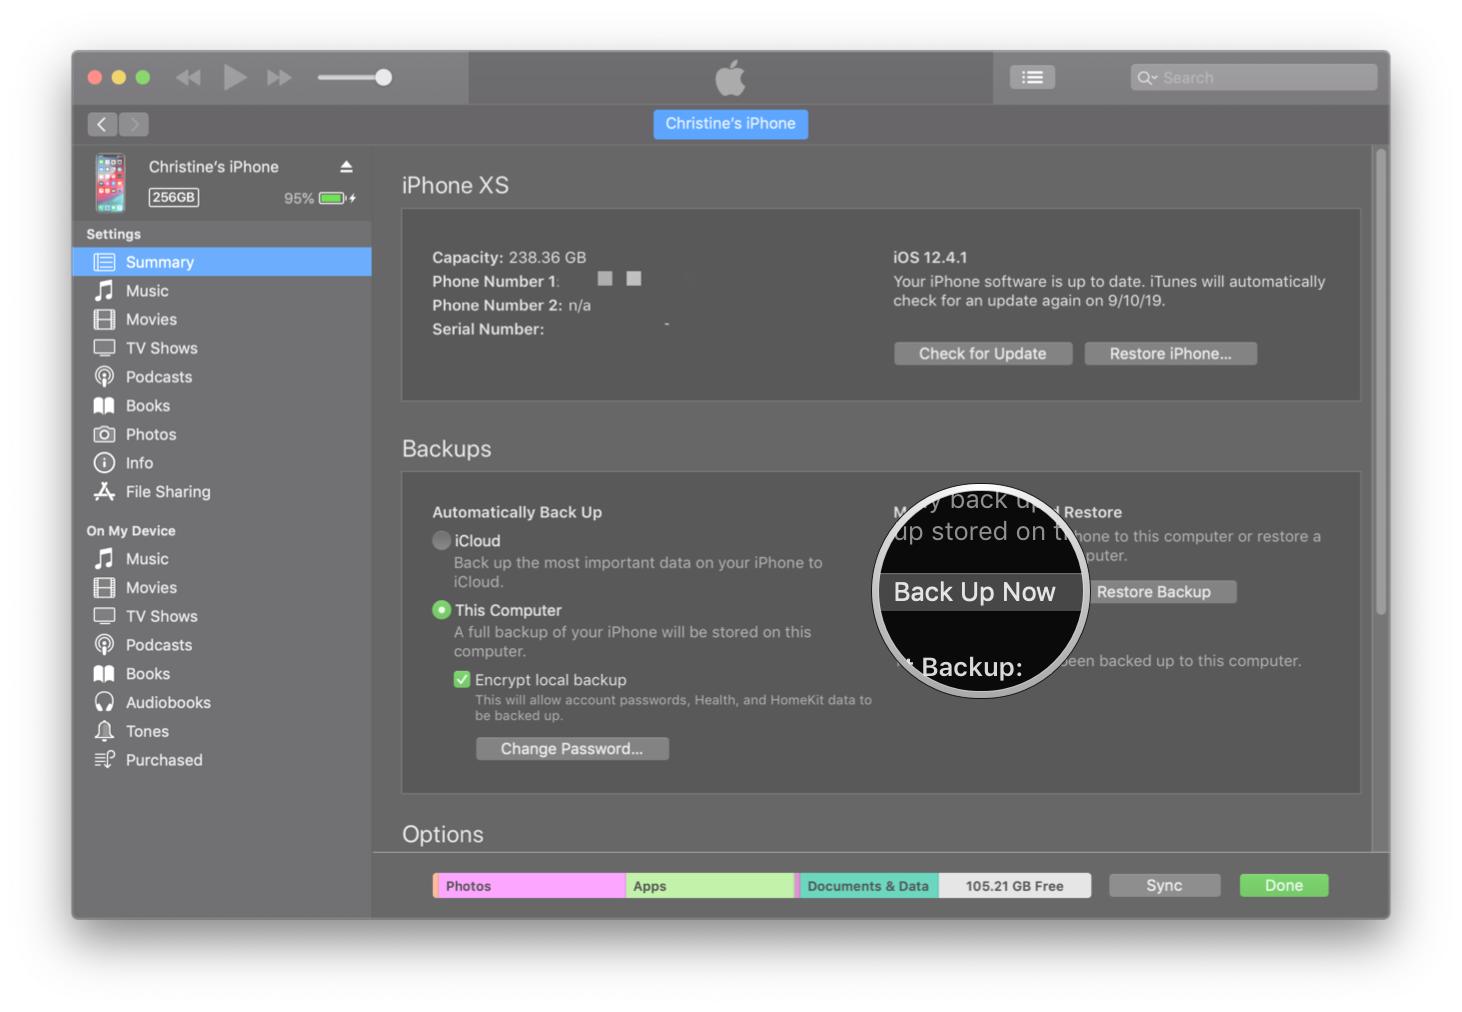
Click on Back Up Now to start the backup.
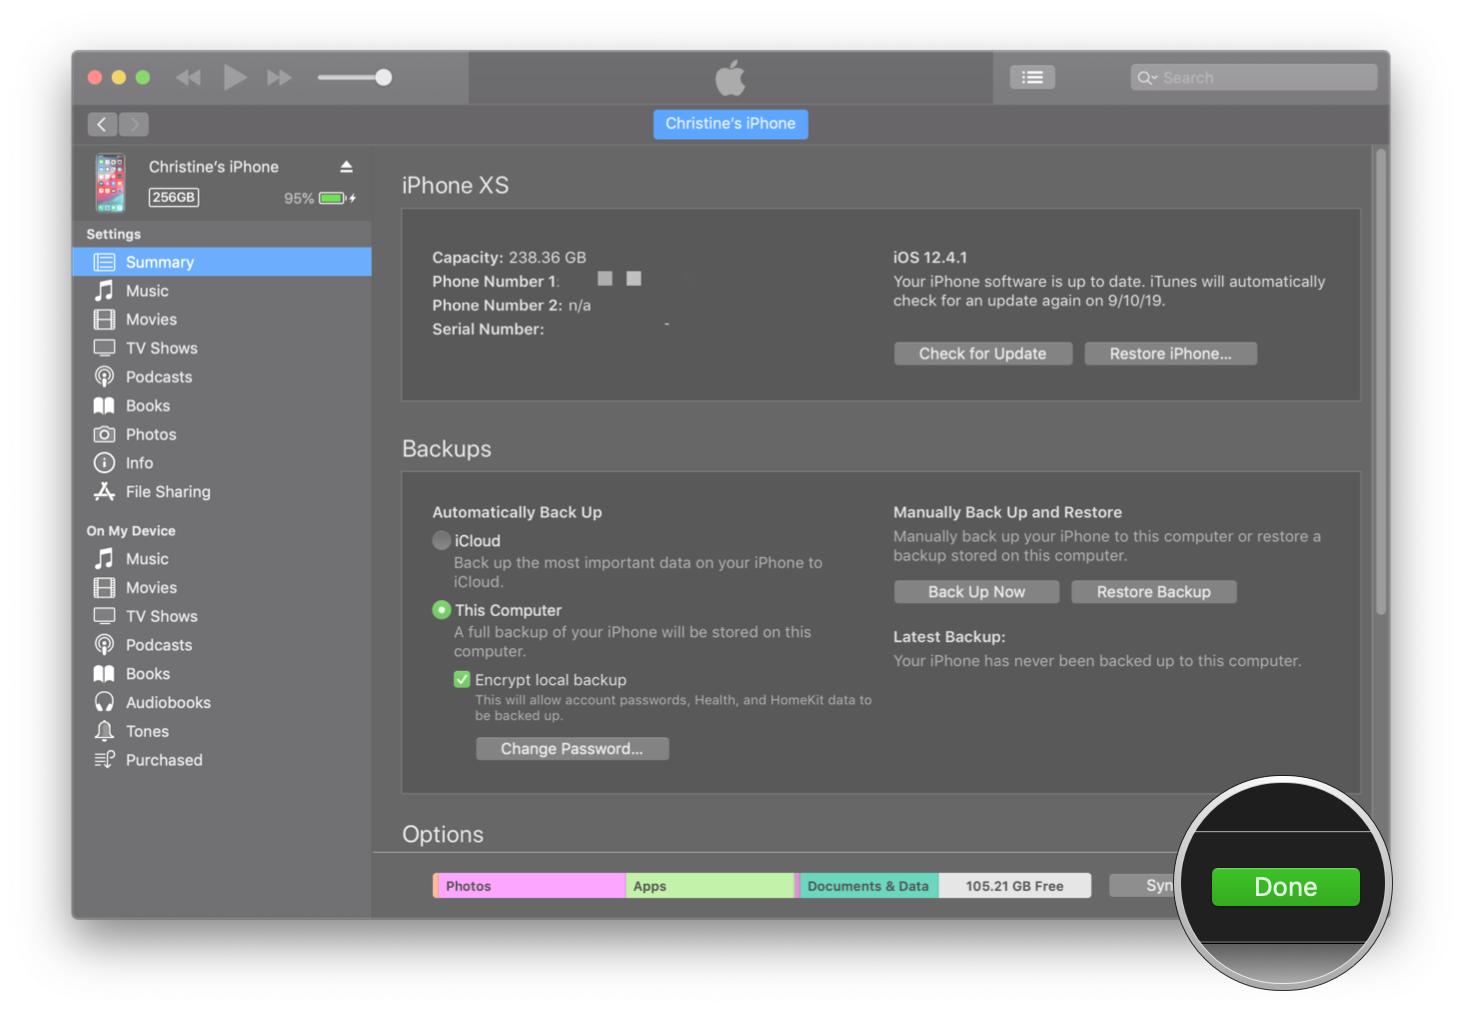
Click Done when you are finished.
Any questions?
Do you have any questions about how to back up an iPhone or iPad? Let us know in the comments and we'll help you out.
Updated October 2020: Updated for iOS 14.
Backing up: The ultimate guide
- Backing up: The ultimate guide
- Best backup services and programs for your Mac
- Best cloud service apps for your iPhone and iPad
- How to back up your Mac
- How to back up your iPhone and iPad
- How to back up your Apple TV
- How to back up your Apple Watch
- How to restore your Mac from a backup
- How to restore your iPhone or iPad from a backup
- How to restore your Apple Watch from a backup
- How to recover your files when you don't have a backup