How to use optimized storage for Music in iOS 10 on your iPhone or iPad
- aug
- 31

Rather than streaming all of their music, many people prefer to download their favorite tracks to the Music app on their iPhone or iPad. This can provide easy access while you don't have an internet connection, but downloaded music can take up a lot of space on your device.
In iOS 10, Apple has added a new setting to let you choose how you want your music stored on your iPhone or iPad. Here's how to take charge.
Apple's 2016 software updates — iOS 10, watchOS 3, tvOS 10, and macOS Sierra — are currently available as closed developer previews or as public betas for iPhone, iPad, and Mac. (Sadly, no public beta for the Apple Watch or tvOS this year.) While the betas contain new features, they also contain pre-release bugs that can prevent the normal use of your iPhone, iPad, Apple Watch, Apple TV, or Mac, and are not intended for everyday use on a primary device. That's why we strongly recommend staying away from the developer previews, and using the public betas with caution. If you depend on your devices, wait for the final release this fall.
What is Optimized Storage?
First introduced as part of iCloud Photo Library, Optimized Storage lets you keep a portion of your library on your device (depending on your free storage space) and automatically dumps older items to make room for newer options as time goes on. In iOS 9, the Music app had a behind-the-scenes version of Optimized Storage, but it tended to drive users crazy — they'd get on a plane, thinking they could listen to a favorite album, only to find it mysteriously missing from their device.
With iOS 10, Apple puts the choice in the user's hands: You can either use Optimized Storage and let the company automatically manage your mobile music collection, or you can choose to disable it and store any downloaded music locally until you say otherwise.
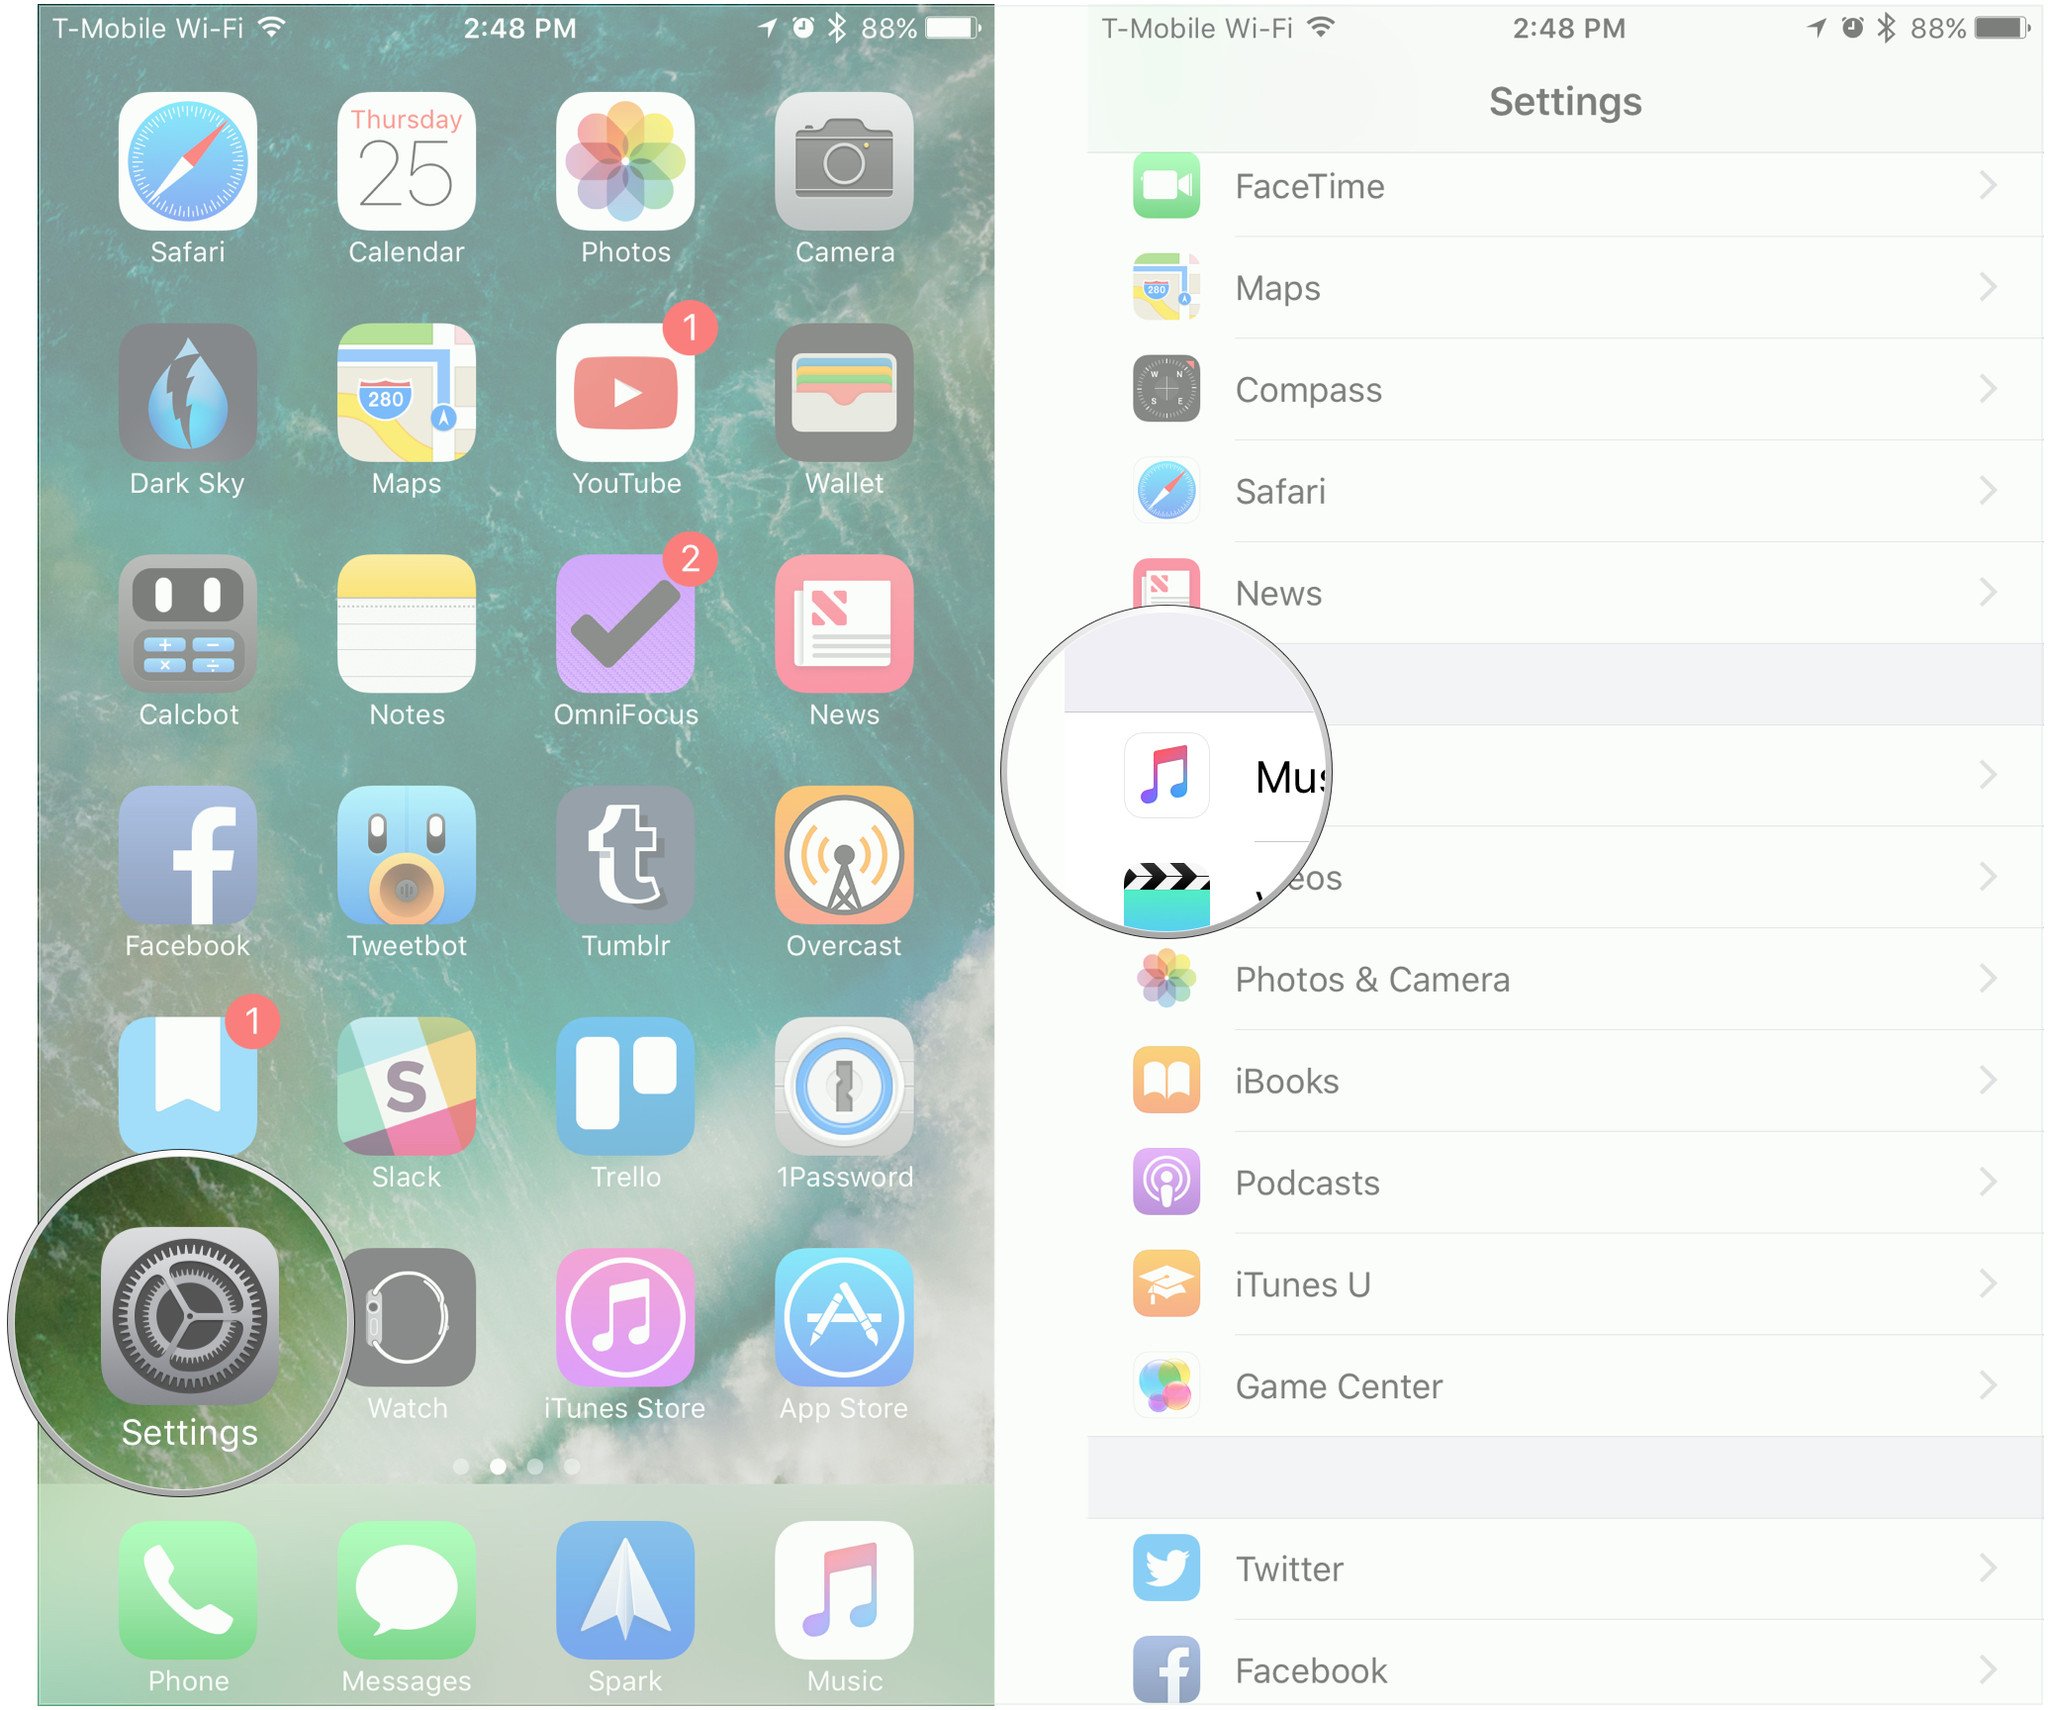
How to turn optimized storage on for Music in iOS 10
- Open Settings.
- Scroll down and select Music.
Under Downloads, tap Optimized Storage.
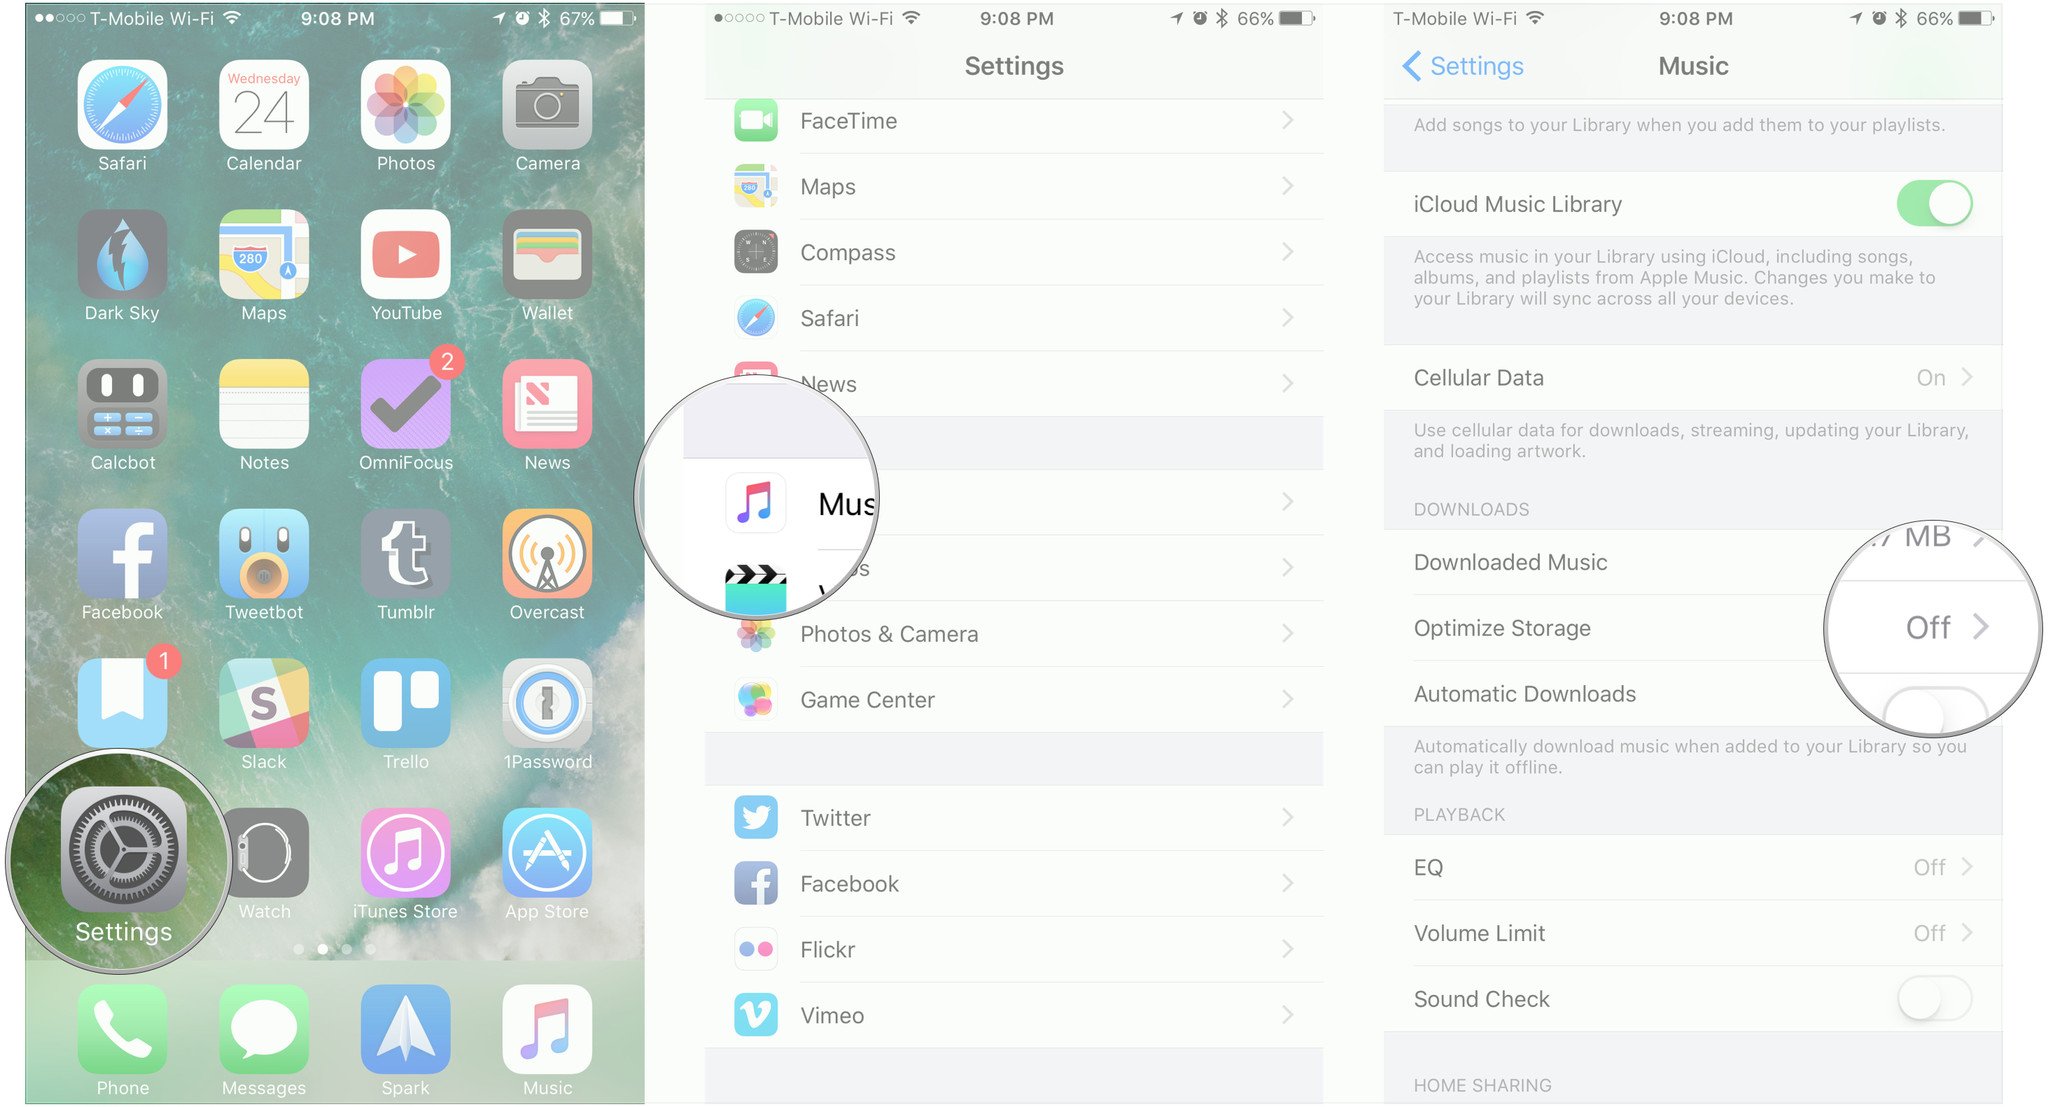
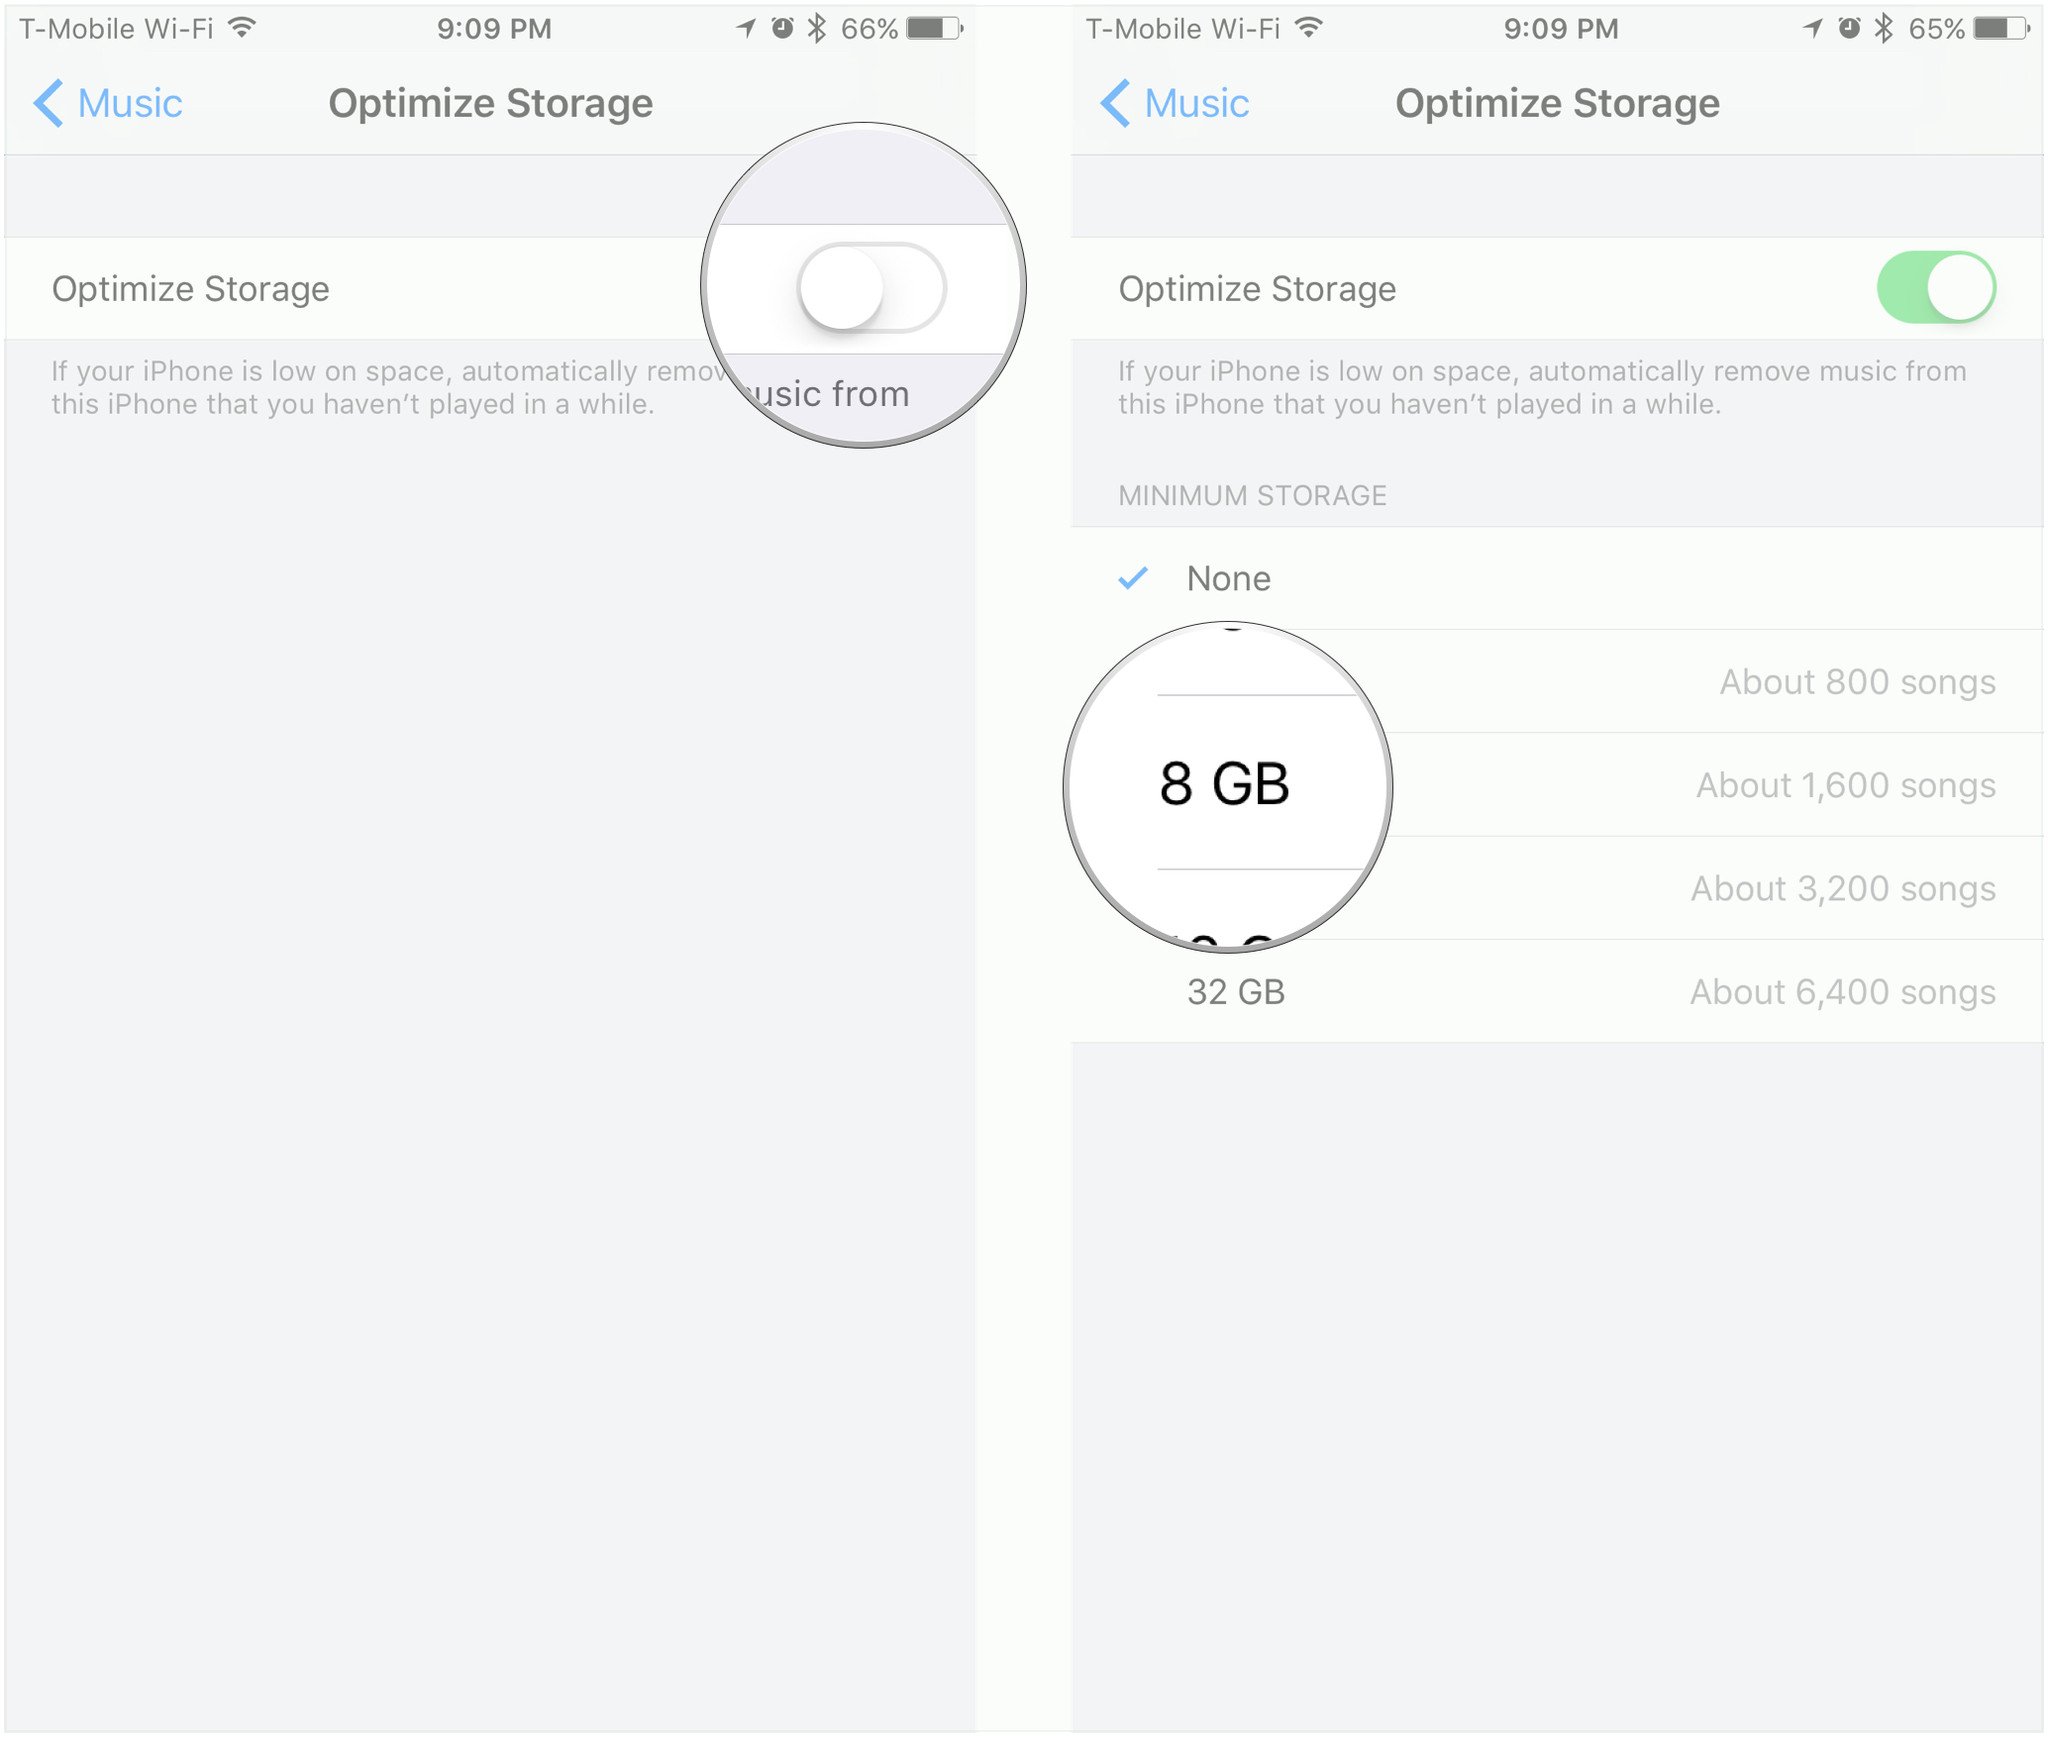
Turn the Optimized Storage switch to the 'on' position. It should now be green.
Select the amount of storage space you would like to allow your music to take up before iOS removes the downloaded files.
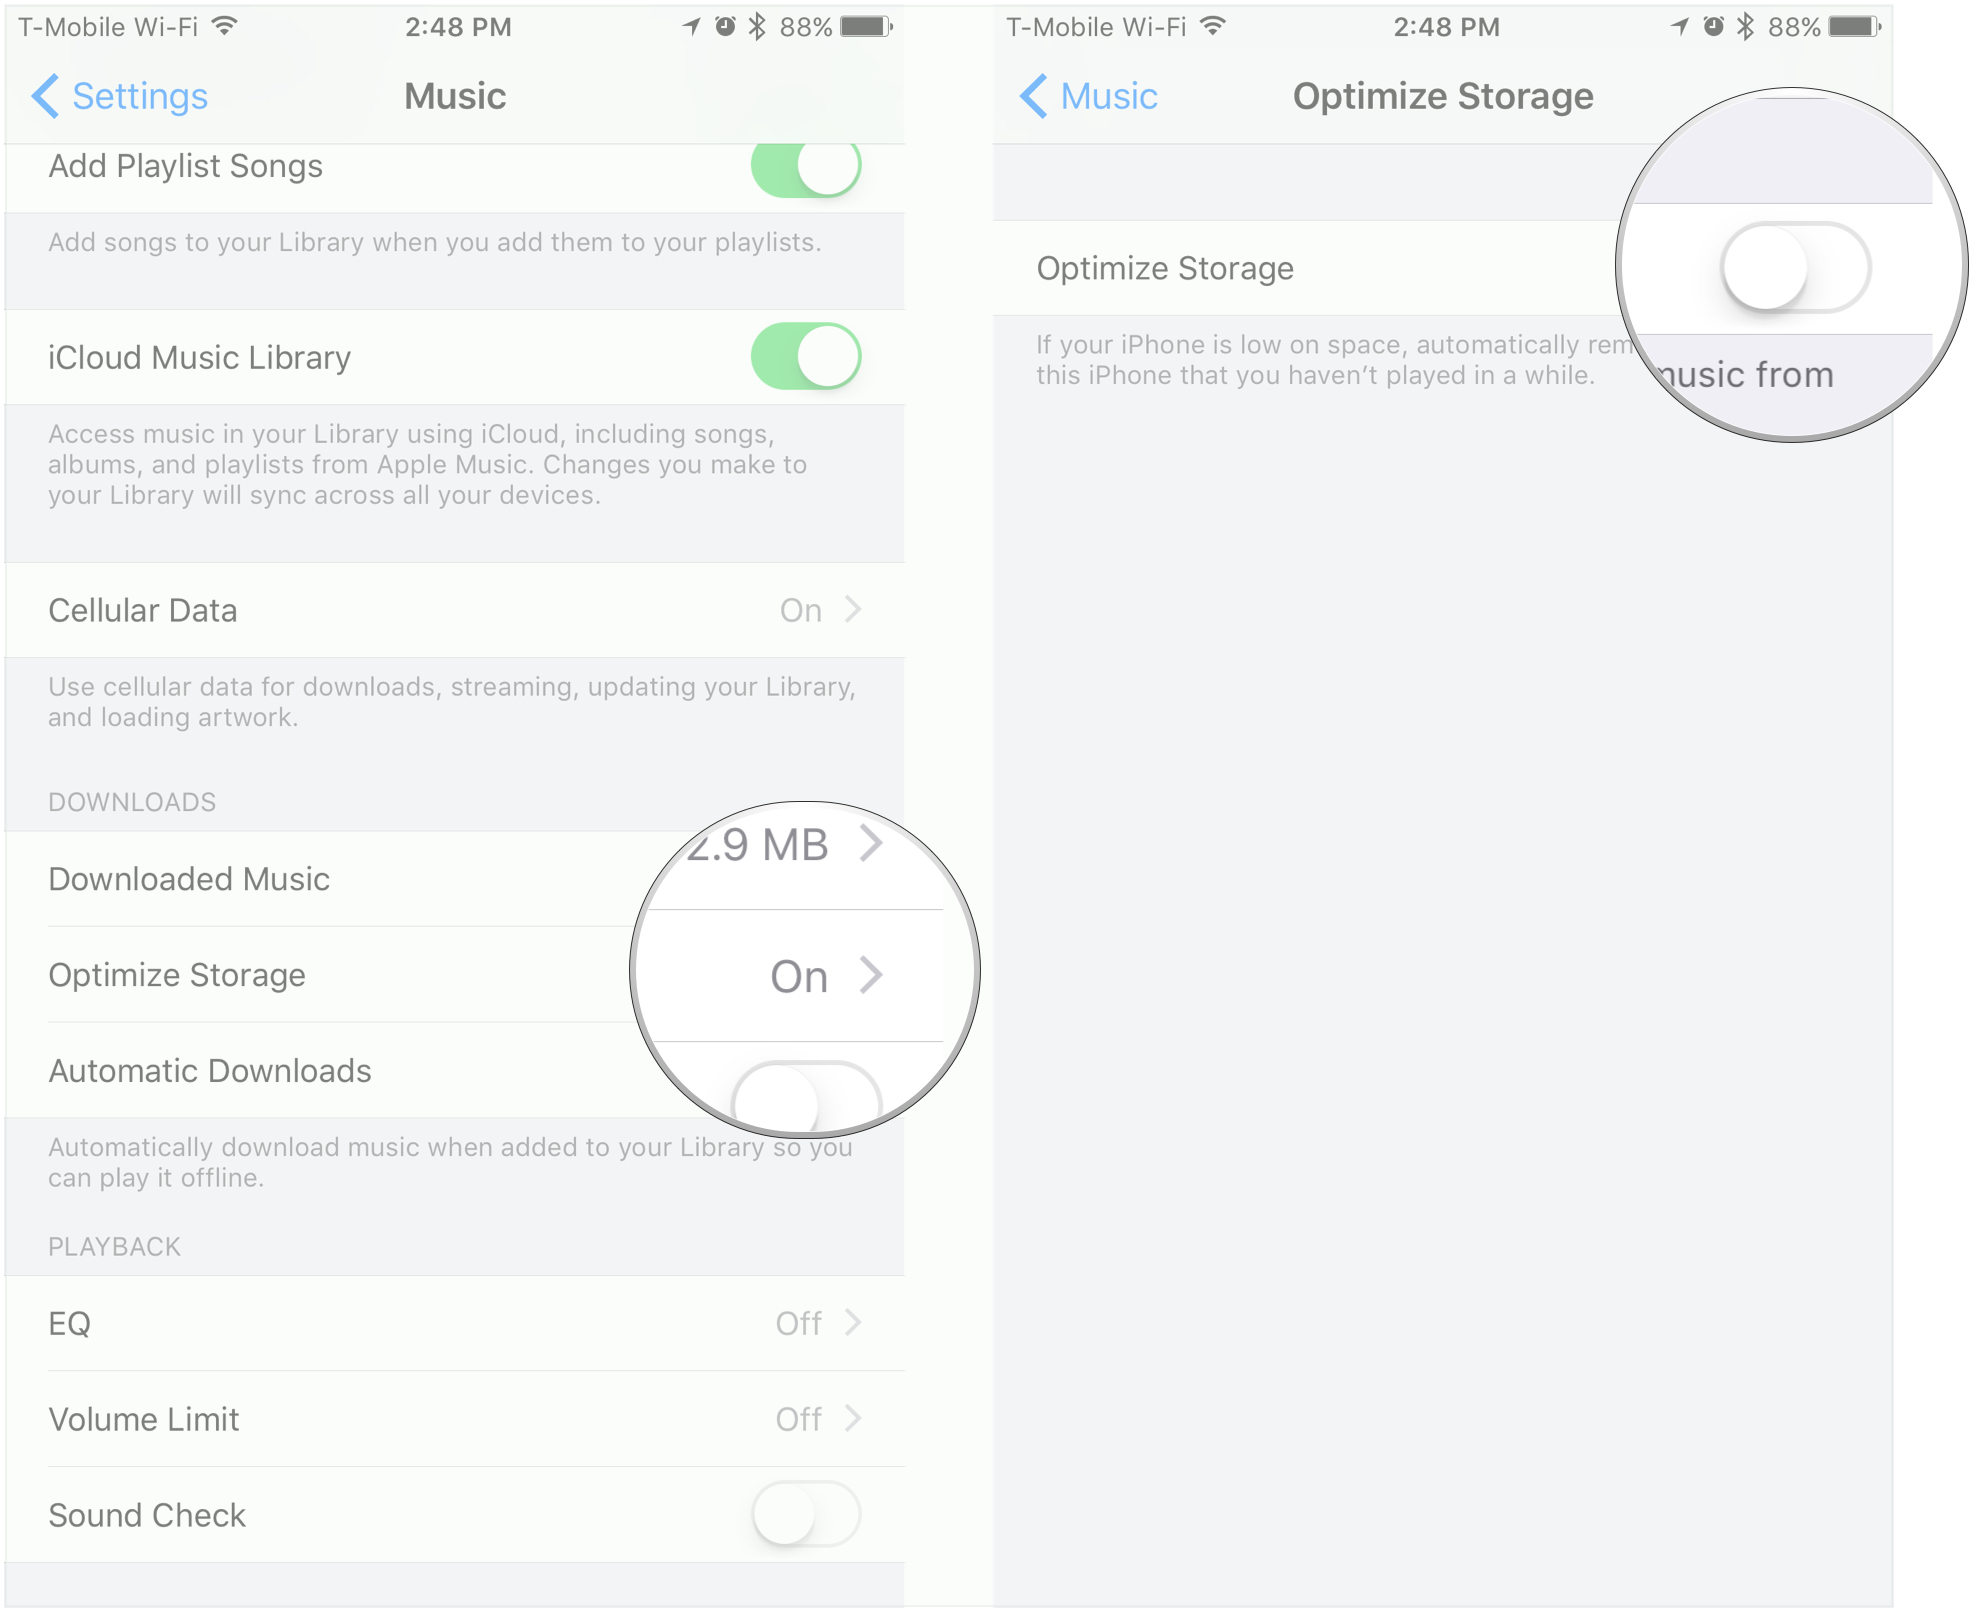
How to turn optimized storage off for Music in iOS 10
- Open Settings.
Scroll down and select Music.
Under Downloads, tap Optimized Storage.
Turn the Optimized Storage switch to the 'off' position. It should now be white.
Questions?
Let us know below!