
Get those iPhone backups off your Mac and onto an external hard drive
- mar
- 31
If you have iOS backups taking space on your internal drive, you can relocate them to an external hard drive to clear out some space.
If you have ever synced your iPhone, iPad, or other Apple devices using your Mac, you have backup folders stored on your internal drive. It's just the way life is. Maybe you only have a few files from a couple of backups and they don't take up much space. Maybe you've been backing up your iPhone for years and have a space hog on your hands.
If you back up your iPhone or iPad through your computer and feel the need to remove these files and place them instead onto an external hard drive, it is possible to do, but beware, Apple really doesn't recommend it.
Note: This guide is for people who back up their iPhone or iPad using a computer, not through iCloud.
What are these backup files and why are they taking up so much space?
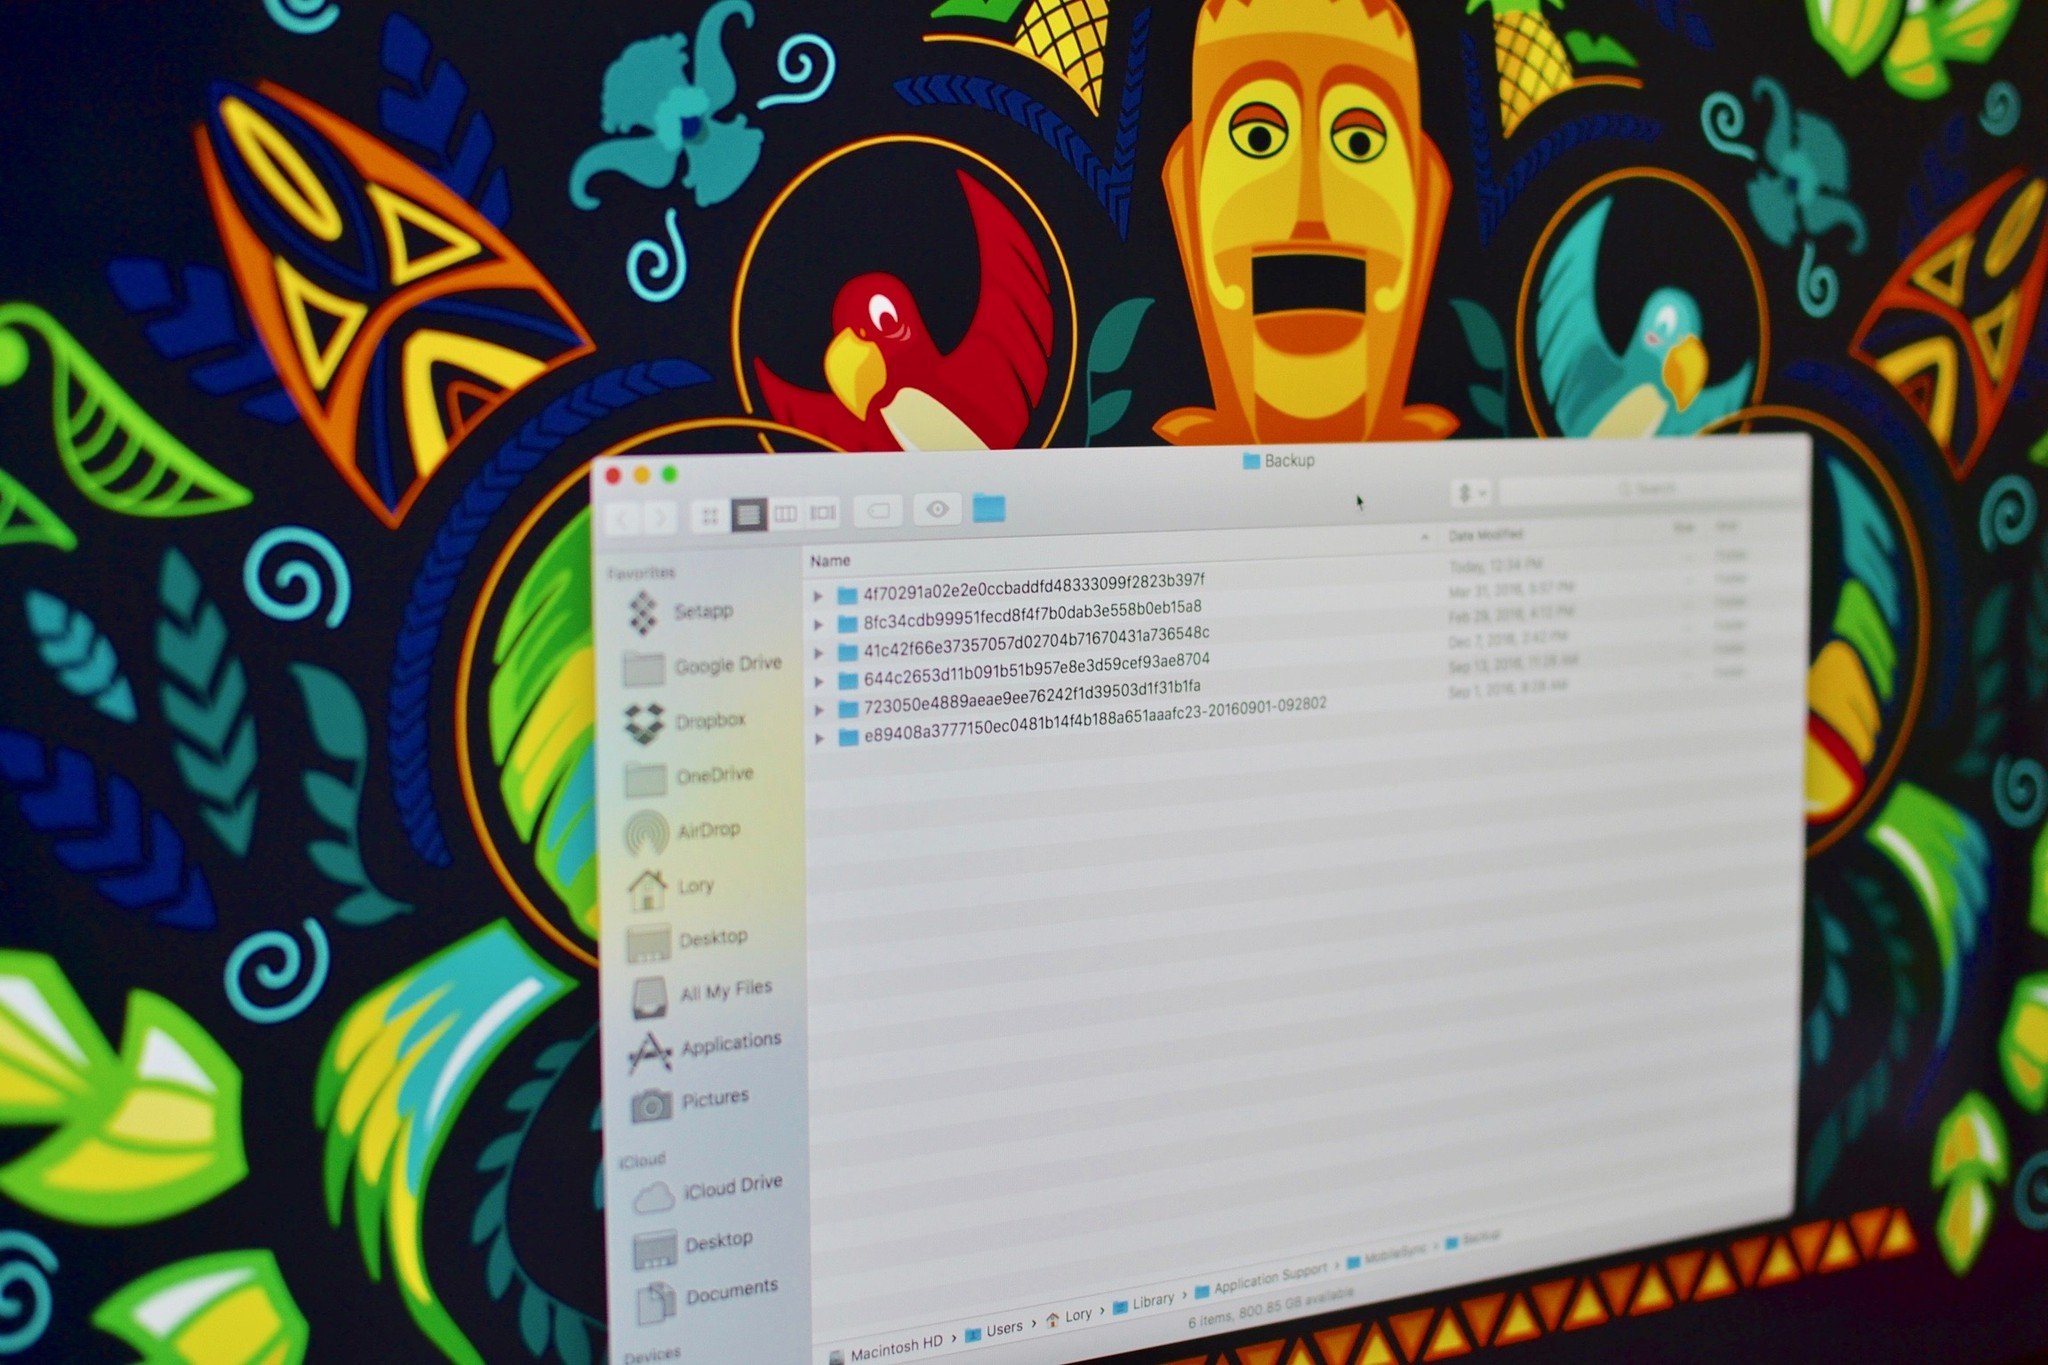
When you back up your mobile device using your computer, the backup is stored on your Mac. The location of the backups is in a folder called MobileSync, and sometimes it gets pretty big, especially if you are syncing multiple devices. Old backups are replaced with new ones, but families that have multiple devices backed up to one computer are going to take up a lot of storage space.
We highly recommend syncing on iCloud, and then deleting the backups on your Mac, rather than relocating them. But, if you're still bent on moving them to an external hard drive, we're here to help.
Step 1: Locate your backups
This part is easy. Your backups are stored in a MobileSync folder. You can find them by typing ~/Library/Application Support/MobileSync/Backup into Spotlight. You can also find the backups for specific devices from Finder.
- Click Finder on your Mac's Dock.
- Click on your device on the left side of the Finder window.
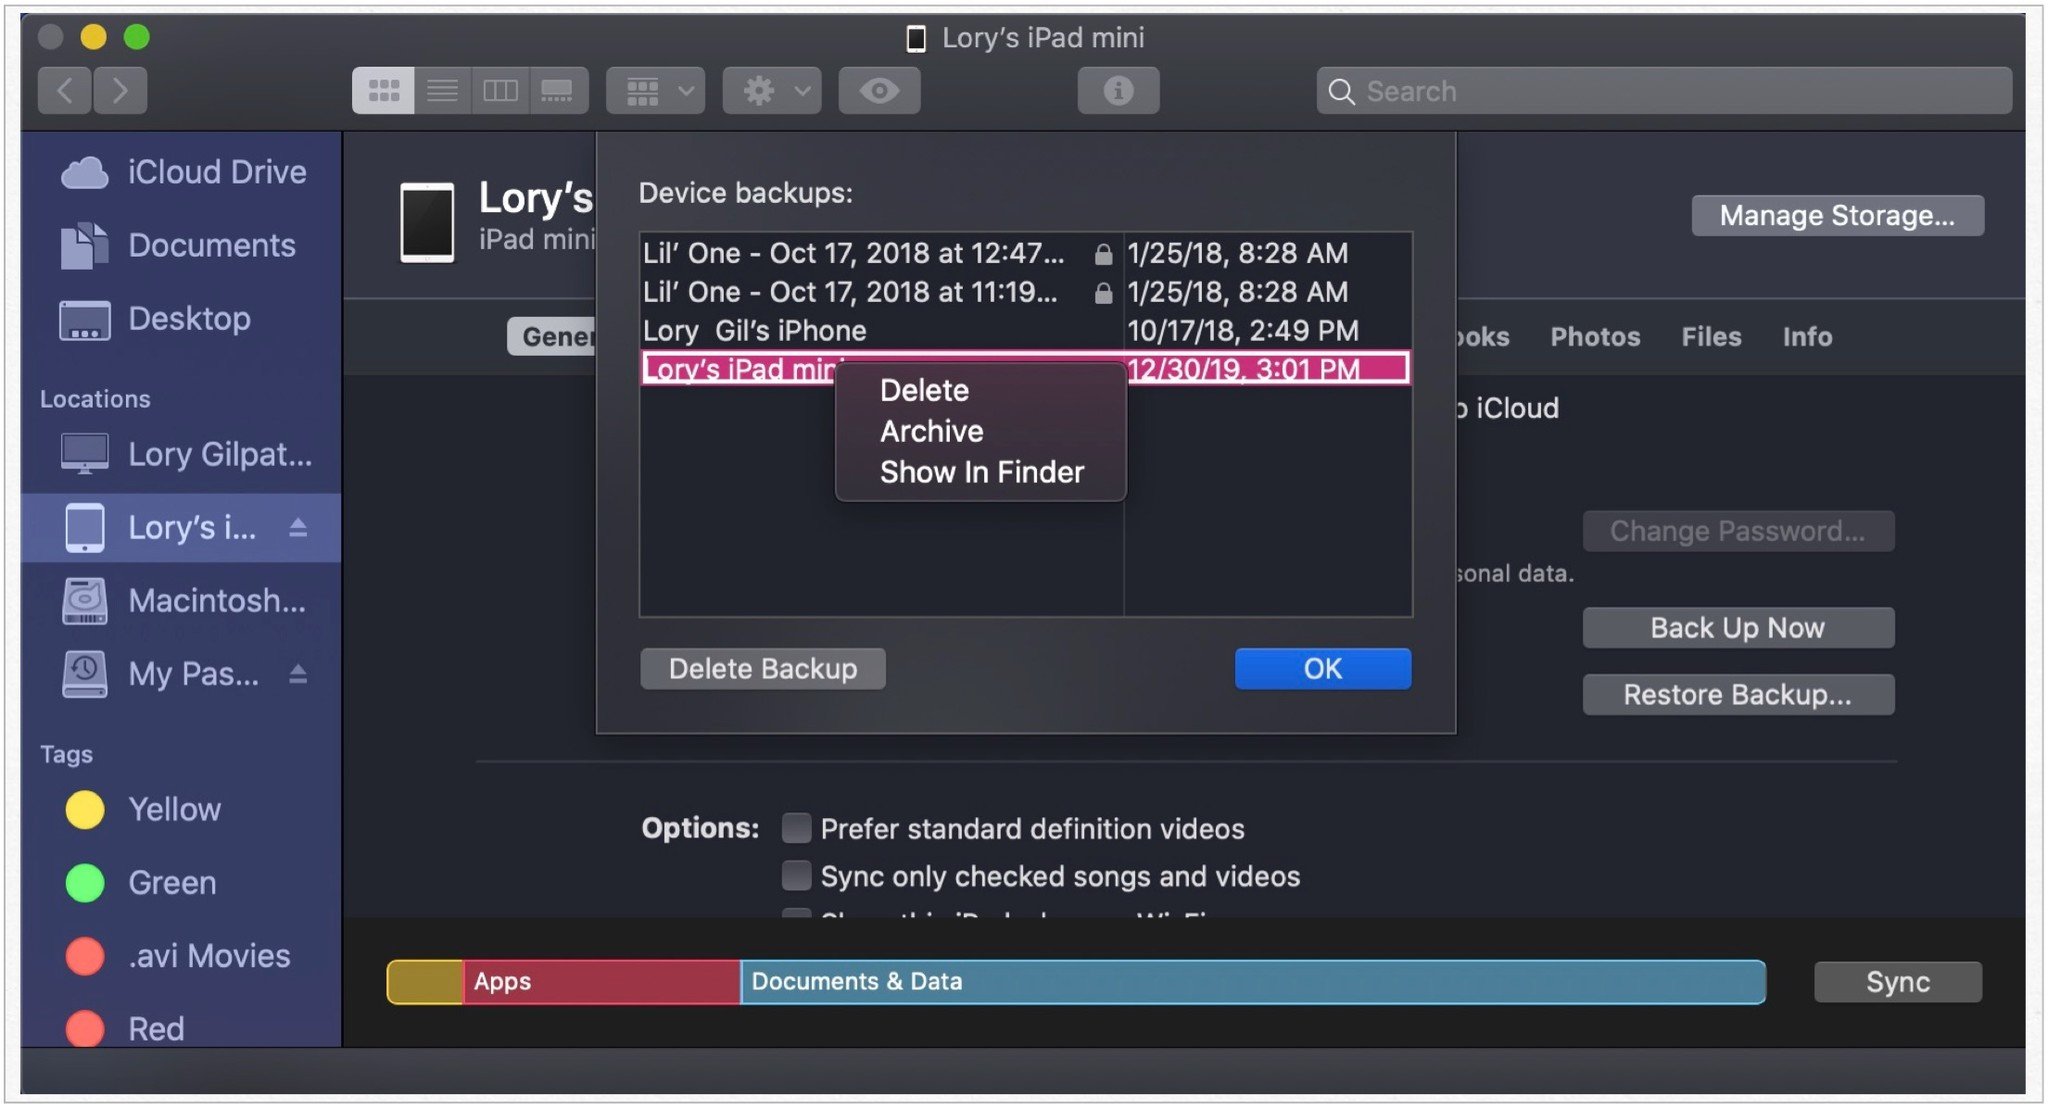
Click on Manage Backups on the General tab.

- Select a specific device.
- Hold down the Control key and click on the device.
Select Show in Finder from the list of available options.
Step 2: Move your backups to an external hard drive
This part is easy, too. But, you really have to pay close attention to the name of your hard drive and the new folder names you create, including punctuation and spacing. This information will be used when creating a Terminal pathway. If you use different names then the ones I suggest, be sure to replace it with the exact name you have in the Terminal command in Step 3.
- Connect your external hard drive to your Mac if it isn't already connected.
- Open the external hard drive.
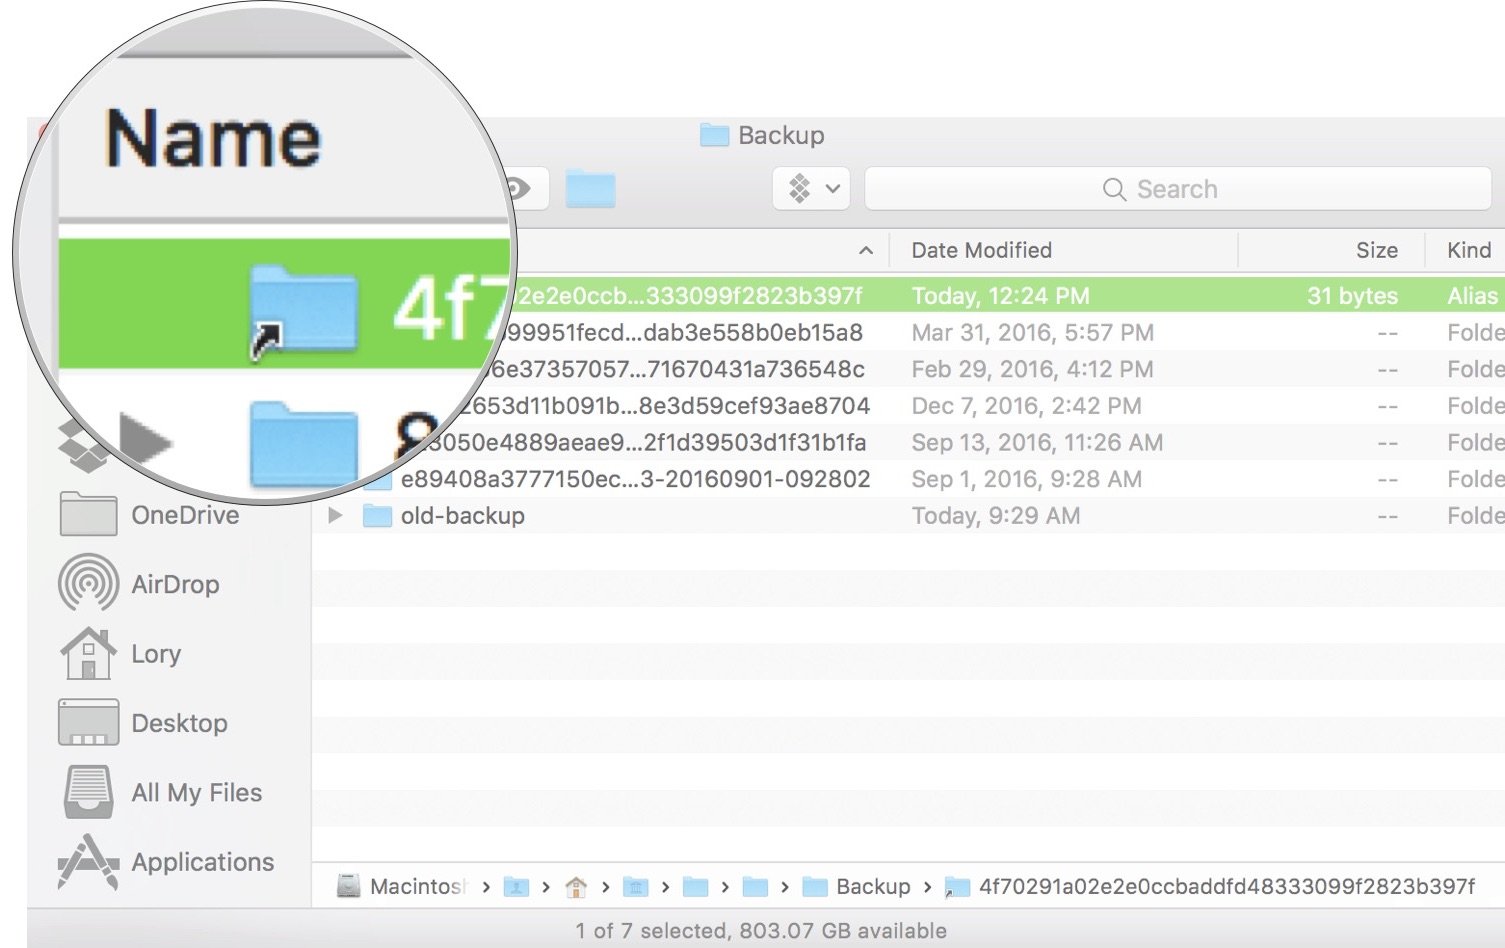
- Go back to the Finder window with your iOS backups in it and select the device backup folder (It will either be called "Backup" or have a bunch of numbers and letters).
Drag it to your external hard drive.
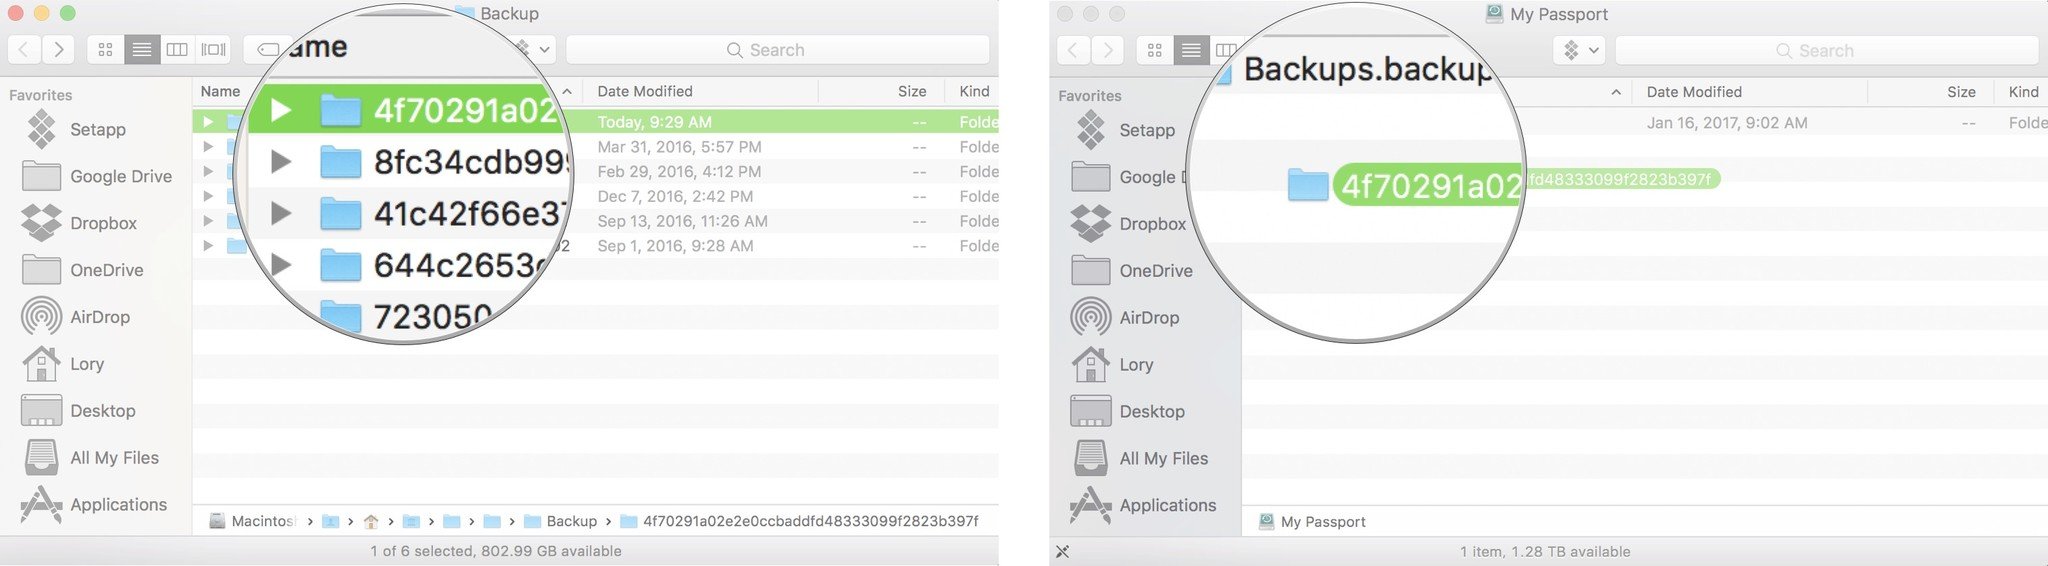
- Enter your administrator password to authenticate your action.
- Rename the iOS backup folder that is now on your external hard drive to ios_backup. You may have to enter your administrator password once again to make this change.
Rename the old backup folder in Finder to old_backup.
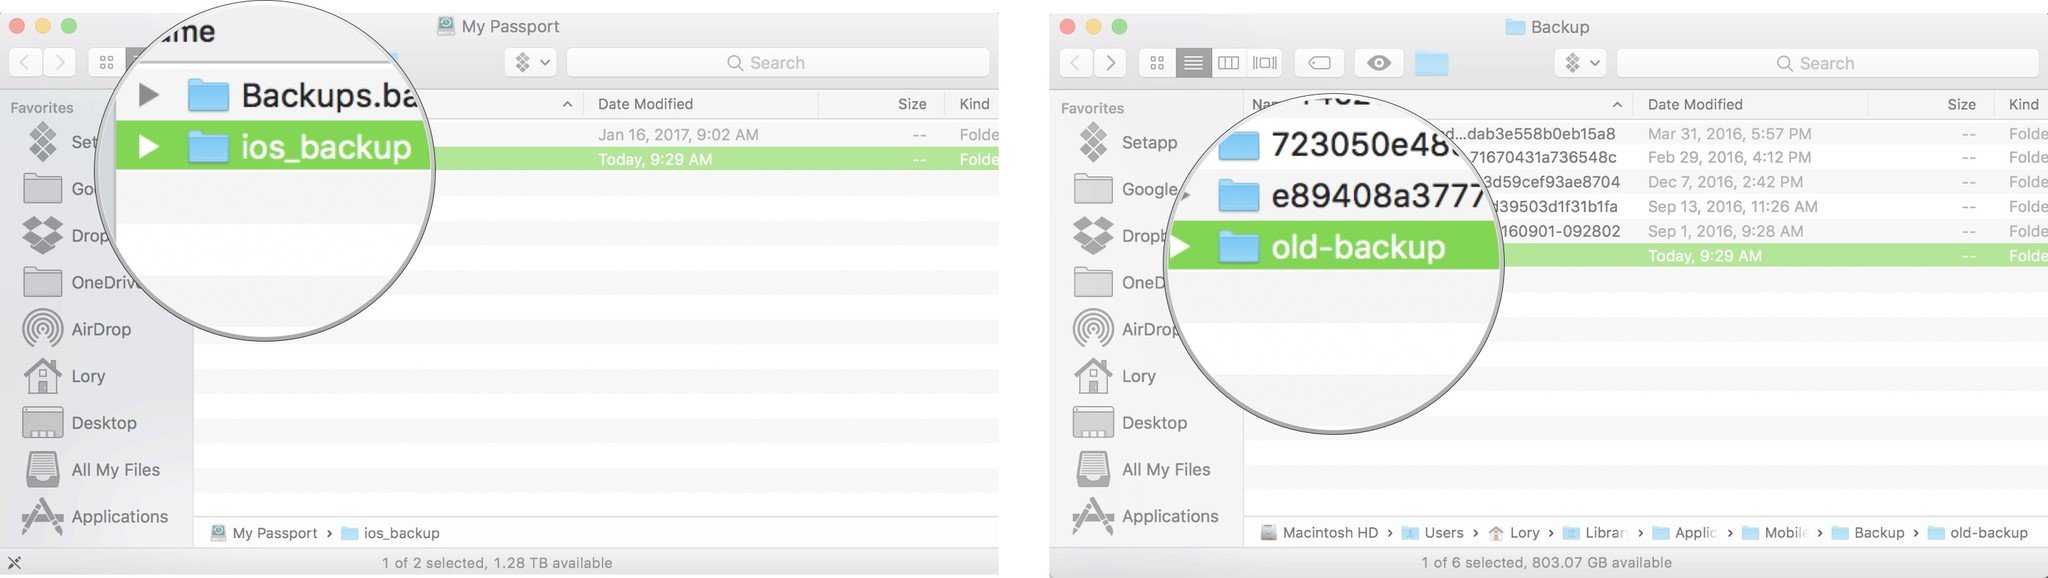
Do not delete the old_backup folder yet.
Step 3: Create a symlink to tell your computer the new location of your backups
This is the more difficult and most important step to moving your iOS backups to an external hard drive. If you don't perform this step, your computer won't be able to back up your iPhone or iPad anymore. You'll have to manually move the folders back to your Mac instead.
In this step, you'll create a symlink — or symbolic link. When you create a symlink, you are creating a new path for Finder to take to get to the backups folder.
Former iMore writer and Mac genius (seriously, he's a genius with a Mac) Peter Cohen explains symlinks perfectly.
Some applications don't follow aliases properly. An older way of creating those sorts of connections is more reliable for actions like what we want iTunes to do: Symbolic links, or symlinks. They work at a low enough level that applications and operating system functions don't have as hard a time with them as they do aliases.
We're going to use the Mac's Terminal app to create a symbolic link to trick iTunes into backing up onto your external drive rather than the boot drive.
If you're using macOS Mojave or later, you will first need to change the permissions for Terminal on your Mac. Otherwise, you won't have permission to follow the remaining steps of this process. To do so:
- Open System Preference.
- Select Security & Privacy.
- Choose the Privacy tab.
- If this screen is locked, select Click the lock to make changes at the bottom left of the screen. Otherwise, skip to Step 6.
Enter your system password and click Unlock on the popup screen.

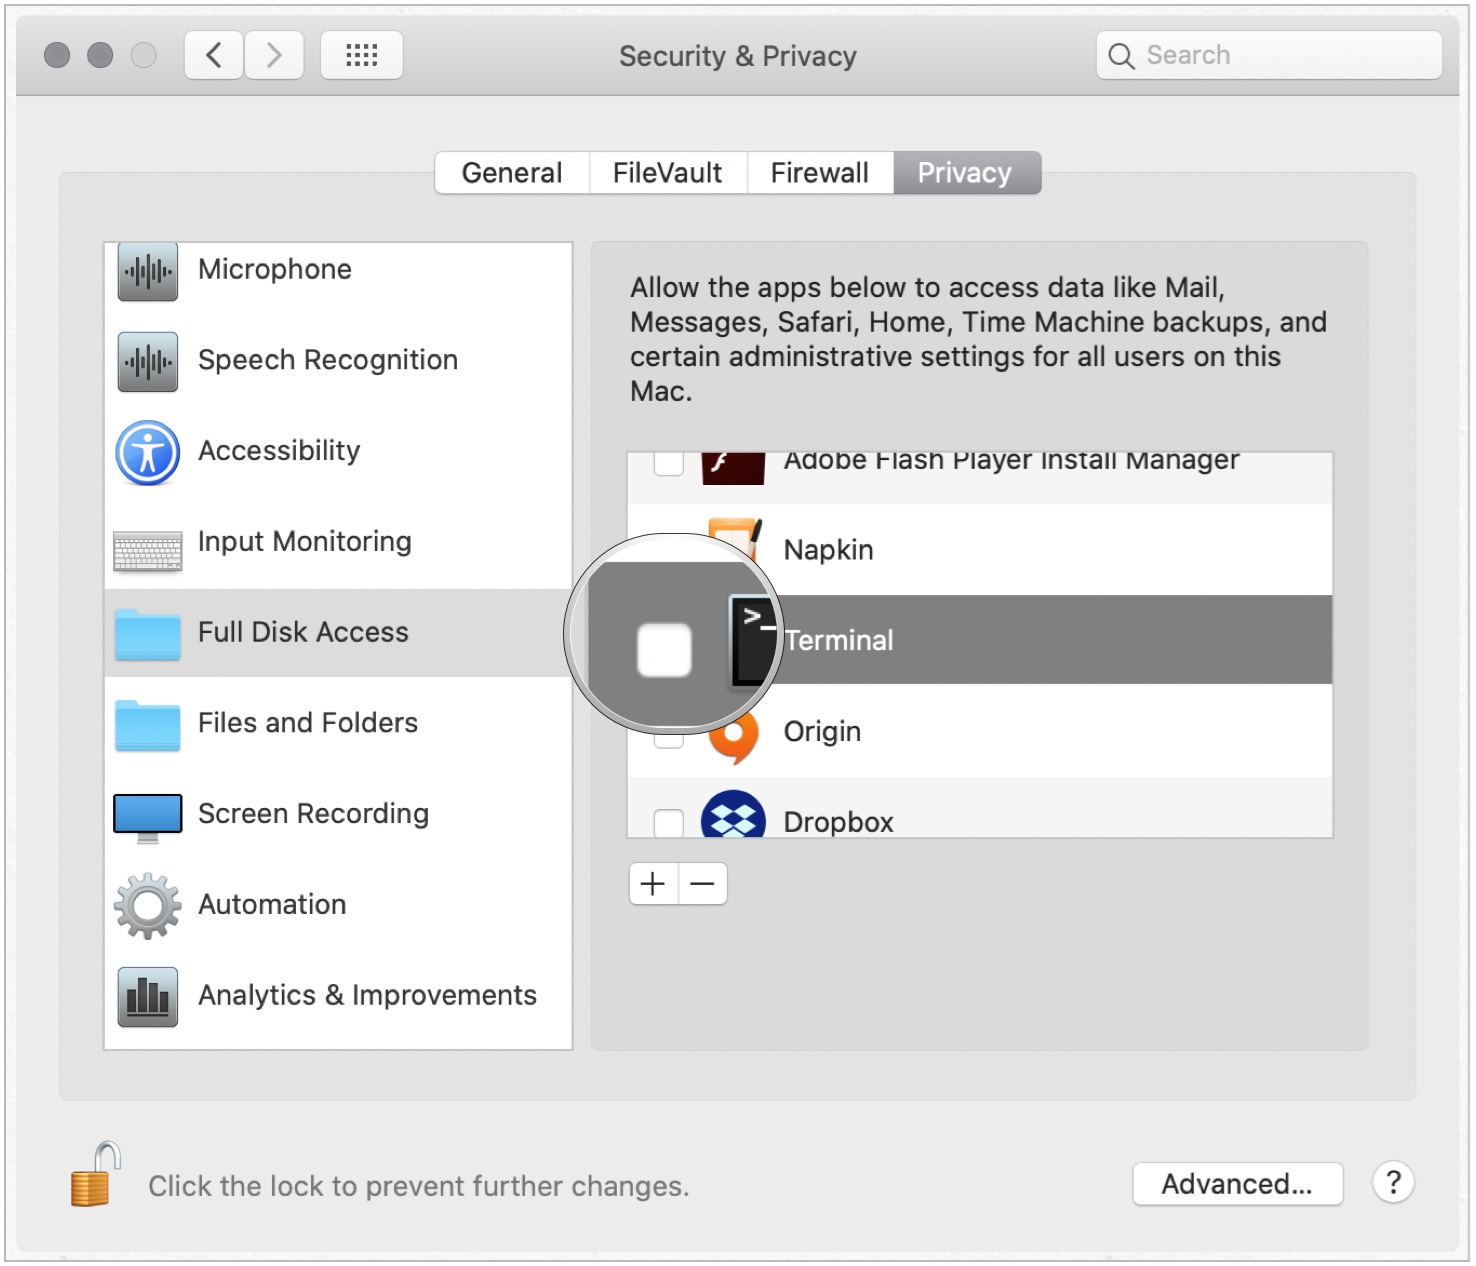
- Click Full Disk Access on the left-hand side of the screen.
- Choose + to add Terminal to the list of apps with full control on your computer.
- In the Finder screen that's displayed, type Terminal in the search box.
- In the search results, highlight Terminal.
Tap Open.
Next, a lesson in using Terminal. The proper pathway is very important for this to work. Every person's hard drive name and every backup folder name will be different. The following is the anatomy of the Terminal code we are using:
ln -s /Volumes/External/ios_backup ~/Library/Application\ Support/MobileSync/Backup/4f1234a05e6e7ccbaddfd12345678f1234b123f
- ln -s: The command that tells the operating system to go to the new location.
- Volumes: A hard drive.
- External: The name of a hard drive. Yours will likely be named something else. In the Terminal command, you must change "External" to whatever your external hard drive is named.
- ios_backup: The renamed backup folder you dragged into your external hard drive. This is the new place that your iOS backups will be stored.
- ~/Library/Application\ Support/MobileSync/Backup: The command that tells the operating system where the backup is.
- 4f1234a05e6e7ccbaddfd12345678f1234b123f: The name of the device backup folder. If you are transferring all of your backups, this will just be named "Backup." If you are transferring one device, use the name of the backup folder for your device. The one above isn't even a real file name. You must change the above backup folder name to whatever is the name of the folder you are transferring.
If your external hard drive's name has a space, be sure to use the proper coding. For example, if your hard drive is named "My Passport" be sure to use a backslash after My, then Space, then Passport. Like this: My\ Passport. Don't forget to capitalize when necessary.
- Find Terminal using Spotlight.
Type the code below.
Don't forget to change the hard drive name and the backup folder name to reflect the name of your hard drive and backup folder.
>ln -s /Volumes/**External**/ios_backup ~/Library/Application\ Support/MobileSync/Backup/**4f1234a05e6e7ccbaddfd12345678f1234b123f**
- Hit Return.
- Quit Terminal.
You will see a new folder in your MobileSync folder that is either called "Backup" or the series of numbers and letters that represent your device. You can tell this is a symlink because it will have an arrow in the bottom left corner.
Next, you'll need to confirm that it worked before deleting your old_backup file on your Mac.
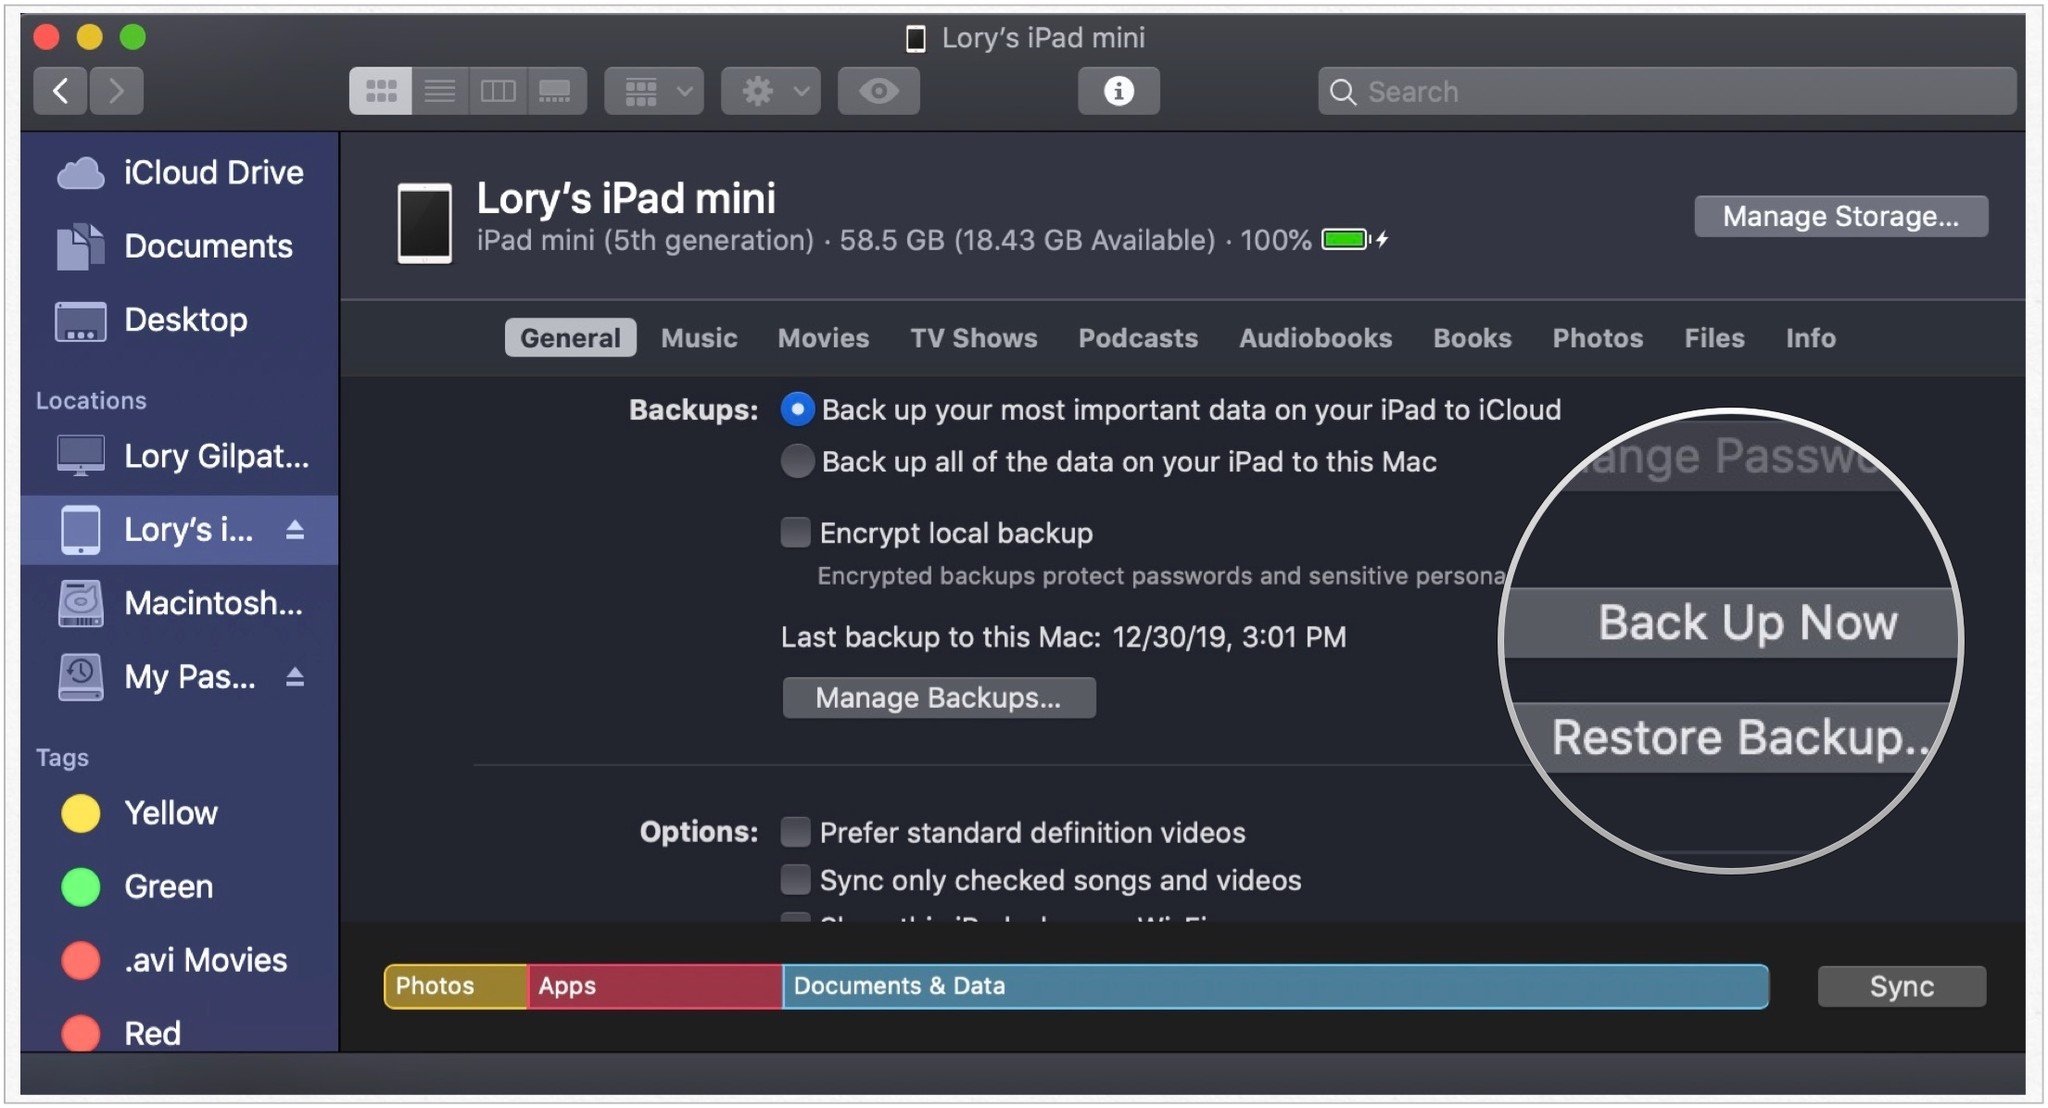
- Click Finder on your Mac's Dock.
- Click on your device on the left side of the Finder window.
Click on Back Up Now on the General tab.
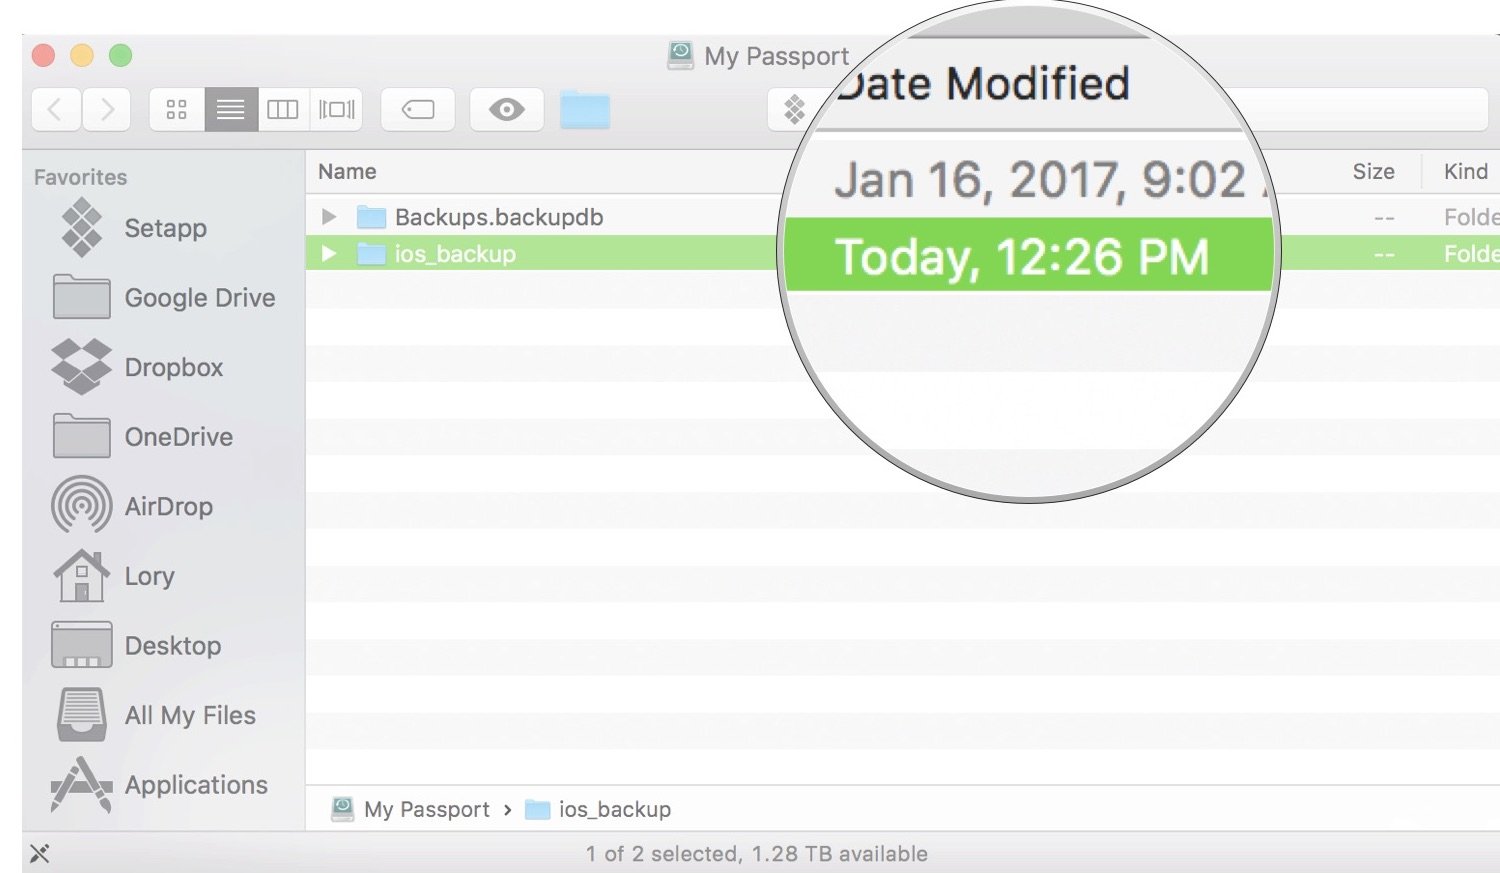
- Open the ios_backup folder on your external hard drive.
Check to see that the date and time on the latest backup is for the one you just completed.
If the pathway relocation worked, and you can confirm that backups are now happening on your external hard drive, you can delete the old_backup folder on your Mac.

Note: If you go back to the MobileSync folder and open the symlink folder, you will see the names of the files that relate to your backup. These are aliases. Not actual files. It's like a thumbnail of a picture.
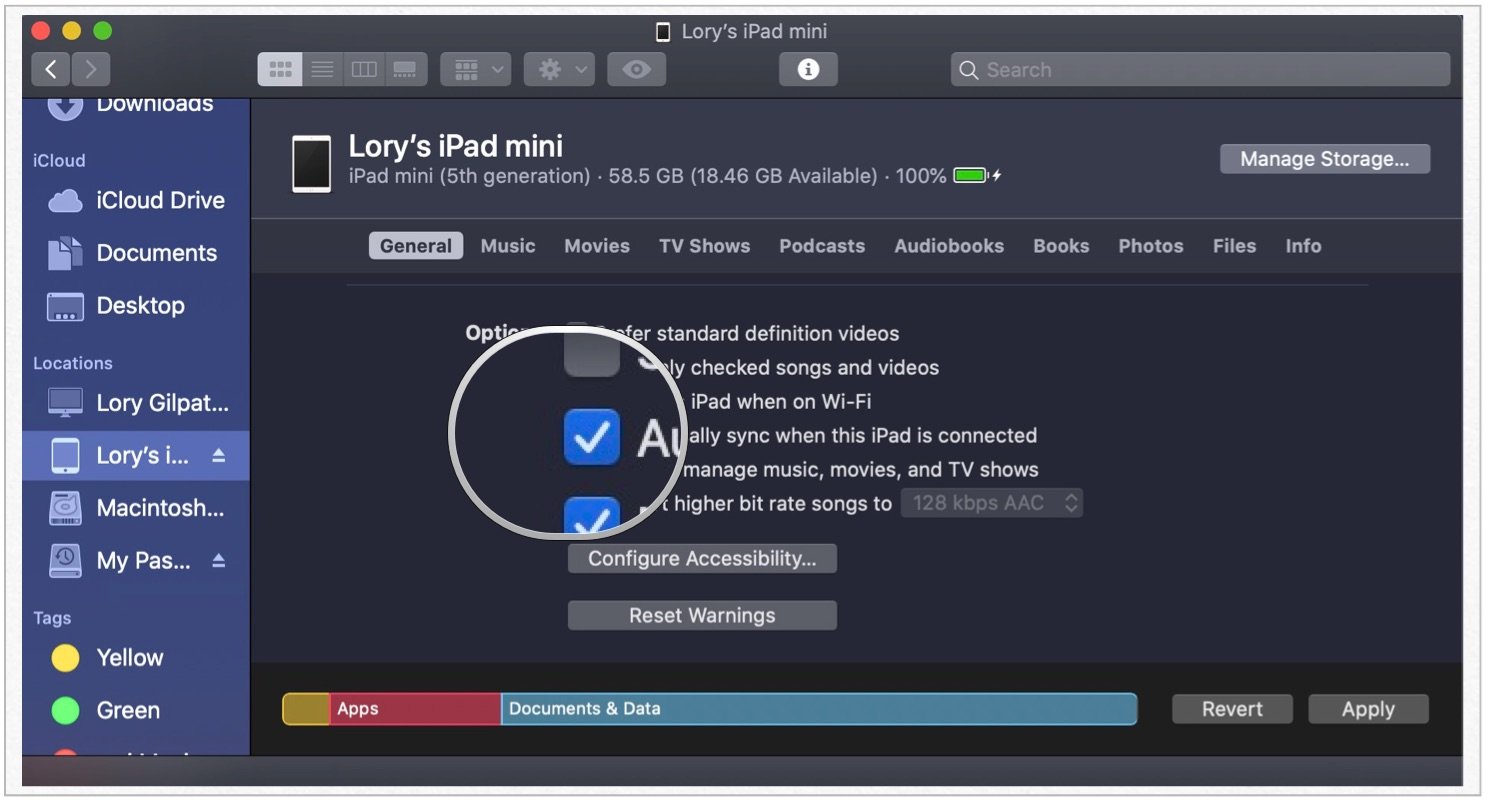
Step 4: Disable automatic backups when connected to your computer
If you don't always have an external hard drive connected to your Mac, you're going to need to disable automatic backups of your iPhone or iPad. Otherwise, whenever you connect your iOS device to your Mac, you'll get an error message.
- Click Finder on your Mac's Dock.
- Click on your device on the left side of the Finder window.
Tick the box at the bottom next to Automatically sync when this iPhone is connected.
Don't forget to manually back up your iPhone whenever you connect it to your computer and have your external hard drive plugged in too.
How to remove the symlink and go back to storing your backups on your Mac
If you made a mistake and the symlink didn't work, or you simply just want to go back to storing your backups on your Mac, all you have to do is delete the symlink folder you created. No need to enter any kind of "rm" or "unlink" command in Terminal.
- Type ~/Library/Application Support/MobileSync/Backup into Spotlight.
- Select the symlink folder. Remember, it's the one with an arrow in the bottom left. It will either be called "Backup" or have a series of numbers and letters representing your device.
- Delete the symlink folder.
- Back up your device via the computer.
Delete the ios_backup folder on your external hard drive (optional).

Any questions?
Do you have any questions about moving your iOS backups to an external hard drive? Put them in the comments and I'll help you out.
Updated March 2020: Up to date for macOS Catalina.
Backing up: The ultimate guide
- Backing up: The ultimate guide
- Best backup services and programs for your Mac
- Best cloud service apps for your iPhone and iPad
- How to back up your Mac
- How to back up your iPhone and iPad
- How to back up your Apple TV
- How to back up your Apple Watch
- How to restore your Mac from a backup
- How to restore your iPhone or iPad from a backup
- How to restore your Apple Watch from a backup
- How to recover your files when you don't have a backup