How to back up your iTunes library
- jul
- 31
How do you back up your iTunes Library and make sure your music, movies, TV shows, and more are safe and sound? Like this!
Updated February 1st, 2017: Added information about backing up with macOS Sierra.
Though we store more and more of our music online these days, a hard-copy backup is still the gold standard for keeping your data safe. And if you use Apple Music or iCloud Music Library, the best way to do that is still iTunes.
There are a few ways to back up your iTunes library; it's important to choose one and regularly back up so that you won't have to worry about your local copy getting lost or damaged. My music — at least for me — is one of those must-backup items; I don't want to have to manually re-build or re-buy thousands of tracks.
First: Make sure your entire library has been locally downloaded
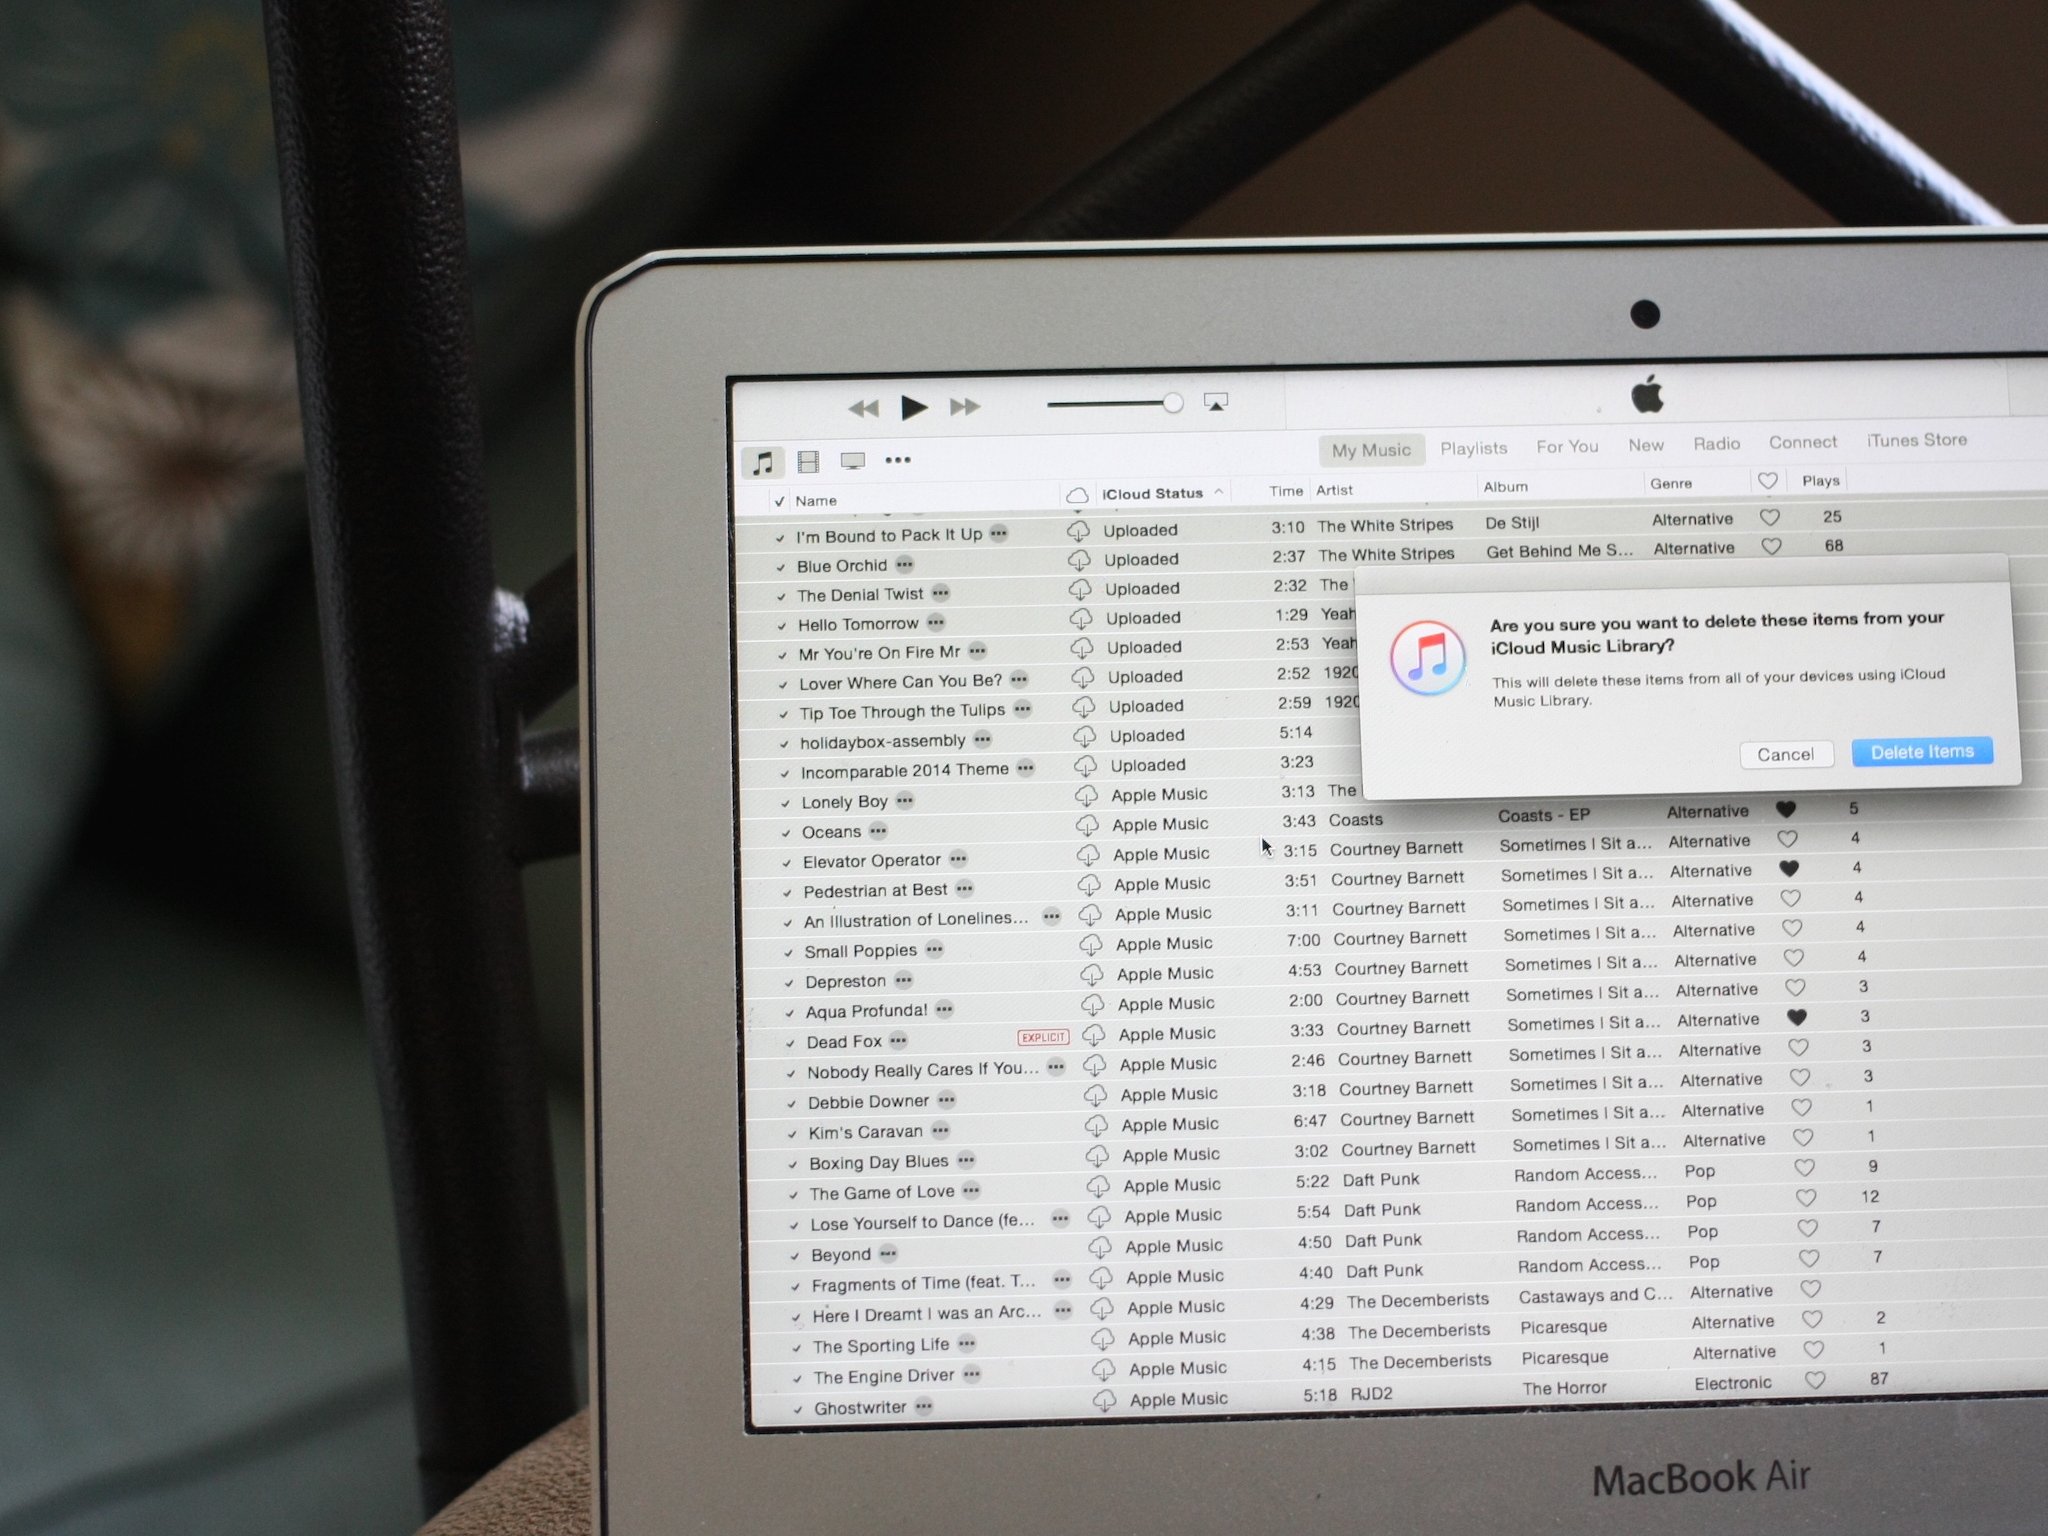
If you use iCloud Music Library or the iTunes Store, you may have some or all of your music stored in the cloud. But to truly make sure your purchased and owned content is backed up, you'll want to download a local copy to your Mac. Here's the best way to do so:
How to download all your music from iCloud Music Library to your Mac
How to back up iTunes via Time Machine or another backup service
If you have Apple's Time Machine backup system enabled — or any other cloud- or system-based backup — your iTunes library should automatically be covered. This way, if you ever need to restore, you can just pop back in Time Machine's History (or a past backup from CrashPlan or Carbon Copy Cloner, for example) to retrieve it.
- How to back up and restore your Mac with Time Machine
- How to choose and set up a backup plan for your Mac
- More info on backups
How to manually back up your iTunes library
If you're not employing a Mac-wide backup service (really, you should get on that), or if you just want to manually back up your iTunes library separately, here's how to go about that.
Consolidate your library
To ensure that all of your iTunes files are in the same place when you make a manual backup, you should first consolidate your iTunes library.
- Make sure you've downloaded a local copy of your music to your Mac.
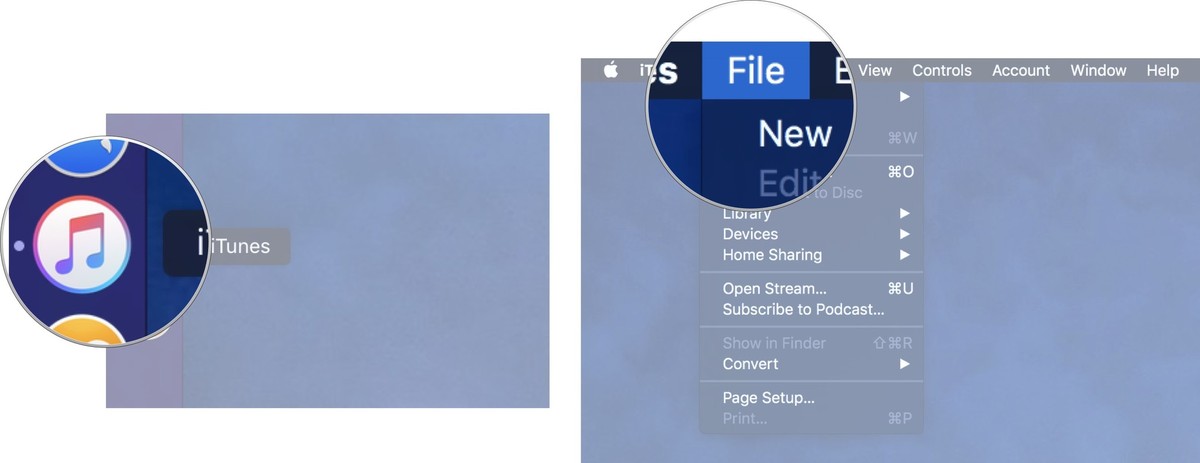
- Launch iTunes on your Mac.
Click File in the upper left corner of your Mac's screen.
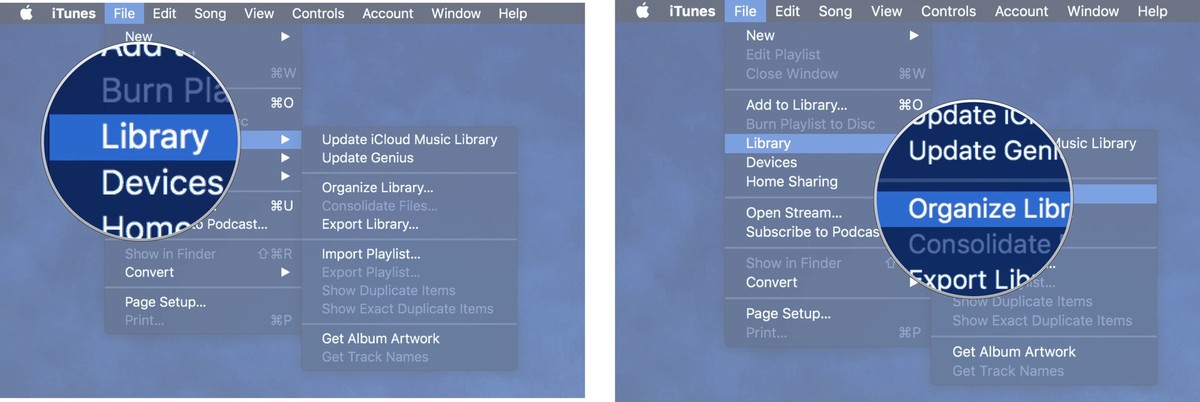
- Hover your cursor over Library in the drop down menu.
Select Organize Library from the secondary menu.
- Tick the box for Consolidate Files when the Organize Library window appears.
Click OK.
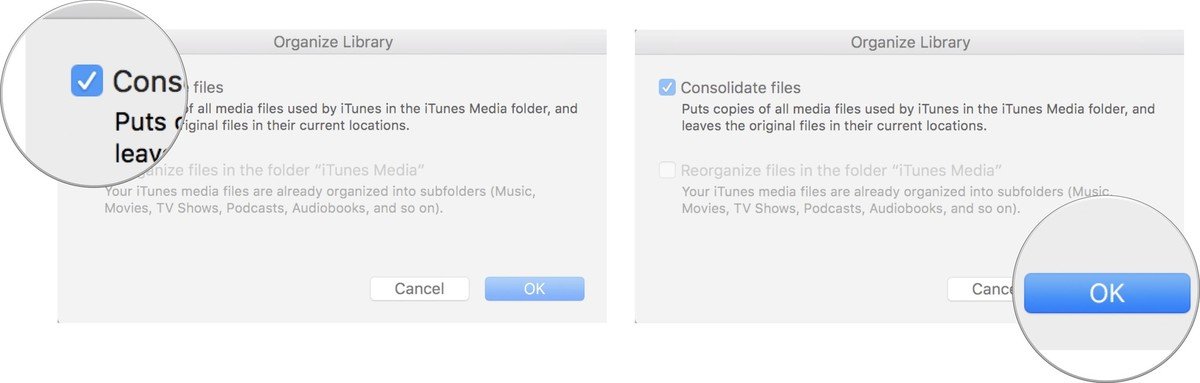
This will make a copy of all files in the iTunes media folder, leaving the originals in their current location.
Copy your iTunes library to a backup source
- If you are using an external hard drive, connect it to your Mac using a USB cable.
- Click on Finder to open a Finder window.
Select your Mac's Hard drive.
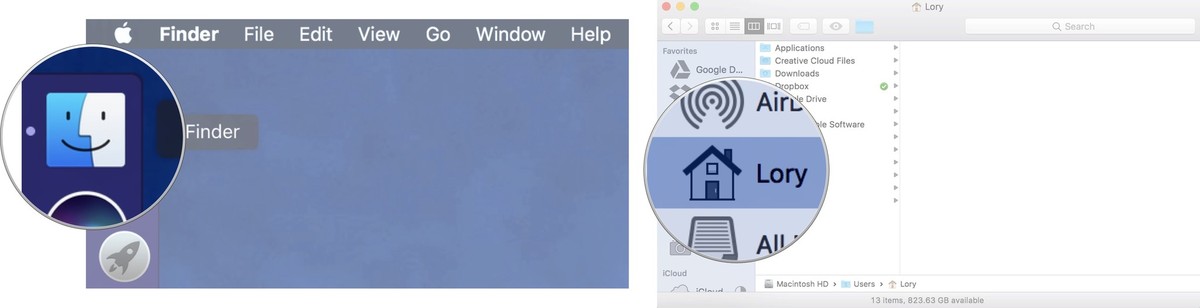
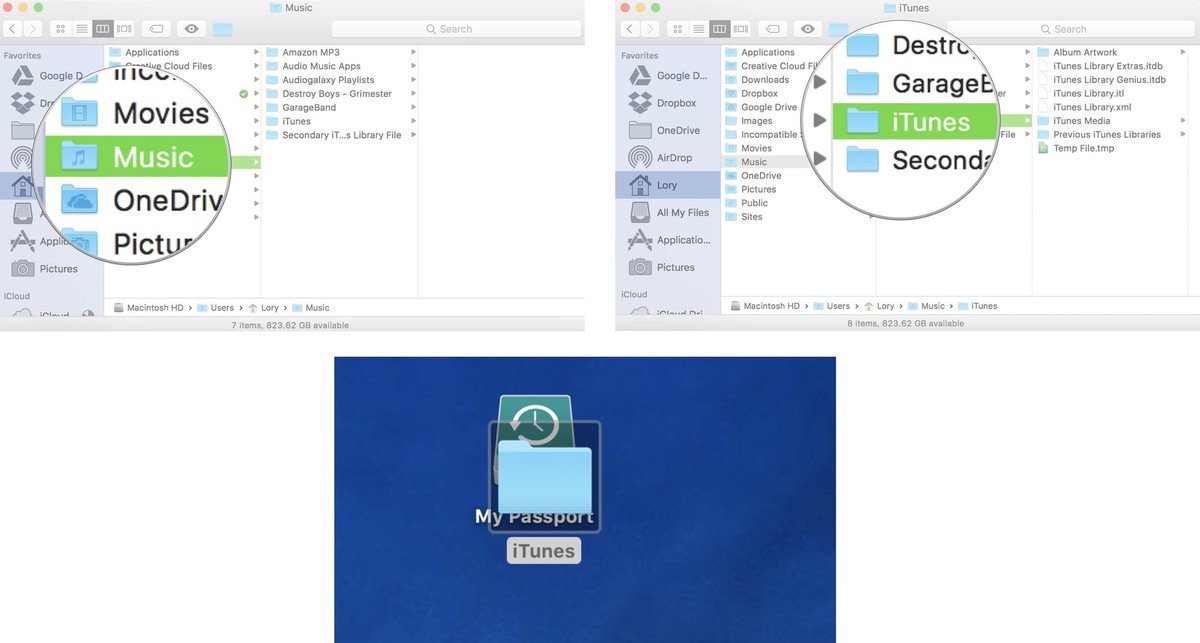
- Click on the Music folder.
Select iTunes and drag that folder to the external hard drive icon on your desktop or copy it to your online backup service.
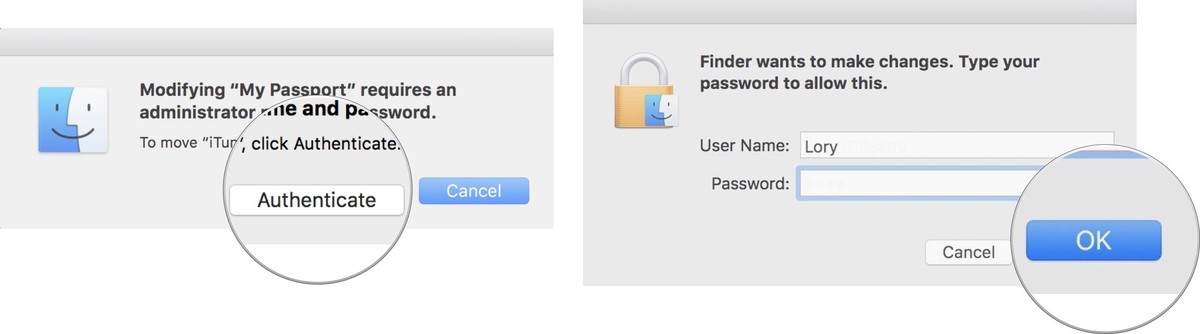
- Click Authenticate, if prompted, to give permission to make a copy of the iTunes folder.
- Enter your administrator password.
Click OK.
The copy process will begin. This could take a very long time, depending on how big your iTunes library is. So, sit back, relax, watch a movie, or whatever you do to pass the time.
Desperate times call for desperate measures
If you are about to do something wild with your iTunes library and don't have a way to back it up on an external drive or online backup service, you can make a temporary backup that you store right on your Mac. This is, by no means, a solid backup plan, but can be useful in a pinch.
Note: After making a copy, it is a good idea to move the copied folder to an easy-to-find location that is separate from any folder you plan to make changes to (like the Music folder). This copied folder should be deleted immediately after it is no longer needed because it takes up extra space on your computer's hard drive unnecessarily and could cause confusion with your most current iTunes folder.
- Click on Finder to open a Finder window.
Select your Mac's Hard drive.
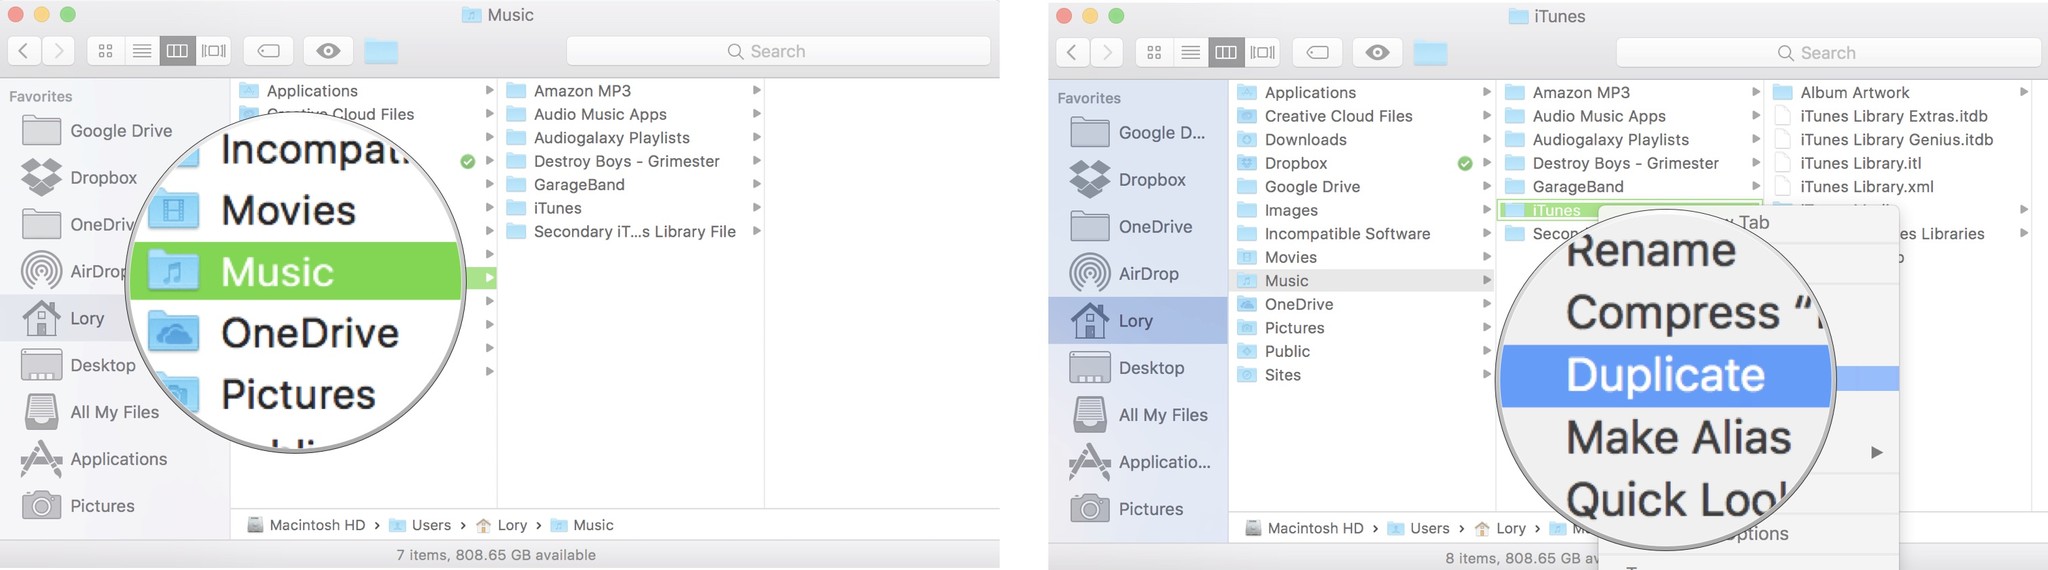
- Click on the Music folder.
- Right-click or control-click on the iTunes folder.
Select Duplicate from the drop down menu.
The copy process will begin. This could take a very long time.
Move the copied iTunes folder to a new, easy-to-find location.
- Delete the copied iTunes folder once you no longer need the temporary backup.
Any questions?
Running into issues making an iTunes backup? Pop them in the comments below.