
Put an end to nuisance camera notifications by creating an activity zone
- jun
- 30

Filter out those nuisance camera notifications by creating an activity zone.
HomeKit Secure Video, while still relatively new, offers many great features, including iCloud storage, local processing, and instant activity notifications. However, Apple's security centric feature has been missing one crucial feature since its debut, activity zones, which has caused some notification nightmares. Thankfully, this is changing in iOS/iPadOS 14 and macOS 11, which are due to be released later this year. If you are daring enough to run the developer betas for the latest and greatest operating systems, you can test out this awesome new feature today. Here's how!
- How to create an activity zone in the Home app in iOS 14
- How to delete an activity zone in the Home app in iOS 14
- How to create an activity zone in the Home app in iPadOS 14
- How to delete an activity zone in the Home app in iPadOS 14
- How to create an activity zone in the Home app in macOS 11
- How to delete an activity zone in the Home app in macOS 11
Apple occasionally offers updates to iOS, iPadOS, watchOS, tvOS, and macOS as closed developer previews or public betas. While the betas contain new features, they also contain pre-release bugs that can prevent the normal use of your iPhone, iPad, Apple Watch, Apple TV, or Mac, and are not intended for everyday use on a primary device. That's why we strongly recommend staying away from developer previews unless you need them for software development, and using the public betas with caution. If you depend on your devices, wait for the final release.
How to create an activity zone in the Home app in iOS 14
For this example, we will be creating a simple four-point activity zone, such as a rectangle or square on our camera's view. You can create more complex designs to better suit your needs; it just involves additional steps for adding zone points.
- Launch the Home app.
- Tap on **Rooms* in the navigation bar at the bottom of the app.
- Swipe to the left or right to navigate to the room that the camera is in.
- Tap on the Thumbnail image of your camera.
- Tap on the Settings icon located near the top of the app.
- Tap Select Activity Zones.
- Tap anywhere on the Camera view to set your first activity zone point.
- Tap in another spot on the Camera view to set a second zone point.
- After setting your second point, a line will appear connecting your points
- Select a position on the Camera view to establish a third point.
- Tap again on the Camera view to set up a fourth point.
- If you are making a more complex zone, continue adding points before moving to the next step.
- Tap on the first activity zone point that you created to finish your zone.
- All of your points should now be connected in the shape that you have created.
- Repeat this process to create any additional zones as needed.
- Tap Done to save your activity zone.
- To establish a zone for the entire area outside of the zone that you just created, tap on Invert Zone at the bottom before tapping Done.
How to delete an activity zone in the Home app in iOS 14
- Launch the Home app.
- Tap on **Rooms* in the navigation bar at the bottom of the app.
- Swipe to the left or right to navigate to the room that the camera is in.
- Tap on the Thumbnail image of your camera.
- Tap on the Settings icon located near the top of the app.
- Tap Select Activity Zones.
- Tap on your existing Activity zone.
- Select Clear with a tap to delete the zone.
- You are now free to create a new activity zone as needed before proceeding.
- Tap Done to save your changes.
How to create an activity zone in the Home app in iPadOS 14
For this example, we will be creating a simple four-point activity zone, such as a rectangle or square on our camera's view. You can create more complex designs to better suit your needs; it just involves additional steps for adding zone points.
- Launch the Home app.
- Tap on the Room name in the sidebar where your camera is located.
- Tap on the Thumbnail image of your camera.
- Tap on the Settings icon located near the top of the app.
- Scroll down, and tap Select Activity Zones.
- Tap anywhere on the Camera view to set your first activity zone point.
- Tap in another spot on the Camera view to set a second zone point.
- After setting your second point, a line will appear connecting your points
- Select a position and tap on the Camera view to establish a third point.
- Tap again on the Camera view to set up a fourth point.
- If you are making a more complex zone, continue adding points before moving to the next step.
- Tap on the first activity zone point that you created to finish your zone.
- All of your points should now be connected in the shape that you have created.
- Repeat this process to create any additional zones as needed.
- Tap Done to save your activity zone.
- To establish a zone for the entire area outside of the zone that you just created, tap on Invert Zone at the bottom before tapping Done.
How to delete an activity zone in the Home app in iPadOS 14
- Launch the Home app.
- Tap on the Room name in the sidebar where your camera is located.
- Tap on the Thumbnail image of your camera.
- Tap on the Settings icon located near the top of the app.
- Tap Select Activity Zones.
- Tap on your existing Activity zone.
- Select Clear with a tap to delete the zone.
- You are now free to create a new activity zone as needed before proceeding.
- Tap Done to save your changes.
How to create an activity zone in the Home app in macOS 11
For this example, we will be creating a simple four-point activity zone, such as a rectangle or square on our camera's view. You can create more complex designs to better suit your needs; it just involves additional steps for adding zone points.
- Launch the Home app.
- Click on the Room name in the sidebar where your camera is located.
- Click on the Thumbnail image of your camera.
- Click on the Settings icon located near the top of the app.
- Scroll down, and click Select Activity Zones.
- Click anywhere on the Camera view to set your first activity zone point.
- Click in another spot on the Camera view to set a second zone point.
- After setting your second point, a line will appear connecting your points
- Select a position and click on the Camera view to establish a third point.
- Click again on the Camera view to set up a fourth point.
- If you are making a more complex zone, continue adding points before moving to the next step.
- Click on the first activity zone point that you created to finish your zone.
- All of your points should now be connected in the shape that you have created.
- Repeat this process to create any additional zones as needed.
- Click Done to save your activity zone.
- To establish a zone for the entire area outside of the zone that you just created, click on Invert Zone at the bottom before clicking Done.
How to delete an activity zone in the Home app in macOS 11
- Launch the Home app.
- Click on the Room name in the sidebar where your camera is located.
- Click on the Thumbnail image of your camera.
- Click on the Settings icon located near the top of the app.
- Click Select Activity Zones.
- Click on your existing Activity zone.
- Select Clear with a click to delete the zone.
- You are now free to create a new activity zone as needed before proceeding.
- Click Done to save your changes.
Once you have established an activity zone, you will only receive notifications when a motion event is picked up within your zone. For even smarter notifications, you can combine activity zones with Apple's local image processing to filter out animals or vehicles within your camera's view. Another new HomeKit feature in iOS/iPadOS 14 and macOS 11 is face detection, which can determine the name of the person and notify you of their presence when they arrive. That is just all sorts of awesome.
Our top equipment picks
Indoors and out
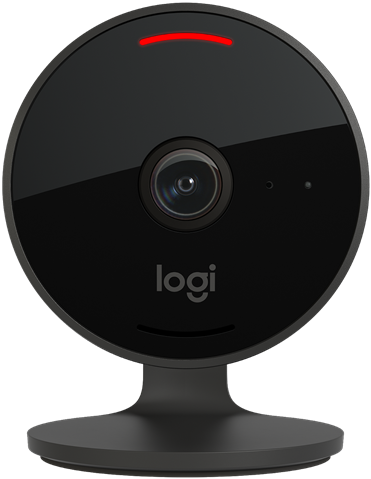
Logitech Circle View
Secure video
The Logitech Circle View has one of the easiest set up processes around which only involves using the Home app. This camera also has all of the bells and whistles, including 1080p video, 2-way audio, and weather resistance.
The Logitech Circle View is our favorite built-for-HomeKit with a set up process that doesn't require downloading another app or establishing an account. Simply unbox the camera, open the Home app, and scan the HomeKit pairing code and you are up and running. Weather resistance allows this camera to work indoors and out, and it features crisp 1080p visuals, 2-way audio, and of course, HomeKit Secure Video, which works with activity zones and stores video in iCloud.
Activity zones everywhere
Of course, Logitech's camera isn't the only one around that supports HomeKit Secure Video. Several others, including the eufyCam 2, and the Netatmo Smart Indoor Camera also support the latest HomeKit features.
Wireless freedom
eufyCam 2

$300 at Amazon$300 at Best Buy$300 at Newegg
eufy's completely wireless cameras not only work with HomeKit Secure Video, but they can last up to an entire year on a single charge of the integrated battery. Place this camera anywhere around or outside the home for smart notifications with activity zones.