
Want to add a family to your Apple accounts? Here’s how to set it up
- sep
- 08
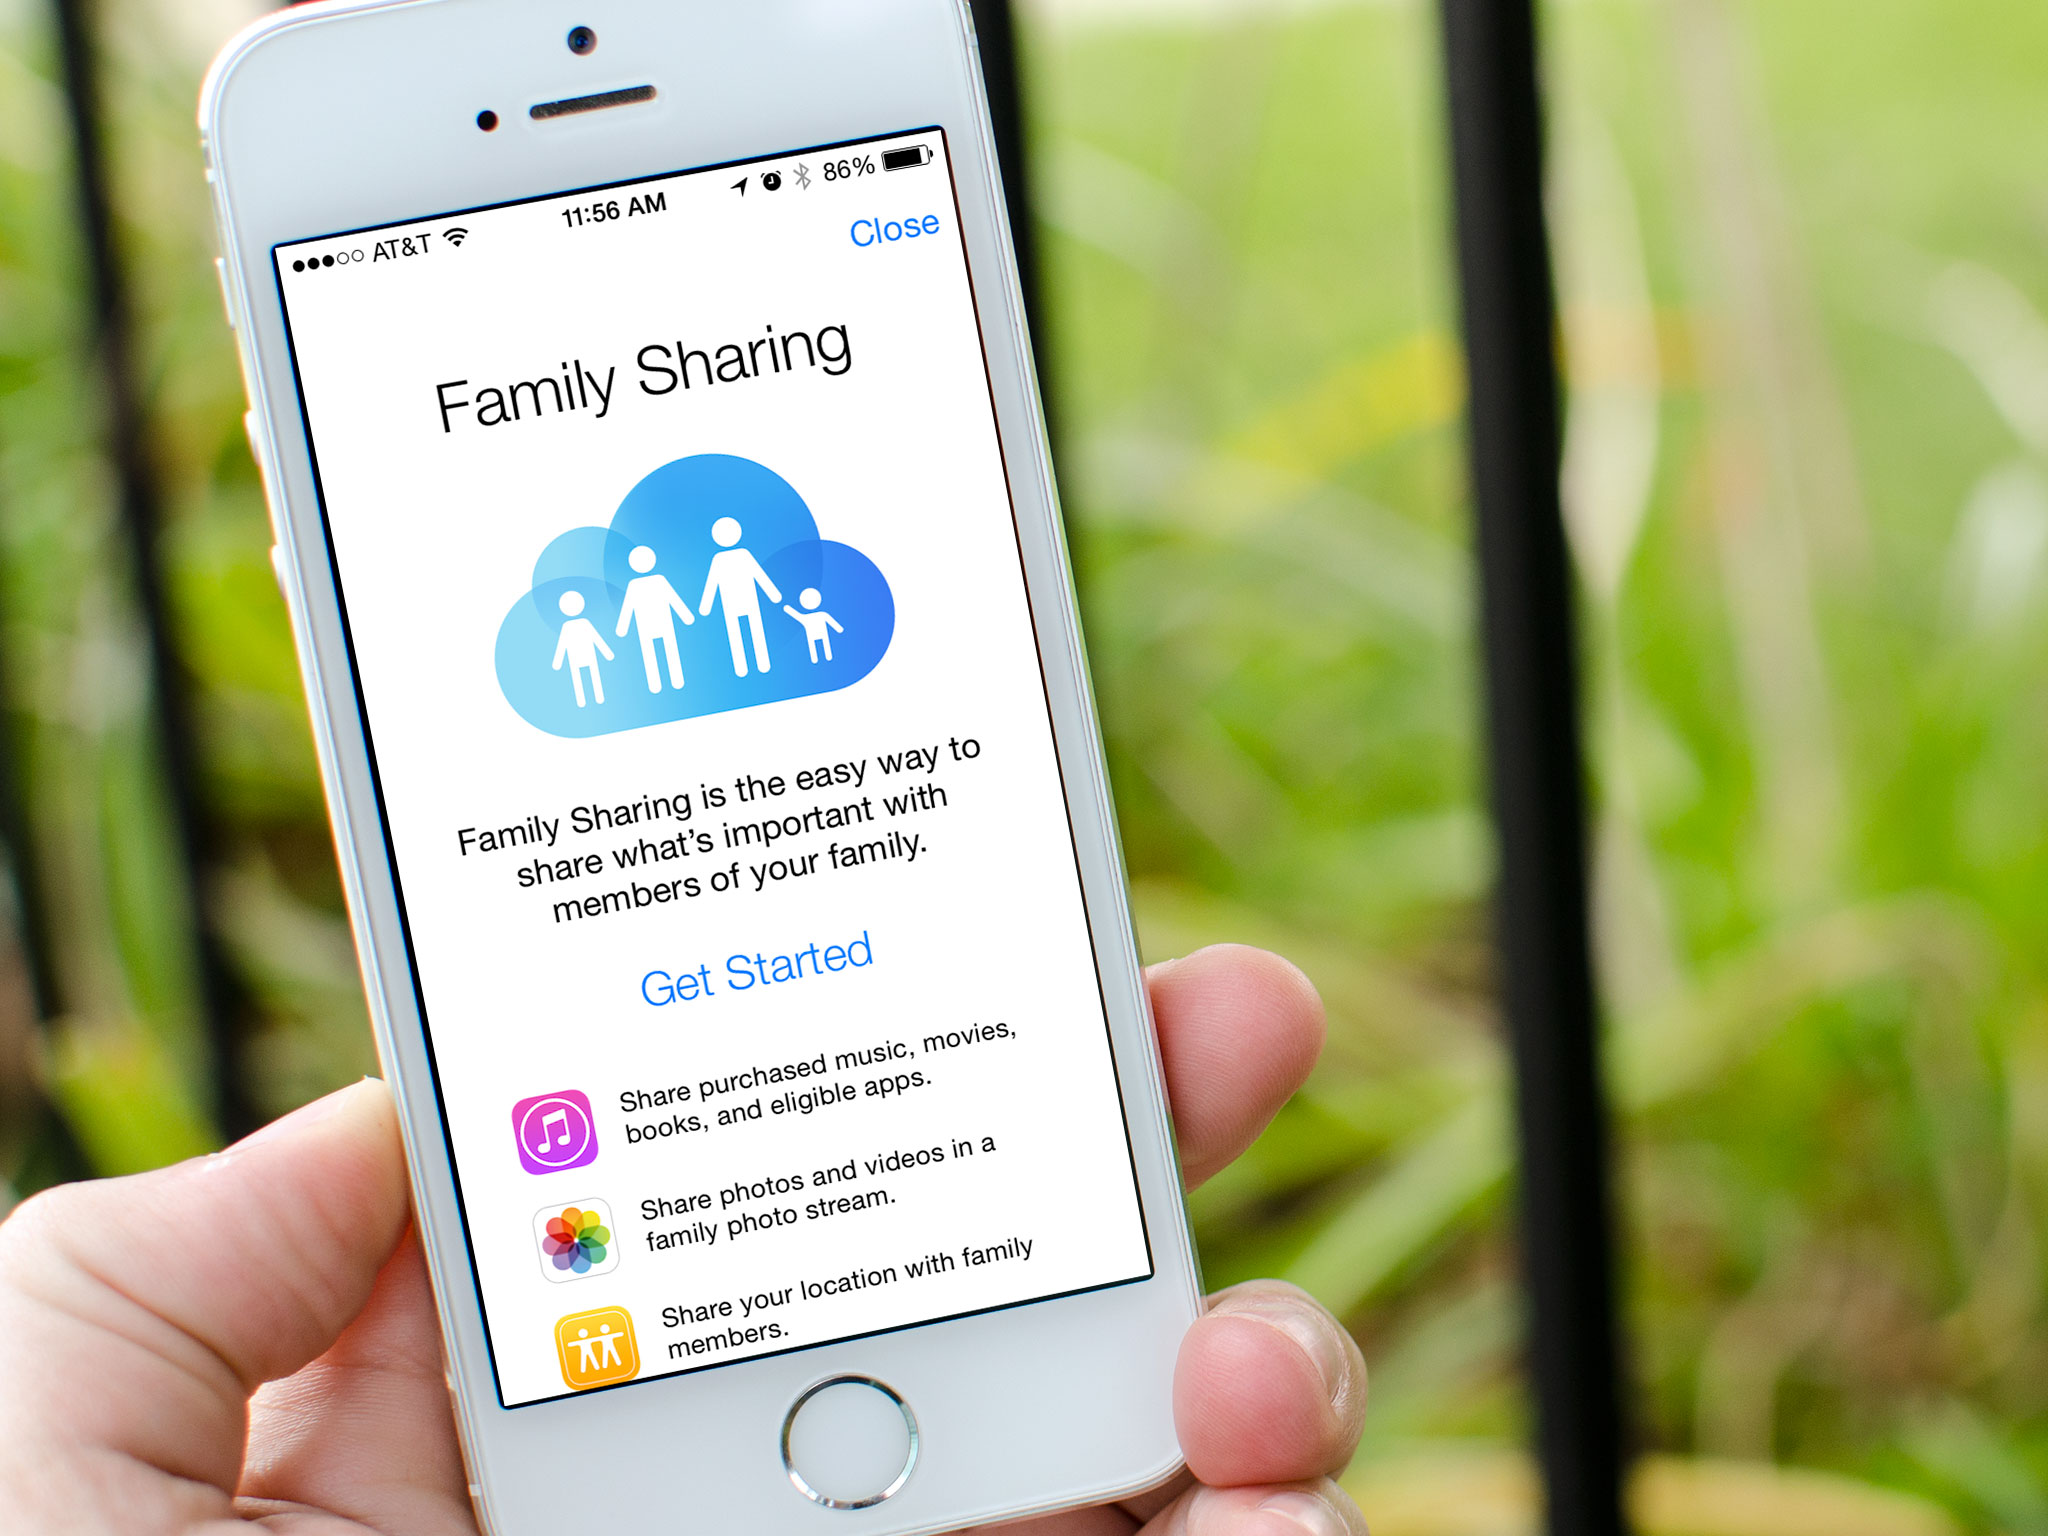
Family Sharing lets your entire family share purchases from iTunes and the App Store without having to share the same Apple ID. Here's how to set up Family Sharing.
With Family Sharing, you can not only share all your iTunes and App Store purchases with your family, but you can set it so that parents require that younger children ask permission before purchasing content. You can then receive a request and either accept or deny it right from your own iPhone or iPad. Here's how to get started.
What you need to know about Family Sharing
Family Sharing lets you add up to six family members. All the devices must be running iOS 8 or above in order to work. Once added, you get instant access to each other's purchases and can view and download them on demand just as you already can from your own account. However, every purchase made from that point forward will then be charged to the family organizer's iTunes account, so keep this in mind. The only exception to this is if the individual iTunes account has enough store credit in order to cover the purchase. If that's the case, store credit from individual accounts will always be used first.
If you decide to remove someone from Family Sharing, they will be able to access any content that was purchased up until that point through their own Apple ID. The same thing happens if you decide to disable Family Sharing. Each individual Apple ID will then have access to all the content up until that point. Anything purchased afterwards will not be accessible to removed members.
Overview of Family Sharing features
- Share music, movies, books, tv shows, and any other purchased content instantly
- Family Photo Stream lets you automatically share photos with other family members
- Share family calendars and still have your own personal calendars as well
- Share locations so you always know where your family members are
- Locate family members' devices from any other device in the family group via Find My iPhone
- "Ask to Buy" feature lets parents require children under 18 to ask permission before purchasing iTunes and App Store content; you can accept or deny requests remotely
Limits on creating Family Sharing groups
Keep in mind that you can only set up and delete two Family Sharing groups a year. That means that if you start a family group and then delete it, you can only initiate the process one more time. After that, you have to wait a calendar year before creating yet another family group. Keep this in mind and remember that it's always better to delete members and not actually close down a Family Sharing group unless you actually have no need for it anymore.
You can't impose purchasing limits on adults (anyone over age 18). Children under the age of 13 will automatically have purchase restrictions enabled and operate under a child account.
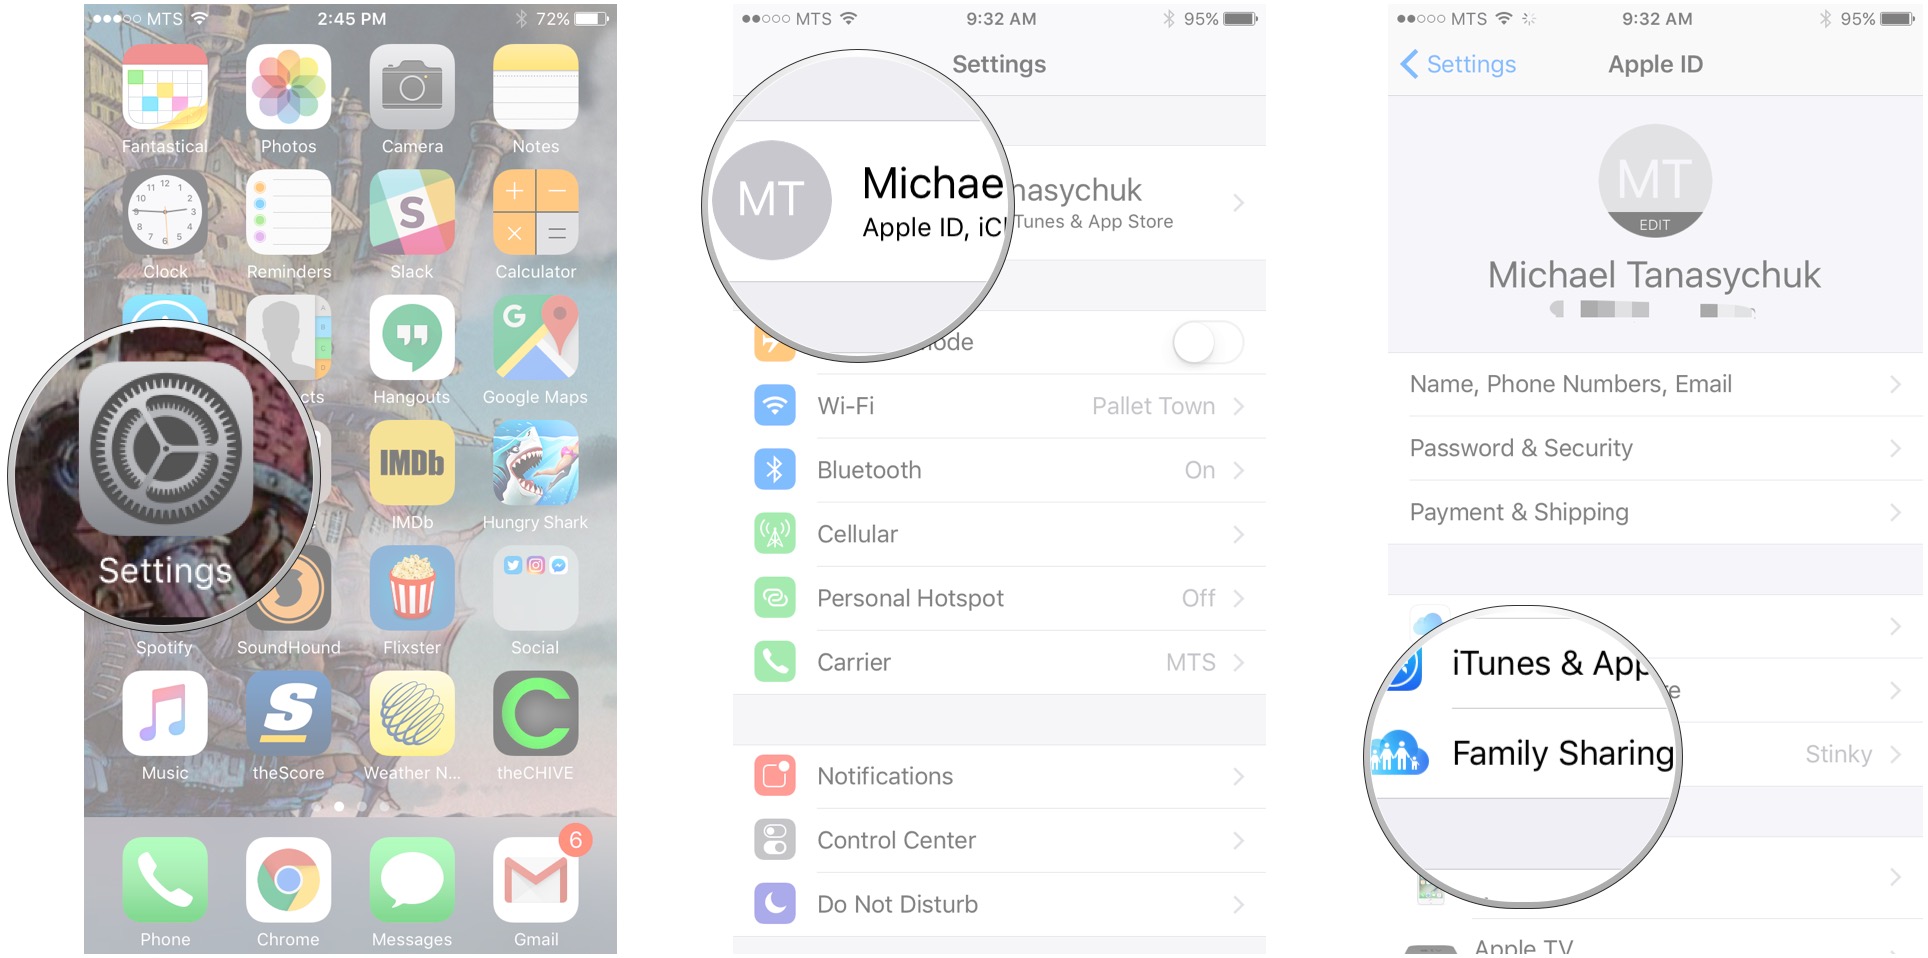
How to enable and get started with Family Sharing on iPhone and iPad
The family organizer is the person that should initially set up Family Sharing. As the family organizer, you are the one that will receive requests for purchases and, more importantly, you are agreeing to pay for any purchases that anyone in the family group makes, adult or child.
- Launch the Settings app on your iPhone or iPad running iOS 8 or higher.
- Tap the Apple ID banner at the top.
Tap Set Up Family Sharing.
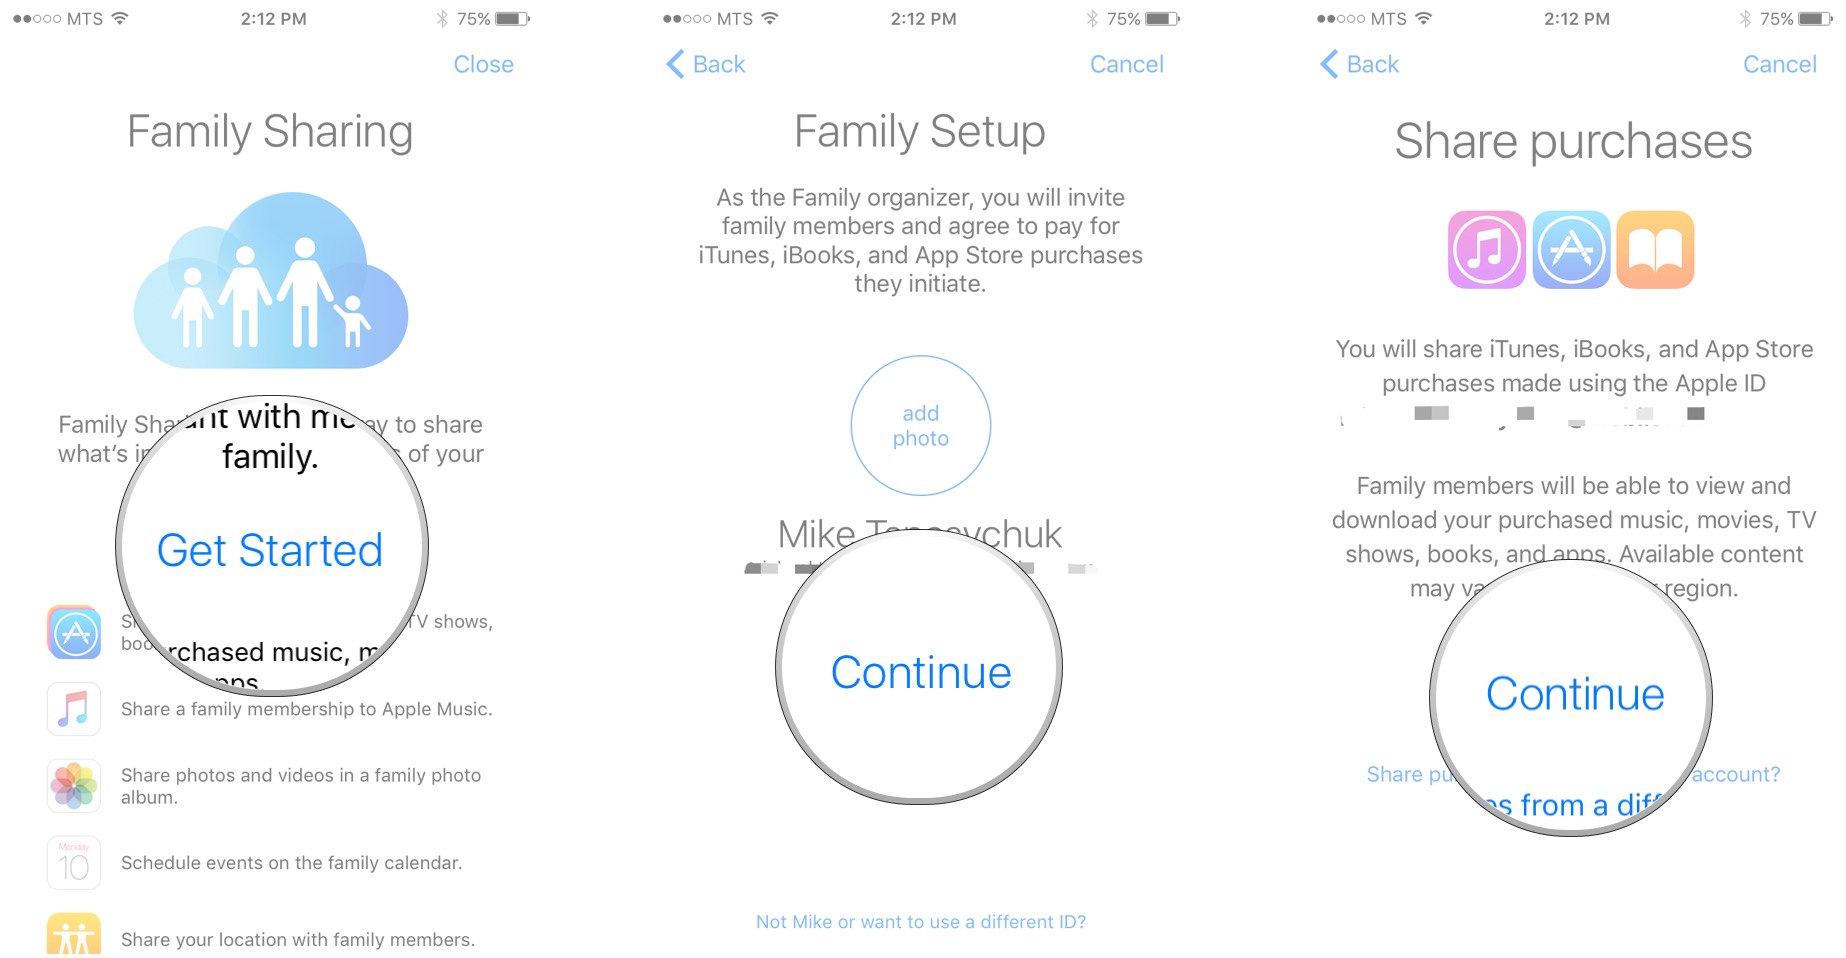
- Tap on Get Started.
- Tap on Continue. You can add a photo beforehand if you'd like, but this is optional.
Tap Continue to share purchases.
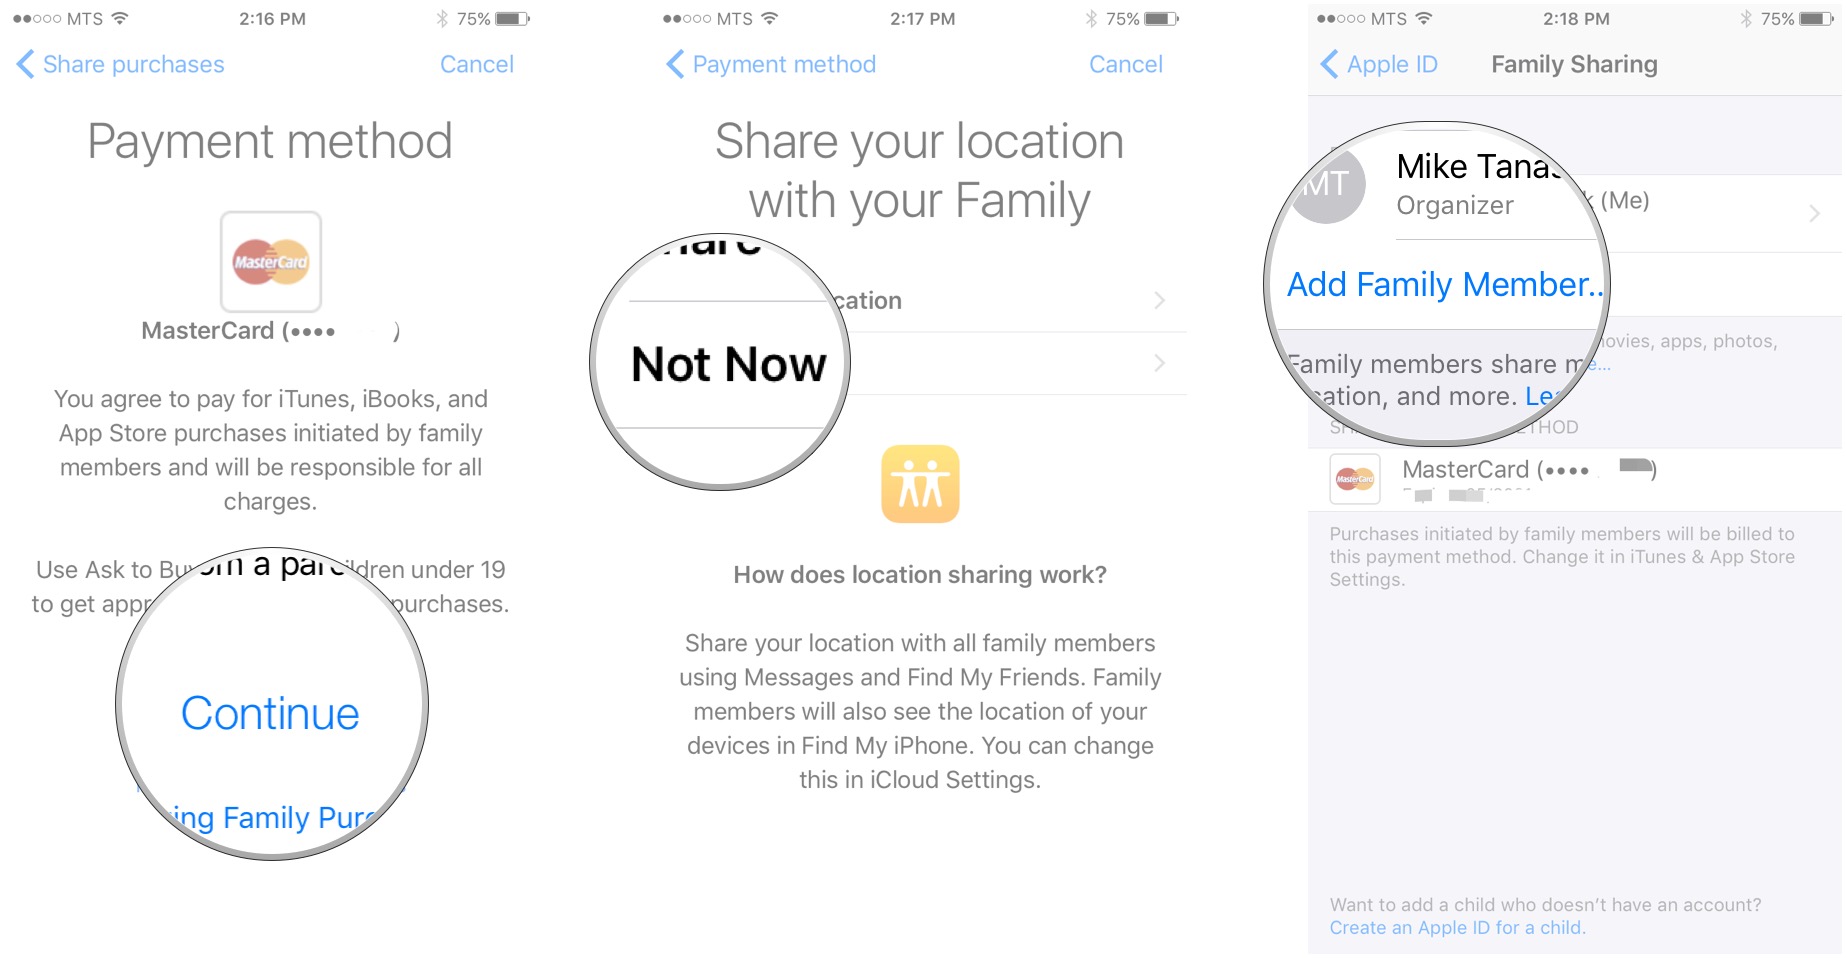
- Tap Continue to confirm your payment method. This can be changed in settings.
- tap Share Your Location to share it with Family members or tap Not Now.
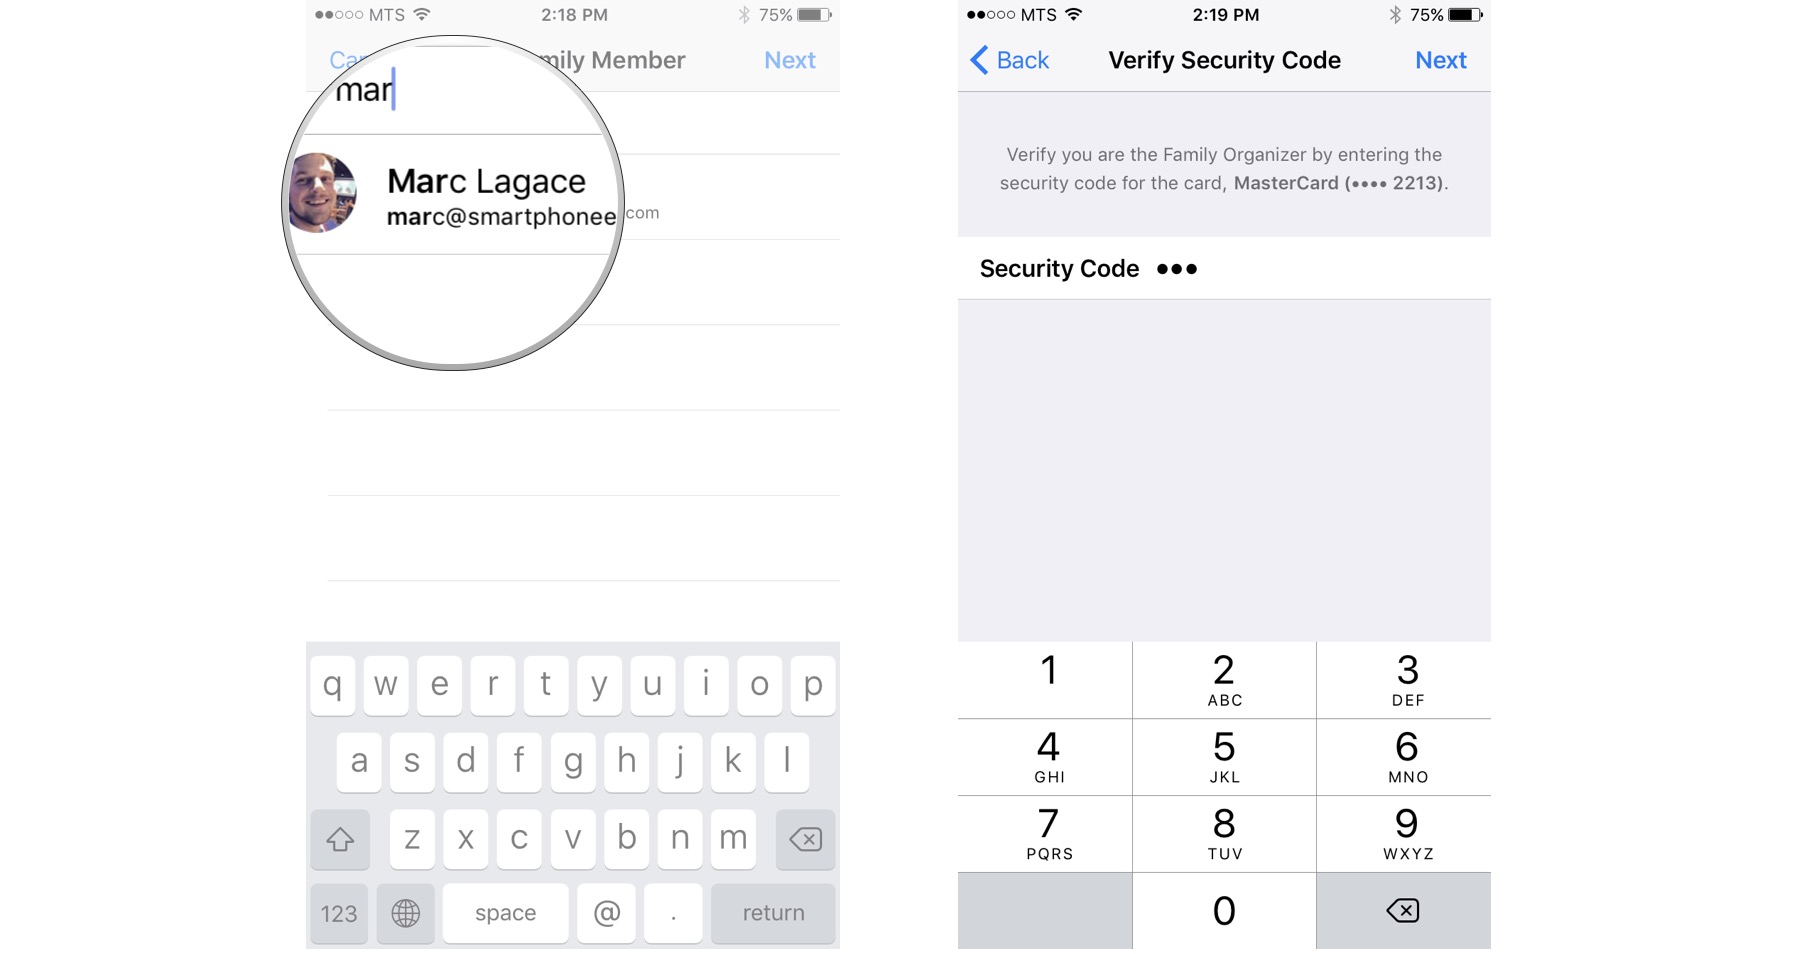
Tap Add Family Member.
- Start typing someone's name.
- Tap the person you'd like to add as a Family Member.
Enter the credit card security code when prompted in order to verify that you're the organizer.
That's it! Just keep adding members until everyone in your family is added (up to 6 people). They will receive an email notification as well as a push notification on their devices asking them to accept your invite. Once they do, all purchases made from that point forward will be charged to the family organizer's account. And they'll instantly have access to everyone else in the group's purchases.
How to accept a Family Sharing invitation on iPhone and iPad
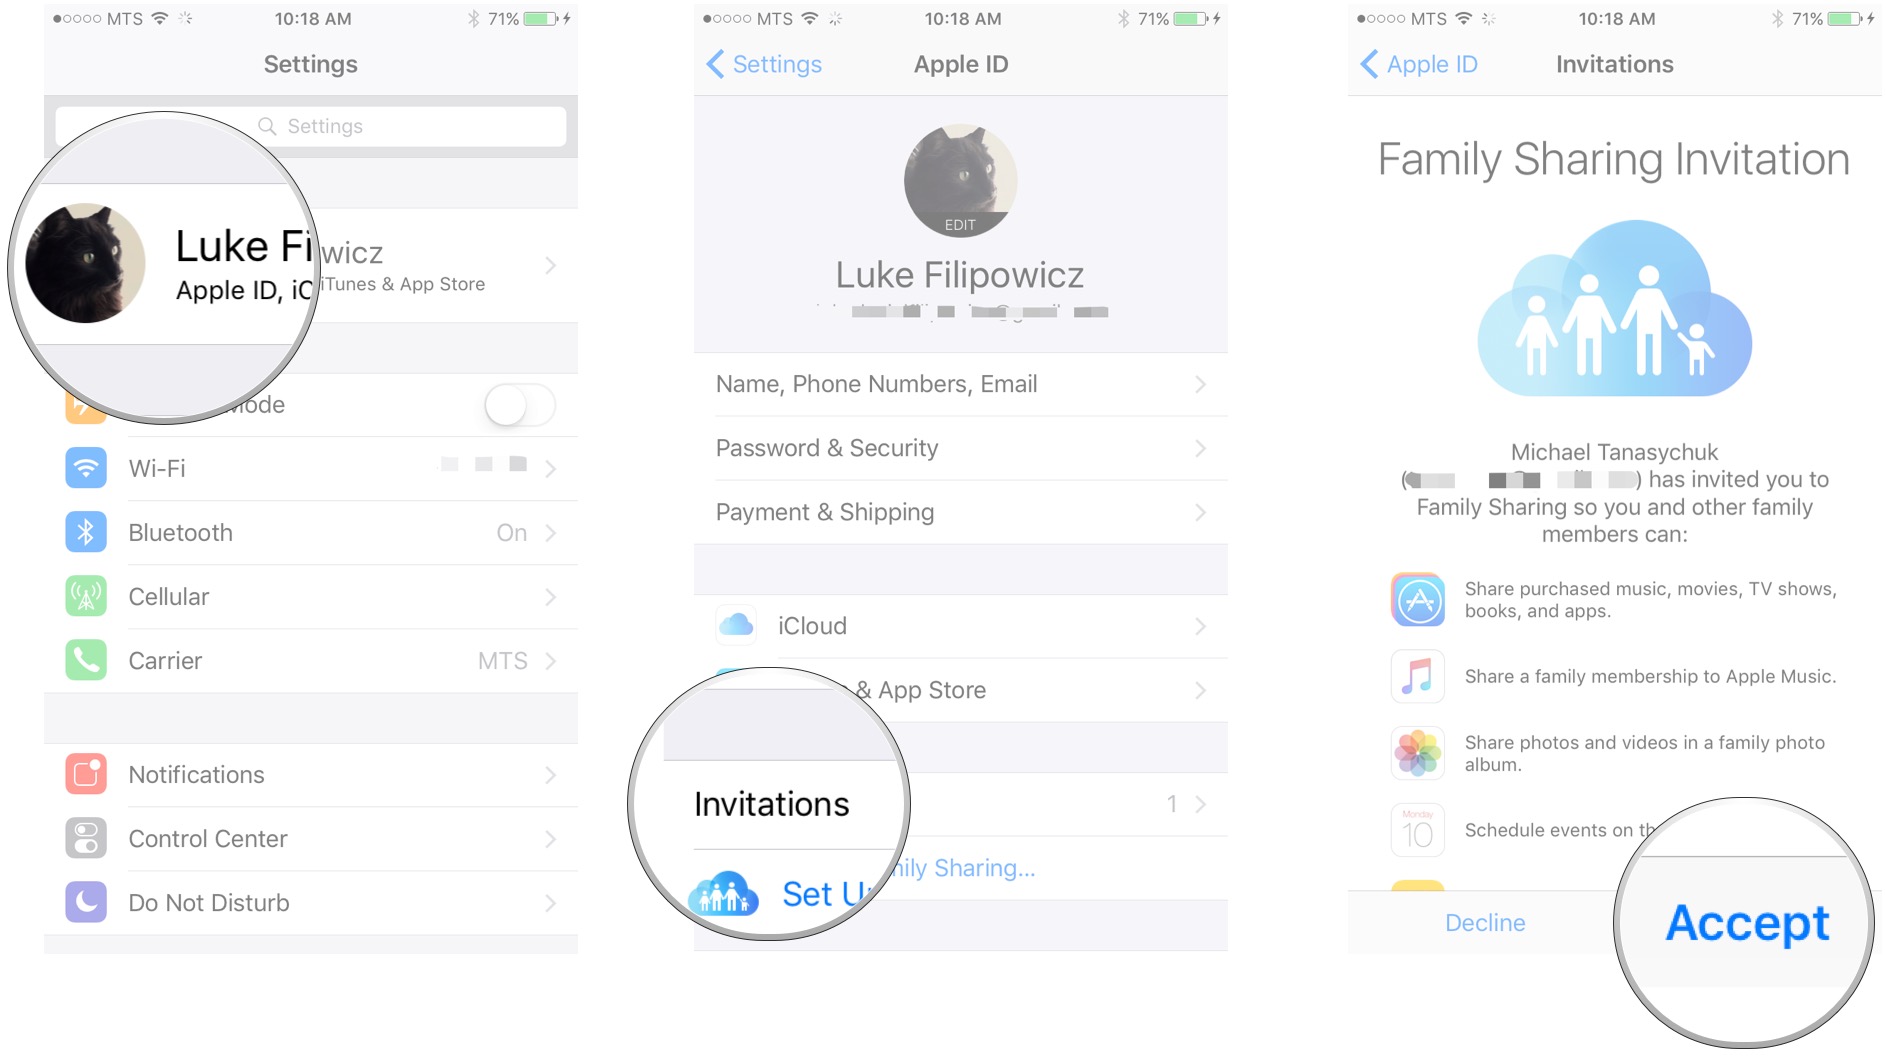
- Launch Settings from your Home screen.
- Tap the Apple ID banner at the top.
- Tap Invitations. There should be a number 1 beside it (unless you have other pending invitations).
Tap Accept.
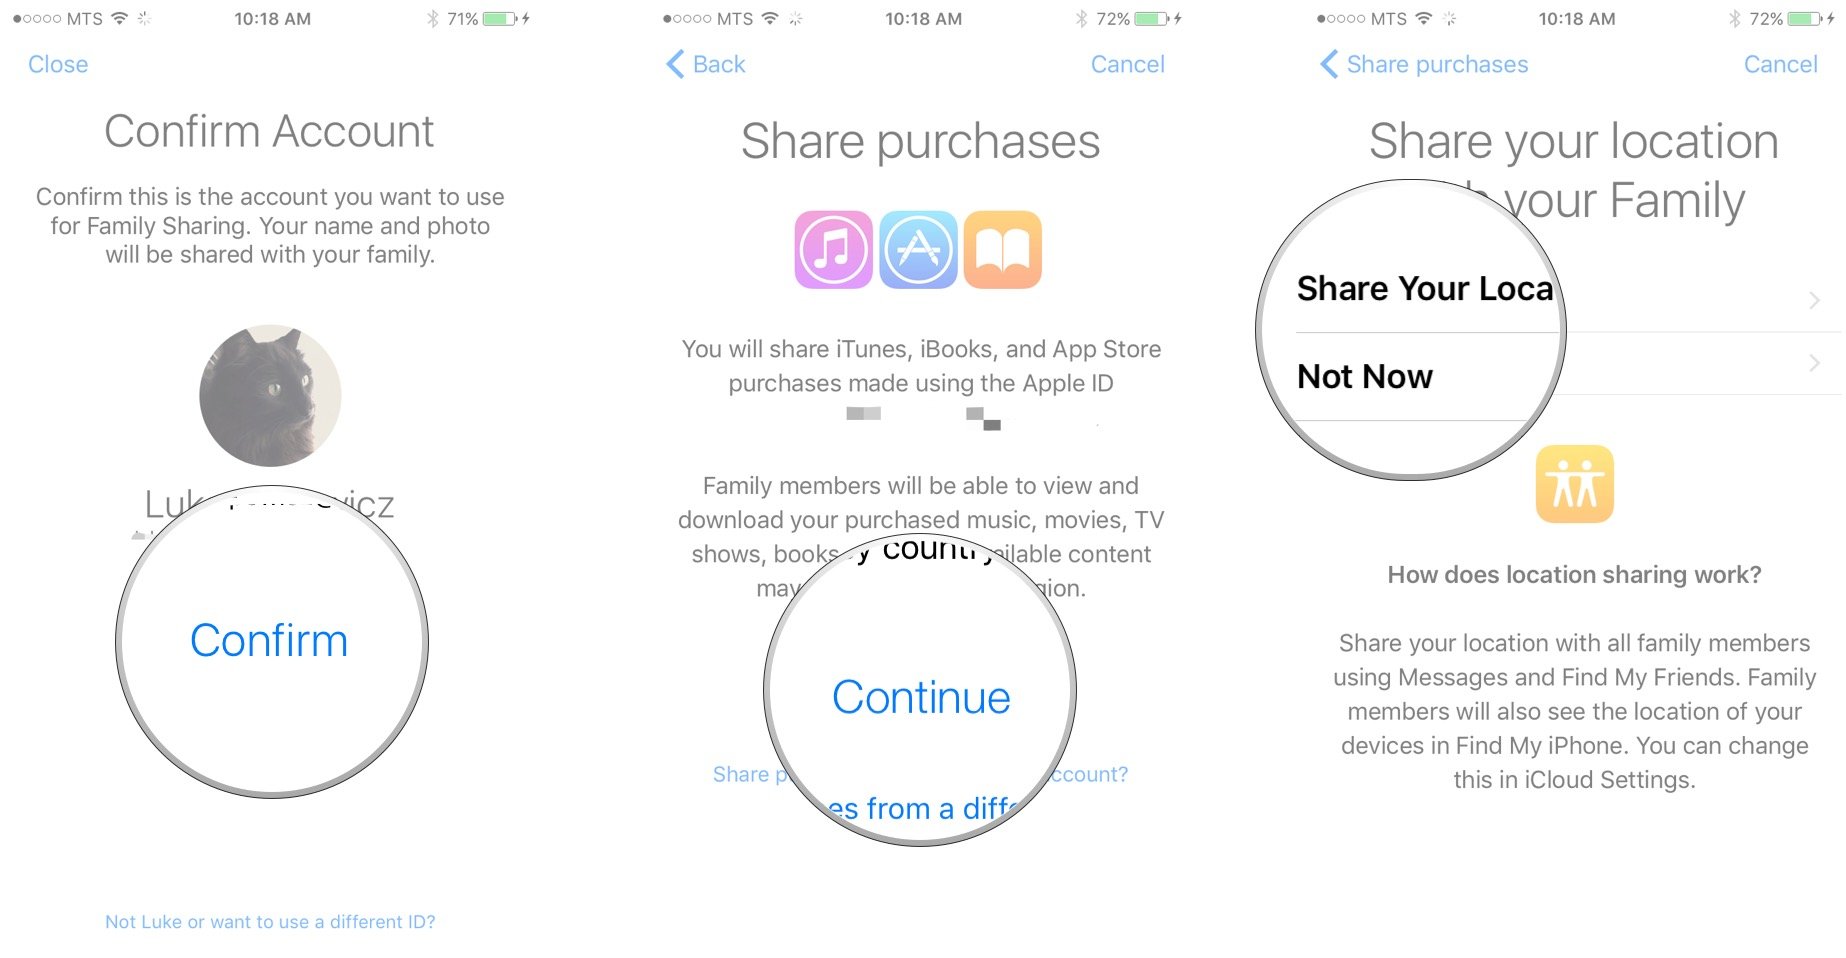
- Tap Confirm. You can alternatively choose a different Apple ID by tapping "Not (your name) or want to use a different ID?"
- Tap Continue to share purchases.
Tap to share your location or tap Not Now.
Welcome to the family!
How to designate someone as a parent or guardian
Note that in order to assign someone as a parent or guardian, you'll need to be the family organizer, i.e. the person that set up the Family Sharing group.
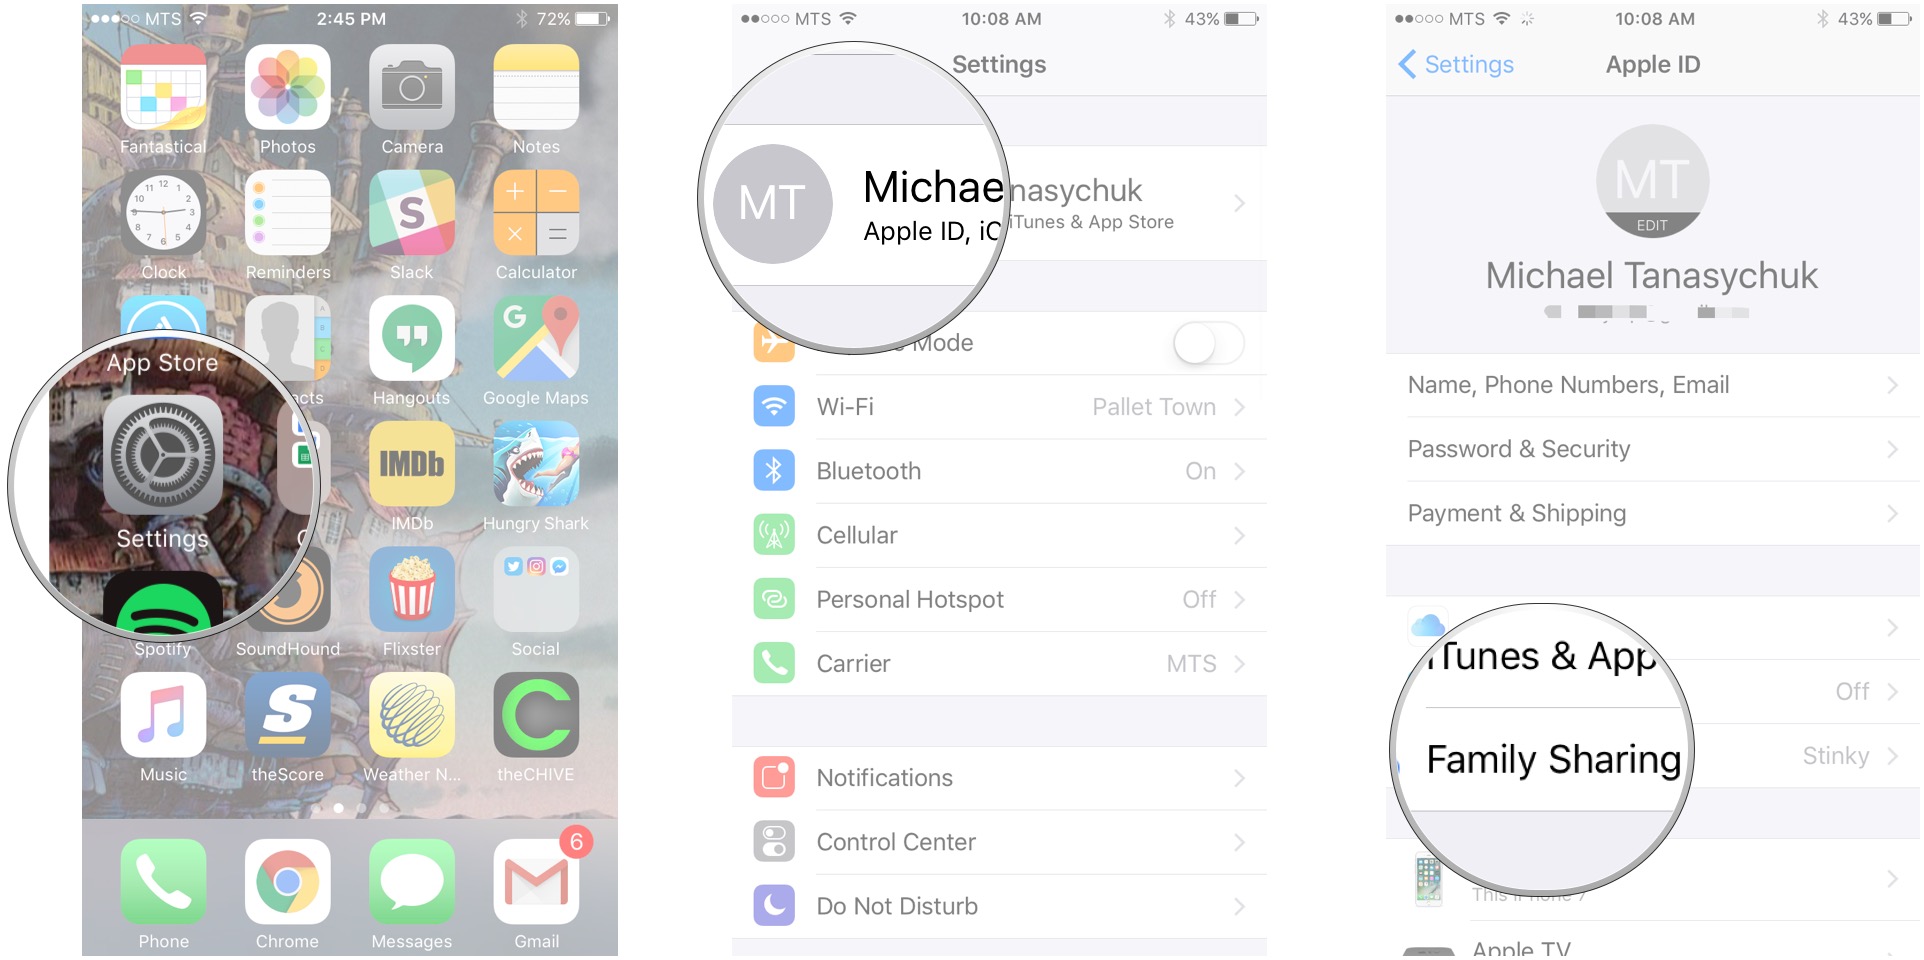
- Launch the Settings app on your iPhone or iPad.
- Tap the Apple ID banner at the top.
Tap on Family Sharing.
- Tap on the person you'd like to assign as a parent or guardian.
Tap the switch next to Parent/Guardian to turn it on (green is on).
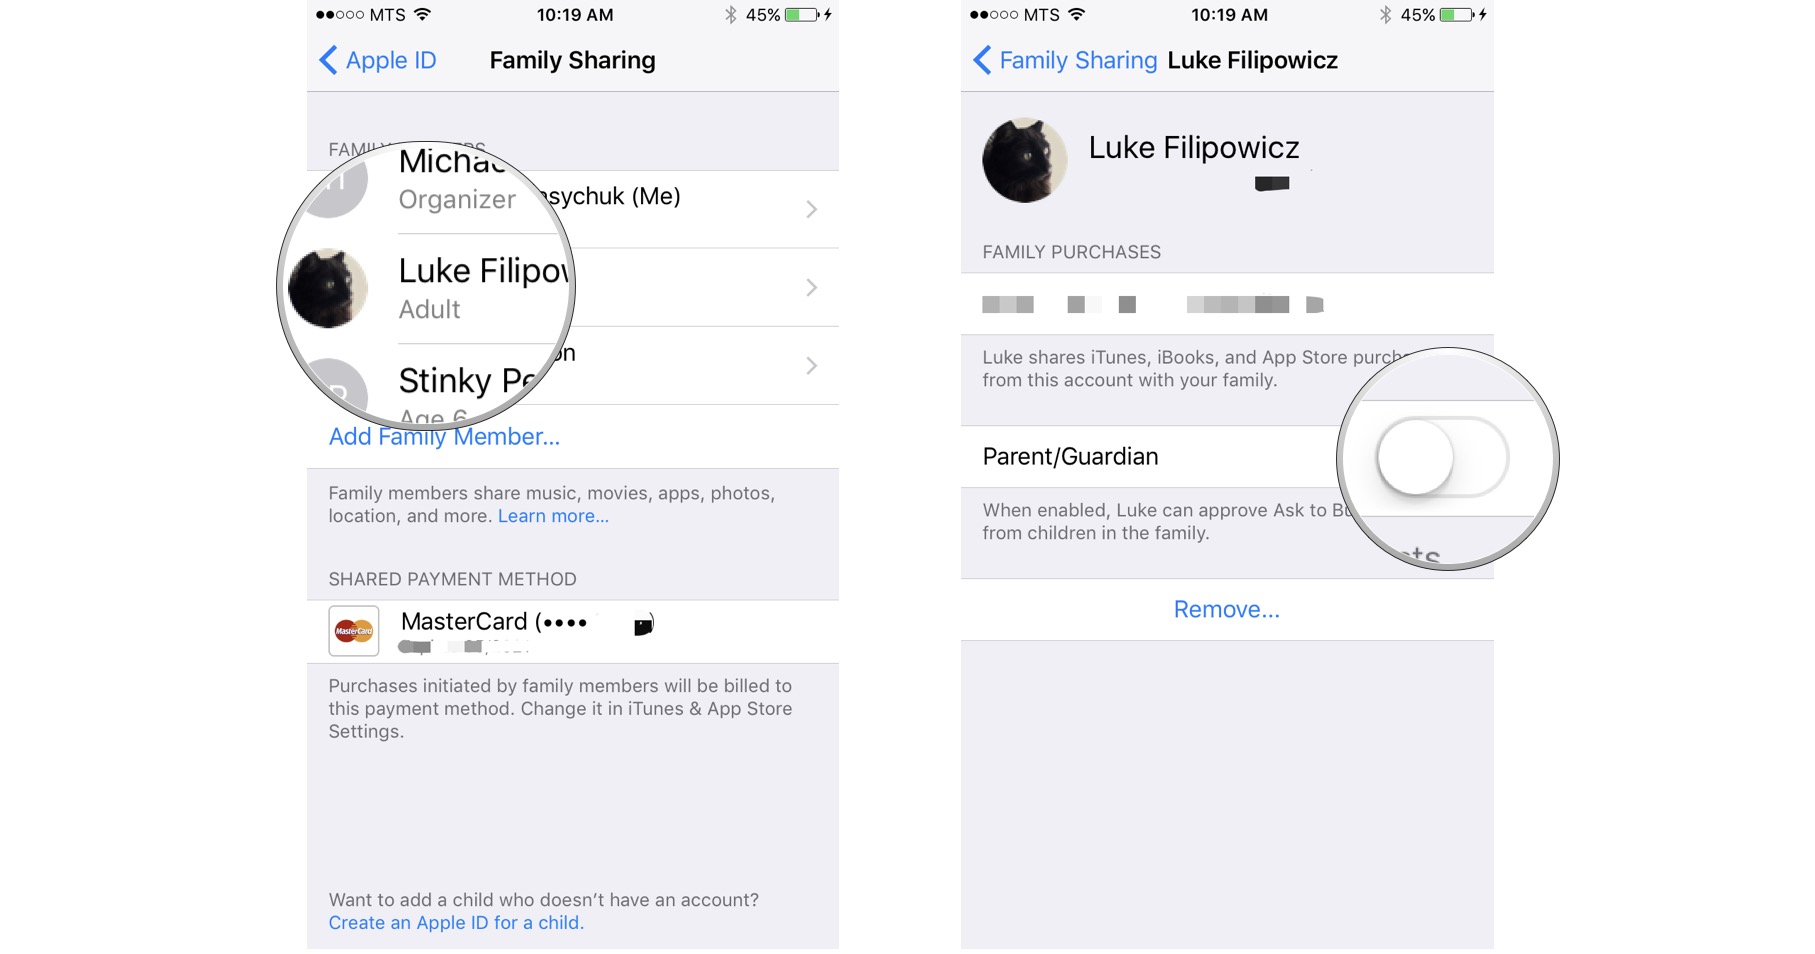
That's it. That person will now receive purchase requests from any children in your Family Sharing group. That means that if one person is busy and can't approve a request, the other parent can. You'll still only need one person to approve a request, though, not both.
Questions?
Let us know in the comments below.
Allyson Kazmucha contributed to an earlier version of this guide.
Updated May 2020: Everything's up to date for the latest version of iOS 13.