Learn how to get every Shine in Super Mario Sunshine
- sep
- 18
![]()
Shine bright like a Shine Sprite.
Sunshine got you beat? If you're playing through Super Mario Sunshine on Super Mario 3D All-Stars and are having a hard time, we've got your back. As you clean up Isle Delfino, you'll discover plenty of Shines among the many stages. Include secret Shine Sprites and you're looking at a total of 120 Shine Sprites. We've broken down our guide by courses with the secret Shines at the end. Here's where you'll find all 120 Shine Sprites in Super Mario Sunshine.
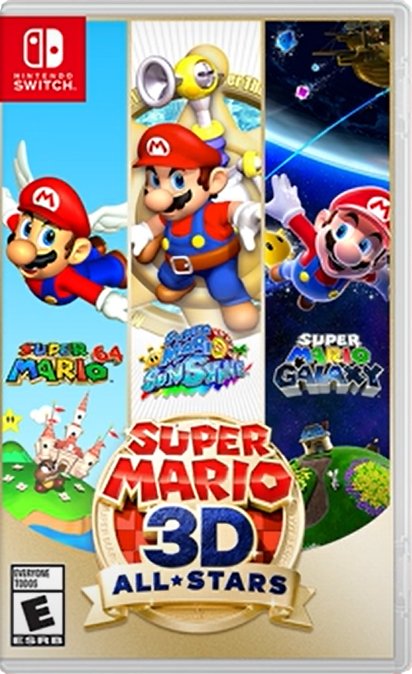
Three classic Mario adventures
Super Mario 3D All-Stars
$60 from Best Buy
$60 from Amazon
$60 from Walmart
Revist these classics
Experience Super Mario 64, Super Mario Sunshine, and Super Mario Galaxy wiith higher resolutions and in widescreen.
All Shines in Super Mario Sunshine
- Bianco Hills
- Episode 1: Road to the Big Windmill
- Episode 2: Down with Petey Piranha
- Episode 3: The Hillside Cave Secret
- Episode 4: Red Coins of Windmill Village
- Episode 5: Petey Piranha Strikes Back
- Episode 6: The Secret of the Dirty Lake
- Episode 7: Shadow Mario on the Loose
- Episode 8: Red Coins on the Lake
- 100 Coin Shine Sprite (Bianco Hills)
- Ricco Harbor
- Gelato Beach
- Pinna Park
- Sirena Beach
- Noki Bay
- Pianta Village
- Corona Mountain
- Delfino Plaza
- Secret Shines
Course 1: Bianco Hills
Unlock Bianco Hills by defeating the second Polluted Piranha and stopping Shadow Mario from kidnapping Peach. When you defeat him, he'll run for the Pianta statue in the middle of Delfino Plaza and jump through the graffiti. Spray the graffiti to unlock the portal to Bianco Hills.
Episode 1: Road to the Big Windmill
At the start of the level, belly flop down the water slide and jump across the short water stream. Once across, use FLUDD to get on the ropes and use them to bounce over the white walls towards the lake. It's covered in brown goop — you can't miss it. Make your way towards the pile of goop shooting out brown balls and spray it down with water. A Polluted Piranha will spawn. Defeat it and earn yourself a Shine.
Episode 2: Down with Petey Piranha
Head back to the bridge you cleared from the previous episode. Head to the windmill and follow the trail of filth, spraying any goo you find along your way. When you get to the top of the windmill, jump on one of moving turbines platforms and ride it to the top to meet Petey.
Both you and Petey will go crashing through the roof and into the windmill. There's no escape now, you have to fight the overgrown plant. Wait for Petey's mouth to open, and then spray his mouth with water to fill him up. When he's ready to burst, he'll fall on his back. That's your cue to jump up and ground pound his belly. Do this three times, dodging his slime attacks every time, and the Shine is yours.
Episode 3: The Hillside Cave Secret
Head back to the bridge in front of the windmill, where you'll find a Pianta starring out towards the cave from the intro of level. Underneath, you'll see a couple of platforms, leading towards the cave. Using FLUDD's hover nozzle, jump down to that platforms and hop across, until you make it the hill. When you walk into the cave, a cinematic will play and Shadow Mario will swoop in, swiping FLUDD from Mario's back.
The follow course is a test of pure platforming prowess, as you'll have to manage the jumps without FLUDD's assist. Time your jumps and get pass the sets of moving blocks and you'll find a Shine waiting for you at the end.
Episode 4: Red Coins of Windmill Village
You'll need to collect all 8 of the level's Red Coins to get this Shine.
- The first Red Coin is between two ropes, right in front of the blue Nozzle Box. You'll see it as soon as you cross the stream at the start; it's just to the left.
- Use the ropes and bounce up to the second Red Coin on its roof.
- To the right, you'll see a third Red Coin on the arch of the white wall. Use the ropes to bounce up and grab it.
- Turn back around and you'll be able to spot the fourth Red Coin, this time on a slightly taller building. Do a spin jump or a wall jump to reach the rope and bounce up to it.
- From the fourth coin, follow the rope you just bounced off towards the cluster of white buildings, dodging the wire traps on the rope and the Wind Duppy circling nearby and grab the fifth Red Coin.
- You don't have to look far for the sixth Red Coin; it's in the doorway, right beneath the fifth coin. Turn back to town to find the last two coins.
- Head up to the top of the white wall and look towards the houses again. Spot the house with two pillars perpendicular to each other. Head to that, either by using the connecting ropes or using a combination of wall jumps and FLUDD. Once you are at the pillars, wall jump between them. The seventh Red Coin is on the roof.
- Nearby, you'll see two collapsed windmills with bridges attached. Jump onto one of the platforms and shoot water into the windmill turbines to move the bridge in position, and jump to the final Red Coin floating in between the two structures.
To collect the Shine, head back to the house with the two pillars. Jump on the roof of the pillar with a rope connected to it and follow the rope to the platform at the top.
Episode 5: Petey Piranha Strikes Back
Petey Piranha is back, and he's brought all of his gunk and goop to town. Follow the trail of brown goo towards to hill and climb it using FLUDD and a well-timed wall jump. You can also follow the connecting rope to get up, or if you're having trouble, use the Rocket Nozzle found in the Red Nozzle Box along the edge of the east wall. Once you're on the top of the hill, you'll see a fenced off area and Petey napping on a platform by himself. Near the fence, you'll spot some Poinks. Let one attach to FLUDD and fill it up with water and shoot it at Petey, waking him from his nap.
Petey Piranha learned a new trick this time and will start flying around town, shooting goo from the sky. Pick up another Poink and fling it at him. When it connects, he'll come crashing to the ground. Use the same technique you used before and fill him up with water and ground pound him when he's on his back. Do that three times, and Petey will be knocked down for good, earning you a Shine.
Episode 6: The Secret of the Dirty Lake
Head down to the lake and back towards the windmill, this time circling around to the back of it. You'll find a new opening, with gunk flowing from it, and a gray Nozzle Box containing a Turbo Nozzle. Jump to the opening and go through it. You'll be greeted to a cutscene of Shadow Mario swiping FLUDD off of your back.
You'll have to rely on your platforming skills to get to the Shine at the end. The first test involves flipping platforms. Watch the pattern and jump between the blue and red platforms. Once you're on the other side, collect the 1-Up mushroom on the star and stand on the cube. It'll start moving and rotating, so make sure you stay one step ahead of it.
Once you're off the cube, avoid the red triangles cutting across the walkway, and make it to the next cube. The next cube will begin to rotate like the other, so do you best to stay one step ahead of it. If you're fast, you can grab the 1-Up Mushroom that floats by. The next portion is tricky and brings back the flipping platforms. Watch the pattern in which they flip and jump across until you make it to the final green platform. Walk down and collect your prize.
Episode 7: Shadow Mario on the Loose
Chase Shadow Mario down and spray him with water. It's as simple as that. Once he's had enough, he'll fall on his back and give up the shine.
Episode 8: Red Coins on the Lake
Most of the coins around the lake area are pretty high, so grab the Rocket Nozzle when you get the chance. It'll make things alot easier.
- The first Red Coin is between the ropes as you enter the lake.
- The second Red Coin is on the rope just above the Red Nozzle Box.
- Follow the rope higher still and find the third Red Coin.
- Use the rope to bounce up one more level or use the Rocket Nozzle. The fourth Red Coin is waiting there.
- Continue down the rope, dodging the enemies on and around the rope and you'll find the fifth Red Coin.
- The sixth Red Coin is on a rope that is seperated from the one you're currently on. Use the Rocket Nozzle or fling yourself from the rope to get to the correct rope. Once you're on, just bounce up and grab it.
- The seventh Red Coin is down below in between the platforms you crossed to get to the cave in episode 3.
- The 8th Red Coin is floating next to a lilipad nearby.
When that's done, the Shine will appear in the windmill.
100 Coin Shine Sprite (Bianco Hills)
You need to collect 100 coins to earn a Shine Sprite. Here are some tips:
- The easiest episode to get 100 coins on is Episode 3.
- Spray open all the flower rings.
- You three coins from ringing the bells, three coins from each Pokey, and one coin from every treetop.
- You can get a large chunk of coins by exploring the lake.
All Shines in Super Mario Sunshine
- Bianco Hills
- Ricco Harbor
- Episode 1: Gooper Blooper Breaks Out
- Episode 2: Blooper Surfing Safari
- Episode 3: Caged Shine Sprite
- Episode 4: The Secret of Ricco Tower
- Episode 5: Gooper Blooper Returns
- Episode 6: Red Coins in the Water
- Episode 7: Shadow Mario Revisited
- Episode 8: Yoshi's Fruit Adventure
- 100 Coin Shine Sprite (Ricco Harbor)
- Gelato Beach
- Pinna Park
- Sirena Beach
- Noki Bay
- Pianta Village
- Corona Mountain
- Delfino Plaza
- Secret Shines
Course 2: Ricco Harbor
Unlock Ricco Harbor by collecting three Shines. When you return to Delfino Plaza, you'll find that another Polluted Piranha has set up shop in town. Defeat it and the building it buried will emerge, along with graffiti on its side. Spray the graffiti and open the portal to Ricco Harbor.
Episode 1: Gooper Blooper Breaks Out
From where you started, board the large ship and jump up against the chain-link fence. From there, jump onto the platform being moved by the crate, and ride that onto the large structure of fences and revolving gates. Work your way to the far right corner of the cage, and drop onto the platform below.
Jump across the next platform and you will land on a platform with two Piantas. If you squirt the propeller above the submarine, you can raise it out of the water and to use it as a platform to get across to the other side. You can also squirt the bloopers in the water, turning them into platforms.
Alternatively, you can also use the angry Pianta near the wall as a bounce pad. You'll see him complaining near a pile of bricks to the left of the ship. Either way, once you're on the upper level of the village, walk up to the Blooper and pull his tentacle.
To defeat Gooper Blooper, spray his face and bait him into an attack. When he swings his tentacles, hop on the ends to disable them and then pull them off of its body. Once you have an opening, pull the cork out of his mouth to do damage. Do this one more time and you'll send it flying, and a Shine Sprite will take its place.
Episode 2: Blooper Surfing Safari
Near the start of the level, you'll notice a new dock to the right of Mario. Waiting there are three different Bloopers — the Green Blooper has the best handling, the Pink Blooper has the worst handling, and the yellow is in the middle. They all seem to have the same top speed though. Just be careful surfing; if you run into something, it's game over. Pick your favorite and follow the path of coins to a sewer entrance.
Inside, you'll have to choose a Blooper to use for the time trial. Any choice should work, but the green one is the easiest to control. So, use that one if you're having trouble. Keep your turns tight and the Shine will be yours.
Episode 3: Caged Shine Sprite
There are several paths to take here, but the most straight forward way to follow the arrows. Using FLUDD's Hover Nozzle to keep your balance, ride the candy-cane crane to the moving pathway and then climb the grating. pass through the revolving gate and jump onto the second fence. Pass through the gate, jump off of it, and resume following the arrows.
You'll come across a Red Rocket Nozzle box. Hopping onto the box will replace FLUDD's Hover Nozzle with the Rocket Nozzle. You can continue following the arrows, but you can also take that Rocket Nozzle directly under the cage and shoot straight up to get the Shine Sprite.
Episode 4: The Secret of Ricco Tower
Head to the newly opened light house and find a way to the opening. You can try wall jumping up the white scaffolding, or spin jump from the ship and use FLUDD's Hover Nozzle to make it. When you're inside, Shadow Mario will swipe FLUDD off of your back, and you'll enter an Old-School stage.
This level consists entirely of rotating wooden blocks. It's actually pretty easy to make it through. Make sure you move against the direction the block is rotating and don't get stuck on one of those colored pegs, and the Shine will be yours.
Episode 5: Gooper Blooper Returns
Gooper Blooper is back! Getting to Gooper Blooper is easy. You can swim right up to the Helipad that he's situated on. Use FLUDD's Hover Nozzle, and hover over to the red platform with the Red Nozzle Box. Swap out the nozzles and blast upward, grabbing the grate underneath the helipad. Shimmy to one of the panels and jump to the top to face off against Gooper Blooper.
He's basically the same as when you fought him before, though slightly more aggressive. Knock out his tentacles, clear an opening, and pull his snout two times to defeat Gooper Blooper.
Episode 6: Red Coins in the Water
The Red Coins won't appear until you ground pound the red switch on the docks. Pick a Blooper and get started. As before, the green one has the best handling. Two minutes should be more than enough time to hunt these coins down.
The best route is the one that follows the coin path, which has every single red coin. The path starts at the first floating platform and loops all the way around the bay. After you get the last coin, you will need to return to the dock to collect your shine. To do this, steer toward the dock and jump, otherwise you'll smack into the dock and fail. If the Shine is not directly in your path, you will skid right by it and have to loop around again.
Episode 7: Shadow Mario Revisited
You have to chase Shadow Mario and blast him with water. If you're adept at jumping, you should not have any problems chasing him up to the scaffolding to spray him down. If you're having trouble, go find the Rocket Nozzle under the helipad. You can also shoot him from below if you've got a shot. After enough, Shadow Mario will call it quits and hand over the Shine.
Episode 8: Yoshi's Fruit Adventure
This level requires Yoshi, so you need to unlock him first. You will find Yoshi's Egg waiting near the market in the upper part of the harbor. This Yoshi will always want a Durian. Jump on top of the giant fruit tanks and ground pound the lever that is raised, which will send a random fruit out the pipe. If you didnt't get a Durian the first time, hop back and forth between the fruit tanks until you get the right fruit and bring it to Yoshi.
With Yoshi hatched, go to the ledge, where the flying fish are jumping, and shoot the fish with purple juice. This will turn the fish into a platform. From there, flutter jump over to the ledge with the palm tree, and flutter again to another metal platform. Stop and create two more platforms using the fish and hop over to them. From the next platform, Yoshi can shoot the orange goo that blocks the way to the Shine. You can access the Shine.
100 Coin Shine Sprite (Ricco Harbor)
You need to collect 100 coins to earn a Shine Sprite. Here are some tips:
- Episode 3 is the best level to earn this shine.
- Go up and down every manhole entrance.
- Squashing the Bloopers instead of shooting them off the railings will give you two coins per Blooper.
- There's a long sting of coins at the top of the tower.
- Check above and under the water.
All Shines in Super Mario Sunshine
- Bianco Hills
- Ricco Harbor
- Gelato Beach
- Episode 1: Dune Bud Sand Castle Secret
- Episode 2: Mirror Madness! Tilt, Slam, Bam!
- Episode 3: Wiggler Ahoy! Full Steam Ahead!
- Episode 4: The Sand Bird is Born
- Episode 5: Il Piantissimo's Sand Sprint
- Episode 6: Red Coins in the Coral Reef
- Episode 7: It's Shadow Mario! After Him!
- Episode 8: The Watermelon Festival
- 100 Coin Shine Sprite (Gelato Beach)
- Pinna Park
- Sirena Beach
- Noki Bay
- Pianta Village
- Corona Mountain
- Delfino Plaza
- Secret Shines
Course 3: Gelato Beach
You will unlock Gelato Beach after collecting 5 Shines. When you return to Delfino Plaza, you'll discover that another Polluted Piranha has made itself comfortable on another building. Defeat the Polluted Piranha and spray the graffiti to open a portal to Gelato Beach.
Episode 1: Dune Bud Sand Castle Secret
Spray the sprout in the middle of the beach and a sandcastle will pop up on the peninsula. Run inside before the castle dissolves and Shadow Mario will swoop in and snatch FLUDD. Get ready for another secret stage.
The trick here is not spend too much time on the sand blocks, as they will begin to dissolve when Mario jumps on top. Dash through the first part until you get the sand structure. Begin to climb, jumping on the solid, orange blocks if you misjudge a jump or dissolve too many sand blocks. Don't worry too much; they will respawn if that happens. Get to the top and grab the Shine Sprite to complete the level.
Episode 2: Mirror Madness! Tilt, Slam, Bam!
Your objective here is to remove the Cataquacks from the reflective panels. Head over to the panels and use the nearby palm trees and jump onto the panels. Simply Spray the Cataquack to the edge until they start to lose balance. Then quickly go to the opposite edge and do a Ground Pound. Once you remove the Cataquacks, the panels will realign and knock the sleeping Wiggler off of the tower, and the shine will be yours.
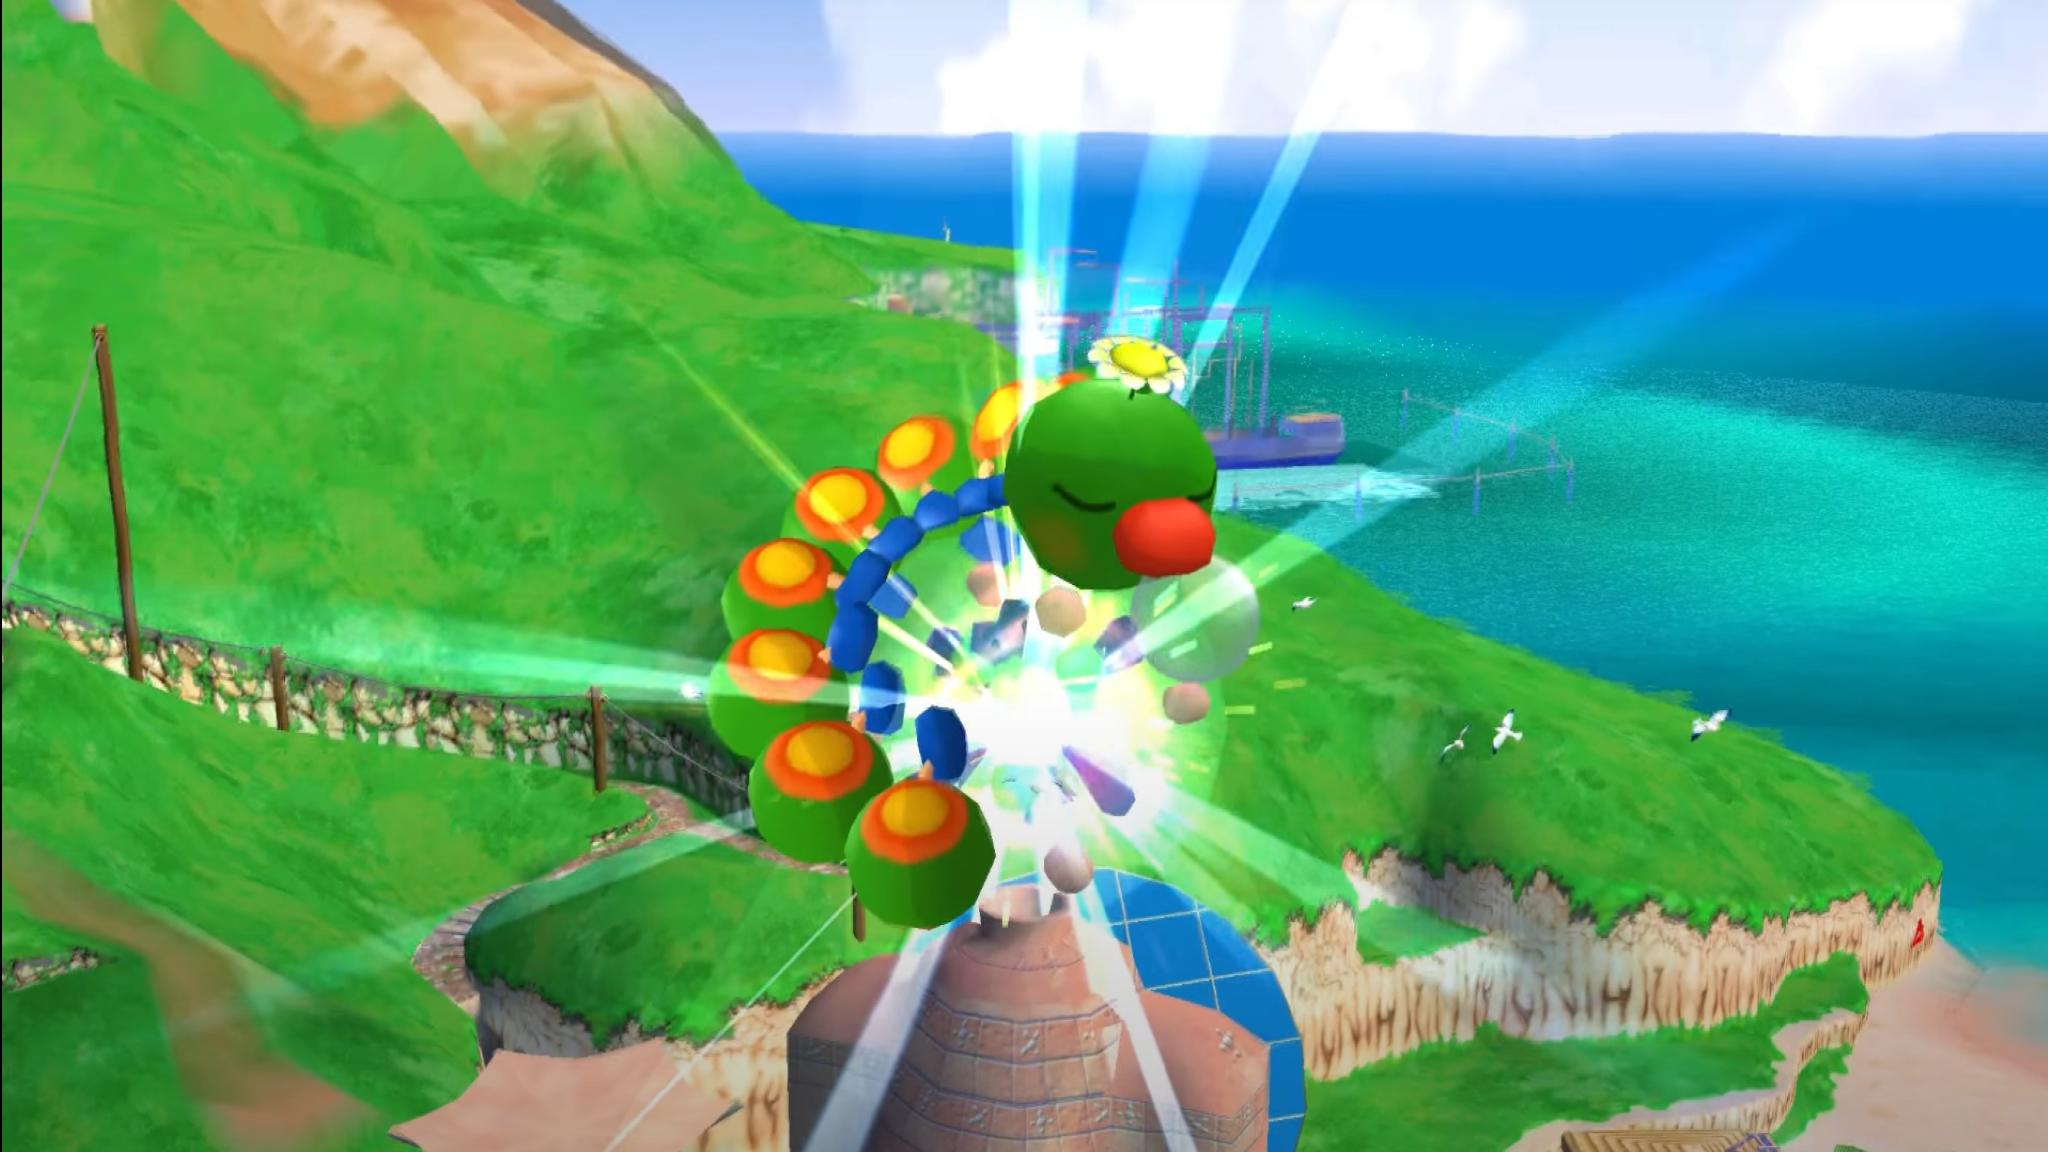
Episode 3: Wiggler Ahoy! Full Steam Ahead!
Wiggler is awake and really mad about it. He's pretty menacing on the beach, but he's easy to defeat. Simply wait for him to walk over one of the saplings, spray it with water, and the sand structure should topple him over. Then, run over to his belly and ground pound the highlighted area.
Episode 4: The Sand Bird is Born
Ah, the infamous sand bird has hatched. Run to the back of the now busted tower and shoot the sprout to create a set of sand stairs. Continue up the stairs and you'll find the Pianta's gathered in celebration at the amphitheater. Slide down the hill and jump into the hole and you'll be transported to the where the Sand Bird resides.
The Sandbird has seven Red Coins across its body. Watch your step, especially near the edge of its wings. Once you have all seven, you have to stay on until the Sand Bird reaches the top of the tower. Stay towards the center of his body and slowly move to the Sand Bird's side when he turns. Collect the last coin at the end of the ride.
Episode 5: Il Piantissimo's Sand Sprint
II Piantissimo will challenge you to a foot race. The goal is the make it to the Amphitheater in less than 35 seconds. Luckily, you're armed with FLUDD. Use your belly slide to stay ahead of Piantissimo, wall jump up the gap that previously housed the sand stairs, and use FLUDD's Hover Nozzle to jump over the hill and shave off a few seconds. It should be enough to outpace the Pianta wannabe.
Episode 6: Red Coins in the Coral Reef
Head to the other side of the beach and jump into the coral reef to do some light treasure hunting.
- Turn left and swim in the crevices of the coral to find your first Red Coin in front of the orange reef.
- Swim over the reef into the gap and find the second Red Coin.
- You should see a school of red fish swimming through the center with the third Red Coin in their midst. Swim up to them and grab it.
- There's another school of red fish carrying the fourth Red Coin. Swim up to them and grab it. If they escape, just wait for the Red Coin to emerge from the sand again.
- Swim to the center of the coral and grab the fifth Red Coin between the two orange pieces of coral.
- The sixth Red Coin is nearby. Simply swim over and add it to your collection.
- Swim over to the right side of the coral. It's the side you haven't explored yet. Pick up the seventh Red Coin hiding next to the orange coral.
- The final coin is right next to the seventh coin.
With the Red Coins collected, the Shine will appear.
Episode 7: It's Shadow Mario! After Him!
Another Shadow Mario stage! He'll circle the path that leads back to the amphitheater, so try your best to keep pace with him and blast him with water. If you're having trouble keeping up, try to stay on the high ground and shoot him in first person. After enough abuse, he'll go down.
Episode 8:The Watermelon Festival
I hope you like watermelon, cause the Pianta at the watermelon shack wants the biggest watermelon on the island and you're the only plumber who can bring it to him. The problem is this watermelon is more delicate than a new born baby and will pop if you hit an enemy or object. If it pops, you'll have to go back to the start and try again.
Push the watermelon down the hill and follow it down. Spray the Cataquacks to stun them and make sure you don't roll the watermelon into any stunned enemies. Guide the watermelon to the shack and carefully push it over the bridge. Take you time — one false move and it's back to the start. Once you get the watermelon over, you'll get the Shine as a reward.
100 Coin Shine (Gelato Beach)
The best episode to do this on is Episode 8. Simply pop the watermelons by pushing them against a wall. The watermelon grows back immediately, and you can repeat this 10 times per melon for 30 coins. When each watermelon runs out of coins, deliver it to the watermelon shack for a bunch of coins.
All Shines in Super Mario Sunshine
- Bianco Hills
- Ricco Harbor
- Gelato Beach
- Pinna Park
- Episode 1: Mecha Bowser Appears!
- Episode 2: The Beach Cannon's Secret
- Episode 3: Red Coins of the Pirate Ships
- Episode 4: The Wilted Sunflowers
- Episode 5: The Runaway Ferris Wheel
- Episode 6: The Yoshi-Go-Round's Secret
- Episode 7: Shadow Mario in the Park
- Episode 8: Roller Coaster Balloons
- 100 Coin Shine Sprite (Pinna Park)
- Sirena Beach
- Noki Bay
- Pianta Village
- Corona Mountain
- Delfino Plaza
- Secret Shines
Course 4: Pinna Park
After you collect 10 Shines, the next time you return to Delfino Plaza, you'll find that Peach has been kidnapped. Shadow Mario escaped through a cannon at the other side of Delfino Plaza. Jump into the cannon to be blasted to Pinna Park.
Episode 1: Mecha Bowser Appears!
When you enter Pinna Park, Shadow Mario is waiting for you at the entrance. Chase him into the park and follow him to the pool. A cutscene will start and Shadow Mario will unleash Mecha Bowser on you. After the cutscene, a Noki, impressed by the show, will offer Mario a ride on the coaster to continue the show. Once Mario is strapped in, the fight will begin.
On the track, you collect rockets that FLUDD can use to shoot at Mecha Bowser. Once you shoot the rocket, you'll have to wait until you pass another rocket to shoot again, so try to make every shot count. While you're waiting in between rockets, you can use FLUDD to shoot the Bullet Bills and dose Mecha Bowsers flames if you get to close. Four hits are all it takes to destroy Mecha Bowser.
Episode 2: The Beach Cannon's Secret
The park is closed in this episode, and for good reason. A crazy mole is shooting rockets on the beach. Run up to Monty Mole's cannon and he'll start tossing bombs at you. Shoot them with a blast of water to disarm them and then toss them back at Monty Mole to damage him. Three hits is all it takes to knock him out, and a opening in his cannon will take his place. Jump inside and watch helplessly as Shadow Mario swipes FLUDD.
Those backgrounds look familiar, don't they? The following stage as a Yoshi motif. This Old-School stage is very simple. Watch the disappearing platforms and run across when the coast is clear. Once you get to solid ground again, hop on the bouncy platforms and hop to the top.
Belly sliding is a good way to cover a lot of ground very quickly, but if you're not skilled at it, just keep up the pace and you should be able to stay one step ahead of the vanishing platforms. The Shine is waiting for you at the end.
Episode 3: Red Coins of the Pirate Ships
The Red Coins are inside the park. Head inside and to the pirate ships to assess the situation.
- The first Red Coin is at the start of the ride.
- Hover to the first ship when it is moving slowly, and stand on the deck of the ship as it swings back up to grab Red Coin two.
- Jump to the second Pirate Ship, and grab Red Coin three on the upswing.
- Hover onto the green cage to the left to grab the fourth Red Coin.
- Drop to the lower platform, and jump up into Red Coin five under the green cage, knocking the Electro Koopas at while you're at it.
- Head back down and jump onto the top of the grating to grab the sixth Red Coin. Head along the platform to the second green cage while ground pounding the Electric Koopas underneath.
- Grab the seventh Red Coin hanging from the grating.
- Look around for the final Red Coin on thetop side of the grating.
When you're complete, the Shine will be yours for the taking.
Episode 4: The Wilted Sunflowers
Snooza Koopa's are eating these poor sunflowers roots. Help them out by defeating them. Spray the faux Yoshi shells to wake up the Snooza Koopas and bait them into an attack. Dodge it and they'll get stuck in the sand — perfect for a ground pound. Rinse and repeat and the watch as the sunflowers spring back to life. Once the last sunflower has risen, you'll be able to grab the Shine. Completing this level also unlocks Yoshi the next time you head to Delfino Plaza!
Episode 5: The Runaway Ferris Wheel
At the start of the level, head into the park. You'll be greeted to a short cutscene of a ferris wheel moving way too fast. Head over to the ferris wheel and then behind it. You'll find plenty of Electro Koopas and a grating to climb. There are also green panels that flip when you spray them with water.
Climb the fence, making use of FLUDD's spray to flip the green panels. You have to be on the opposite side of the grate to knock the Red Electro Koopa. This part is a bit frustrating, largely due to the tight space and wonky camera. Take your time, clear the Electro Koopas, and continue your climb. Once you make it to the top, bounce on the rope and grab onto the grating. Smack the troublesome turtle off of the platform and the Shine is yours.
Episode 6: The Yoshi-Go-Round's Secret
To access this Shine, you'll need the help of Mario's old pal, Yoshi. Enter the park and head to the Yoshi-Go-Round; you'll notice that there's a missing orange Yoshi. Head to the Pianta tree on the right side of the park to find a Yoshi Egg. You'll have to bring Yoshi the fruit that he's thinking of. Luckily, there's fruit scattered all over the park.
- Papaya: Dangling from the nose of the Pianta Tree
- Coconut: The palm tree by the Pirate Ship Ride.
- Pineapple: Beneath the gondola on the path to the Ferris Wheel
- Banana: On the ledge beneath the Pineapple.
You'll need an Orange Yoshi to complete the ride, so if Yoshi is thinking of a coconut or a banana, feed it to him to hatch him. Then find a pineapple or a papaya to turn him Orange. Head back to the ride and slot Yoshi into the right spot. As is tradition, Shadow Mario will swoop in and snatch FLUDD off Mario's back.
This is one of the trickier secret levels. The first part is easy enough and you should be able to get by the rotating blocks with no problem. The rotating Yoshi blocks will prove a challenge. Take your time and don't rush. There's not much room for error here. When you make it to the other side, ride the orange cube to the final section.
There's some tricky platforming in the next section, made trickier thanks to the tight camera. Thankfully, you don't have to worry about the platforms moving under your feet. Time your jumps and climb up the next few orange blocks to get to your prize.
Episode 7: Shadow Mario in the Park
Well, look who decided to pay the park a visit again. This might be one of the easiest run-ins you'll have with this punk, as he doesn't do a lot of jumping as compared to other times. Shoot him down and earn your Shine.
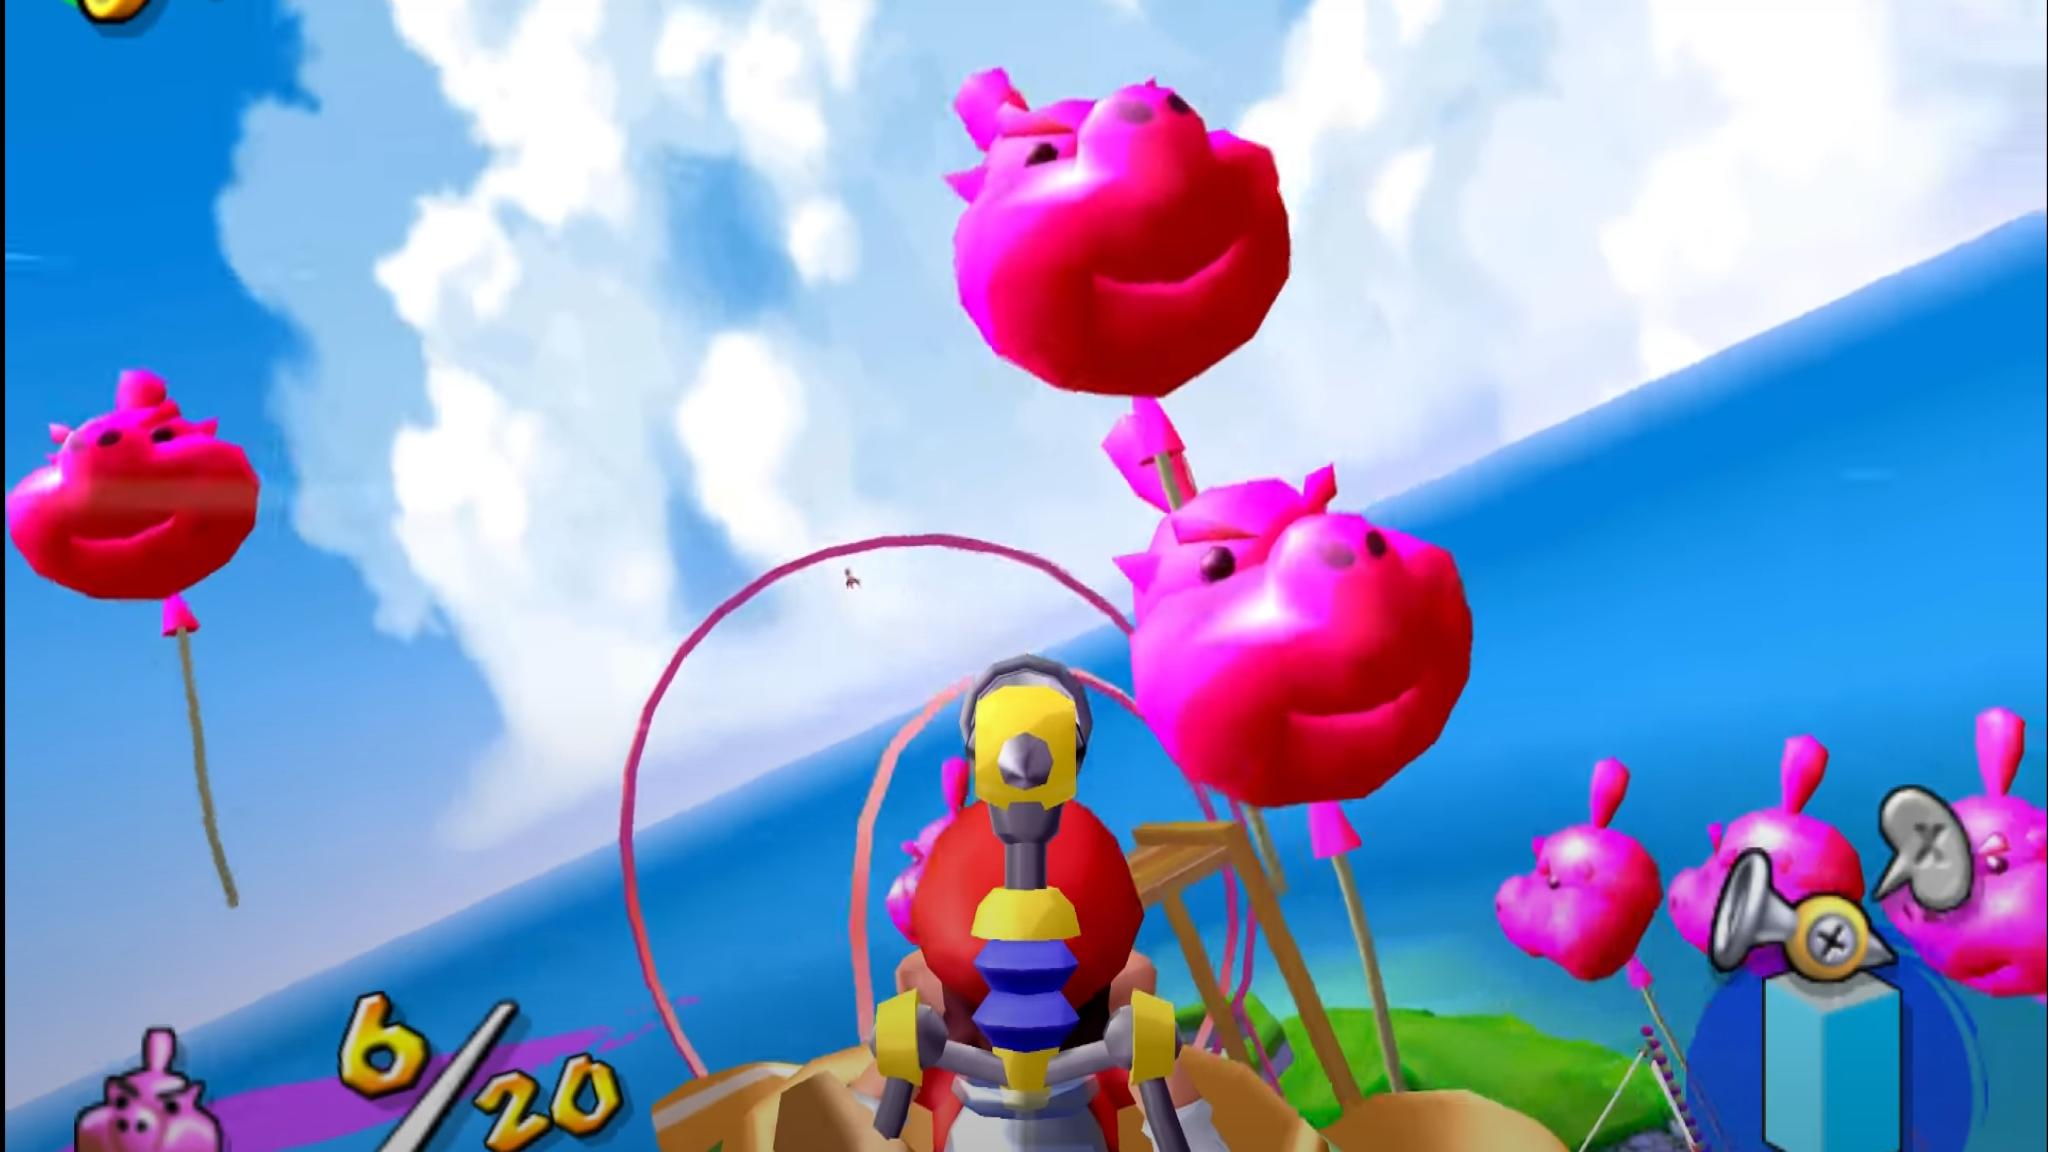
Episode 8: Roller Coaster Balloons
The goal is to knock out 20 balloons within three laps of the roller coaster ride. If you run through all three laps without bursting all of the balloons, you will die. Remember that the faster you're moving, the more off center you need to aim. Try to hit groups of balloons when you get the chance. If you can pop all 20 within 3 laps, the Shine is yours.
100 Coin Shine Sprite (Pinna Park)
The easiest way to do this in on Episode 2. Just shoot the Bullet Bills and collect the coins. It's really that simple.
All Shines in Super Mario Sunshine
- Bianco Hills
- Ricco Harbor
- Gelato Beach
- Pinna Park
- Sirena Beach
- Episode 1: The Manta Storm
- Episode 2: The Hotel Lobby's Secret
- Episode 3: Mysterious Hotel Delfino
- Episode 4: The Secret of Casino Delfino
- Episode 5: King Boo Down Below
- Episode 6: Scrubbing Sirena Beach
- Episode 7: Shadow Mario Checks In
- Episode 8: Red Coins in the Hotel
- 100 Coin Shine Sprite (Sirena Beach)
- Noki Bay
- Pianta Village
- Corona Mountain
- Delfino Plaza
- Secret Shines
Course 5: Sirena Beach
To unlock Sirena Beach, you have to complete episode 4 of Pinna Park. When you do, return to Delfino Plaza and discover Shadow Mario with a Yoshi Egg. Spray the foe down to free the Yoshi Egg. Once it's free, bring over the fruit it is thinking of to hatch the dinosaur. Jump onto Yoshi and climb onto the roof with the giant pinapple lodge in a pipe. Use Yoshi to clear the pipe and head to Sirena Beach.
Episode 1: The Manta Storm
When you enter Sirena Beach, head to the angry Hotel owner at the highest point of the map. Talk to him to trigger the entrance of the Phantamanta. This is a huge shadow of a Manta and is one of the tougher bosses in the game.
You must soak Phantamanta by any means necessary. As you start to damage Phantamanta, it'll start breaking into smaller mantas. Spray those and break them down into even smaller mantas. Once they turn pink, they'll direct their attack directly at Mario. Bob and weave their attack and use every opportunity to dose the mantas with water. Be sure to avoid the trail of electric goo that the mantas leave behind as well. Eventually the onslaught will end, and the Shine will be yours
Episode 2: The Hotel Lobby's Secret
The Hotel that was under siege by the Phantamanta has returned, but now it's full of ghosts. The mayor just can't catch a break! Talk to the Pianta at the door and enter the lobby. It's crawling with Boos. Shoot the pink boos with FLUDD to create platforms and jump up. Follow the path of pink books until you get to the top. Jump into the mouth of the Boo statue and watch a cutscene where Shadow Mario snatches FLUDD. A tale old as time.
For this Old-School stage, you'll have to make use of enemies to clear gaps. Use the wandering enemies near the ledge to bounce up to the next level and then time your jumps so they align with the floating baddies. Break the bricks to create a path to wall jump up. Once on top, you'll have to contend with dissolving sand blocks. Move quickly and make it to the solid watermelon blocks.
At the end, there's a rotating block that'll lead you to a small sand area. Make your way around it and the Shine Sprite will be yours.
Episode 3: Mysterious Hotel Delfino
The hotel is now open, though it's standards are questionable. In the lobby there's a Yoshi Egg who is craving pineapple, and the fruit stand is fresh out. We'll have to fulfill Yoshi's demand to get the Shine on this level.
Head to the men's bathroom on the first floor (on the far-left corner if you are coming from the entrance), and go to the stall at the end with the leaky toilet. Jump up from there and you'll end up in a second-floor bathtub. Don't use any doors from here on out, as they will lock behind you and you'll have to start this journey again from the start. Pass the Boos and the Noki children and reveal an image of a Boo on the closet by shooting it with water. Once all the panels are flipped, it will open into another room.
In the next room, you'll find some Pink Boos terrorizing a poor Pianta. Spray them to turn them into platforms, and then hop up to the next level. Once you flip through the floor panel, shoot the yellow bookshelf to reveal another room. Head into it and ground pound the discolored panel in the floor to drop down into a room with crates and a Giant Boo sleeping in the doorway. Break the crate to your immediate left and you'll finally find a pineapple. Leave through the door and head back to the Yoshi Egg.
Once Yoshi has been hatched, jump on his back and take the stairs to the top levrel. At the top, you'll spot your prize. Head to the open hotel room just pass the Shine room. Jump on the bed and hop into the vents.
The Giant Boos are no match for Yoshi's tongue. Head down the passage to the sweeper's left. Make a left turn at the four-way intersection, and pass the left turn that leads to the real Blue Coin. If you want to get the Shine, take the next left, and ground pound the crack in the room at the end of that shaft. The Shine is yours.
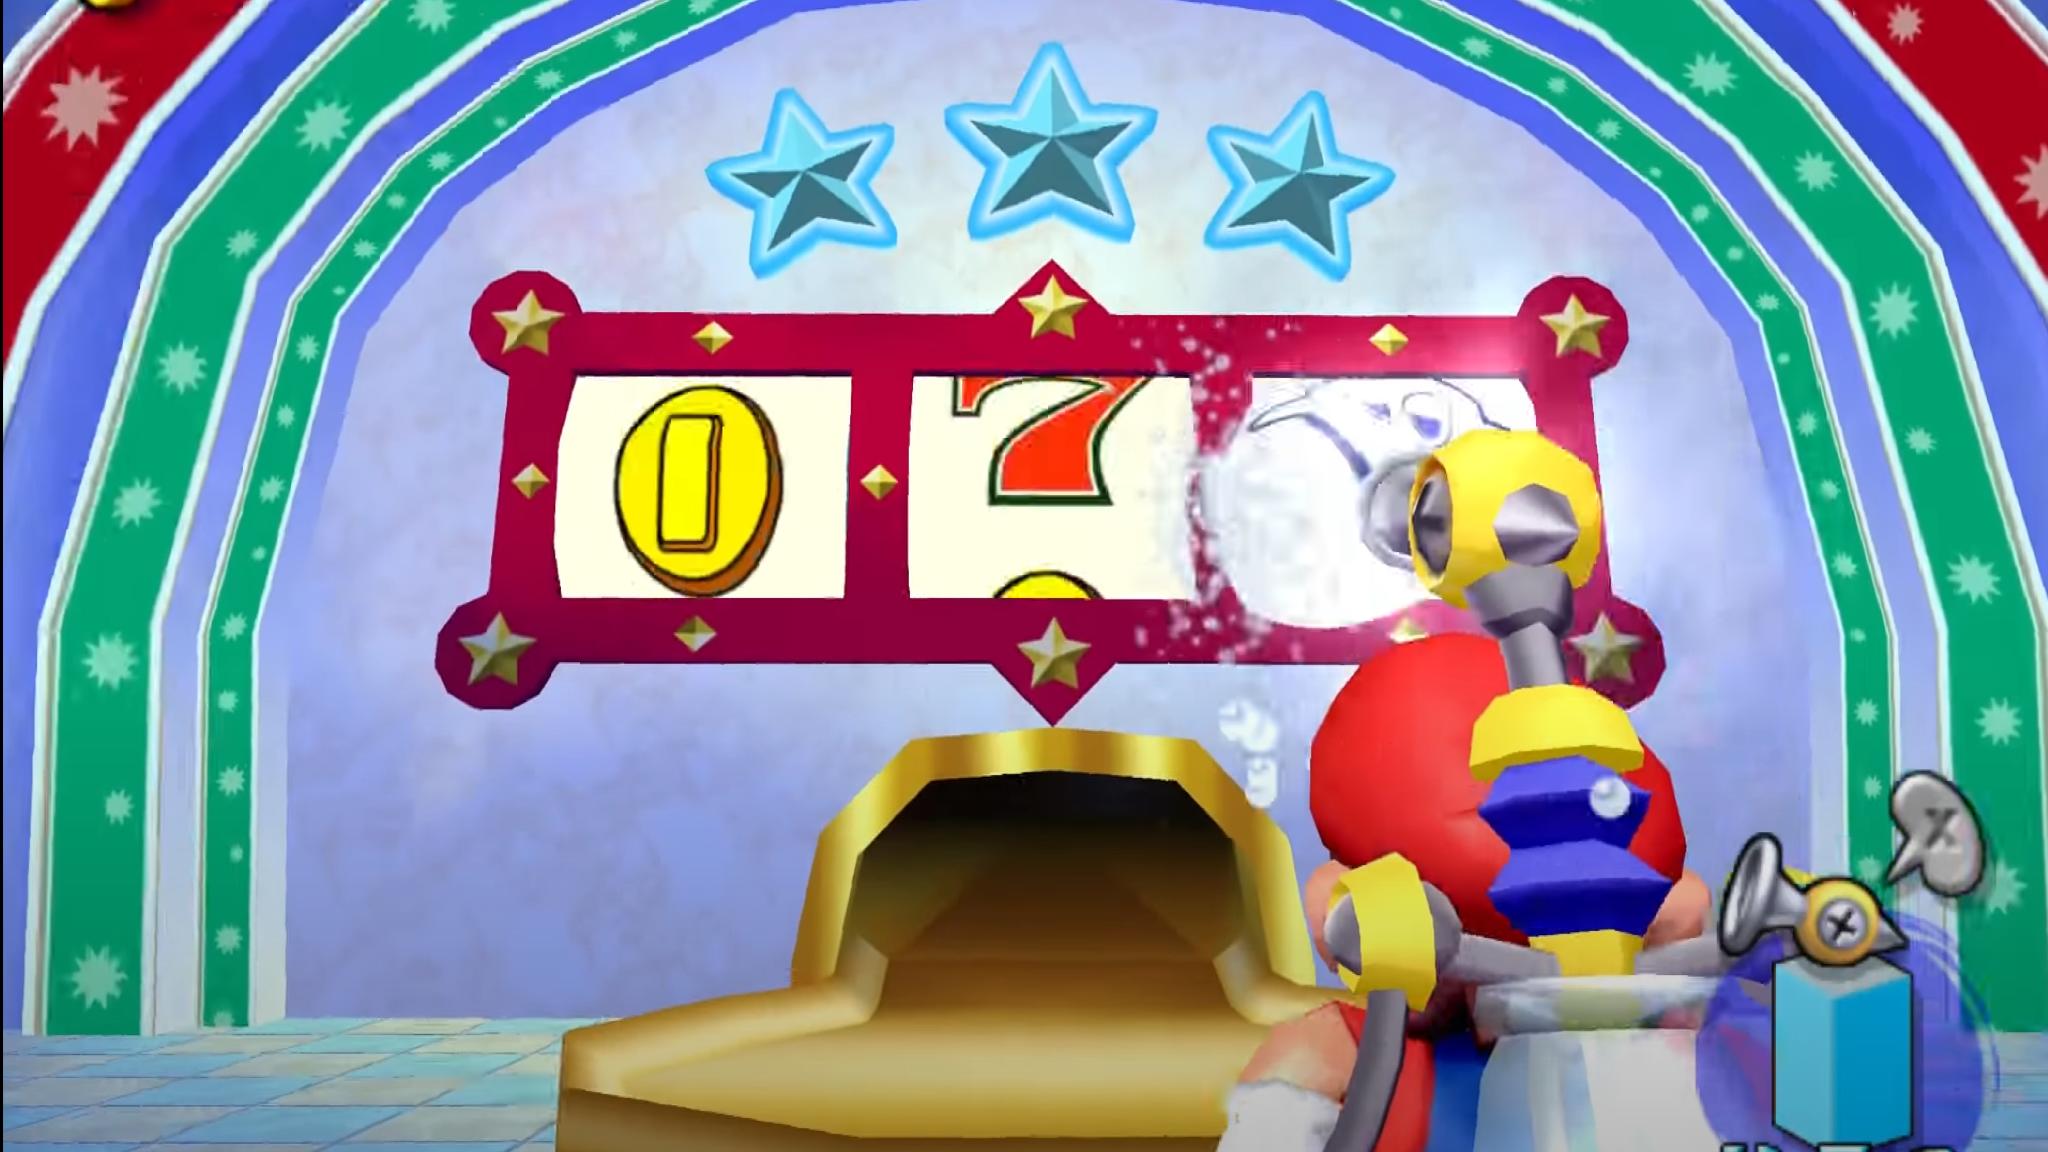
Episode 4: The Secret of Casino Delfino
Enter the hotel lobby and walk to the pink Pianta blocking a door in the lobby. Talk to him and he'll lead you into the hotel casino. On both sides, there's a slot machine to play. Shoot the panels and spin until you get 777 on both. After that, the curtain will rise in the middle and reveal a board of question marks. Spray the board until you form a picture of a Shine Sprite. Once you've done that, the board will clear away, revealing a pipe. Jump into it and watch as Shadow Mario swipes FLUDD.
This secret level might look difficult, but it's actually one of the easier secret stages. Adjust your camera and dodge the first few cubes and ride the rotating cube platform to the other size. Jump between the moving pegs, the spinning wooden block, and then ride another rotating block to your prize.
Episode 5: King Boo Down Below
Head back into the casino and ground pound the only purple panel to be brought into King Boo's lair. King Boo is easy to defeat, as he doesn't really attack you directly. Spin his slot machine, ground pounding the purple panels to temporarily stop the roulette wheel. You want to get fruit, since this is the only way to damage him.
When you eventually get fruit, pick up the chili pepper and toss it at King Boo's tongue, and then throw another fruit at him as he panics. The combination is deadly to the ghoul. Do this three times to defeat King Boo.
Episode 6: Scrubbing Sirena Beach
In this episode, you are given three minutes to clear all of the goo on the beach. Make use of the Water Barrels nearby as well as running while spraying water. You need to clear about 99% of the muck, so there's some room for error, but not much. You'll know you've reached your quota once the timer stops. When that happens, walk over the the Mayor and claim your prize.
Episode 7: Shadow Mario Checks In
Shadow Mario is back again and running through the hotel. This time, the Boos are also impersonating Shadow Mario. You'll be able to tell them apart from the real thing though. They're lacking the paintbrush and theme music. Chase him and spray him down until he gives up the Shine.
Episode 8: Red Coins in the Hotel
Step into the hotel and ground pound the red switch. This will make the Red Coins appear along with a timer. You have five minutes to collect all eight Red Coins.
- The first Red Coin is right next to where you activated the switch.
- Head through the passage in the men's toilet and jump into the upstairs room. Spray the painting next to the Pianta to reveal a Boo. Jump through and walk into the room with the Nokis to find the second Red Coin.
- Leave the room and run over to the reception desk on the floor to find the third Red Coin.
- Run upstairs to grab the fourth Red Coin.
- Grab the fifth Red Coin in the pool room.
- Head back to the first floor and check the ladies room for the sixth Red Coin.
- Go up to the top floor, into the open room near the pool room, and bounce on the bed into the vents. Go down the path on the sweeper's right-hand side, all the way to the corner room with six gold coins. Ground pound the crack and will drop into the room with the Dolphic poster. Shoot it down and grab the seventh Red Coin.
- Jump into the next room and ground pound the off-color floor panel and you'll find the final Red Coin.
The Shine will appear in the hotel lobby.
100 Coin Shine Sprite (Sirena Beach)
You will need to collect 100 coins to unlock another Shine. Here are some tips:
- Episode 3 is the best episode to use.
- Spray the flames for coins outside, then spray the flames inside the hotel, and search for coins in the pools.
- You can get more coins from lamps and other pieces of furniture in higher floors, as well as from Boos.
- Use Yoshi and start eating Boos.
All Shines in Super Mario Sunshine
- Bianco Hills
- Ricco Harbor
- Gelato Beach
- Pinna Park
- Sirena Beach
- Noki Bay
- Pianta Village
- Corona Mountain
- Delfino Plaza
- Secret Shines
Course 6: Noki Bay
Collect 20 Shines to unlock Noki Bay. When you do, a rainbow appears near the Fountain by the canal in the center of town. If Mario stands in the center of the rainbow and looks at the sun, you will be transported to Noki Bay.
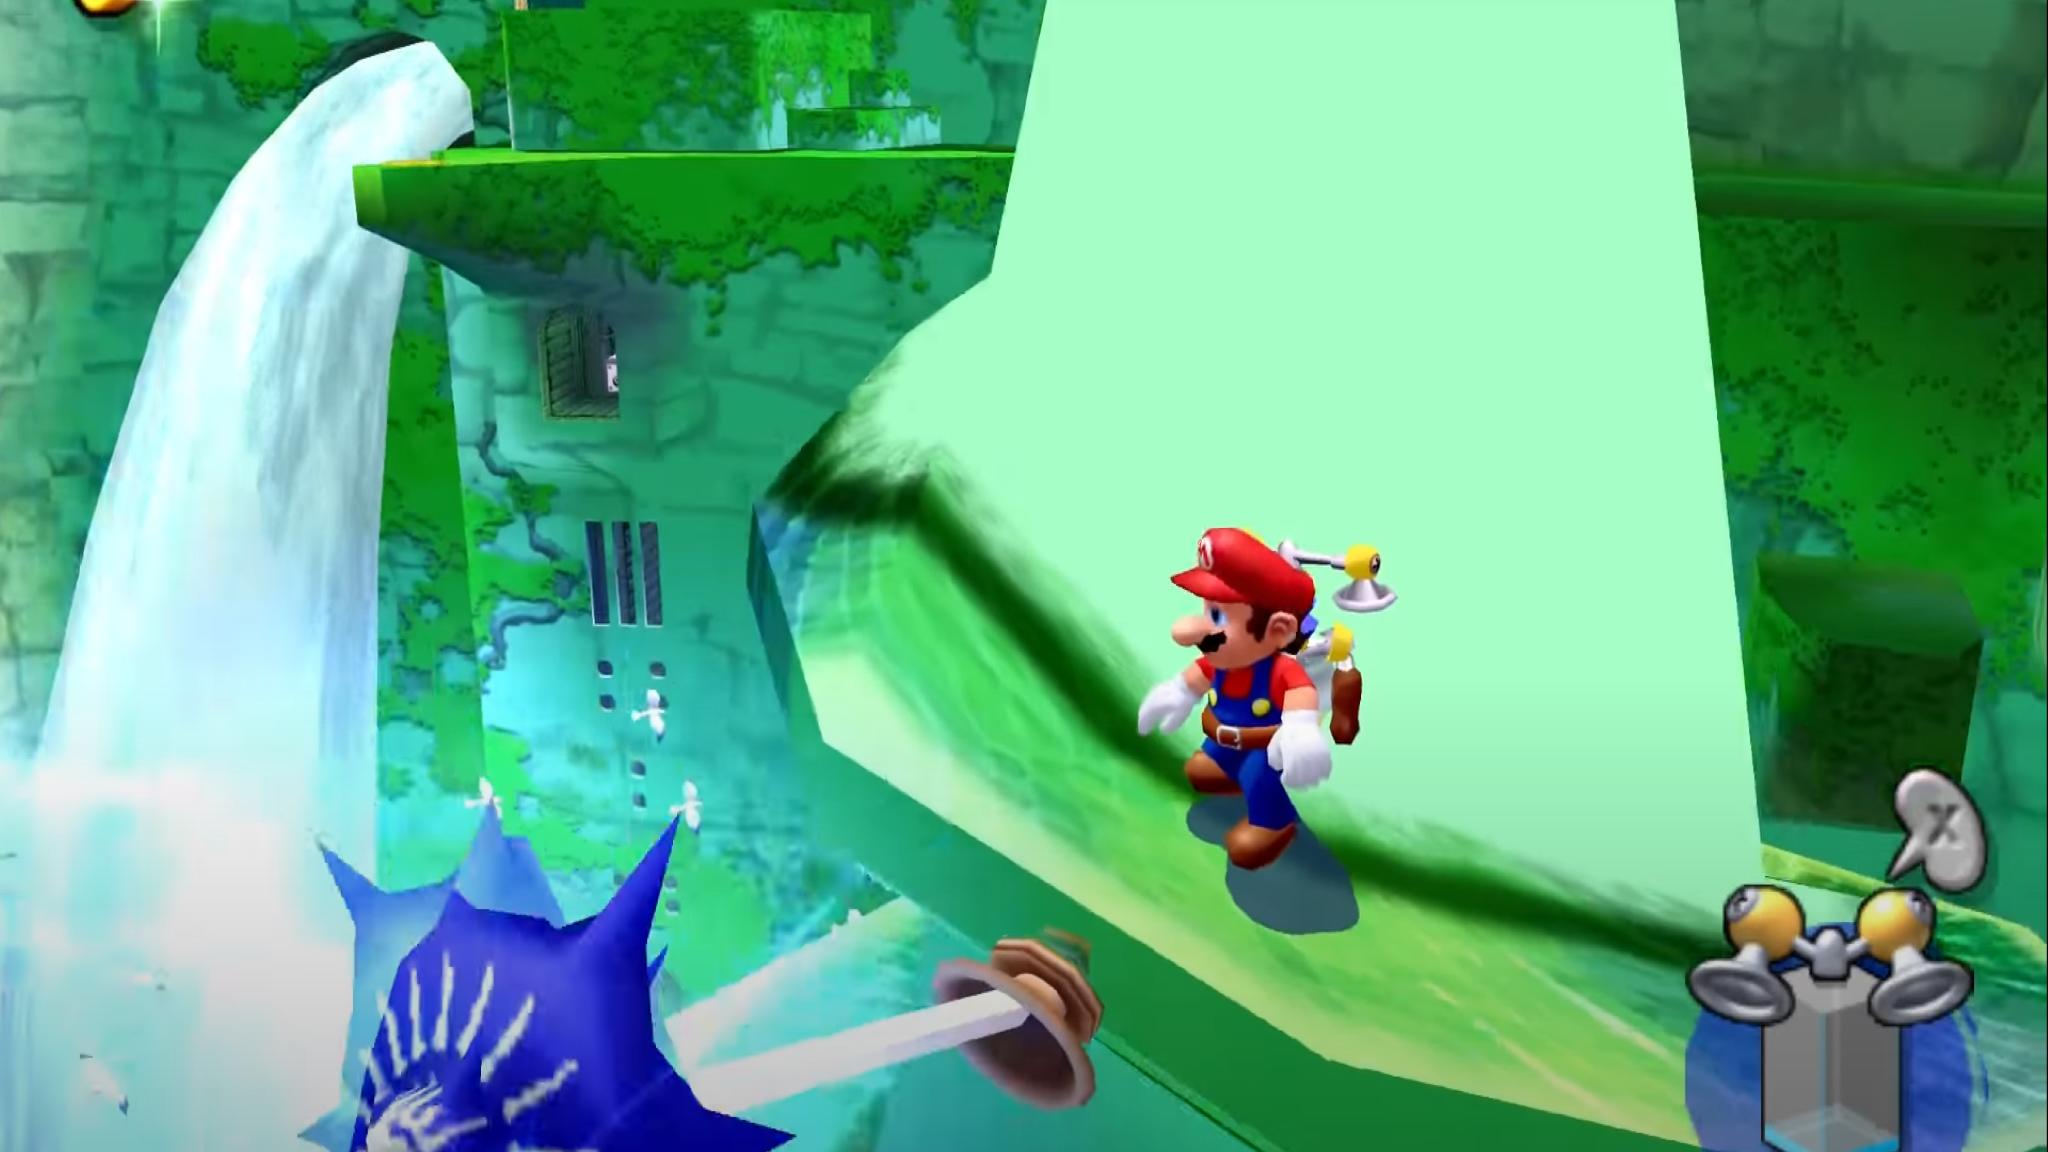
Episode 1: Uncork the Waterfall
Noki Bay has been poisoned thanks to Monty Mole corking the waterfall. He's positioned at the top of a cliff, shooting balls of colorful goop down the hill we need to climb. Hop across the water and do not fall in; the poisonous water will hurt Mario. Jump forward and around the pillar until you get to a sign and a scale. Jump onto one end of the scale and shoot water into the jug hanging across to pull yourself up.
Continue climbing up the side of the cliff, using FLUDD's hover nozzle and some careful platforming to avoid the gaps and the incoming projectiles. Follow the signs until you get to another scale. Pump water into it to get to the next level.
The following is tricky, and you must climb the wall using a combination of wall jumps and FLUDD's Hover Nozzle. The spin jump is particularly helpful here. Continue to dodge the projectiles and climb, stopping at the fresh water to refill FLUDD's tank. Monty Mole is waiting for you just ahead.
Monty fights the same as as he did in Pinna Park, though he tosses bombs at a faster rate now. Stun the bombs with a spray of water and chuck them back at Monty to unplug the waterfall and claim the Shine.
Episode 2: The Boss of Tricky Ruins
Start by jumping across the poison water, using FLUDD to avoid the fish bouncing around between platforms and speak to the Noki fisherman, who will tell you about an ancient Noki King buried nearby, He tells Mario that spraying the magic paintings on the wall will reveal a path. Take his advice and spray the painting behind him to reveal a path.
You'll have to wall jump up the wall and you only have 30 seconds, so you'll have to move fast. Wall jump to the right, and then the right again. Once you're out of the course, spray the smaller bloopers away and spray the next painting. Follow the path to the end and you'll find your old friend, Gooper Blooper.
Gooper Blooper is more aggressive this third time around but fights the same way it has the pass two rounds. Remove his arms, dodge the smaller bloopers, and spray his face until you can pull the cork out of his mouth. Try removing the center two tentacles if Gooper Blooper is giving you too much trouble. Pull his snout one more time and the squid will be defeated.
Episode 3: Red Coins in a Bottle
At the start of the level, Mario will be greeted by the same Noki that has been helping him the last few episodes. He claims that he knows how to solve Noki Bay's water problem, but he needs Mario to practice, so he sends him into a bottle. Hmph, ok.
Important to remember that Mario will slowly lose oxygen while he's underwater. If you find yourself low on oxygen, grab a coin to restore Mario's supply.
- The first one is right in front of you when you start. Switch to hover mode and jet forward to get it.
- The second Red Coin is in the middle of the water.
- If you turn after collecting the second coin, you'll spot two Red Coins very close to each other, as if they are marking out a path for you to follow.You've got the third and forth coins!
- On the floor near the edge of the bottle by the sign, you'll find the fifth Red Coin.
- Head to the column of yellow coins (a sign with an arrow pointing up is nearby). When you step near the sign, Mario gets shot up by a forceful current. At the top of a row of Gold Coins, you'll find the sixth coin.
- Look for the castle at the bottom of the bottle. The seventh Red Coin is outside of the castle on a small rock.
- The final coin is inside the small room on top of the castle.
Once you've collected all 8, the Shine is yours.
Episode 4: Eely-Mouth's Dentist
The episode starts with a Noki telling you that his Grandpa is waiting for Mario at the top of the waterfall. He gives Mario a helmet, as well. Take the rope shortcut back to the cliff you climbed when you were battling Monty Mole earlier. You'll find the Noki at the top who will explain that the waterfall has clear a way into the bay and that the poison is coming from an eel underneath. Jump down the waterfall to enter Eely's domain.
Once you're underwater, you'll be greeted by four glowing lights in the depths of the ocean. Eely will start shooting toxic purple bubbles at you. Dodge them as you approach. When you're close enough, Eely will reach out, revealing his rotten mouth. Shoot his plaque ridden teeth with FLUDD's stream of water to clean them. You'll know you're done when Eely's tooth is sparkling.
Because you're underwater, Mario will slowly lose oxygen as the fight continues. If you find yourself getting low, swim to the sides and collect Gold Coins to replenish your health and oxygen. Dodge the poisonous bubbles coming from Eely's mouth and clean every tooth, until it's satisfied.
Episode 5: II Plantissimo's Surf Swim
Thanks to your work in the previous episodes, the water in Noki Bay is now back to normal and has begun to bring back tourist, like II Plantissimo. Take the shortcut rope up to Plantissimo and talk to him to accept his challenge.
The flag is behind you, towards the area where you met the Noki grandpa in Episode 2. This race isn't too hard, as it turns out Plantissimo is a better runner than he is a swimmer. Jump back down into the water after him and make use of the platforms to stay ahead of him. It shouldn't be too difficult to best him on this level. Once you defeat him, the Shine is yours.
Episode 6: The Shell's Secret
You'll have to get up to the portal in the conch shell to enter the secret stage. The only way up there is to follow the ropes. Avoid the electric enemies and bounce your up to the top, using FLUDD's Hover Nozzle to keep you from over or under shooting your jumps. Jump into the conch shell and say bye to FLUDD.
This is one of the toughest secret stages. Wall jump out of the starting area, and then jump across the spinning and rotating platforms, Triple jump (or if you're feeling lucky, wall jump) to the platforms moving in and out of the wall. Jump across and climb up the pole to get to the next level. Walk over the tight rope and bounce to the platform with the nails sticking out. If you miss your jump, it's all over.
The next jump is very tricky as you need to wall jump at an angle up to the next level. You'll have to do it one more time across a bigger gap. Instead of wall jumping directly across, try to aim for the ledge that closest to the wall you're jumping off of.
If you make it to the top, you'll have to move across the rotating logs, and then a tower of spinning platforms. Once you get passed those two obstacles, the only thing left to cross is one spinning wooden platform that's rotating at an angle. Don't forget to jump at the end and you'll land on the red platform where the Shine resides.
Episode 7: Hold it, Shadow Mario!
This episode like all of the other Shadow Mario episodes. Shadow Mario is a master at wall jumps, so remember if you can't keep up, you can always spray him from after. Hit him enough times and he'll call it quits.
Episode 8: Red Coin Fish
At the start of this episode, you'll once again be greeted by the Noki who tells you to visit his grandpa at the top of the waterfall. Head up there using the rope as a shortcut and once you're at the top, dive back into the bay, back into the area where you fought Eely Mouth.
The Red Coin fish will break apart and reform again, making collecting the coins a pain. Wait for the fish to reform into one unit and try and grab as many Red Coins as you can in one swoop. Once you get all eight, the Shine is yours.
100 Coin Shine Sprite (Noki Bay)
You will need to collect 100 coins to unlock another Shine. Here are some tips:
- Use Episode 6 for the most coins.
- There's 50 over the water just behind your starting position.
- The rest of them can be filled by checking various tunnels.
- Use the gold button switch at the top of the waterfall where Monty Mole was.
All Shines in Super Mario Sunshine
- Bianco Hills
- Ricco Harbor
- Gelato Beach
- Pinna Park
- Sirena Beach
- Noki Bay
- Pianta Village
- Episode 1: Chain Chomplets Unleashed
- Episode 2: II Plantissimo's Crazy Climb
- Episode 3: The Goopy Inferno
- Episode 4: Chain Chomp's Bath
- Episode 5: Secret of the Village Underside
- Episode 6: Piantas in Need
- Episode 7: Shadow Mario Runs Wild
- Episode 8: Fluff Festival Coin Hunt
- 100 Coin Shine Sprite (Pianta Village)
- Corona Mountain
- Delfino Plaza
- Secret Shines
Course 7: Pianta Village
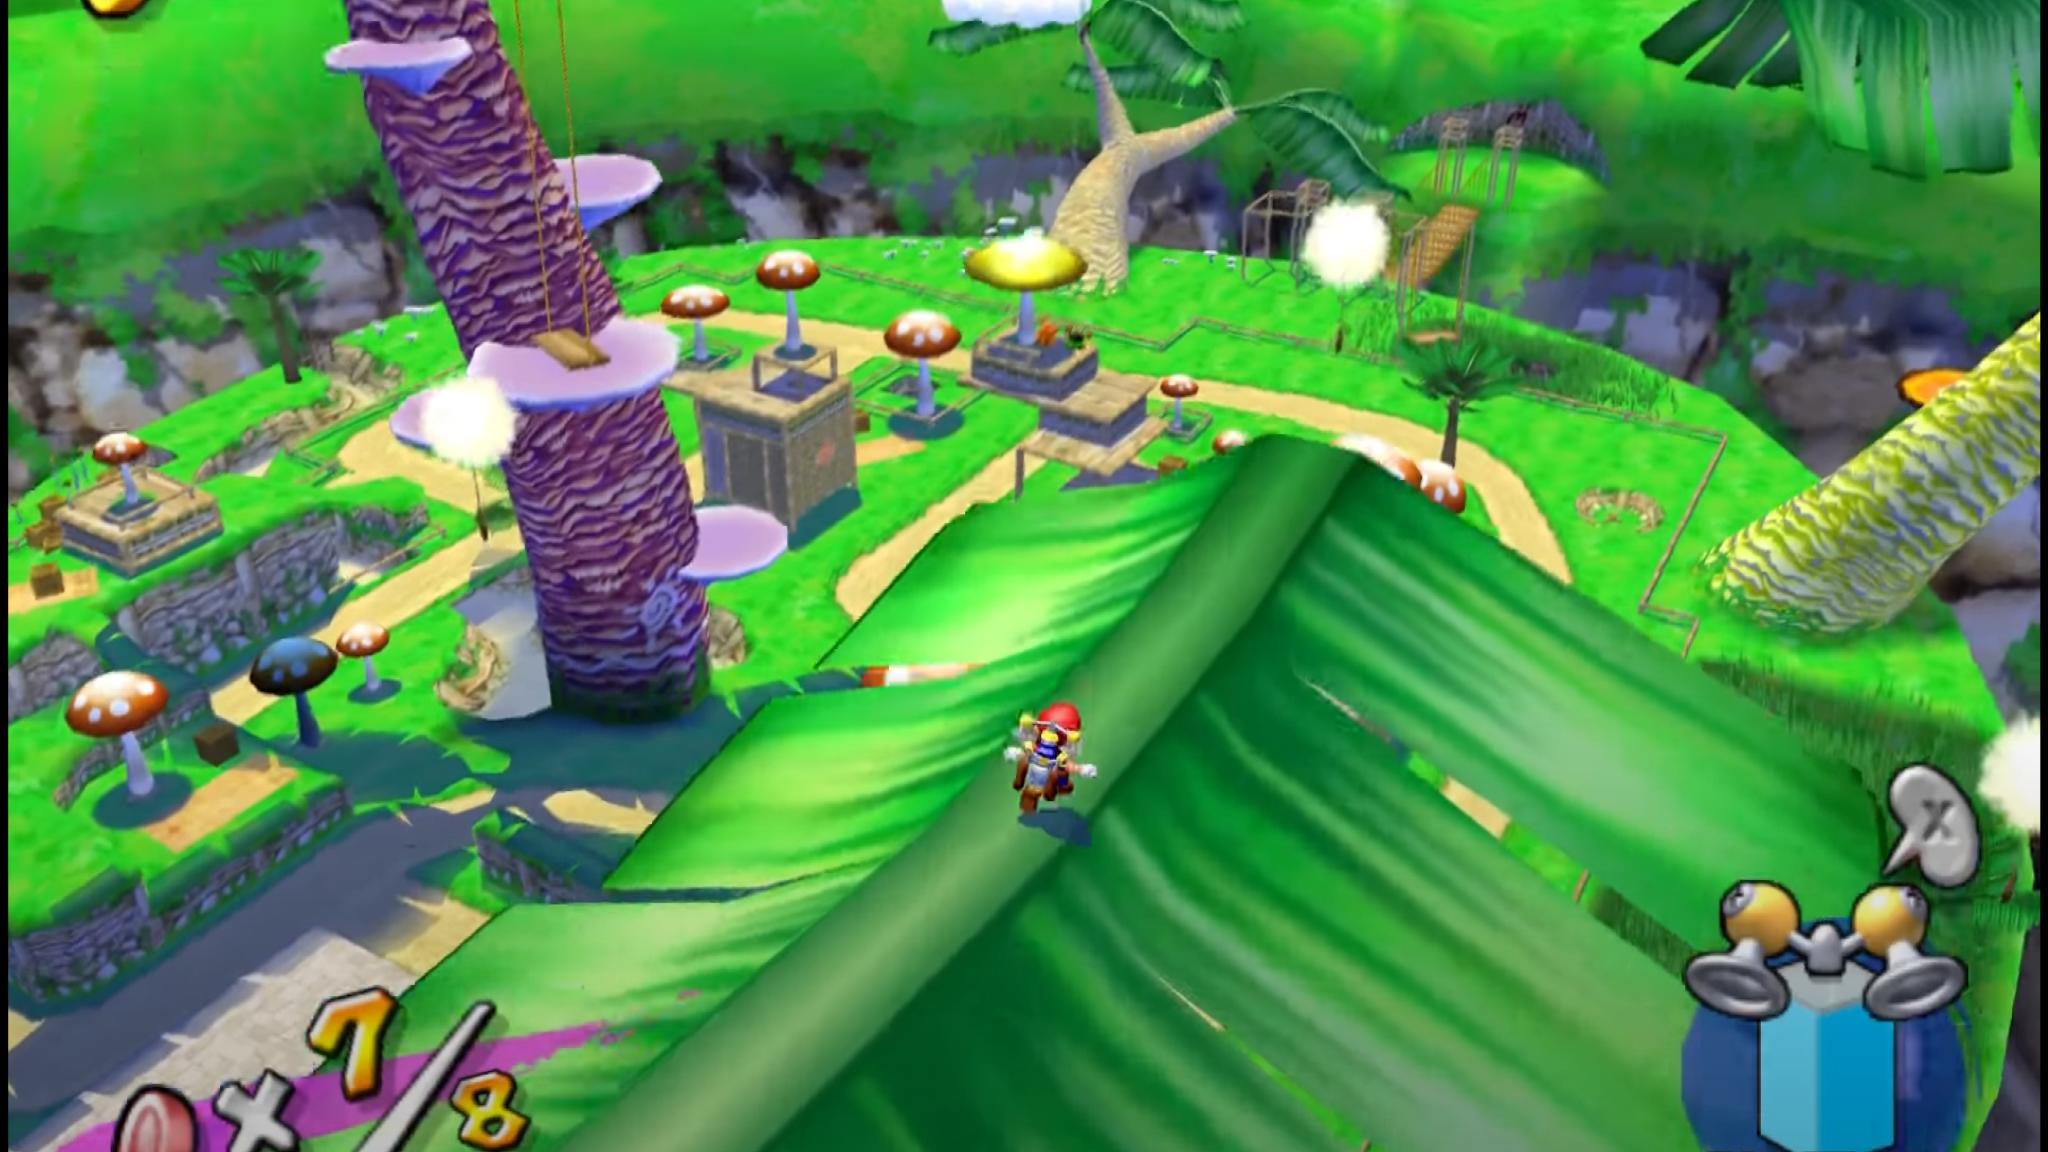
Pianta Village is actually unlocked from the start of the game and can be entered through a pipe on top of the Shine gate. However, it's incredibly difficult to reach without the help of the Rocket Nozzle.
Episode 1: Chain Chomplets Unleashed
Poor Chain Chomplets have become overheated and are making a mess around the village, smearing fire goop everywhere they go. Pianta Village is big and maze like, so make a bee line towards the center of the village where you'll find a cool, refreshing body of water. You'll have to send the Chain Chomplets here to cool them off.
The Chain Chomplets bounce around town aimlessly. They don't attack, but the goo they leave behind will set Mario on fire. Use FLUDD to cool the Chain Chomplets down temporarily, and then grab their tails and snap them towards the water. Once all three Chain Chomplets are in the wayer, you'll get the Shine.
Episode 2: II Plantissimo's Crazy Climb
II Piantissimo will challenge Mario to another foot race acrpss the village and up a palm tree. The trick to winning this race is Mario's belly slide. Since the paths are wide and slide like, you should have no problem guiding Mario down one of the paths. Once you reach the end of the village, hop over the fence, and run up the palm tree. Best his 30 second time and you'll nab another Shine.
Episode 3: The Goopy Inferno
This level starts with Mario getting FLUDD snatched. It's almost like secret stage, though you have to recover FLUDD. There are two ways to get through this stage. The first is to head to the far side of the island and find the large hole that'll lead you to the underside of the villag. You'll have to navigate a maze that will eventually lead you to FLUDD.
The second, more unorthodox approach is to go around the village and find the stream of water. Swim into the area where you threw the Chain Chomplets and use the water droplets that fall off of Mario to clear a path to FLUDD. This requires Mario to jump in and out of the water quickly. It's a bit cumbersome but a lot faster than navigating the underside of the village. Once you've cleared enough of the goo, you should be able to safely jump over to the area where FLUDD has been dropped.
Once FLUDD has ben recovered, hop onto the golden mushroom, and wash the goo off of the mayor. He'll thank you and give you a Shine as a reward.
Episode 4: Chain Chomp's Bath
This village seems to have a Chain Chomp issue. Instead of dealing with three Chain Chomplets though, you'll have to contend with one giant one. There's a bath waiting for the Chain Chomp on the other side of the Village, so you'll have to do you best to get it there.
You can't snap the Chain Chomp like you could snap the Chain Chomplets. Instead, you pull on the Chain Chomp's chain and drag it to where you want to go, but you can only do so once the Chain Chomp has been cooled down. Lead the Chain Chomp down the left side of the village, spraying him down and adjusting his path if he starts to stray.
For the most part, let the Chain Chomp do the heavy lifting and bounce toward the tub. When he starts hopping by, spray him down and drag him into the tub. He'll thank you with a cool Shine.
Episode 5: Secret of the Village Underside
To get to the secret, you'll need Yoshi's help. Thankfully, you'll find a new Yoshi Egg waiting at the other end of the bridge that leads into the village. There's a tree near the back of the village that has one of ever fruit in its branches. Grab what Yoshi is craving and take it back to hatch the egg.
Head back to the start and jump down to the mushrooms growing underneath the village. Yoshi's flutter jump should make jumping across the mushrooms a breeze. Follow the trail of mushrooms until you make it to the end. Use Yoshi's juice to wash away the orange paint and hop in.
You'll lose FLUDD again but you'll be joined by a bunch of Piantas who want nothing more than to Toss Mario. Just keep in mind that the Chucksters toss Mario in the direction he is facing. It's pretty straightforward after that. Get tossed around enough and you'll find your way to the Shine
Episode 6: Piantas in Need
This level task Mario with finding 10 Islanders trapped under fire goo in three minutes. All of the islanders are on the ground level, so just circle the village and look for the rippling spots. That's where the villager is hiding. Be sure to clean them off 100% before moving on. You'll know you're done when they start cheering and sparkling.
Be sure to chat with the saved villagers afterwards, 8 out of the 10 will offer a blue coin for saving them. Head back to the Mayor once the villagers have been saved and claim your prize.
Episode 7: Shadow Mario Runs Wild
Shadow Mario is back in town, and it's time to give him chase. You know the drill; follow him and spray him with water, and you'll be rewarded with a Shine.
Episode 8: Fluff Festival Coin Hunt
The fluff festival is in full effect in Pianta Village and giant tufts of dandelion are blowing through the air. Hidden amongst the fesitvities are 8 Red Coins.
- Go under the village and follow the path of mushrooms, much like you did in episode 5. Find the nearest piece of grating that runs vertically and climb up and onto the horizontal grating. Run around that and grab the first Red Coin.
- Head back up top and cross the bridge. Turn right, and climb up the giant palm tree. The leaf hanging over the bridge has the second Red Coin.
- The third Red Coin is hanging out under a regular sized palm tree on the left hand side of the village.
- The fourth Red Coin is in the fruit tree.
- Cross over to the hot spring where you gave Chain Chomp a bath. Grab the fifth Red Coin that's in the water.
- Head out of the bath tub and towards the back of the map. Just under the massive palm tree is the sixth Red Coin. Watch out for the bee hive nearby.
- Make a left from the bath tub until you find a stack of crates. Break through them and find the seventh Red Coin.
- Head back to the giant palm tree near the bath tub and climb up its trunk. Jump into one of its massive leaves and leap over to the palm tree in the middle of the village. Run up the leaves and you'll see the final Red Coin in the center.
The Shine will appear on a nearby cloud. To get to it, grab a dandelion tuft and gracefully float over to the cloud.
100 Coin Shine Sprite (Pianta Village)
You need to collect 100 coins to earn a Shine Sprite. Here are some tips:
- Episode 5 is the best level to use for this.
- Use Yoshi to knock down bee hives for coins, and then eat the bees for some more.
- Yoshi can eat the Wind Duppies for 3 coins.
- Ground pound the Pianta Statues nose for coins.
All Shines in Super Mario Sunshine
- Bianco Hills
- Ricco Harbor
- Gelato Beach
- Pinna Park
- Sirena Beach
- Noki Bay
- Pianta Village
- Corona Mountain
- Delfino Plaza
- Secret Shines
Final Course: Corona Mountain
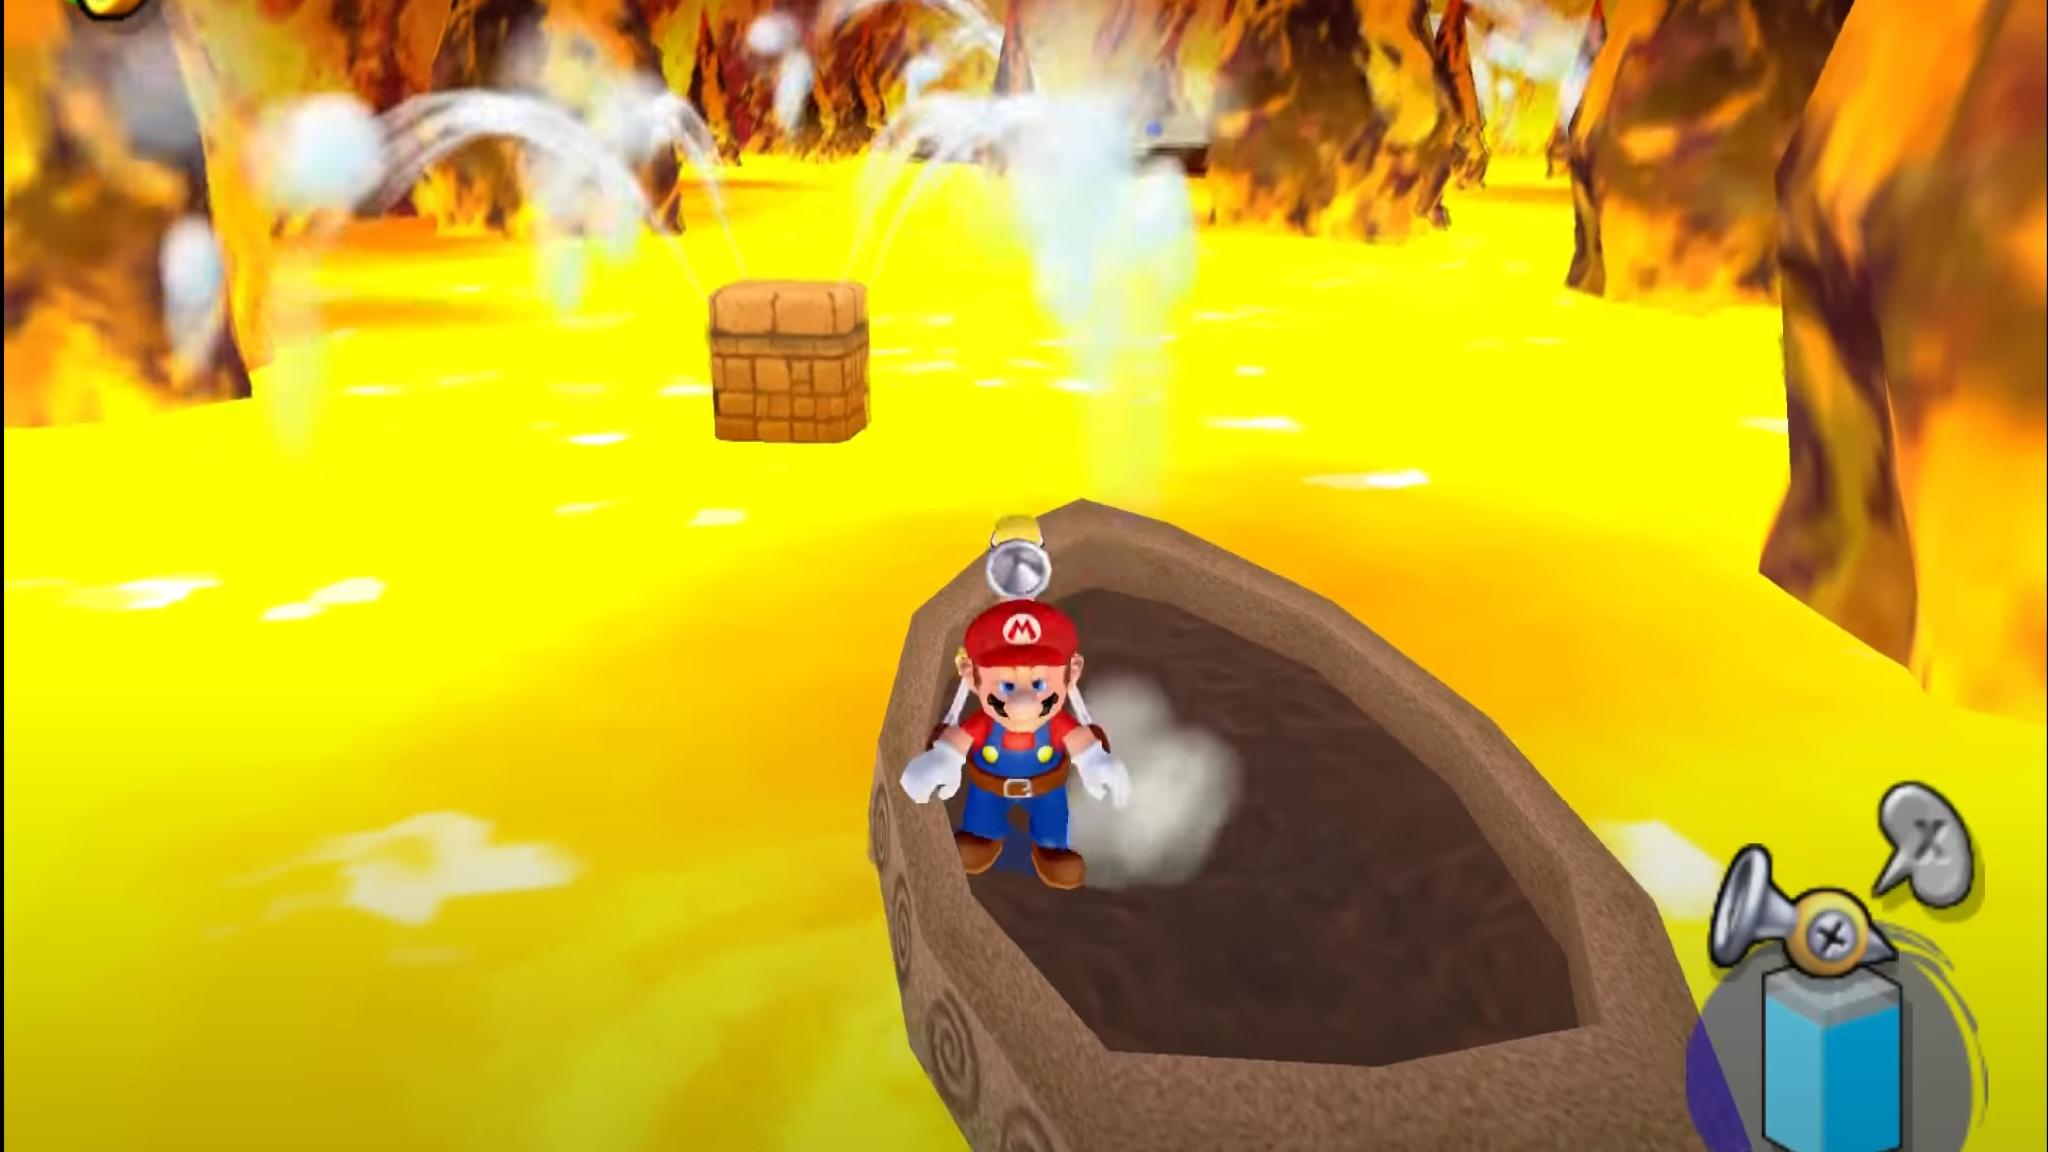
Corona Mountain is the final stage in the game and can be accessed once Shadow Mario has been defeated in every level. When you re-enter Delfino Plaza, you'll discover that the whole place is flooded. Shadow Mario is waiting for you in front of the entrance to Corona Mountain. Race over and follow him into the opening of the mountain.
The lava and spikes in Corona Mountain will kill Mario instantly if he touches them, so be careful. Make strategic use of FLUDD's Hover Nozzle and dodge the spikey platforms. Spray the flaming platforms with water to cool them. Continue to hop across the platforms until you make it to the solid ground again. Use the sprinkler to replenish FLUDD's water tank and break the crate nearby to net another 1-Up Mushroom. The next portion will see Mario steering a small boat to get to the other side.
Shoot FLUDD's water in short, controlled burst to steer the boat. If the boat touches anything, it'll sink. Shoot a stream directly ahead of you if you want to come to a stop. Once you clear the pillars in the lava, ditch the boat and hop onto solid ground. Grab the Rocket Nozzle out of the Red Nozzle Box for the final portion.
Using the Rocket Nozzle, shoot yourself up and land on the clouds as you get higher and higher, The Rocket Nozzle uses a lot of water, so make sure every jump counts. Once you make it to the black Cloud, you'll discover Bowser and Bowser Jr. relaxing in a hot tub with Princess Peach.
Bowser's floating hot tub has five points marked with a flame. Run around the tub and rocket blast over the marks and crack them with a super ground pound. Doing so will rock the tub and that corner will begin to come apart. Quickly jump back to safety and repeat four more times. Once you defeat Bowser, you'll earn a Shine, and the end game credits will roll.
All Shines in Super Mario Sunshine
- Bianco Hills
- Ricco Harbor
- Gelato Beach
- Pinna Park
- Sirena Beach
- Noki Bay
- Pianta Village
- Corona Mountain
- Delfino Plaza
- Secret Shines
Delfino Plaza

Delfino Plaza is the hub world that Mario uses to connect to the different courses on Isle Delfino. As you progress through the game, more activites become available.
Shines available from the start
The First Airstrip Shine
You get this Shine at the start of the game after defeating the first Polluted Piranha.
Beach Treasure
If you head east towards the beach, you'll notice sparkling on the beach. Spray it with some water and a Shine will emerge.
The Slide Mini-Game
You'll find a pipe east of the lighthouse. Jump in and you'll end up in a short stage where you have to slide down a series of ramps. It's pretty easy to get down safely, if you stick to the left side of the slide. If you time your jump as soon as the red section ends, you can skip a section. During the last part, move to the gray block in the middle and carefully slide down the thing beam. Once you've cleared that, the Shine is yours.
The First Dirty Bell
Jump onto the top of the building with the orange flag and then aim spray water at the bell to start cleaning it. After you've totally cleaned, a Shine will appear. To get the Shine, take the manhole that runs along the west side of town. It'll take you right to the building
Shines available after unlocking Bianco Hills
The Box Smashing Mini Game #1
The door near the canal area by the Shine Gate is now open. Once inside, you have 30 seconds to smash all the boxes in the room. It's as simple as that.
The Box Smashing Mini Game #2
After you complete the box smashing mini game the first time, leave and reenter. The boxes are stacked a little higher the second time around, but you should be able to use the spin jump to get to the top of the taller boxes.
Chuckster on the Roof
Head to the Northwest corner of town and head to the roofs. Find a roof with a weathervane and a Pianta sitting nearby. For the low, low price of one coin, he will chuck you to the top of the tower along the west side of town right next to a Shine Sprite.
Shines available after unlocking Gelato Beach
The Pachinko Mini Game
Ride on the boat that runs from the town to the small island with the fruit basket Pianta. When the boat passed under the bridge, you will notice a single gold coin underneath. Jump up and use FLUDD to hover into the hole and you'll enter the infamous Pachinko course.
This is a level that is entirely frustrating, much like the real game. Shoot up the trampoline to collect the first tree red coins, but you'll need some luck and patience to gather the remaining red coins. Holding left after the launch steers you left and holding right pushes your further to the right. Holding nothing will send you close to the middle. If you miss completely, you'll get shot out of the stage and lose a life.
Use FLUDD to try and steer you into the correct platforms. When you collect all eight, you'll have to fall in the center to collect your prize. Just be careful — you can still die even if you unlock the Shine.
100 Coin Shine Sprite (Delfino Plaza)
Getting 100 coins is easy in Delfino Plaza. Here are some tips.
- Head through the tunnel network and collect all of the coins you can find.
- Spray wanted posters, green birds, hanging signs, and open windows for coins.
Shines available after unlocking Pinna Park
The Gold Bird
Head to the island off of the east beach, where there is a blocked pipe. You'll notice that there is a small, gold bird flying around. Shoot it with water and reveal a Shine. Shines available after unlocking Yoshi.
The Lily Pad Mini Game
Getting to this mini game requires a couple of steps. First, hatch a Yoshi and find your way to the island with the fruit basket Pianta. You can either take the boat or the manhole tunnel. Once you're there, wait for the next boat which will take you to a metal structure south of the island. Eat some fruit while you wait and catch the final boat to your destination. Wash the orange goop off with Yoshi's juice and jump down.
This is a very difficult shine to get. You must collect all the red coins laid out before you. They're out in the open and you should have no problem finding them. Collecting them is another matter. Use short, controlled burst to slow the lily pad down so you can collect the red coins. The last coin in the current requires a jump. If you end up letting the lily pad go by, you can try to balance yourself onto the edges of the slide. Collect all the Red Coins and you'll get the Shine.
Shines available after unlocking the Turbo Nozzle
Turbo Nozzle Fun
Equip the Turbo Nozzle and fire yourself toward the building to the left of the Pianta statue. It's the building with the Yoshi Egg on the roof. Blast through the doors and you will find a Shine.
The Water Slide Mini-Game
Using the Turbo Nozzle, break through the doors of the police station to be transported to a long water slide. Line up straight down the middle and blast away on your Turbo Nozzle. Time your jumps just a little bit early, and you should make the jumps with no problem. The Shine is waiting at the end. Shines available after unlocking the Rocket Nozzle
Shines available after unlocking the Rocket Nozzle
The Lighthouse
Use the Rocket Nozzle and shoot up to the light house and you'll see a fire symbol on top. Rocket again and ground pound it to find a Shine.
Cleaning the Shine Gate
Use the Rocket Nozzle to blast to the grassy ledges behind it and then again to get up close. Hose it down and rocket up again to the top of the Shine Gate to claim your prize.
Cleaning the Second Bell
There's more cleaning to do! Rocket up to the second bell and shoot it with water. When it's clean, you'll earn a Shine.
The Tall Grass Mini Game
Head to the northwest shore and notice the palm trees sticking out of the wall. Rocket up to one at the end, and you'll find a pipe. In this mini game, you'll have to find the Red Coins hidden in the field. Switch the camera to an overhead view so you don't wander
Most of the Red Coins found on this level are within something. Save the flaming Pianta to earn a Red Coin and defeat the two Pokeys and two Yunbos to get 4 more Red Coins. There's one Red Coin in the form of a red bird that perches on the tallest block in the area. Finally, you'll find one red coin in the put by the watermelon block and the final coin is sitting on top of a brown block. Once you collect all 8, the Shine is yours.
Shines available after you beat the game
The Second Airstrip Shine
After Shadow Mario floods Delfino Plaza, there will be a Pianta in a boat that will offer to take you to the airstrip for 10 coins. Do it and you'll be able to return to where you started the game.
To get the Shine here, grab the Turbo Nozzle, hit the red switch, and blast through the building for the first red coin. Follow the coin path around the airstrip to pick up the rest of the Red Coins. Grabbing all the red coins will make the Shine appear.
All Shines in Super Mario Sunshine
- Bianco Hills
- Ricco Harbor
- Gelato Beach
- Pinna Park
- Sirena Beach
- Noki Bay
- Pianta Village
- Corona Mountain
- Delfino Plaza
- Secret Shines
Secret Shines
These are secret Shine Sprites found in each of the games 7 main course. There's two in every level.
Bianco Hills Secret Shines
The Hill Side Cave Red Coins
Start Episode 8 and go back to the cave that led you to the secret stage before. This time, you'll be able to keep FLUDD. Instead, you'll be tasked with collecting eight Red Coins before the time runs out.
- On the second moving platform at the start.
- On the bottom right corner when you get to the moving orange blocks.
- On the top right corner when you get to the moving orange blocks.
- On the bottom left corner when you get to the moving orange blocks.
- On the top left corner when you get to the moving orange blocks.
- On the spinning star to the right of the blocks that are circling the platform. Use FLUDD to get over.
- On the star right next to the sixth coin.
- On the spinning star to the left of the blocks that are circling the platform. Use FLUDD to make the jump.
The new Shine will appear right in front of the old one.
Red Coins of the Dirty Lake
Head back to Episode 6 and towards the back of the dirty lake. Back in the secret stage, you'll need to ground pound the red switch and collect the 8 Red Coins in 1:30 to get another Shine.
- The first Red Coin is floating in between the flipping platforms.
- The second Red Coin is on the spinning star.
- Another Red Coin is between the two red triangles.
- Ride the rotating cube and you'll run into the fourth Red Coin.
- Keep riding and the fifth Red Coin will make an appearance.
- The sixth Red Coin is waiting in the top left corner. Jump on the blue panel to get it
- Head to the middle and grab the seventh Red Coin
- The final Red Coin is in the bottom right corner, opposite of the sixth coin.
Head over and collect your prize.
Ricco Harbor Secret Shines
Blooper Speed Run
Replay Episode 2 and if you can get a better time than 40 seconds in the Blooper race, you'll earn another Shine.
Red Coins of Ricco Harbor
Head back to Episode 4 and head to the top of the tower at Ricco Harbor. When you reenter the secret stage, ground pound the red switch and start the time.
- The first Red Coin is on the second rotating wooden block.
- The next Red Coin is hoveringabove the fourth rotating wooden block.
- Wall jump between the gray walls to collect the third Red Coin.
- Wall jump between the gray walls to collect the fourth Red Coin.
- The fifth Red Coin is float above the second rotating cog.
- The sixth Red Coin is floating above the second tilted wooden block.
- Continue hopping along the wooden blocks to get the seventh Red Coin.
- The final Red Coin is on the second to last wooden block.
The Shine is all yours.
Gelato Beach Secret Shines
Dune Bud Sand Castle Red Coins
Replay Episode 1 and enter the sandcastle that leads to the secret stage. Run through the first row of sand blocks and trigger the red switch. You have one minute to grab all of the Red Coins.
- The first Red Coin appears on the next row of sand blocks.
- The second coin is up ahead on the orange block.
- The third Red Coin is at the end of the sand block path.
- The fourth Red Coin is on the lower left-hand corner on the orange blocks.
- The fifth Red Coin is on the lower right-hand corner on the orange blocks.
- Red Coin six is right in the middle, hovering above set of orange blocks.
- Climb up and to the orange block on the right for the seventh Red Coin.
- On the opposite end, you'll find the last coin.
After that, the Shine is yours.
Dune Bud Secret
Replay Episode 8 and head over to the reflective panels. Find the sprout in between the panels and spray it with water, which will create a staircase leading down. Spray the wall at the bottom to reveal a Shine.
Pinna Park Secret Shines
The Beach Cannon's Red Coins
Head back to Episode 2 and back into Monty Mole's cannon. Once inside, stomp on the red switch on the Yoshi block. You have a minute to collect all eight Red Coins.
- The first Red Coin is immediately to the left.
- Red Coin two is toward the center nearby.
- The third Red Coin is at thelower right-hand corner.
- Red Coin four is in the center towards the top.
- The fifth Red Coin is at the top right corner.
- Red Coin six is at the top left corner.
- The seventh Red Coin is at the top of the next level after you bounce up the trampoline pads.
- The final coin is right down the path of disappearing red blocks.
With that, the secret Shine is all yours.
The Yoshi-Go-Round's Red Coins
Replay Episode 5, and reenter the secret stage using a orange Yoshi. Once inside, jump pass the rotating blocks and ground pound the red switch. This time you have two minutes to collect all of the Red Coins.
- The first Red Coin is on the left side, underneath the dark green arch.
- The second Red Coin is right next to it, under the blue arch.
- Wall jump between the orange blocks in the next section to get Red Coin three.
- Red Coin four is right by coin three.
- The fifth Red Coin is on the brown block at the top.
- From here, you'll be able to see the sixth Red Coin underneath an orange block.
- Red Coin seven is right across from it.
- The final Red Coin is hovering in the corner. Jump on the orange block and ride it up to collect it.
Be careful not to fall as you run over to collect the secret Shine.
Sirena Beach Secret Shines
The Hotel Lobby's Red Coins
Go back to Episode 2 and reenter the secret stage. Head through the first part as you normally would. Once you break passed the brown blocks, you'll find the red switch. Ground pound it and start the timer. You'll have 1:30 to collect all of the Red Coins.
- The first Red Coin is at the start.
- The next Red Coin is just ahead of it.
- The third Red Coin is floating about the next set of sand blocks.
- The fourth Red Coin is floating about the watermelon block.
- Red Coin five is underneath the ice cube blocks near the back of the block structure you're standing on. Jump down, using FLUDD to make sure you don't miss it.
- The sixth Red Coin is floating above the sand structure as soon as you jump off of the wooden cog.
- Red Coin seven is to the right on the bottom row.
- The final coin is on the opposite side.
The Red Coins of Casino Delfino
Return to Episode 4 and head back into casino. Play the games and get access to the secret stage again. Time is short on this run — you'll have one minute to collect all of the Red Coins once you press the red switch.
- The first Red Coin is between the two moving cubes.
- The next Red Coin is floating over the moving block. Ride the block and jump up to grab it.
- Red Coin three is between the moving cubes in the next area
- The fourth Red Coin is floating over the rotating cube.
- Red Coin five is floating above the moving wooden pegs.
- The sixth Red Coin is on the following peg.
- Red Coin seven is on the following peg.
- The final coin is floating above the rotating wooden block
Noki Bay Secret Shines
The Shell's Red Coins
Head back to episode 6 and reenter the special stage through the shell. Make it pass the first few obstacles and smash the red switch to start the timer.
- The first Red Coin is floating near the switch.
- The next Red Coin is between the two moving platforms.
- The third coin is floating near the pole you climb to get to the next level. Jump from the wall or wall jump to collect it.
- Red Coin four is on top of the red ramp.
- Red Coin five is between two nails, right next to the green glass.
- The next coin is floating on the next level.
- Red Coin seven is floating right before the spinning wooden block.
- The final coin is on the opposite end of the wooden block.
Gold Bird of Noki Bay
Enter any of the episodes that have clean water to get this Shine. From the start, head to the area where the grandpa Noki told you about the ancient king's treasure. Head to a green arch and wall jump between the walls. You'll jump into a secret path. Follow the path to another opening. When you jump into the new opening, you'll be shot up to the top of the cliff, with nothing but a tree and a gold bird. Spray the bird to get the shine.
Pianta Village Secret Shines
Red Coins of the Village Underside
Head back to Episode 5 and enlist Yoshi's help again to get back into the secret stage. Once in the stage, hit the red switch and start the timer.
- The first Chuckster will throw you through the first Red Coin.
- The next Chuckster will be kind enough to toss you to the next Red Coin.
- Red Coin three is on the next platform.
- The fourth Red Coin is right next to it.
- Turn around and hover to the rope behind the platform. Grab the fifth Red Coin in the middle.
- Red Coin six is between the flaming Pianta.
- Use the Chuckster to get back to the main course and jump across to nab Red Coin seven.
- Jump up one more level and grab the final coin.
And with that, the Shine is yours.
Brighter than the Sun
Replay Episode 8 and head to the giant palm tree in the back of the village (the one you ran to when you raced II Piantisimo. Use FLUDD to hop onto the giant palm tree leaf and towards the tower with the emblem of the sun on it. You'll know it because a Red Coin is sitting on top of it.
Stand on the emblem and aim FLUDD at the sun. Spray it down and the Shine is yours.
All Shine Sprites in Super Mario Sunshine
Wahoo! You did it! Now you know where and how to acquire every Shine Sprite in Super Mario Sunshine. If you want help with Super Mario 64 or Super Mario Galaxy, we have guides for those games as well.
Three classic Mario adventures
Super Mario 3D All-Stars
$60 from Best Buy
$60 from Amazon
$60 from Walmart
Revist these classics
Experience Super Mario 64, Super Mario Sunshine, and Super Mario Galaxy wiith higher resolutions and presented in widescreen.
Get More Switch
Nintendo Switch