
Here’s how to use your iPhone’s built-in tools to make photos stand out
- nov
- 07
Adjust light and color in the Photos apps right on your iPhone with these simple steps.
The Photos app lets you customize and make adjustments to your pictures with a simple swipe or tap. Thanks to the Auto Enhance feature, that is the magic wand, you can change the saturation of your photos, turn them into black and white, or revert them back to the original. All these tools can help you turn your normal pictures into amazing photos that are worthy of putting on your digital frame. All that right on your iPhone or iPad. Here's how you can adjust light and colors in the Photos app!
How to enhance images in Photos on iPhone and iPad
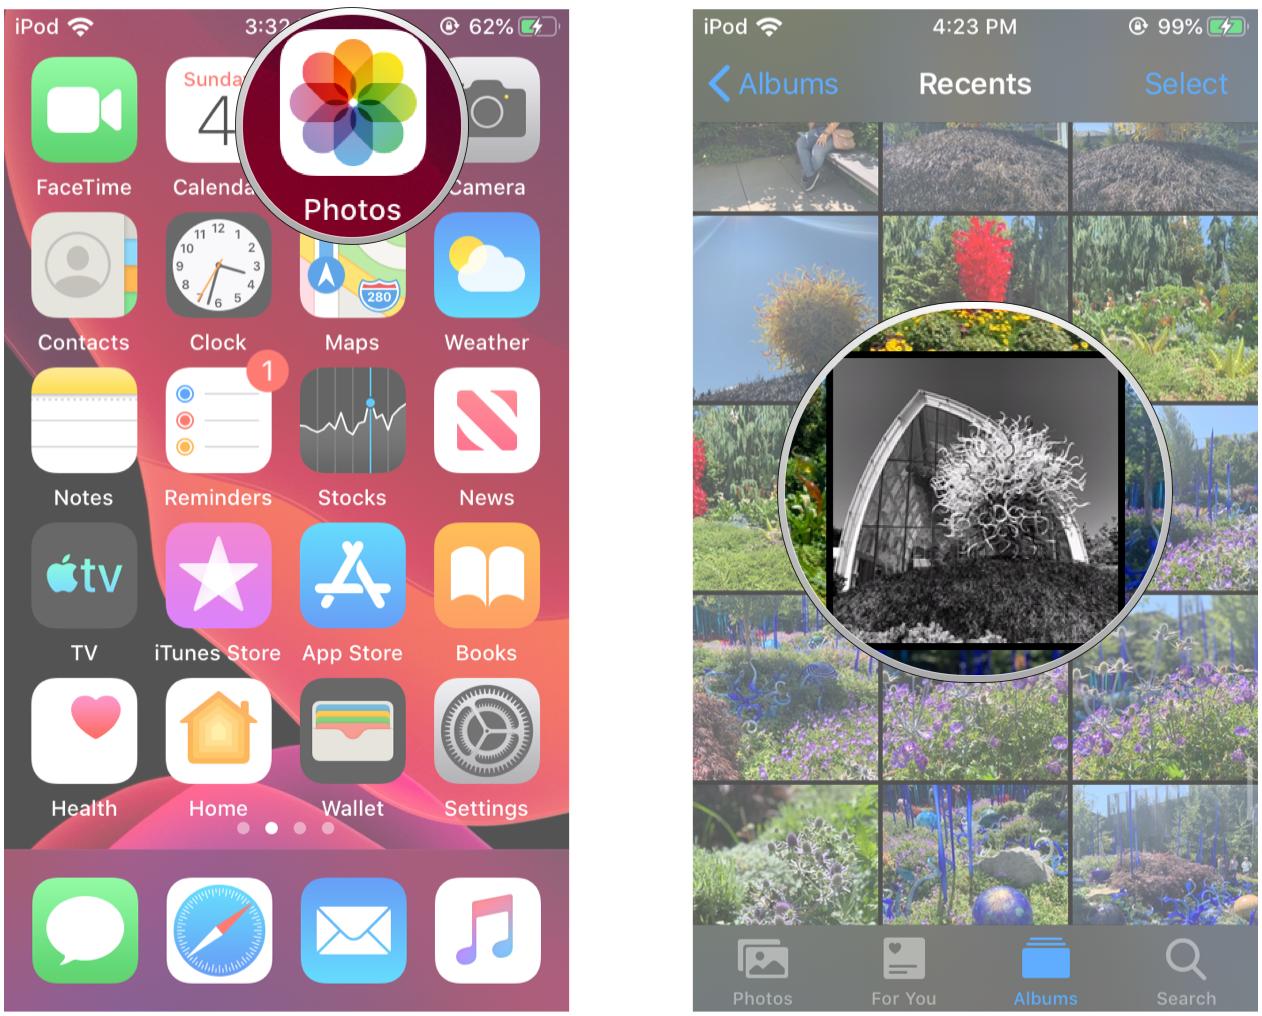
- Launch Photos on your iPhone or iPad with iOS 13.
Find a photo you want to enhance and tap to open it.
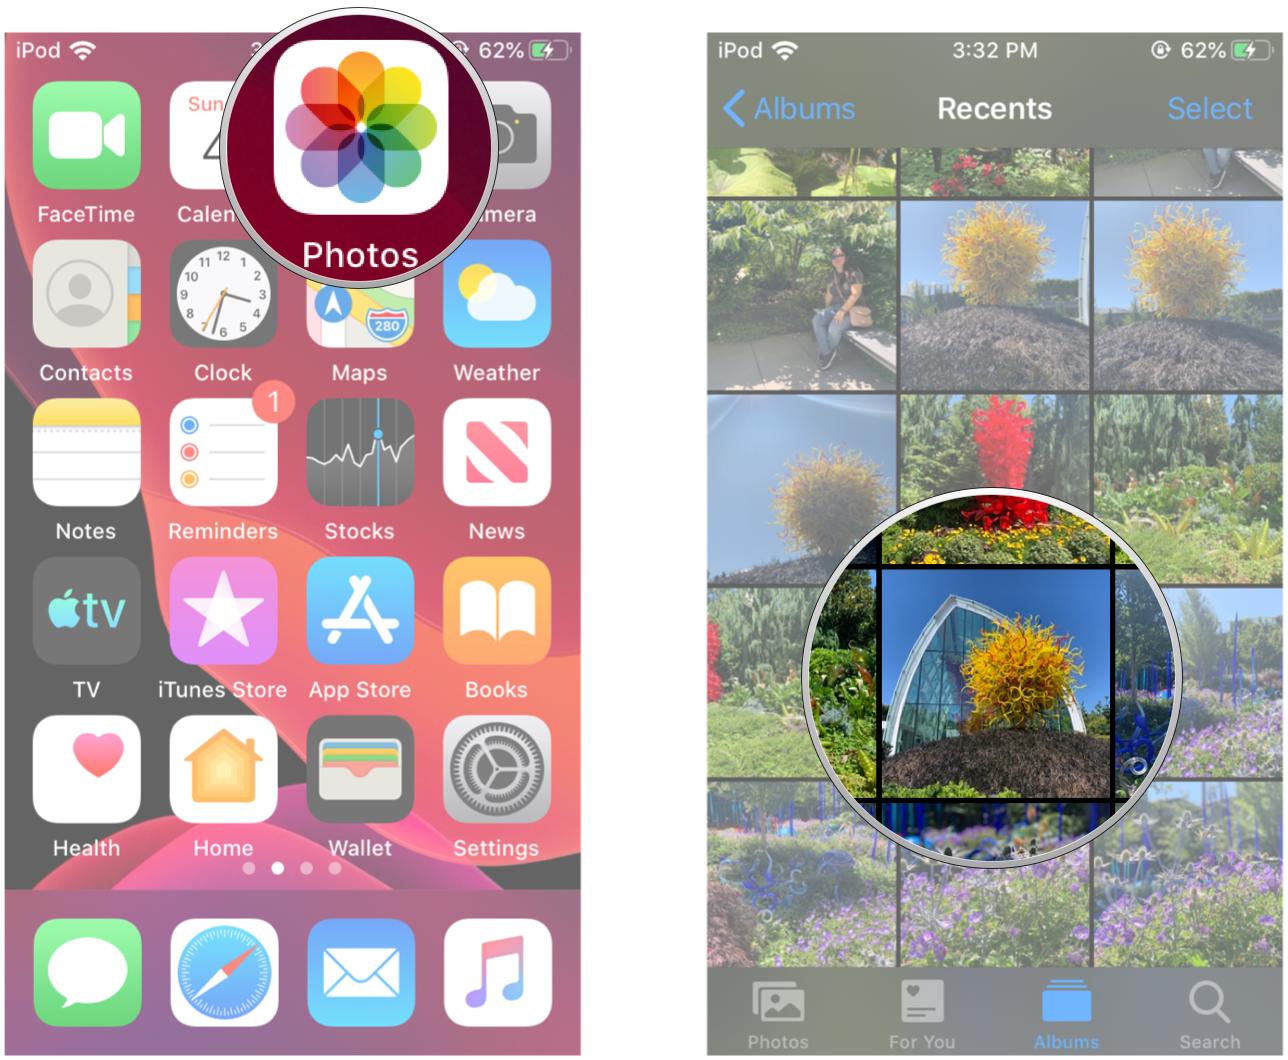
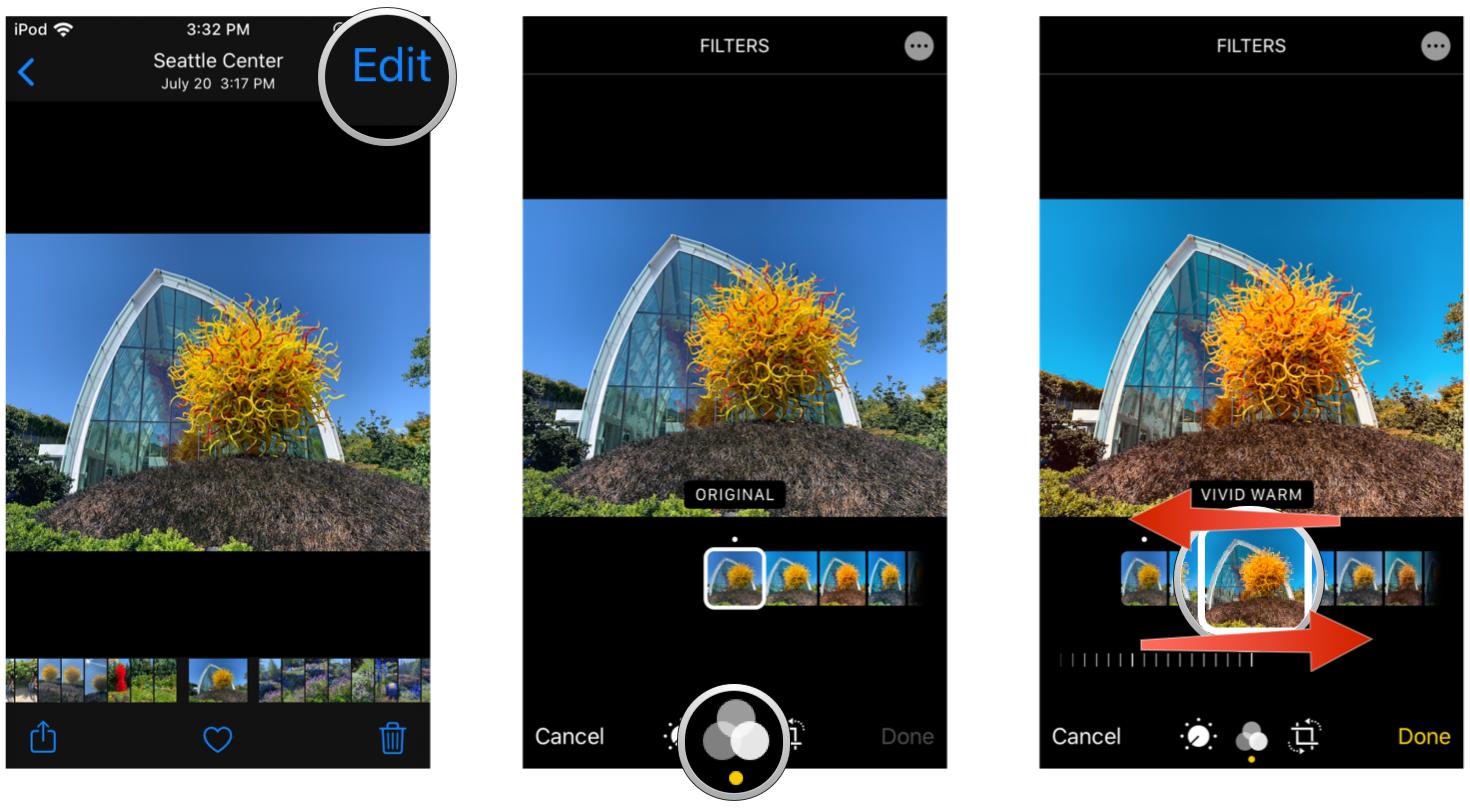
Tap Edit in the upper right corner.
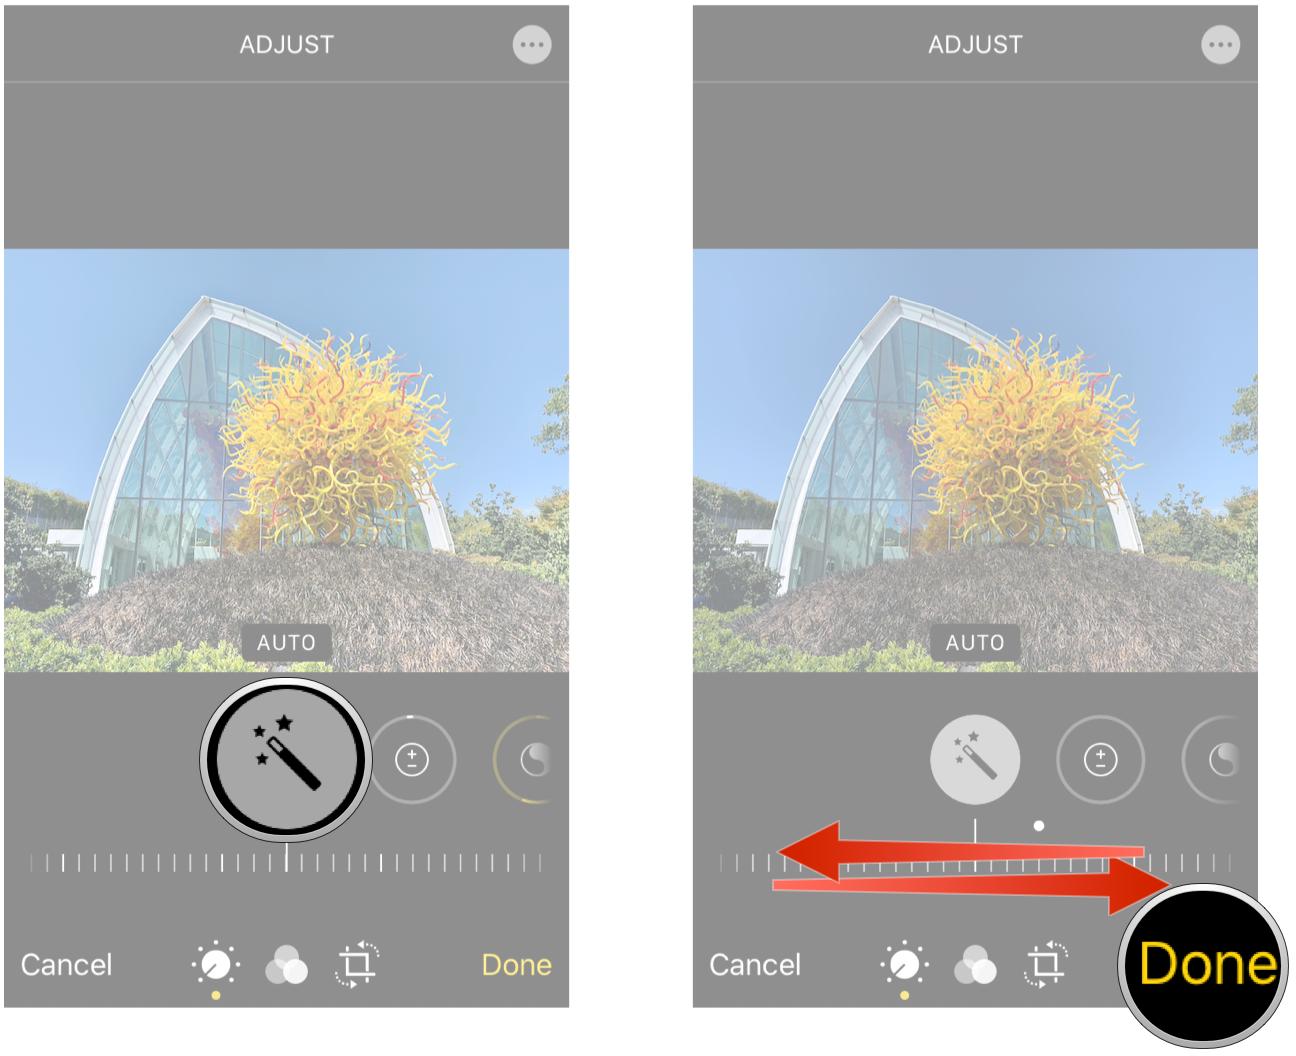
Make sure you're in the Lighting section (dial with dots around it) and then tap the Auto-Enhance button (it looks like a magic wand).

You can slide the dial at the bottom to adjust the intensity of the Auto-Enhance feature. This adjusts other aspects automatically.
Tap Done in the bottom right corner once you are satisfied with your changes.
How to change the lighting in your photos on iPhone and iPad
- Launch Photos on your iPhone or iPad.
Find a photo and tap it to open it.

Tap Edit in the upper right corner.
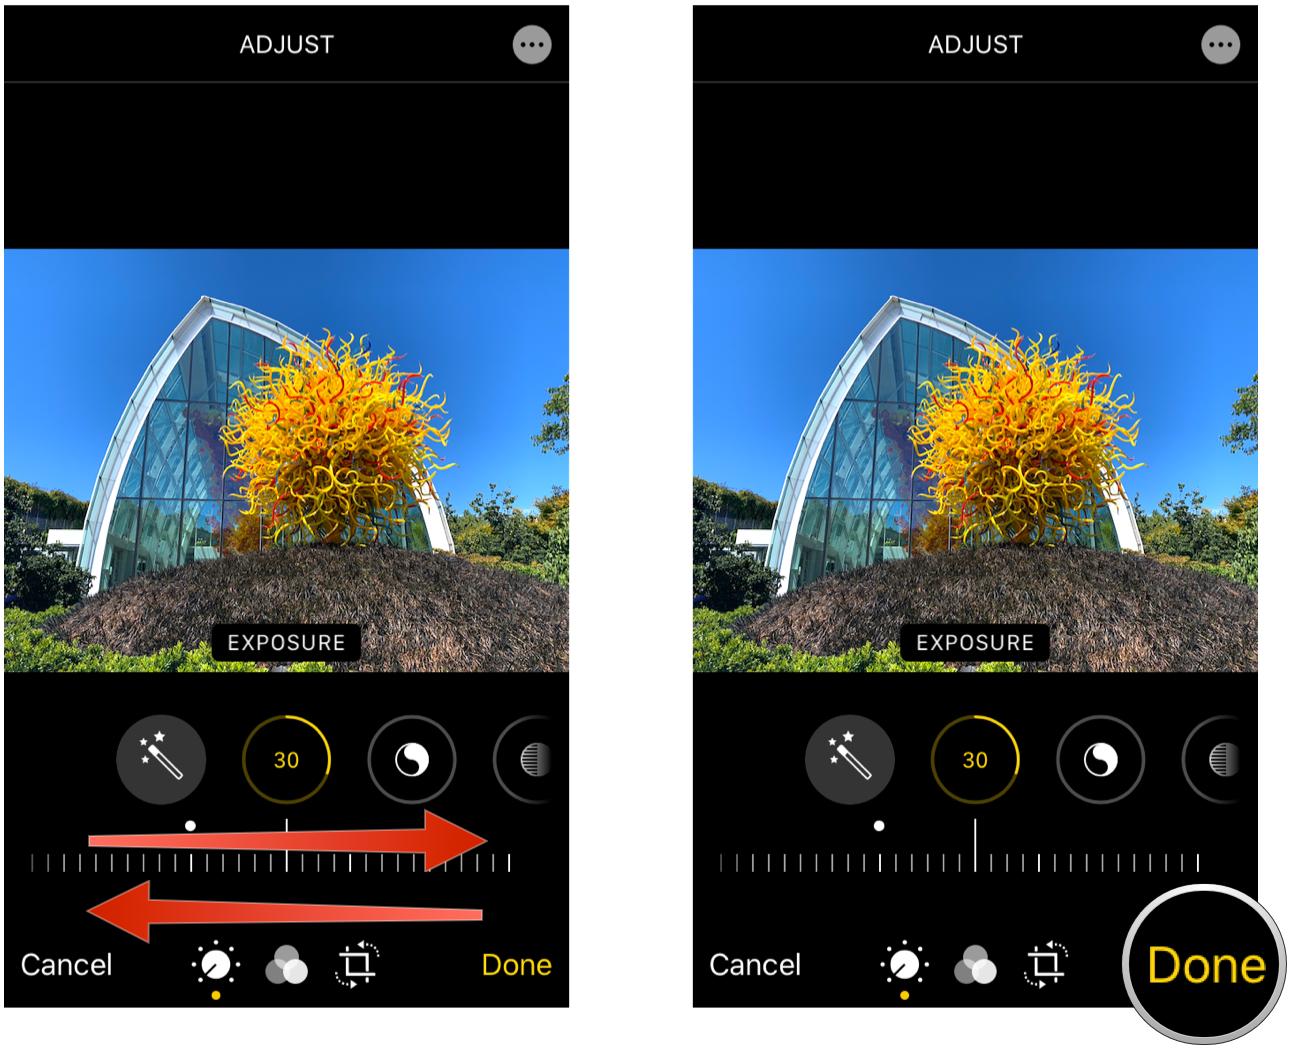
Tap the Lighting button in the bottom menu bar (it looks like a dial with dots around it).
Swipe horizontally through the different lighting aspect categories and tap the one you want to adjust.
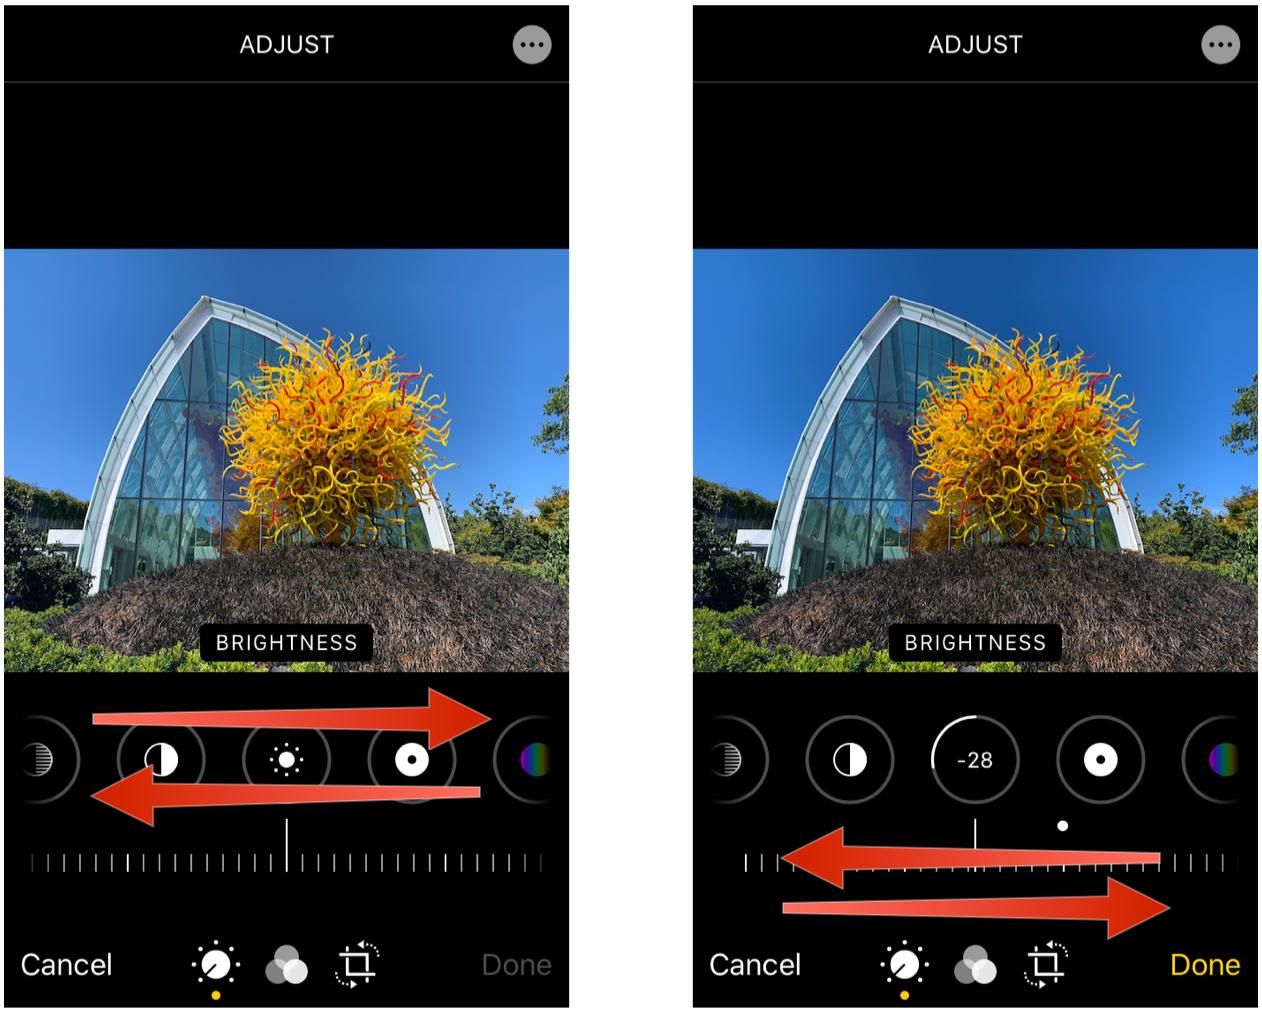
For each adjustment you want to make, slide the dial at the bottom left to right for a weaker or stronger effect.
Tap Done in the bottom right corner to save your changes.
How to change color in your photos on iPhone and iPad
- Launch Photos on your iPhone or iPad.
Find a photo and tap it to open it.
Tap the Edit button.
- Tap the Color button in the middle of the bottom menu bar.
Swipe left and right to find a color filter that you like — it is applied on your image in real-time.
If you want to make more adjustments to color, tap on the Lighting button (dial with dots around it) at the bottom menu bar.
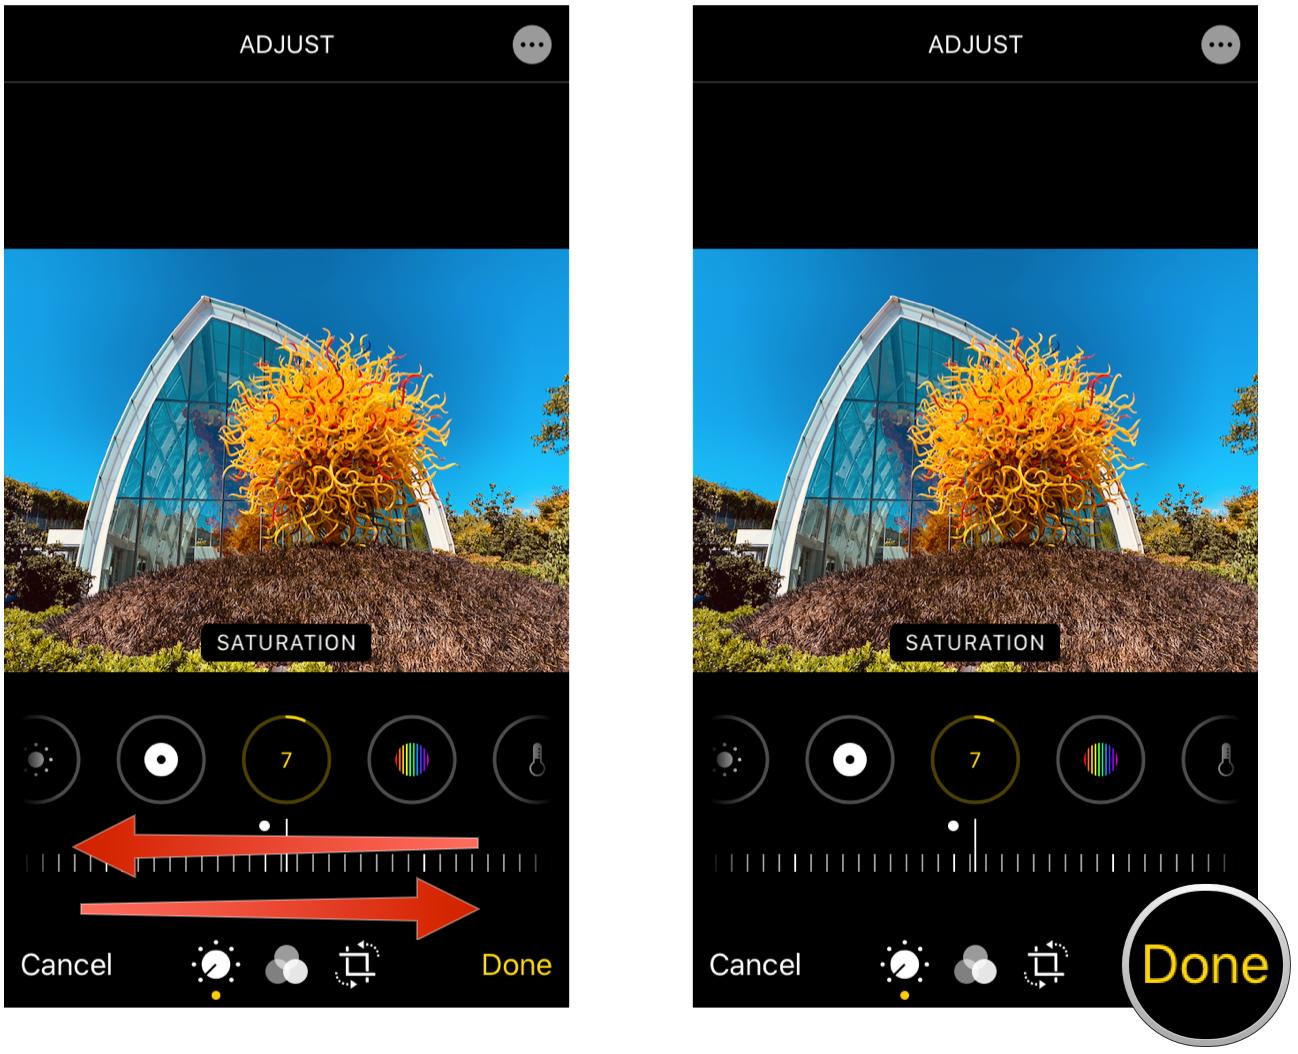
Swipe until you find Saturation, Vibrance, Warmth, and Tint.
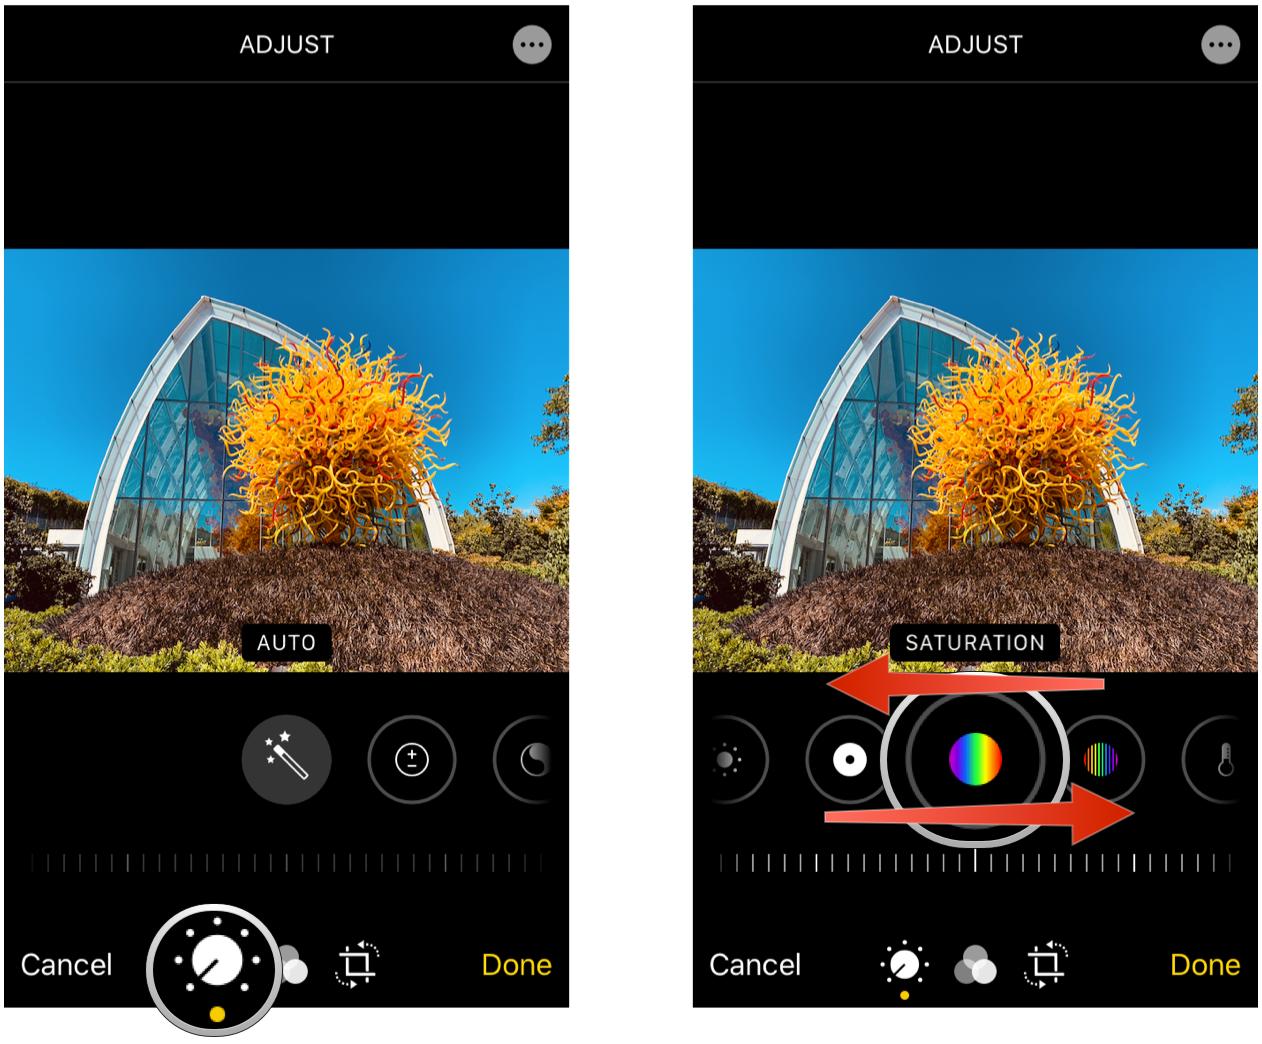
Adjust the dial on these until you're satisfied.
Tap Done in the bottom right corner to save all changes.
How to convert photos to black and white in the Photos app
Previously in iOS, there was an option to smartly convert your photo to black and white. Like the lighting and color smart adjustments, the black and white option is no longer available. However, you can change it to B&W through filters on iOS 14.
- Launch Photos on your iPhone or iPad.
Find a photo and tap it to open it.
Tap the Edit button.
- Tap the Color button in the bottom menu bar.
Swipe through the filters until you get to the three black and white ones: Mono, Silvertone, and Noir. They're automatically applied to your photo as you browse.

If you need to make adjustments, tap the Lighting button to make changes to individual lighting aspects.
Tap Done to save your changes.

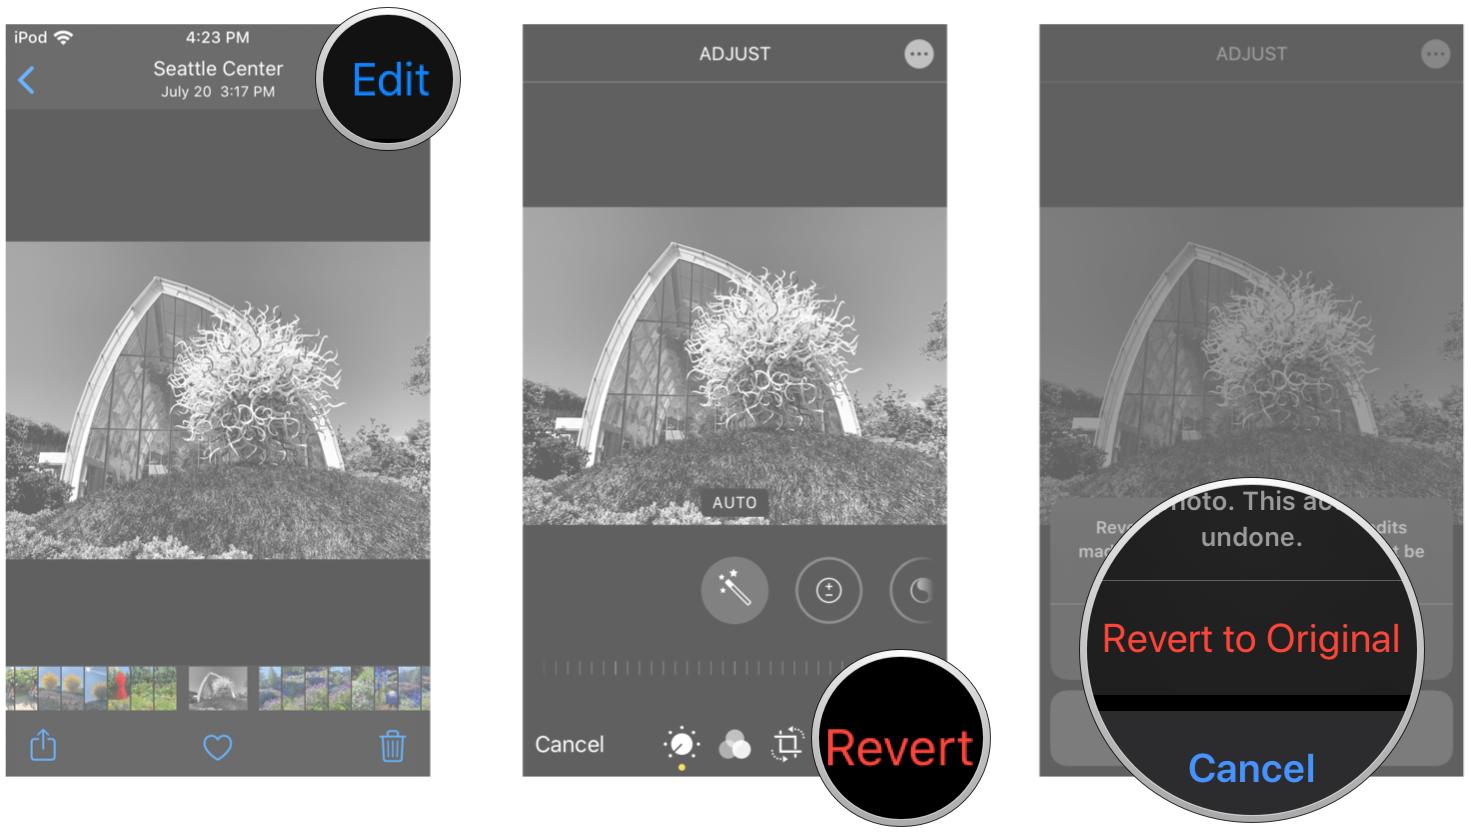
How to revert back to the original photo
You can edit your pictures and adjust light and color in the Photos app all you want. But if you're not satisfied with the end result, you can always revert all the changes you made in an instant and get the original photo back. Here's how!
- Launch Photos on your iPhone or iPad.
Find a photo that you edited through the Photos app.
Tap Edit in the upper right corner.
- Tap Revert in the bottom right corner (where Done usually is).
Confirm that you want to revert the edited image back to its original form.
Any questions?
If you have any questions about how to adjust light and colors in the Photos app, let us know in the comments!
November 2020: Updated for iOS 14 and iPadOS 14.
