
How to set up Apple’s 2-factor authentication for Auto Unlock on macOS Sierra
- aug
- 19
How do you switch from Apple's two-step to two-factor authentication, how do you set it up, and how do you get verification codes? Here's what you need to know!
Apple originally implemented two-step verification then, more recently, two-factor authentication (2FA) system-wide. The terms are contentious in the security community — some don't consider an out-of-band token to be sufficient as a second factor — but the bottom line is this: If you want something more than just your password to protect your Apple ID for iCloud and iTunes, then this is your best and only option. And iOS 10 makes it easier than ever.
Note: Two-factor authentication is required to use Auto Unlock — automatically logging into your macOS Sierra Mac with your watchOS 3 Apple Watch.
I haven't been able to set up two-factor authentication yet, help!
I know the feeling! Here's the deal. Prior to iOS 10, two-factor would either work immediately or say it wasn't available, but not tell you why.
Here's what was happening: If you had any devices that didn't support 2FA, Apple would simply tell you it wasn't available. What that really meant was, you'd logged into your account from a device running software earlier than:
- iPhone, iPad, or iPod touch with iOS 9 (or still using a 4-digit passcode, I believe.)
- Mac with OS X El Capitan and iTunes 12.3
- Apple Watch with watchOS 2
- Windows PC with iCloud for Windows v5 and iTunes 12.3.3
Since those systems weren't compatible, logging into any or all of them would have disqualified your account for two-factor … until now.
I'm already running two-step verification, how do I switch?
You'll need to turn off the old two-step verification before you can turn on the new two-factor authentication. You can do this on the web:
- Go to appleid.apple.com/
- Enter your Apple ID and password to login.
- Click on Edit to the far right of Security.
Click on Turn off two-step verification.

How do I turn on two-factor authentication?
With iOS 10, Apple will now let you set up two-factor authentication on your iPhone or iPad regardless of whether or not you have older devices that aren't compatible. You'll simply be advised about their lack of compatibility during setup, and you'll need to add a 6-digit verification code to the end of your password to authenticate on any of those devices going forward. (Or simply update those devices to the latest version of macOS and iOS, if possible.)
- Launch Settings from your Home screen.
- Tap on iCloud.
- Tap on your account at the top.
Tap on Password & Security.

- Tap on Set Up Two-Factor Authentication.
- Tap on Continue.
Tap on Turn On Anyway if you're warned about compatibility.

- Make sure your phone number is correct.
- Choose between text message and phone call for verification.
- Tap Next at the top right.
- Enter your Passcode.
Tap Continue when informed that your Passcode will replace your iCloud Security Code. (It currently tells you this even if your Passcode has already replaced your iCloud Security Code so, if that happens, just continue anyway.)

How do I get two-factor authentication codes now?
When you need to sign into iCloud.com on a new browser, or onto another iPhone, iPad, or Mac, you'll need your two-factor authentication code. There are a couple of ways to get it.
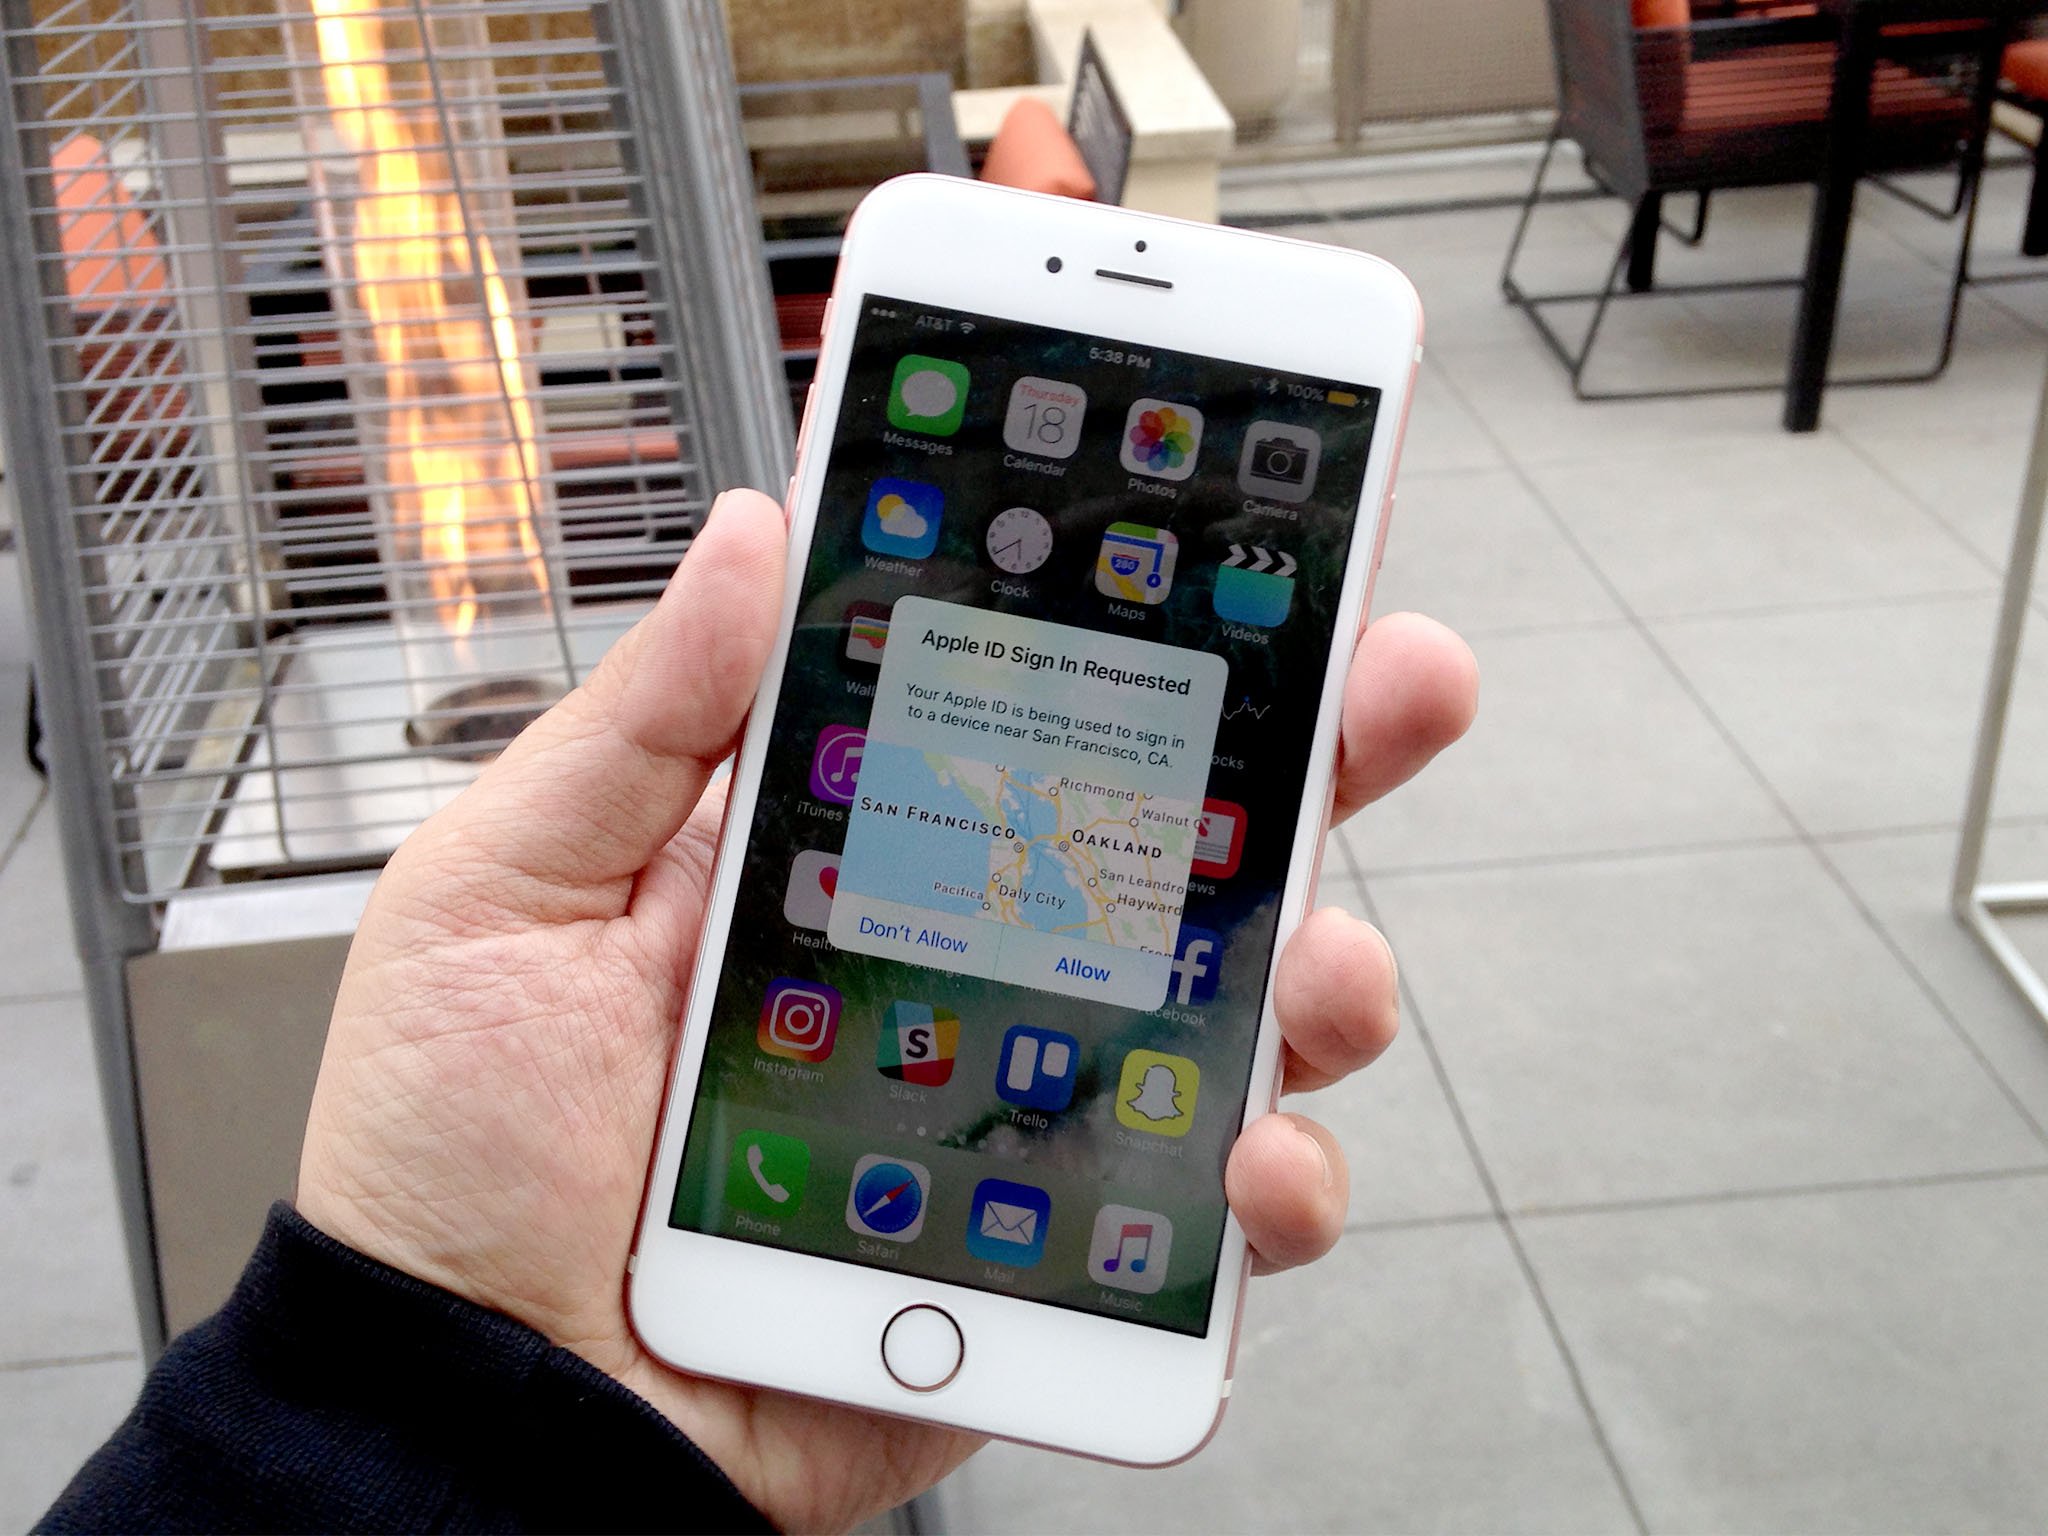
First, a push notification will show up on an already-logged-in device telling you someone is trying to sign into your account and showing you, on a map, where the sign-in attempt is coming from. If it's you:
- Tap Continue
Enter the code to sign in.

You can also generate a code at any time:
- Launch Settings from your Home screen.
- Tap on iCloud.
- Tap on your account at the top.
Tap on Password & Security.
- Tap on Get Verification Code
Enter the code to sign in.

Any two-factor questions?
If you have any issues with 2FA, or any other questions, drop them in the comments below!