
How to use Search in Photos for Mac
- jan
- 20
How do I use search in Photos for Mac?
Photos for Mac is a great way to keep your memories, photos, and videos organized, but being able to search through everything effortlessly can get a bit tricky and overcomplicated.
Here's how to become a master at searching through photos for Mac!
- How to find your old iPhoto and Aperture events, stacks and projects in Photos for Mac
- How to get EXIF, location, and metadata info in Photos for Mac
- How to add and edit title, description, and keywords in Photos for Mac
- How to use Computer Vision to search Photos for Mac
- How to search for your pictures and videos in Photos for Mac
How to find your old iPhoto and Aperture events, stacks and projects in Photos for Mac
Anything previously organized into events in iPhoto or stacks, projects, or events in Aperture gets brought over to Photos during setup, of course. The stacks, projects, or events themselves, however, are converted into folders. That means they're all the same now, but it also means they're really easy to find.
How to locate your old Aperture stacks, project, and events in Photos
- Launch Photos on your Mac
Go to View > Show Sidebar in the menu, or press Option + Command + S

You'll find your stacks, projects, and events there as folders.

How to get EXIF, location, and metadata info in Photos for Mac
Photos for Mac lets you bring up an info pane that shows, if available, the title, file name, date and time stamp, EXIF (exchangeable image file format — aperture, shutter speed, focal length, metering mode, and ISO speed, resolution, file type), description, assigned faces, and location on a map. Not everyone has use for this type of information, but if you do, it's really easy to get.
How to bring up EXIF, location, and other metadata information in Photos for Mac
- Launch Photos on your Mac
Select the picture or video you want to find out about
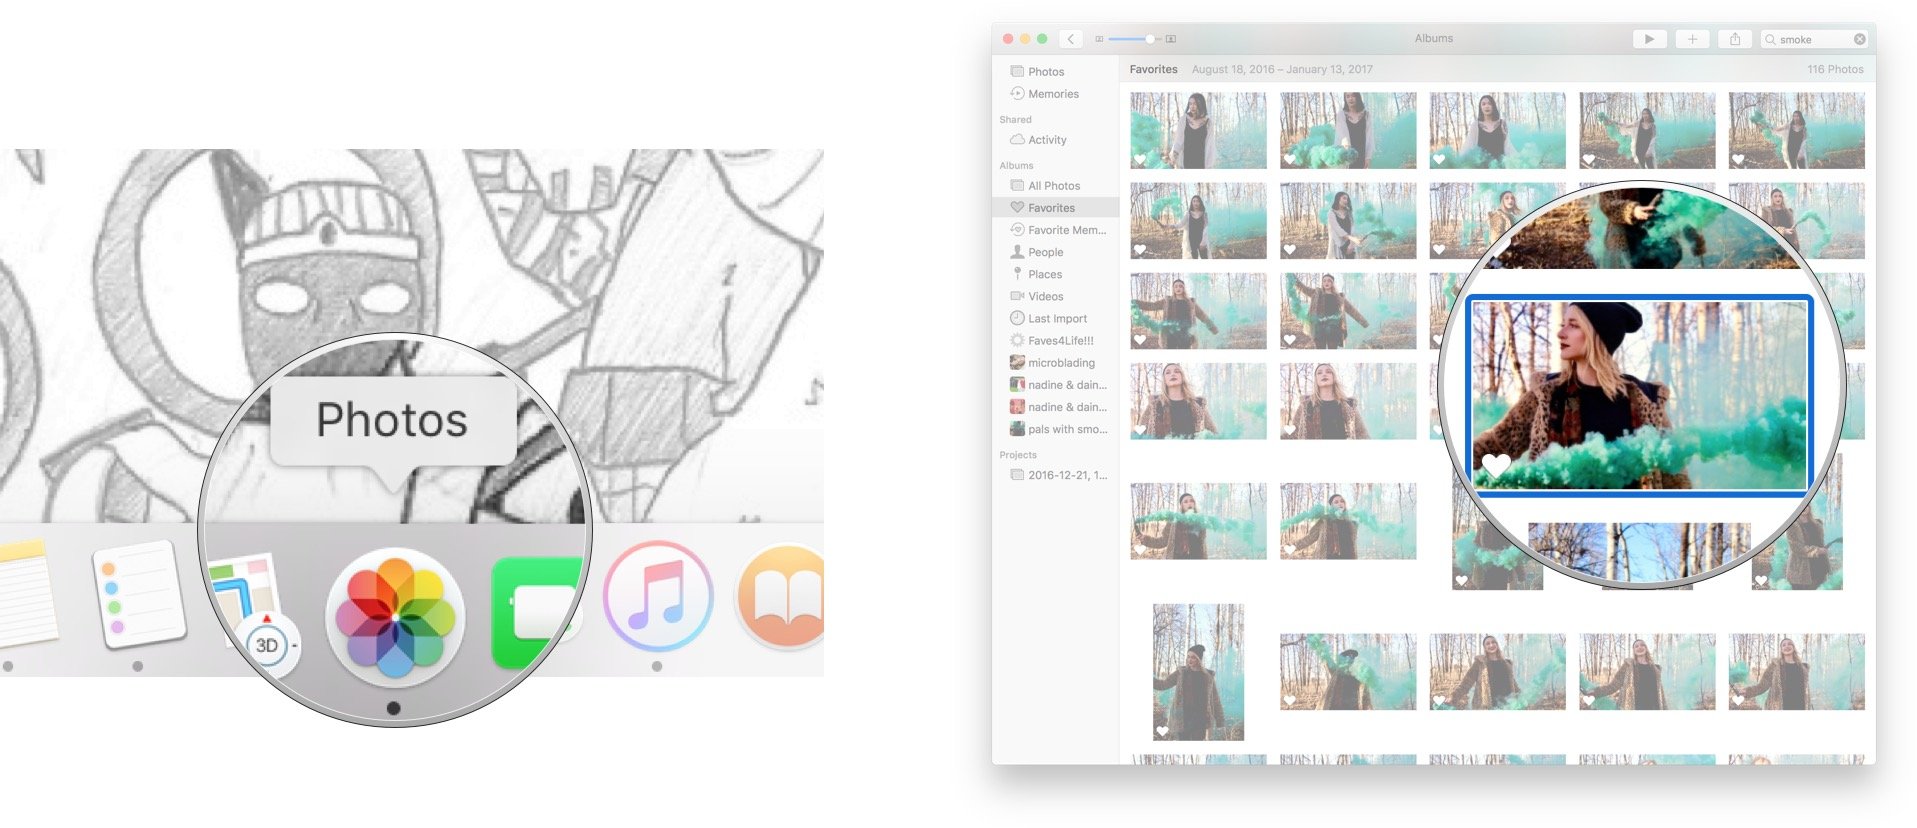
Click on Window > Info in the menu. (Or just hit Command + I)

The info pane will present all the data you need, and you can even edit title, description, keyword, faces, and other data right there, right away.
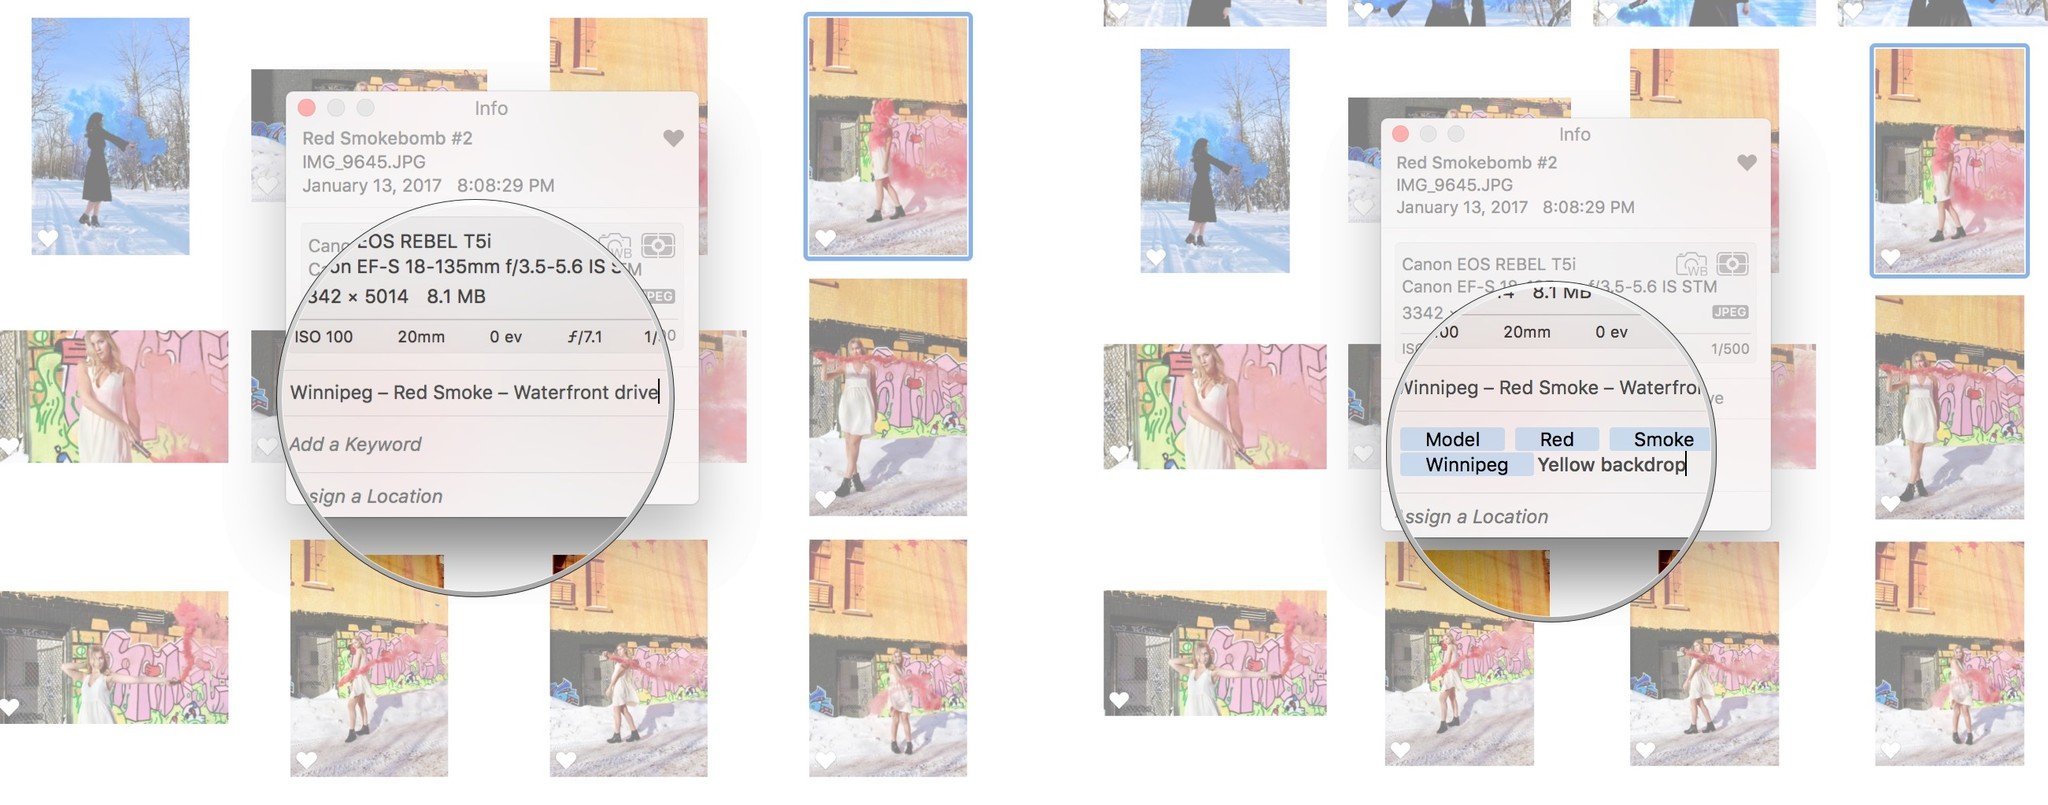
How to add and edit title, description, and keywords in Photos for Mac
While dumping pictures and videos is certainly the fastest way to get them into Photos for Mac, the time you save up-front can be more than offset by the time you spend later trying to find a specific picture and video.
If you take just a few minutes to delete the pictures and videos that you know you'll never want to see again, and tag the ones you absolutely know you will, you can save a lot of time in the long run. It's a little more work for present you, but future you will thank you!
How to add a title, description, and keywords to a picture or video in Photos for Mac
- Launch Photos on your Mac
Select the picture or video you want to find out about

- Press Command + I to pull up the photos info.
Click on Add a Title at the top and type in your title.

- Click on Add a Description and type in a little about the picture or video.
Click on Add Keywords and enter some words that'll help you find the picture or video later, like "family", "bob's birthday 2014", "Apple Watch event" — whatever works for you.
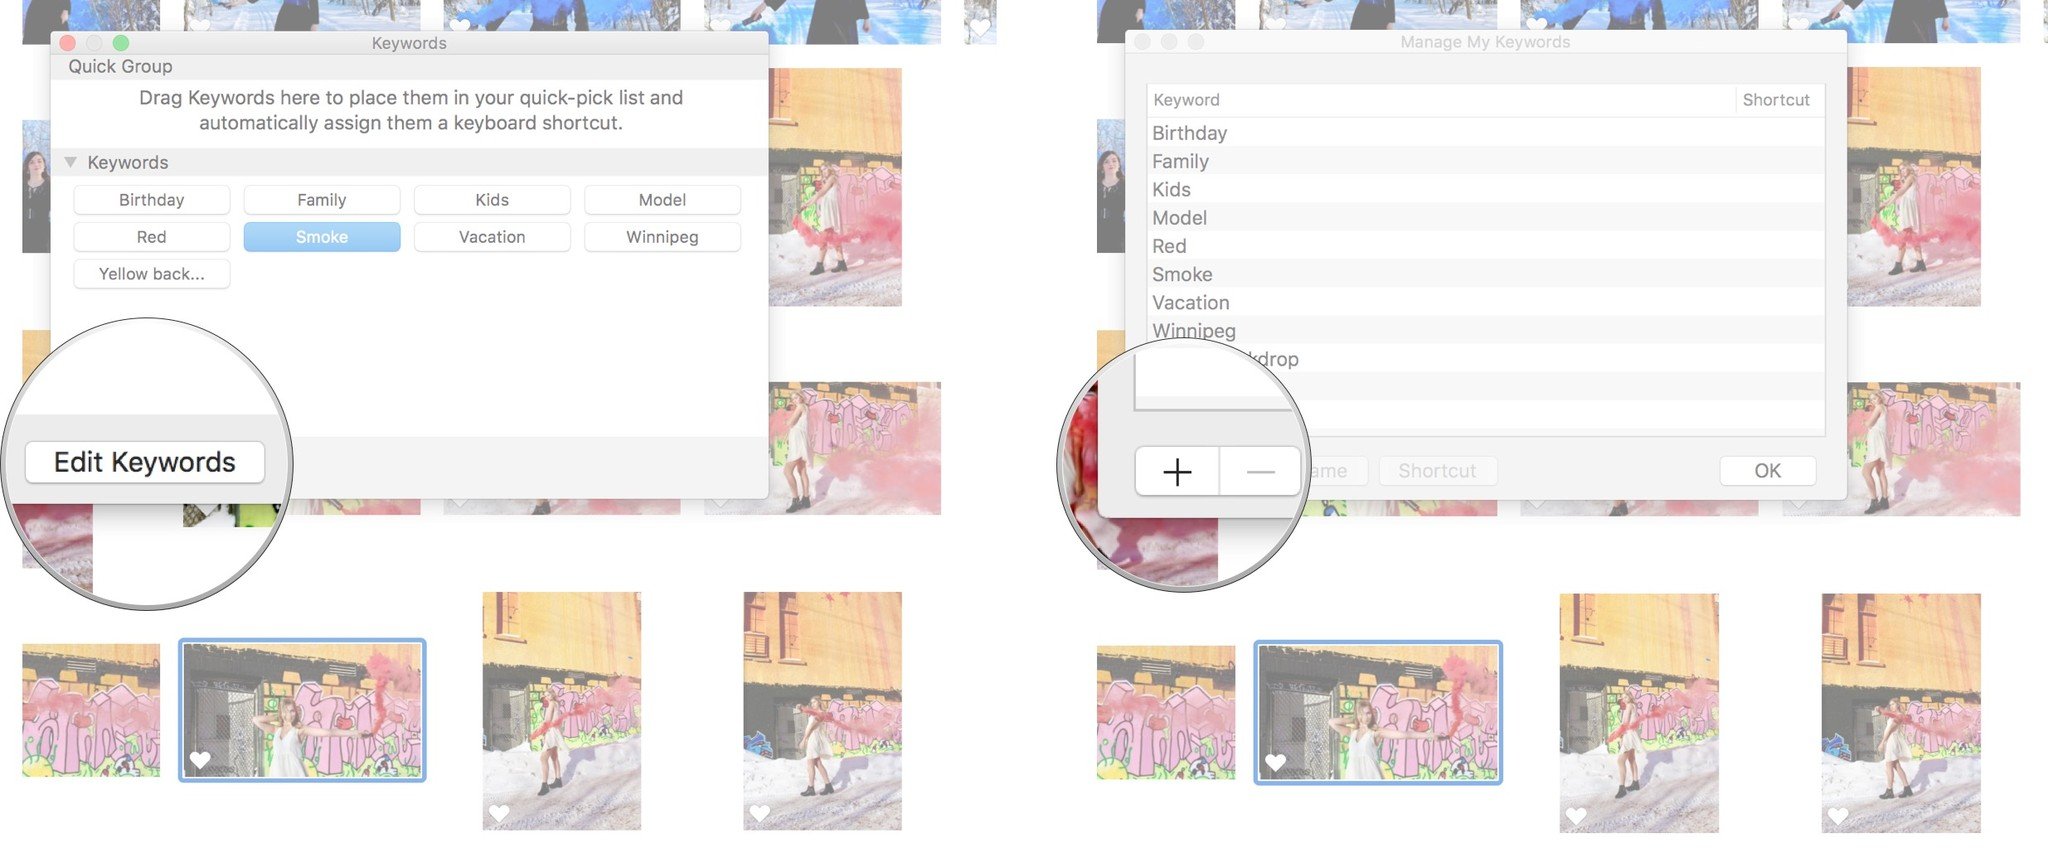
How to manage keywords with Photos for Mac
If you're more of a power keyword user, Photos for Mac has a more powerful keyword tool for you.
- Launch Photos on your Mac
Press Command + K to pull up the keyword box.

- Click on a Keyword to apply it to the currently selected picture or video. (Or just type its shortcut.)
Click again on a Keyword to remove it from the currently selected picture or video. (Or just type its shortcut again.)

- Click on Edit Keywords to change the current keywords.
Click on + to add a new keyword and shortcut, - to remove an existing one, or Rename to change it.
How to use Computer Vision to search Photos for Mac
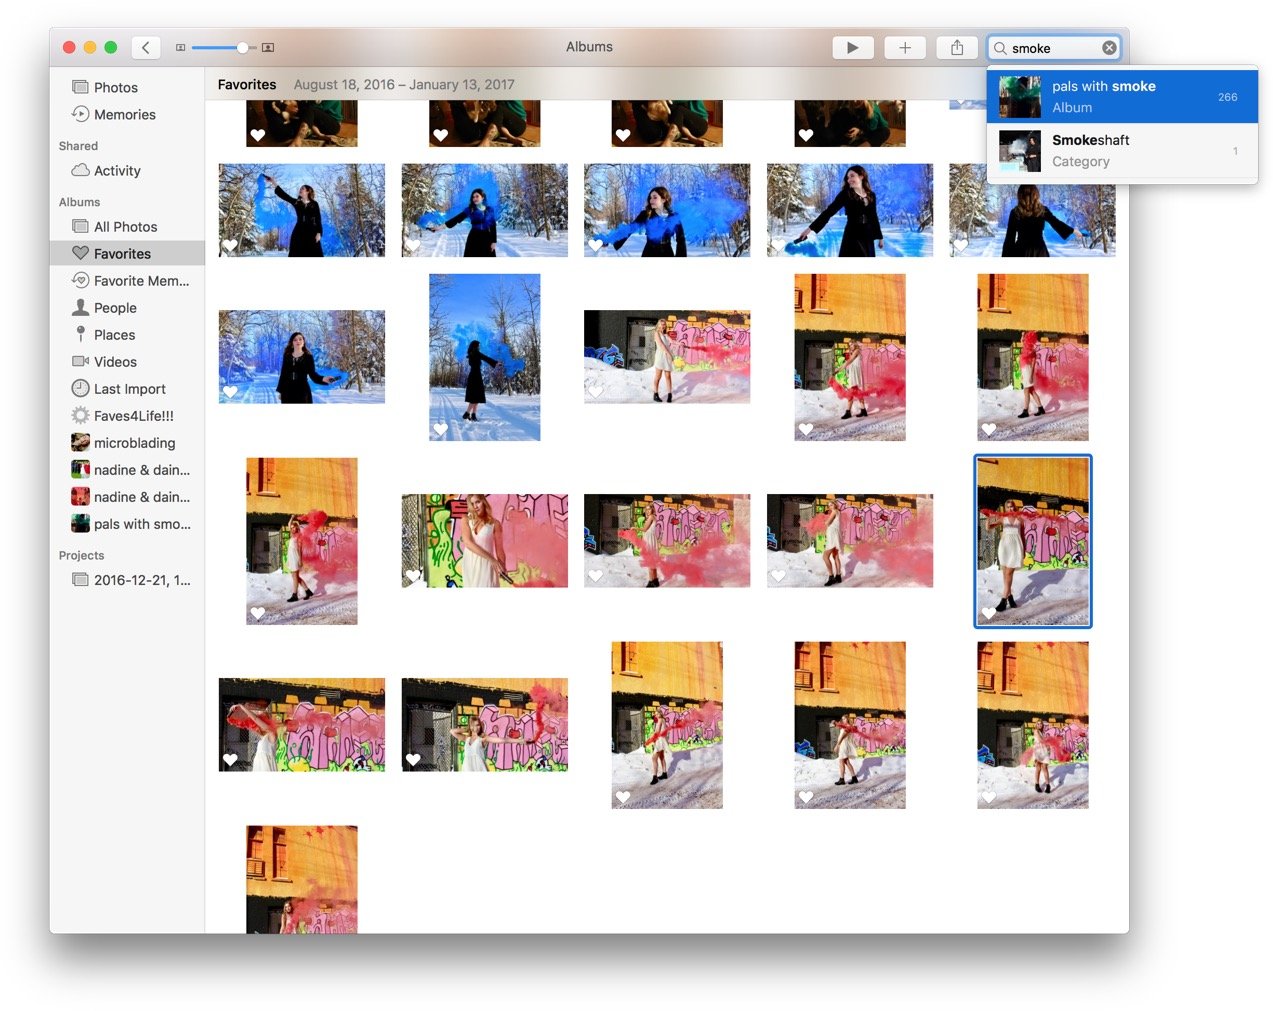
Finding pictures in Photos for Mac has gotten a lot easier and a lot more powerful. In addition to facial recognition and geo-location, Apple has introduced Computer Vision , which is a fancy way of saying Artificial Intelligence for recognizing what's in an image, which is a fancy way of saying it can tell when there's a car or steak in your pic. They're called "categories" and now, when you search, they're presented alongside other results. Here's how it works!
How to search for a specific category in the Photos app
- Launch the Photos app from your dock.
Click the Search bar in the upper right corner.

- Type the category you would like to search for, for example "coffee".
- Click the option you would like to select. All of the photos and videos related to that keyword will appear.
How to search for your pictures and videos in Photos for Mac
Rather than scrolling through all your pictures and videos, search can be a quick way to find just exactly what you want!
You can use search in Photos for Mac almost like Spotlight to filter through your library based on the year, month, and/or day a picture or video was taken, the place it was taken in, who appears in it (if you're using faces), and the text that appears in the keywords or even filename.
There aren't any advanced search or boolean options — you can use smart folders for something closer to that — but you can stack terms and that means there's still plenty of power inside that little box.
How to search for your pictures and videos in Photos for Mac
- Launch Photos on your Mac.
- Enter the terms you want to search for. You can enter multiple terms, e.g. "San Francisco Serenity March 9 2015 apple".
Choose the picture or video you want from the list Photos populates.
How to use smart albums as "advanced search" in Photos for Mac
The smart folder system in Photos for Mac is really clever and allows for a lot of options. If you need something more complex than standard search, especially if you think you might run it even semi frequently, a smart folder might be a good alternative.
What do you think?
Are you a huge fan of using Photos for Mac? Or do you prefer to use something else to organize and keep track of your photos and videos? Let us know what you think in the comments below!