
How to record your gameplay on iPhone and iPad
- sep
- 21

How do I record my gameplay on my iPhone or iPad? Here's how to do it — and how to keep your kids from filling up your Camera Roll with screen recordings!
Apple's Game Center not only gives third-party apps leaderboards and multiplayer options, it also offers gameplay recording features. If the app you use supports Game Center's ReplayKit, you can record your screen and microphone during gameplay to share it with friends, or stream it online to make some cool "Let's Plays."
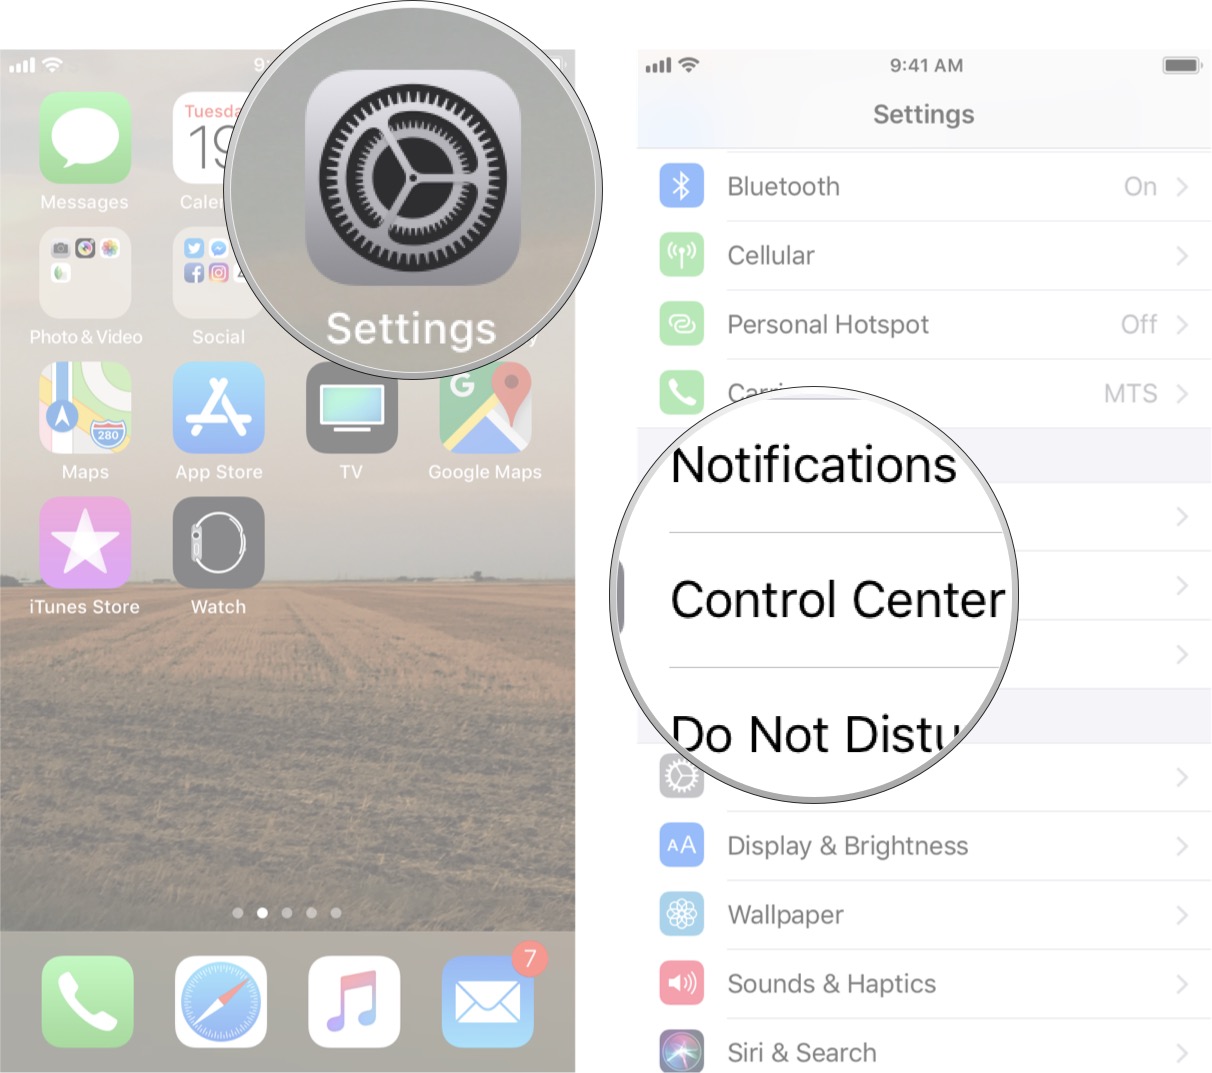
How to record your screen with iOS 11 for iPhone and iPad
iOS 11 has made it even easier to record gameplay by allowing screen recording at anytime throught Control Center. All you need to do is add screen recording to your Control Center enabled functions.
- Launch Settings from your Home screen.
Tap Control Center
- Tap Customize Controls.
Tap Screen Recording.
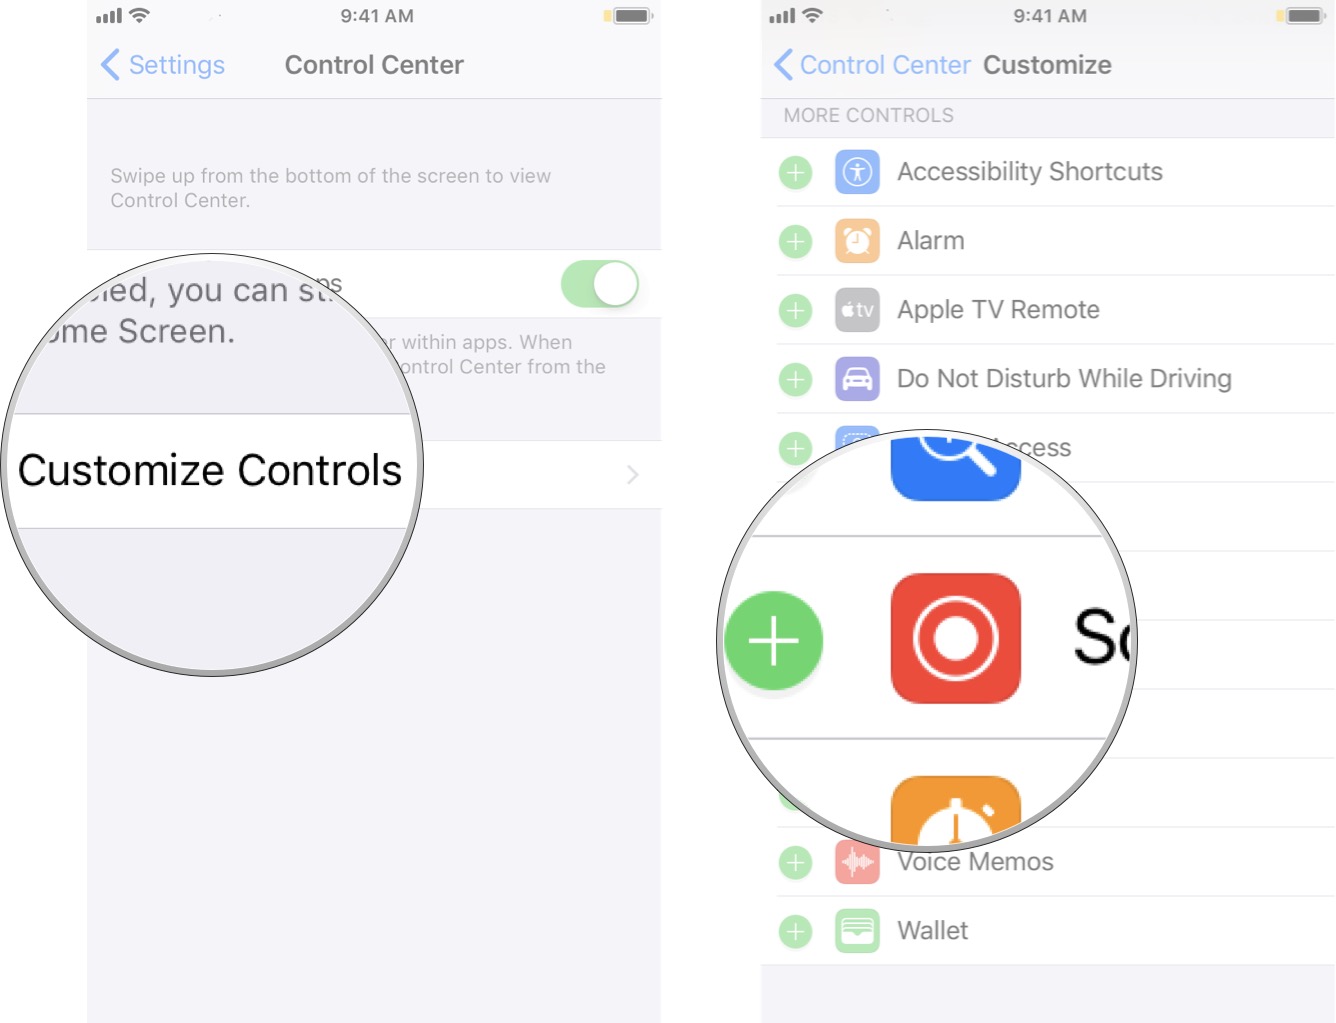
Now you can pull up the Control Center at anytime and start recording what's on your screen. All the recording videos will save to your Camera Roll automatically when you stop recording.
How to record your gameplay with iPhone or iPad
Not all games support ReplayKit — here's a good list of games, but in general, we recommend reading App Store descriptions to see if your favorite title supports screen recording.
- Open a ReplayKit-compatible game.
- Find the screen recording feature. (It usually shows up as a camera icon on the main screen.)
- Tap the screen recording icon.
Press Record Screen (or Record Screen and Microphone, if applicable) when prompted to allow the game to record.
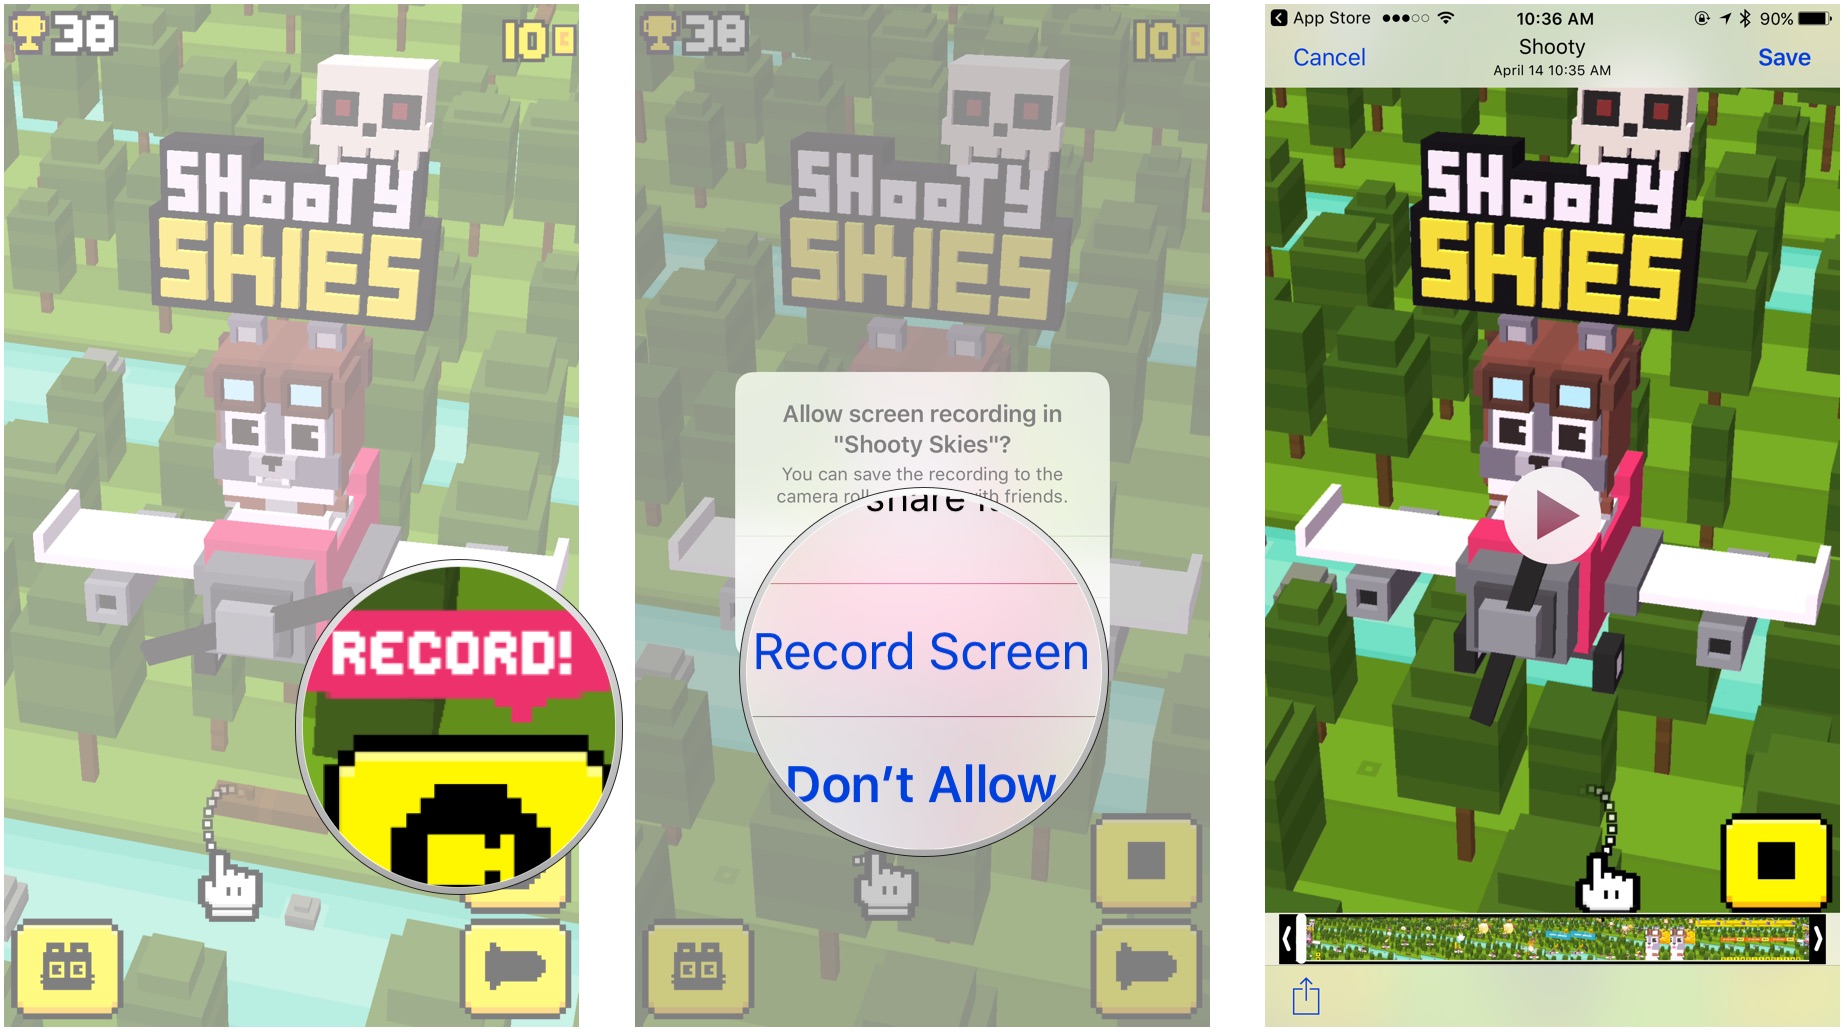
- Play your game.
- Press the Stop button when finished.
How to record your gameplay on iPhone or iPad with an unsupported game
If your game doesn't support ReplayKit, you can still record your screen if you have a Mac nearby by using QuickTime Player.
- Connect your iPhone or iPad to your Mac via Lightning cable.
- Open QuickTime Player.
- Go to File > New Movie Recording.
- Click on the Down Arrow next to the Recording button and select your iPhone under Camera.
- Press Record.
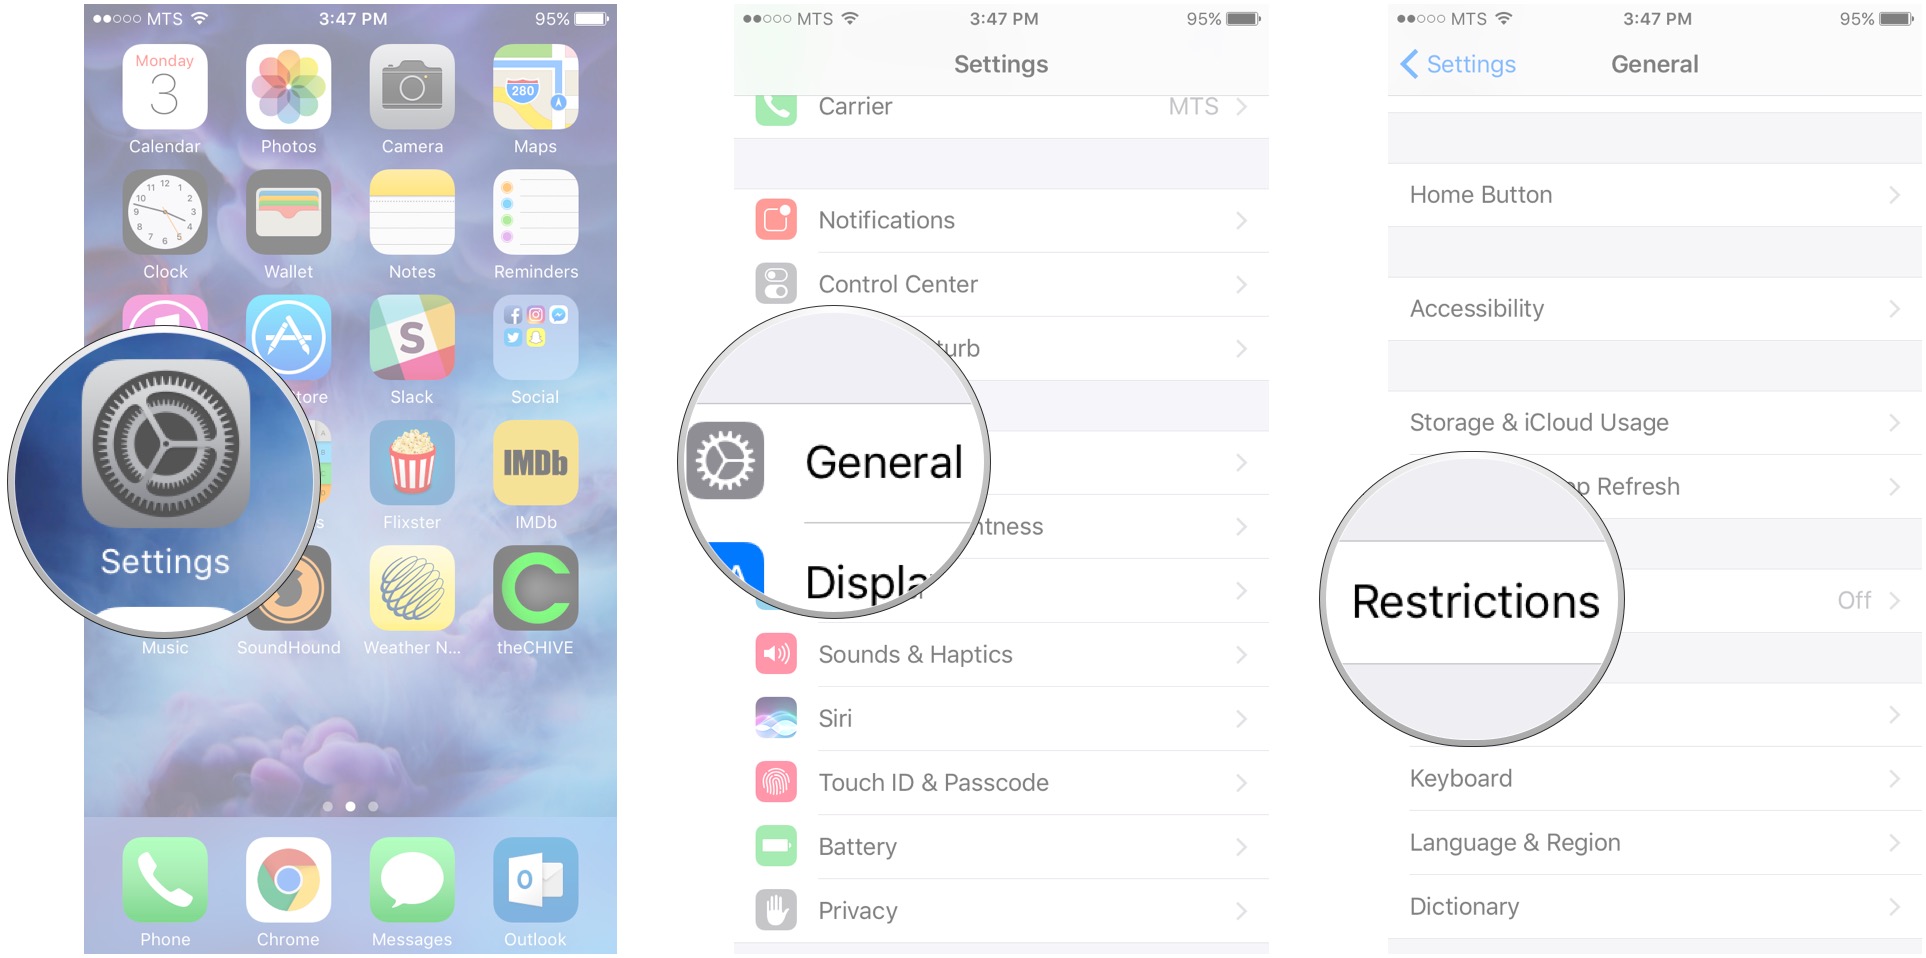
How to disable screen recording for games using Restrictions
If your kids spend too much time playing certain games, or you don't want your kids inadvertently filling up your iPhone with HD game recordings, you can easily turn off screen recording from the Restrictions screen on your iPhone or iPad. Here's how!
- Launch Settings from your Home screen.
- Tap General.
Scroll down and tap Restrictions.
- Tap Enable Restrictions if you haven't done so already.
- Enter a passcode — make sure it's not a passcode your children can guess. Enter it again to confirm.
Tap the switch next to Screen Recording under Game Center, all the way at the bottom.
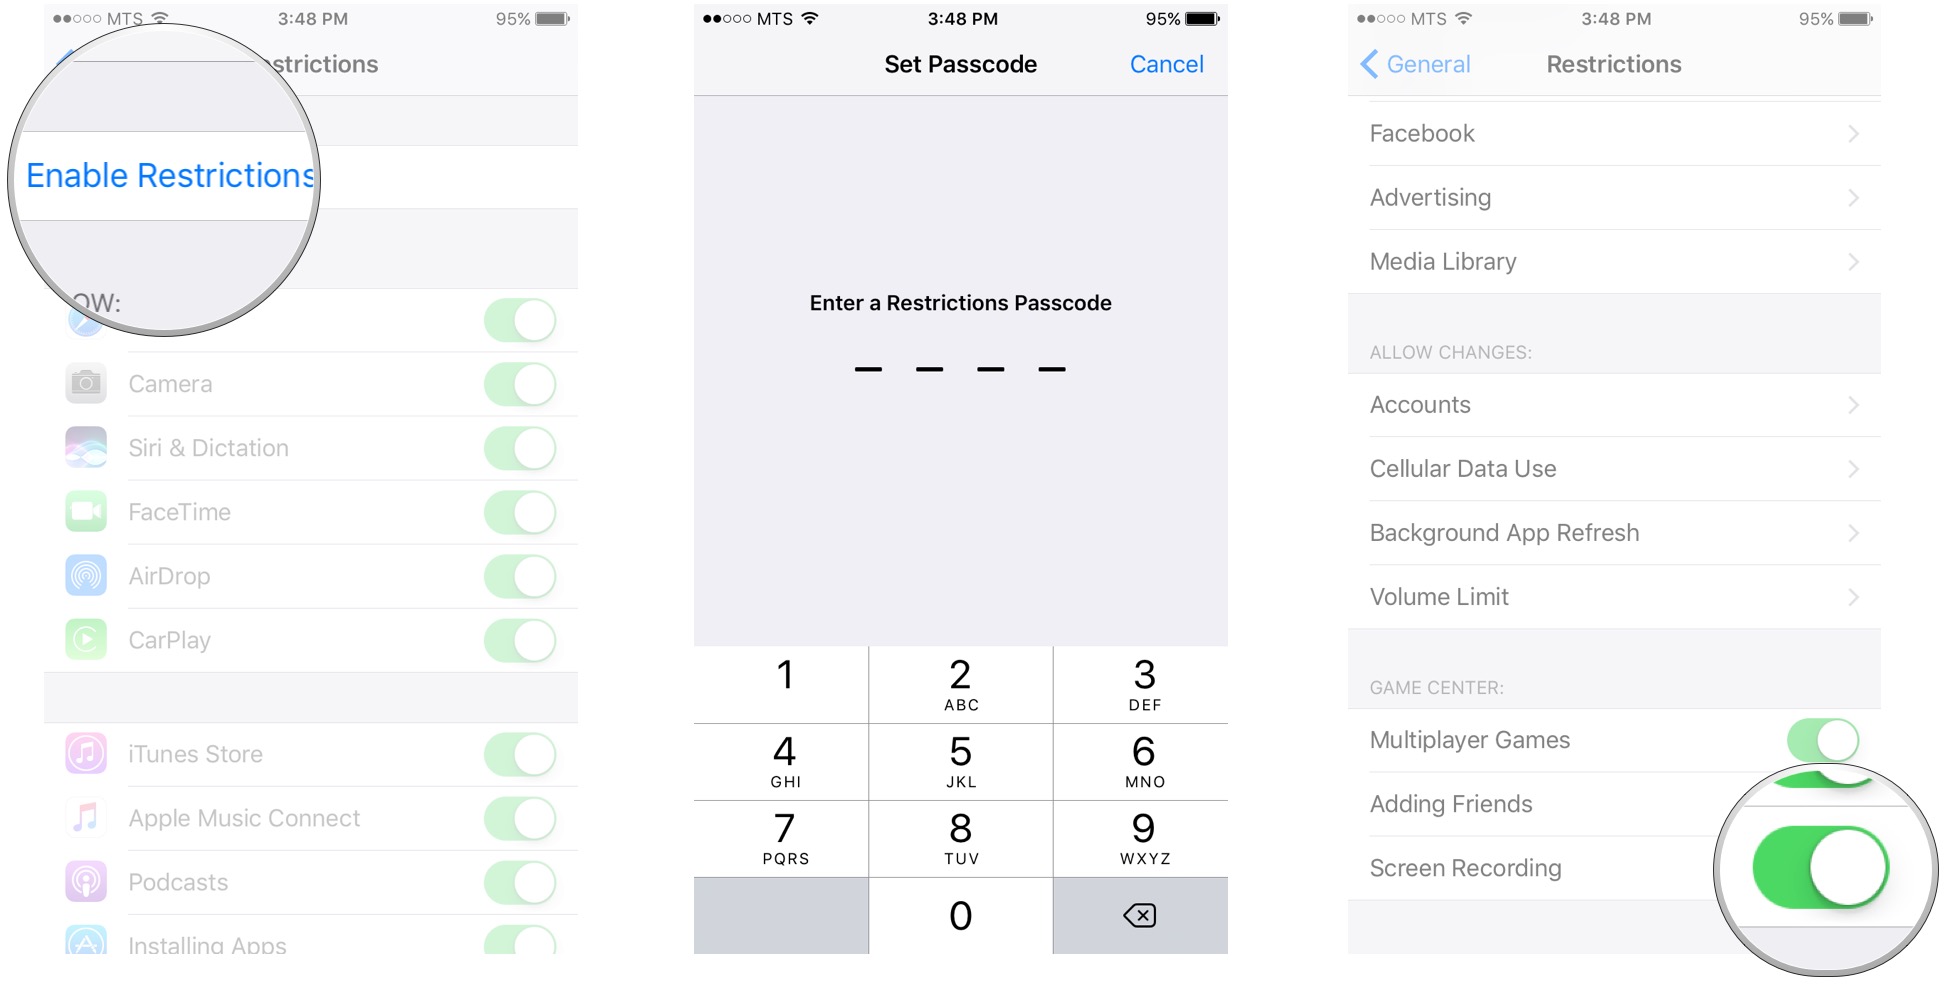
Screen recording is now disabled during gameplay, and the icon won't show up in the game.
How to disable screen recording for games by signing out of Game Center
If you don't want to set up Restrictions on your iPhone, there's another way to prevent screen recording: Sign out of Game Center. If you're not logged in with your Apple ID, there's no option to record gameplay.
- Launch Settings from your Home screen.
- Tap Game Center. You'll have to scroll about halfway down.
- Tap your Apple ID at the top of the screen.
Tap Sign Out.
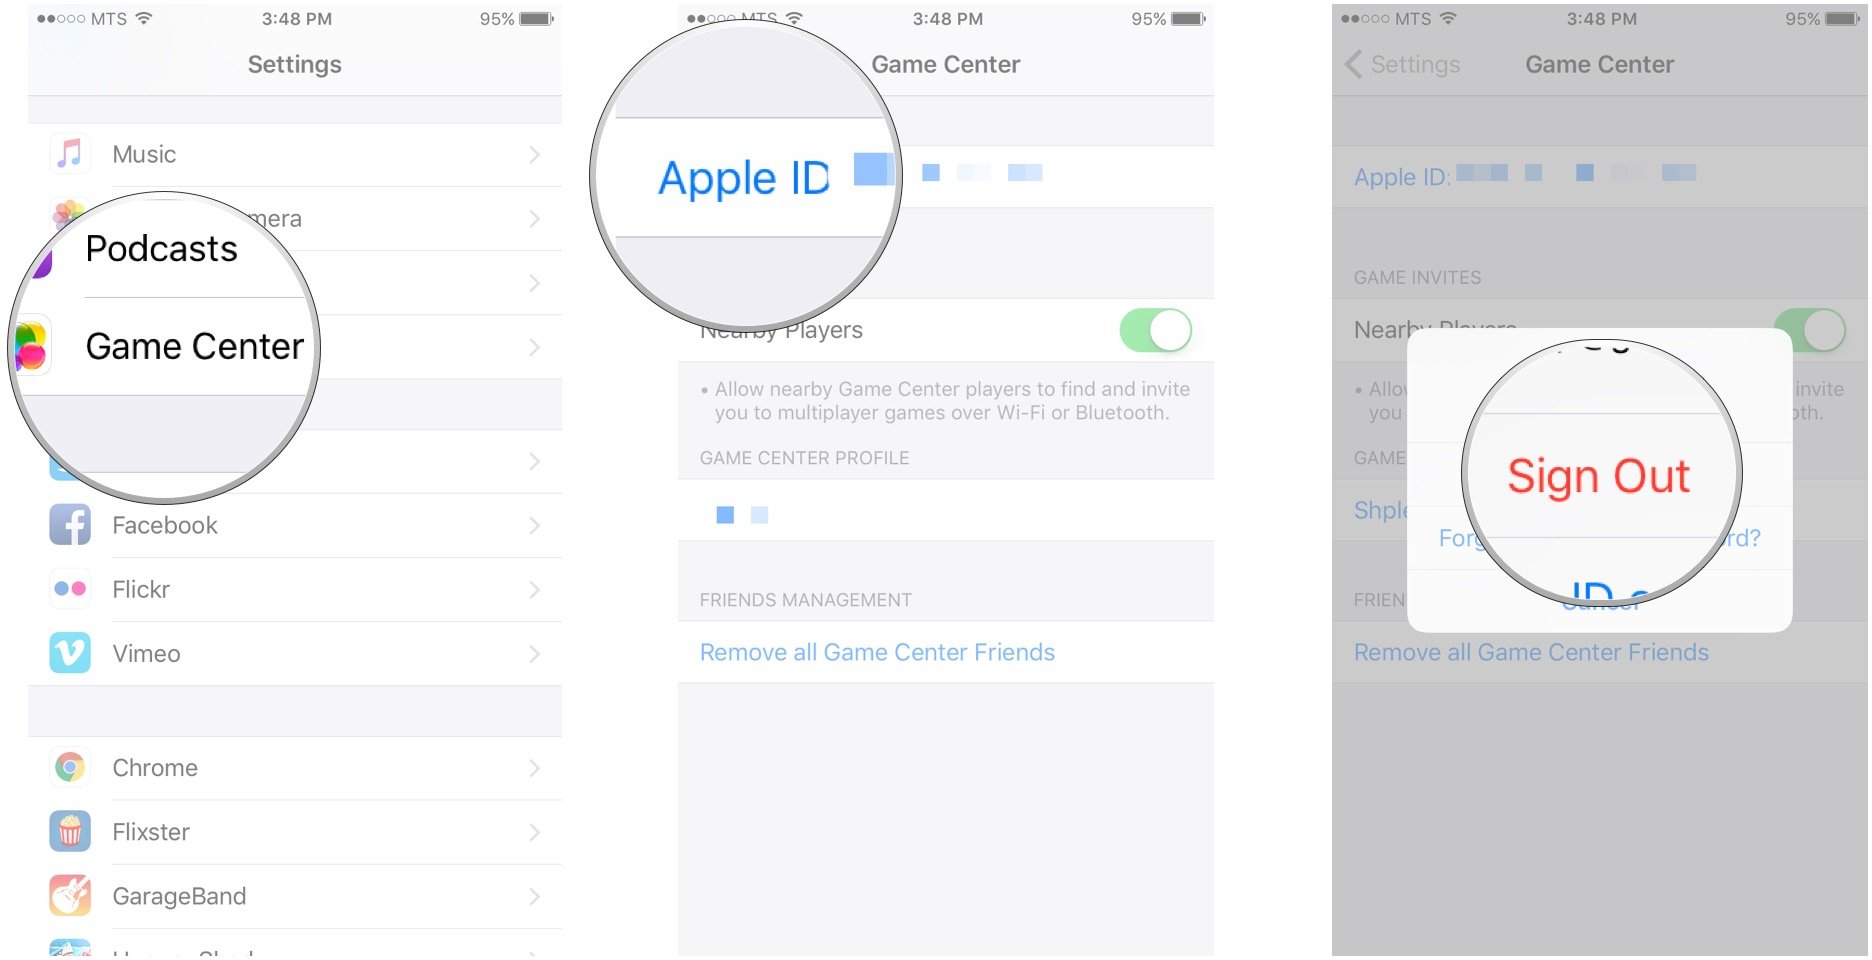
You will now be signed out of Game Center and will have to sign in if you want to use Game Center when playing games.
Questions?
Let us know in the comments below!
Updated September 2017: Added information on how to screen record in iOS 11.
Game Center: The Ultimate Guide
- What happened to Game Center in iOS 10?
- How can I tell if a game supports Game Center?
- How to view your achievements
- How to view leaderboards
- How to add and remove friends in Game Center
- How to invite or challenge someone to play a Game Center game
- How to play a game in iMessage
- How to record your gameplay on iPhone and iPad
- How to switch between Game Center accounts on Apple TV