How to order prints, books, cards, and more in Photos for Mac
- dec
- 14
How do you take all your special moments and turn them into cherished holiday gifts? With Photos for Mac!
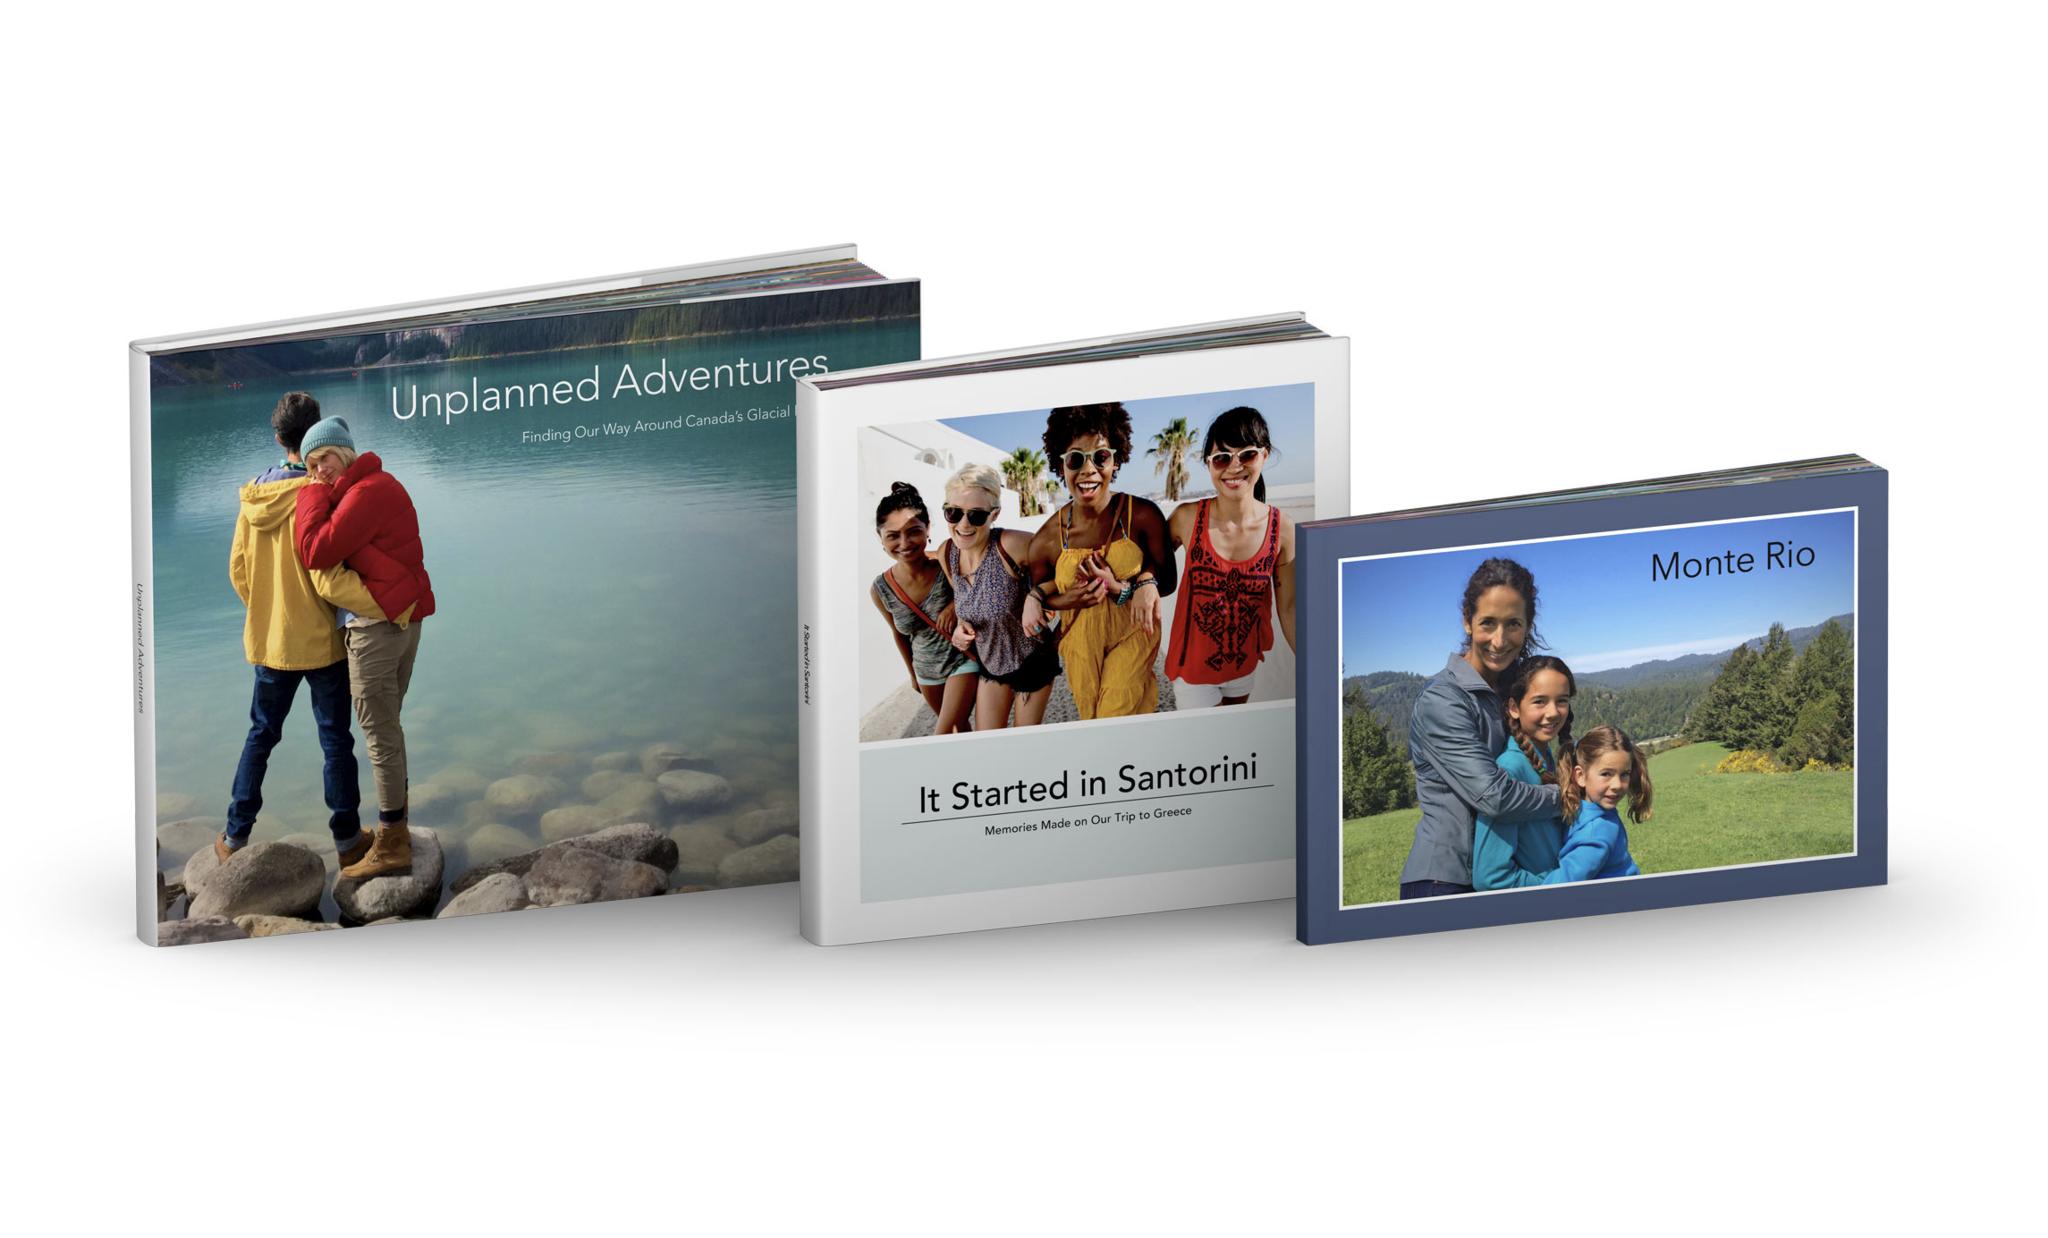
Nothing is more personal than sharing memories with friends and family, and nothing is more personal than a picture book. Thanks to Photos on the Mac, you can create, order, and ship the perfect bundle of memories without having to leave your house. The Photos app includes a book, calendar, and card maker so you can give the gift of pictures to your loved ones. Here's how to make one.
Note: It takes approximately three business days to create and prepare a photo project to ship. Shipping time depends on your location and how close to the holidays it is. Make sure you have plenty of time (about two weeks) to ensure your project arrives on time.
- How to make a photo book in the Photos app on Mac
- How to make a calendar in the Photos app on Mac
- How to make a card in the Photos app on Mac
- How to order prints in Photos for Mac
How to make a photo book in the Photos app on Mac
The perfect gift for any mom, grandparent, or significant other is a photo book filled with memories. If you have been shoring up all of your pictures in the Photos app on your Mac, it will take just a few minutes to create a personalized photo book.
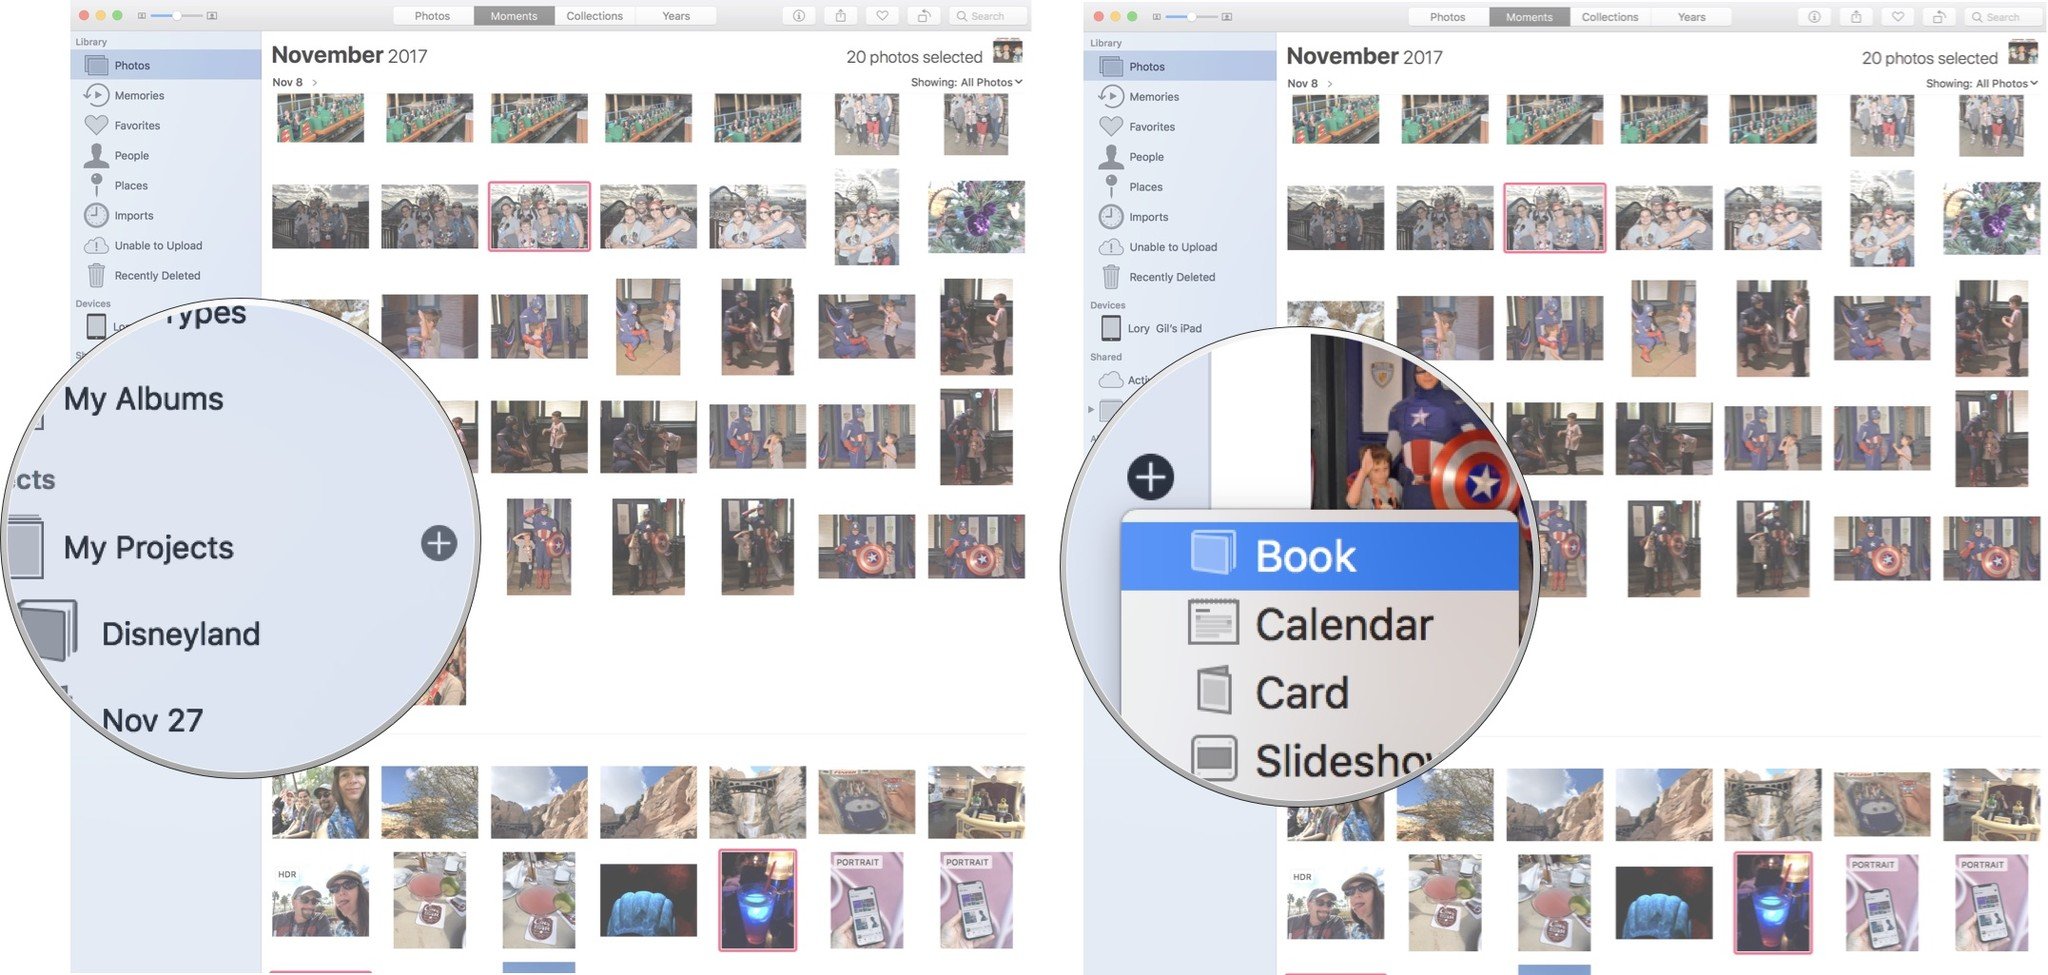
- Launch the Photos app on your Mac.
- Select at least 20 pictures from your Photo library (you can select as many as you like, but the picture books start at 20 pages).
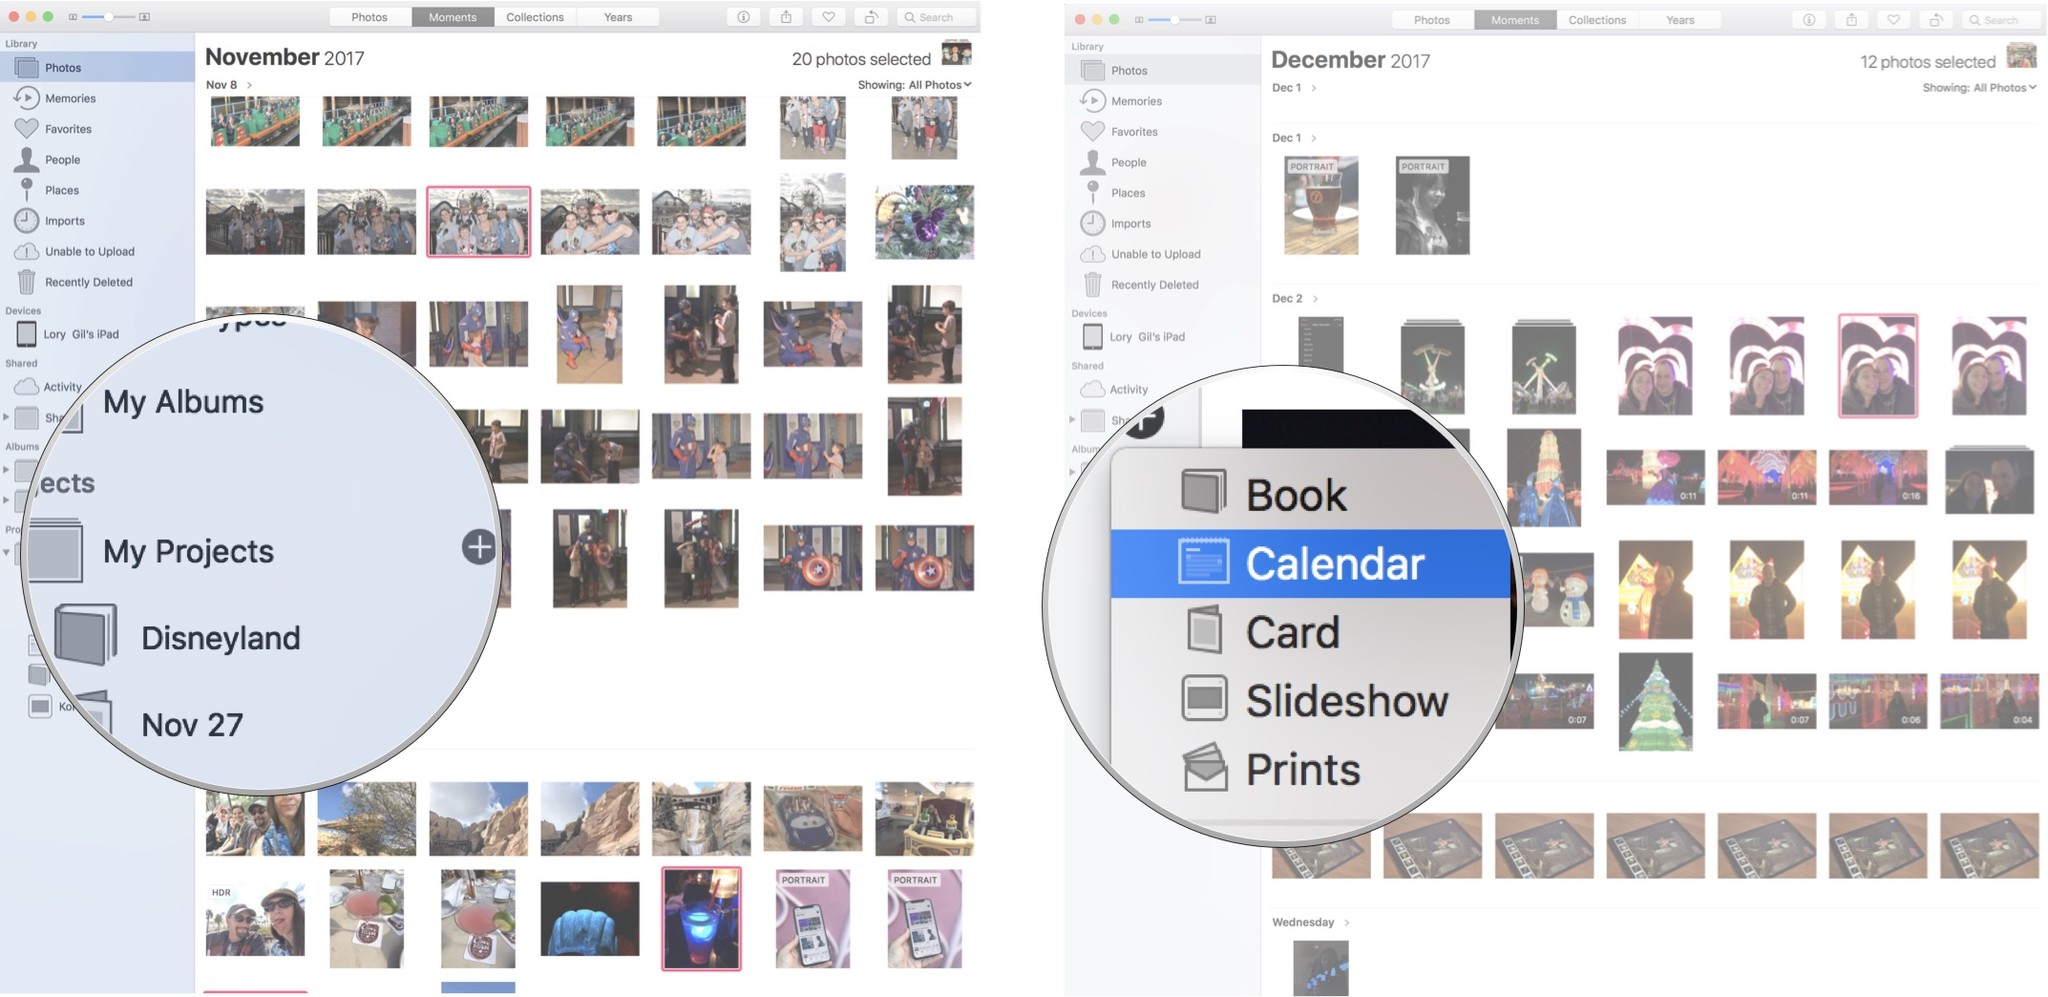
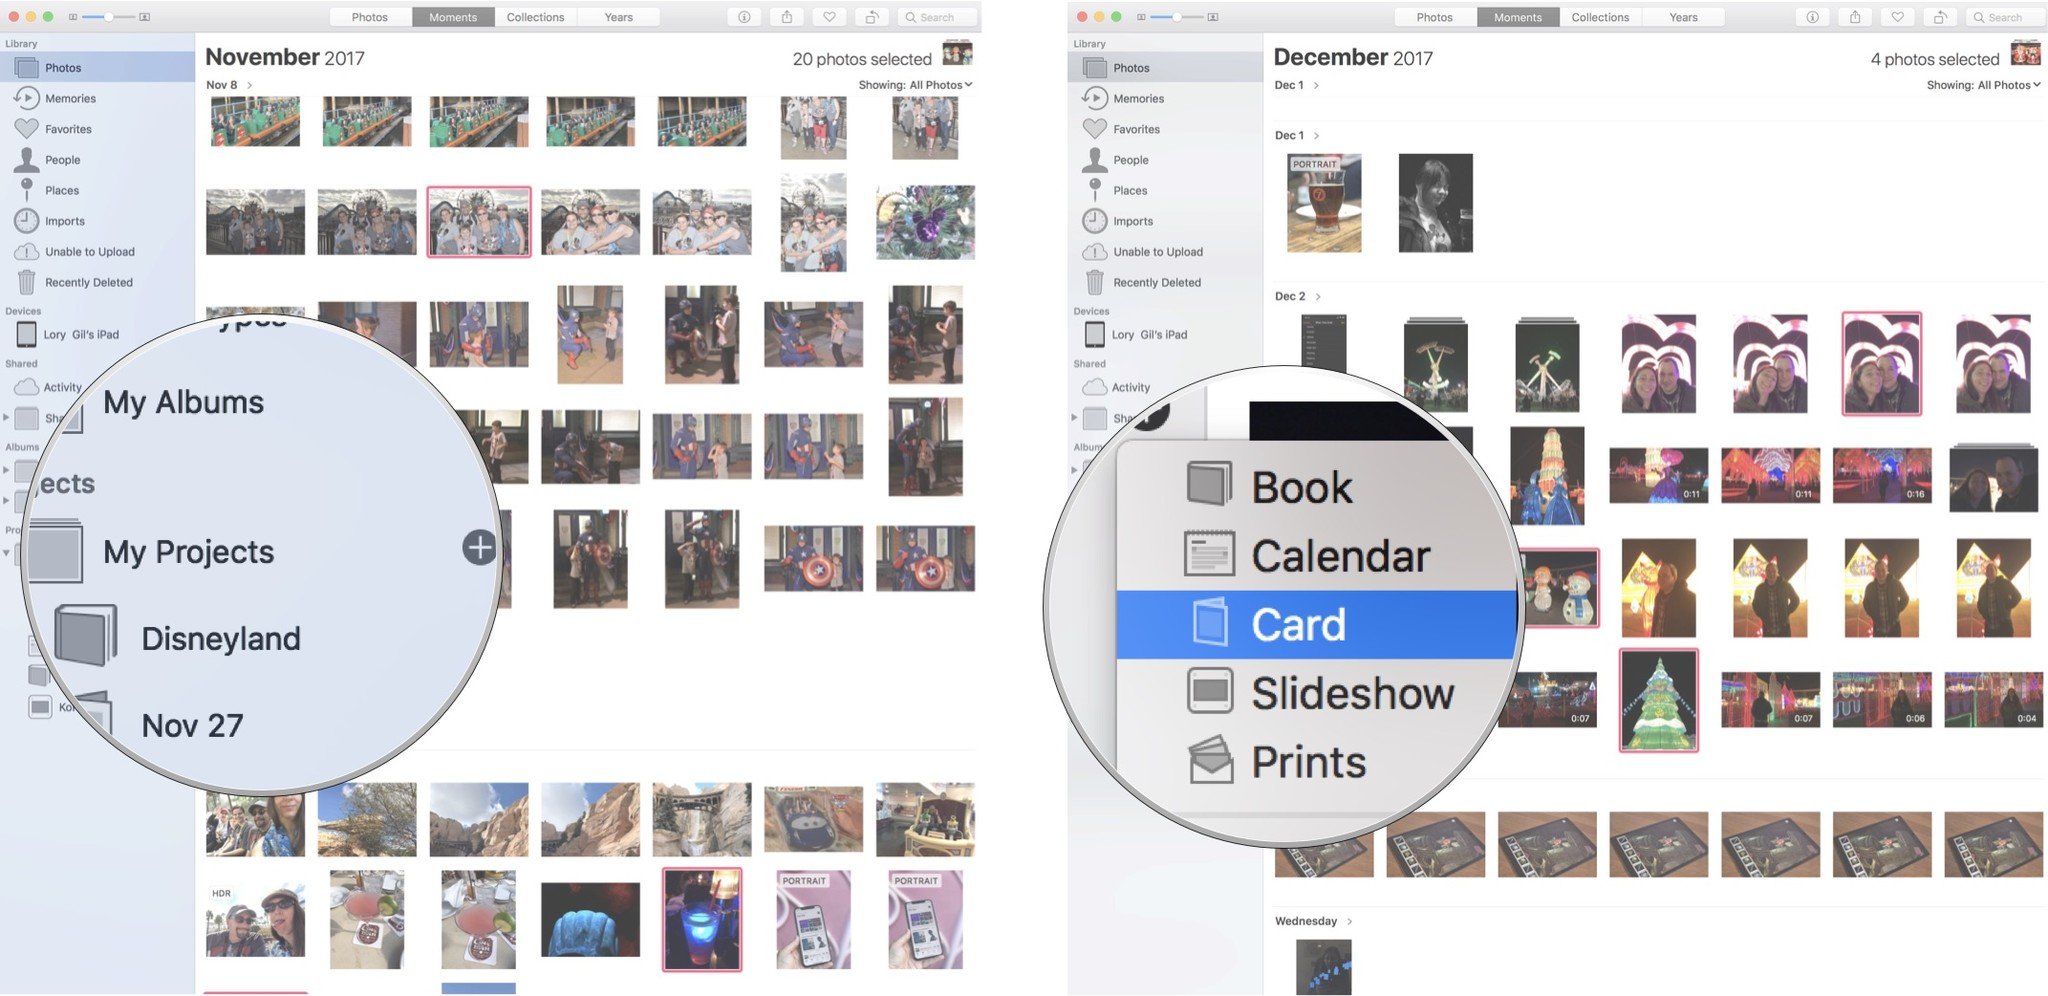
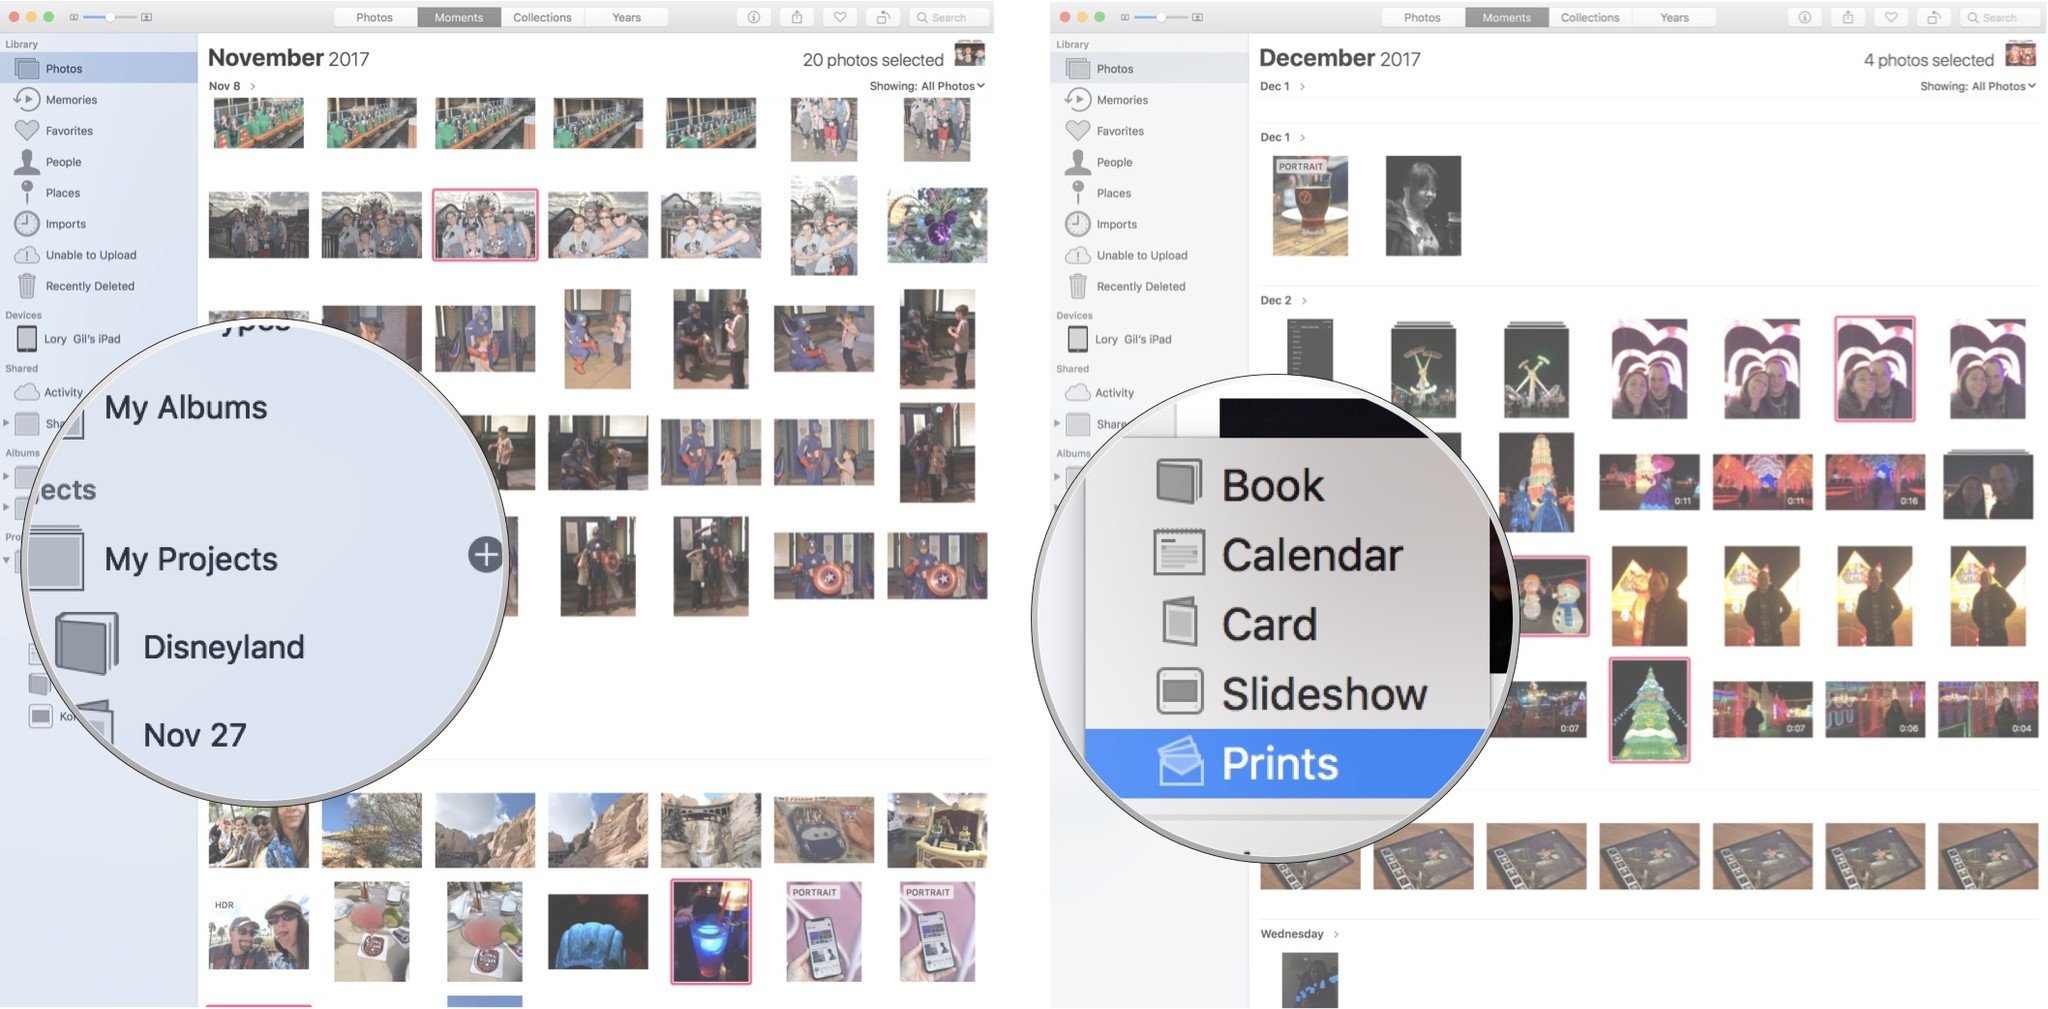
- Click on the Add (+) button in sidebar next to My Projects.
Click Book.
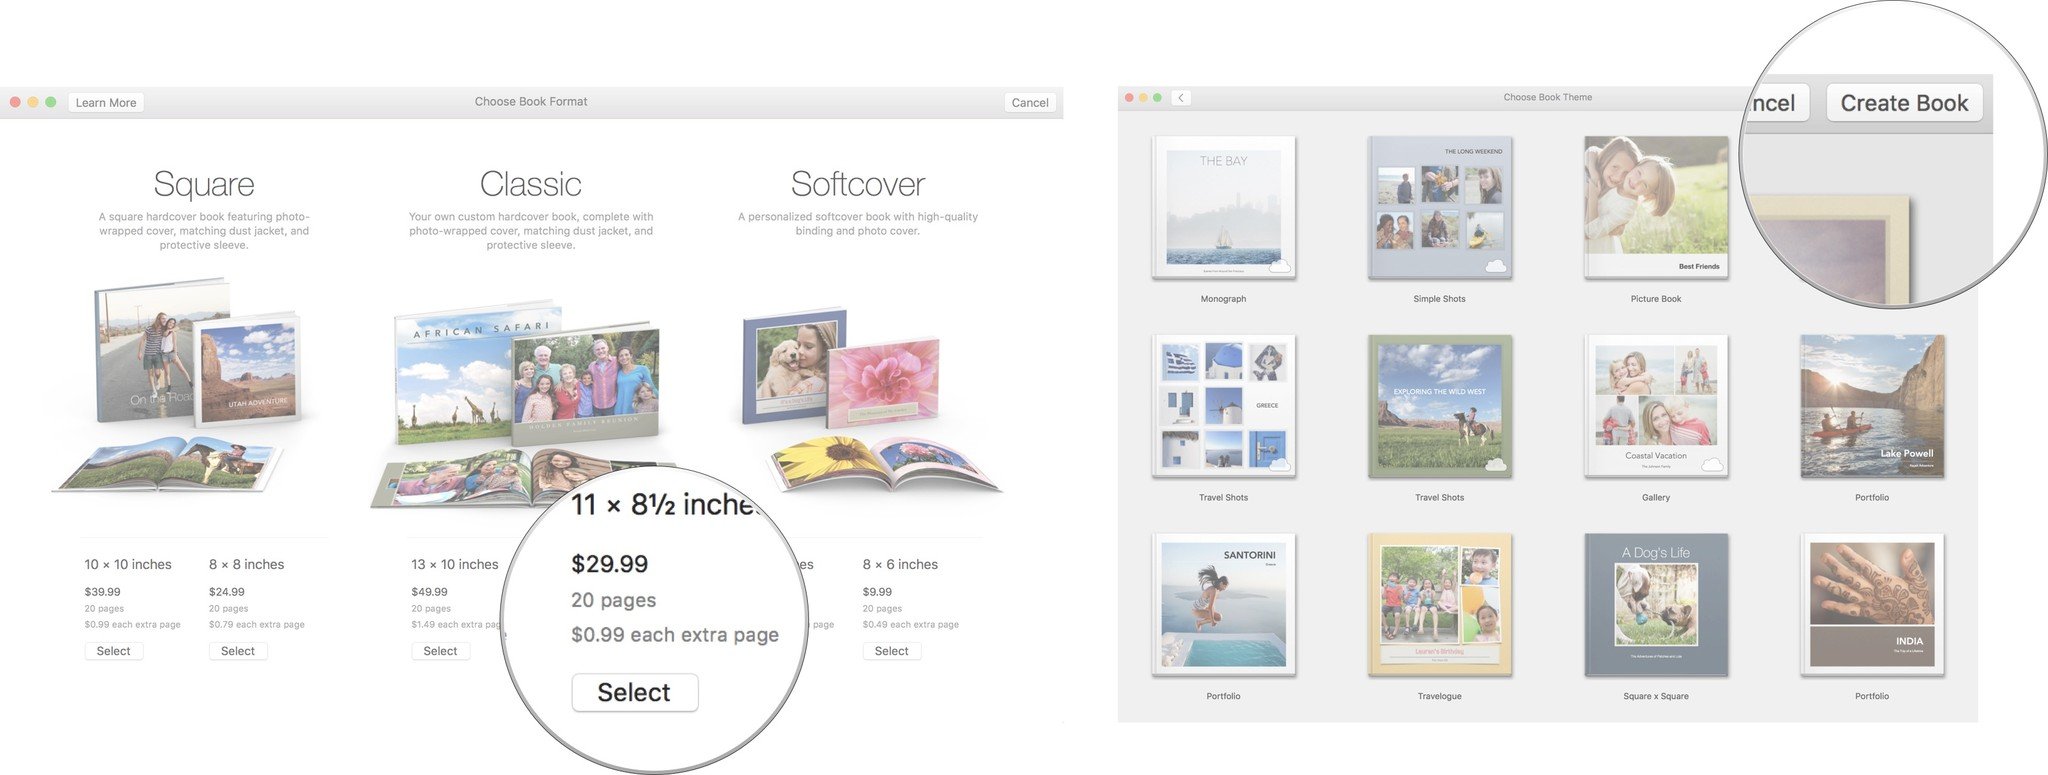
- Select a book style from square, classic, or soft cover (each has two options).
- Choose a book theme. Different books offer different templates both inside and on the cover. You can always change the theme later if you don't like the one you chose.
Click Create Book.
The photos will automatically populate onto each page. You can then manually edit each page, or simply buy the book as-is.
How to edit a photo book page
- Double-click on a page to select it.
- Click on a picture and drag your cursor to the left or right to reposition it.
Click Options just under the page to edit the template.
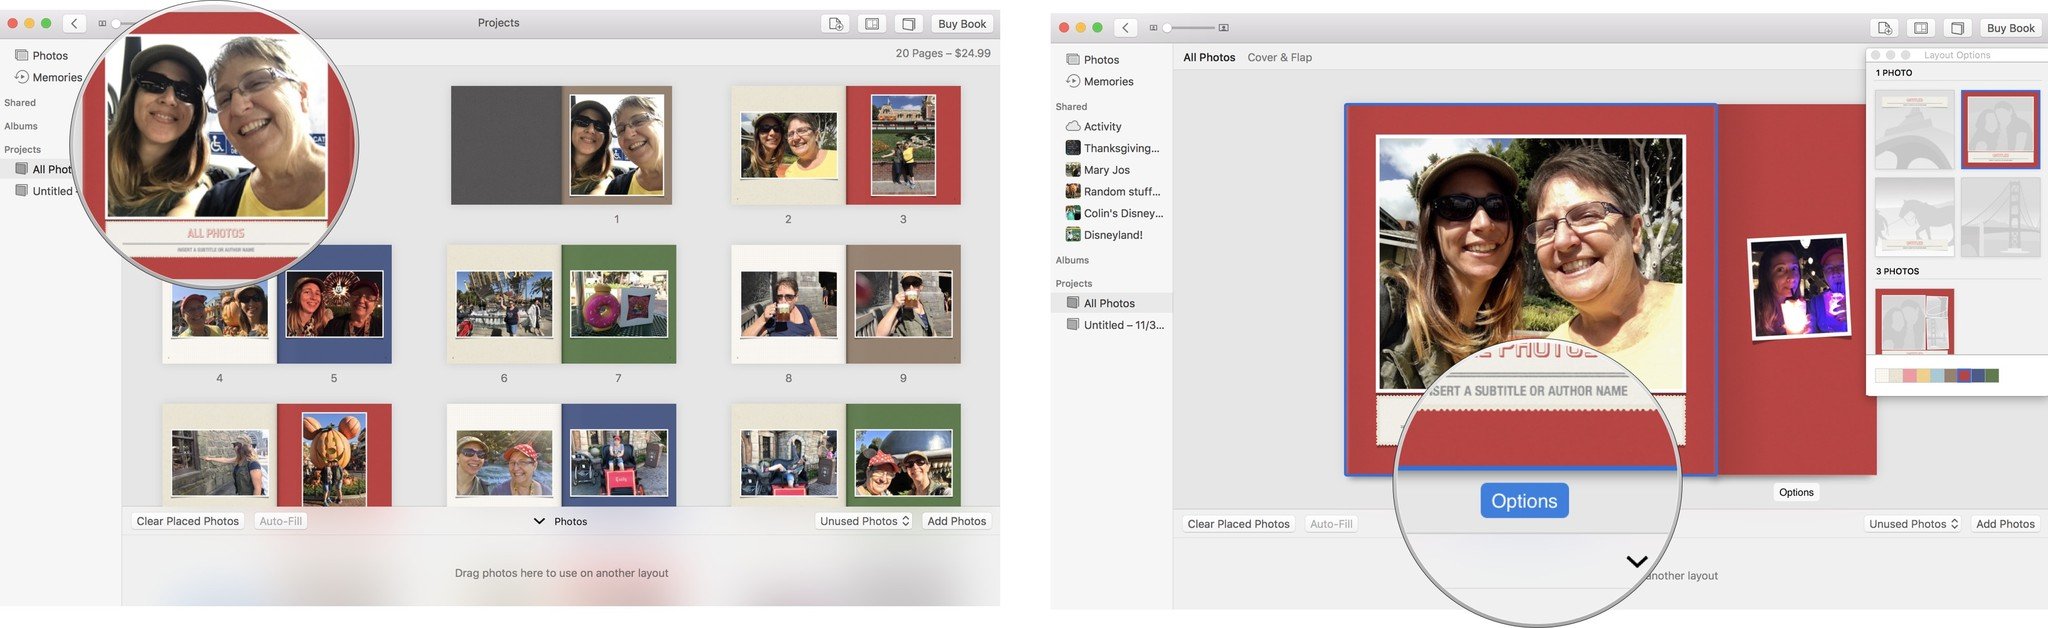
- Select a new template. You can change the layout of the page, add more photos to a page, or remove photos from a page. Depending on the book theme you choose, you could have dozens of template options. If you see wording on a template, that means you are supposed to write in your own content.
- Double-click a picture to edit it. You can add filters, zoom and crop, and adjust the picture with your photo editing tools.
Click on a text box to add your own title or sentiment.

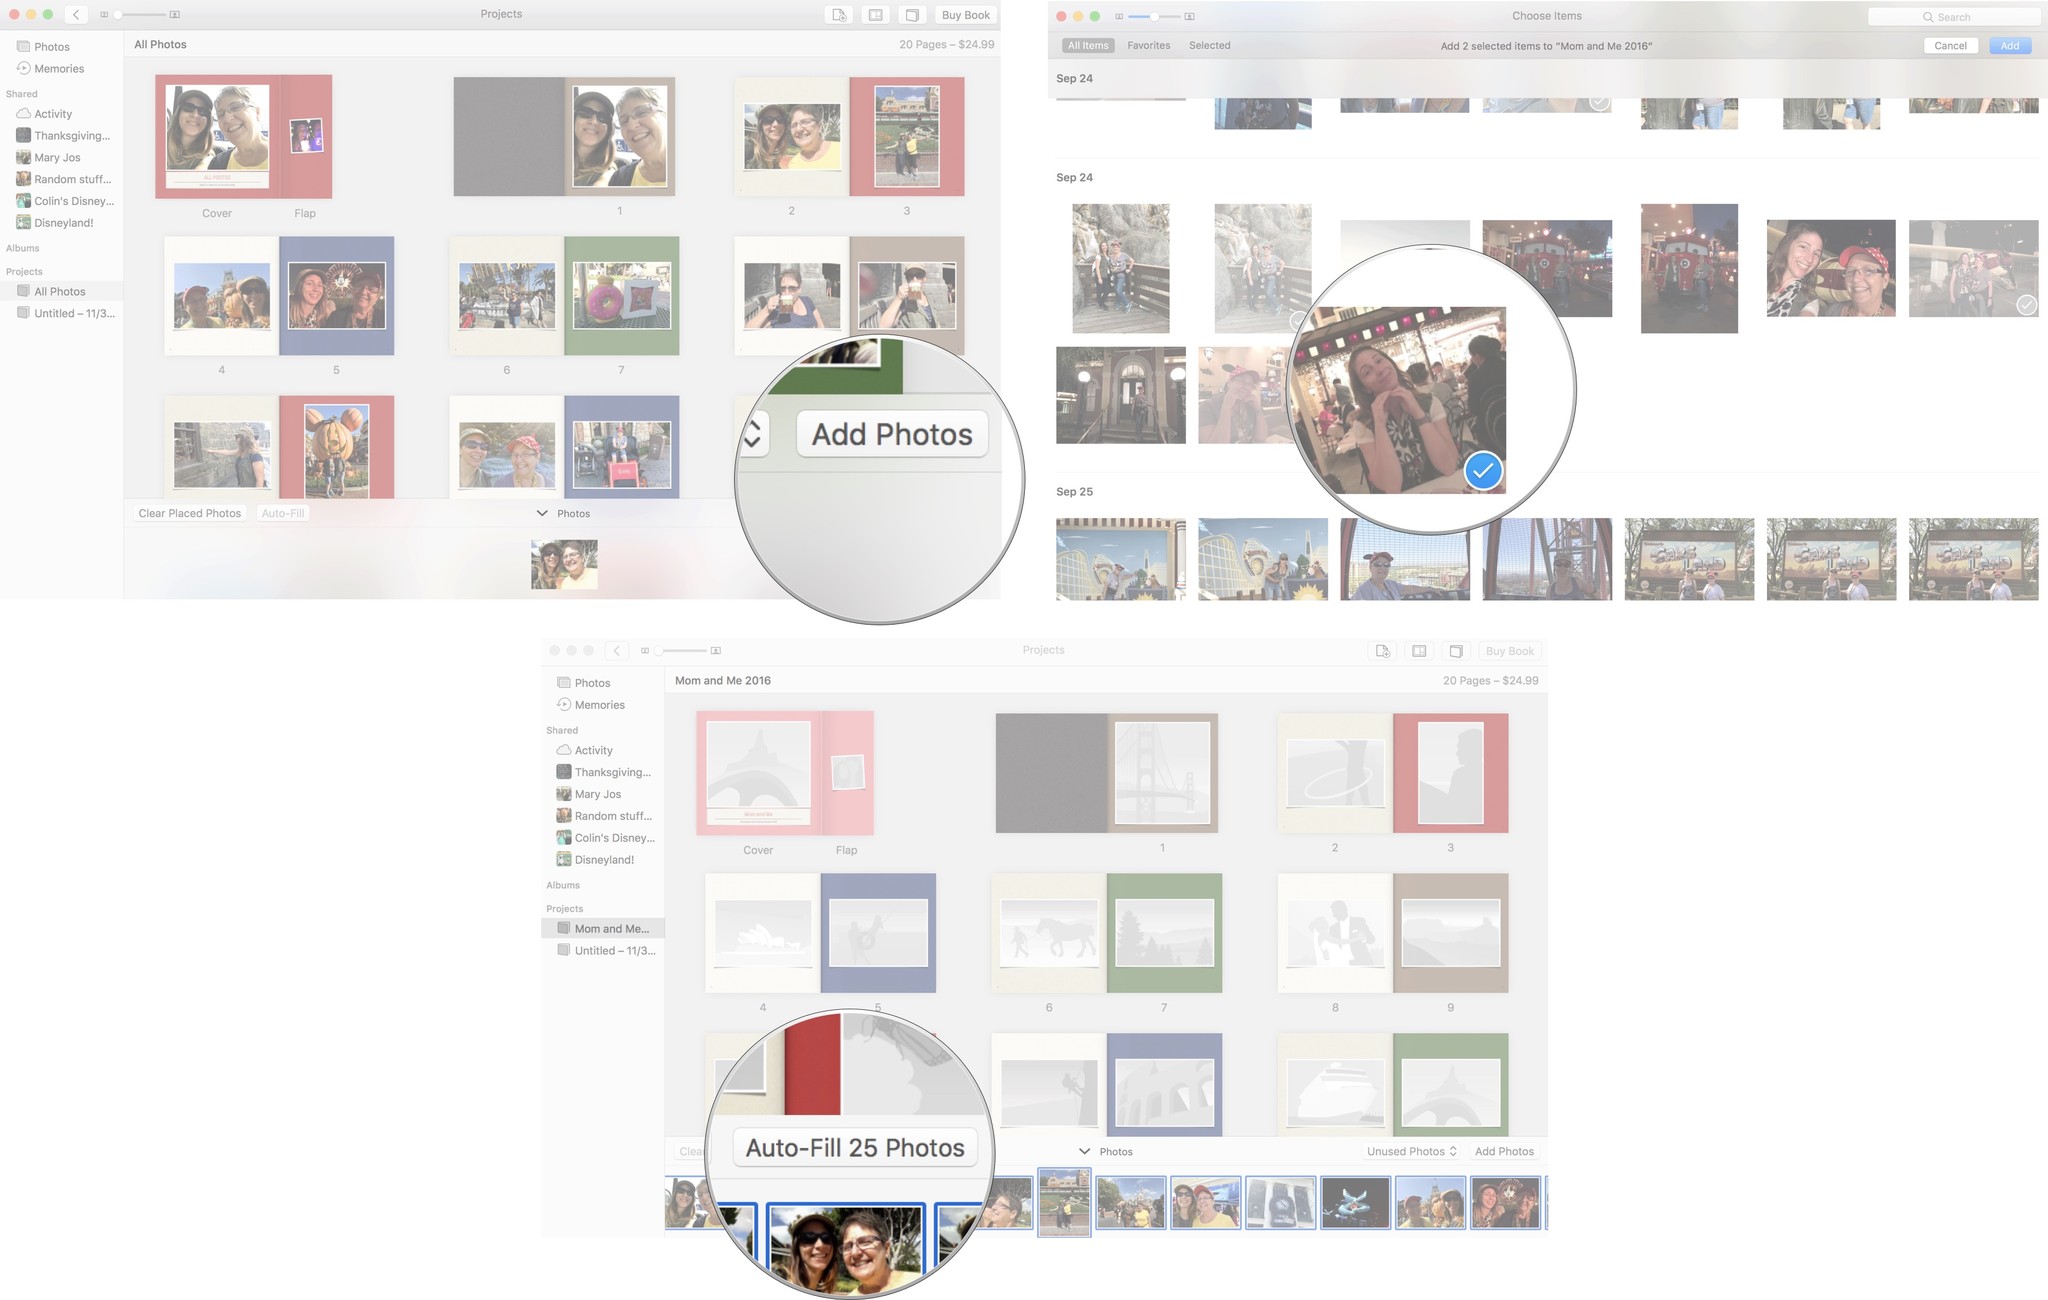
How to add pictures
If you are short on pictures or know there is one specific pic you want to include, you can add them after you've created a photo book. Tap add Photo in the bottom right corner of the Photos app window.
You will be shown groups of photos based on the albums you originally selected pictures from. This makes it easier to find more pictures based on your current events. However, you can scroll down further to view and select photos from anywhere in your library. When you are done selecting pictures, click Add in the upper right corner of the Photos app window.
Newly added pictures will appear in a tray at the bottom of your screen. Drag a photo to a page to add it to the book. Or, you can click the auto-fill button to automatically add new pictures to empty spots in the book.
How to add or remove pages
If you have a lot of pictures in your original set, Photos will automatically create new pages to fit them all in. It will also generate the new cost, which will be $0.79 per page more than the base cost. You can remove pages by selecting one and then clicking the add/remove page button in the upper right corner of the Photos window and then click remove page. You can do this with multiple pages at the same time. Photos from the removed pages will go into your unused photo tray at the bottom of the screen.
You can add new pages in the same way. If you decide it's worth the extra cost to add a couple more pages to round out the memories, tap the add/remove page button and then click add page.

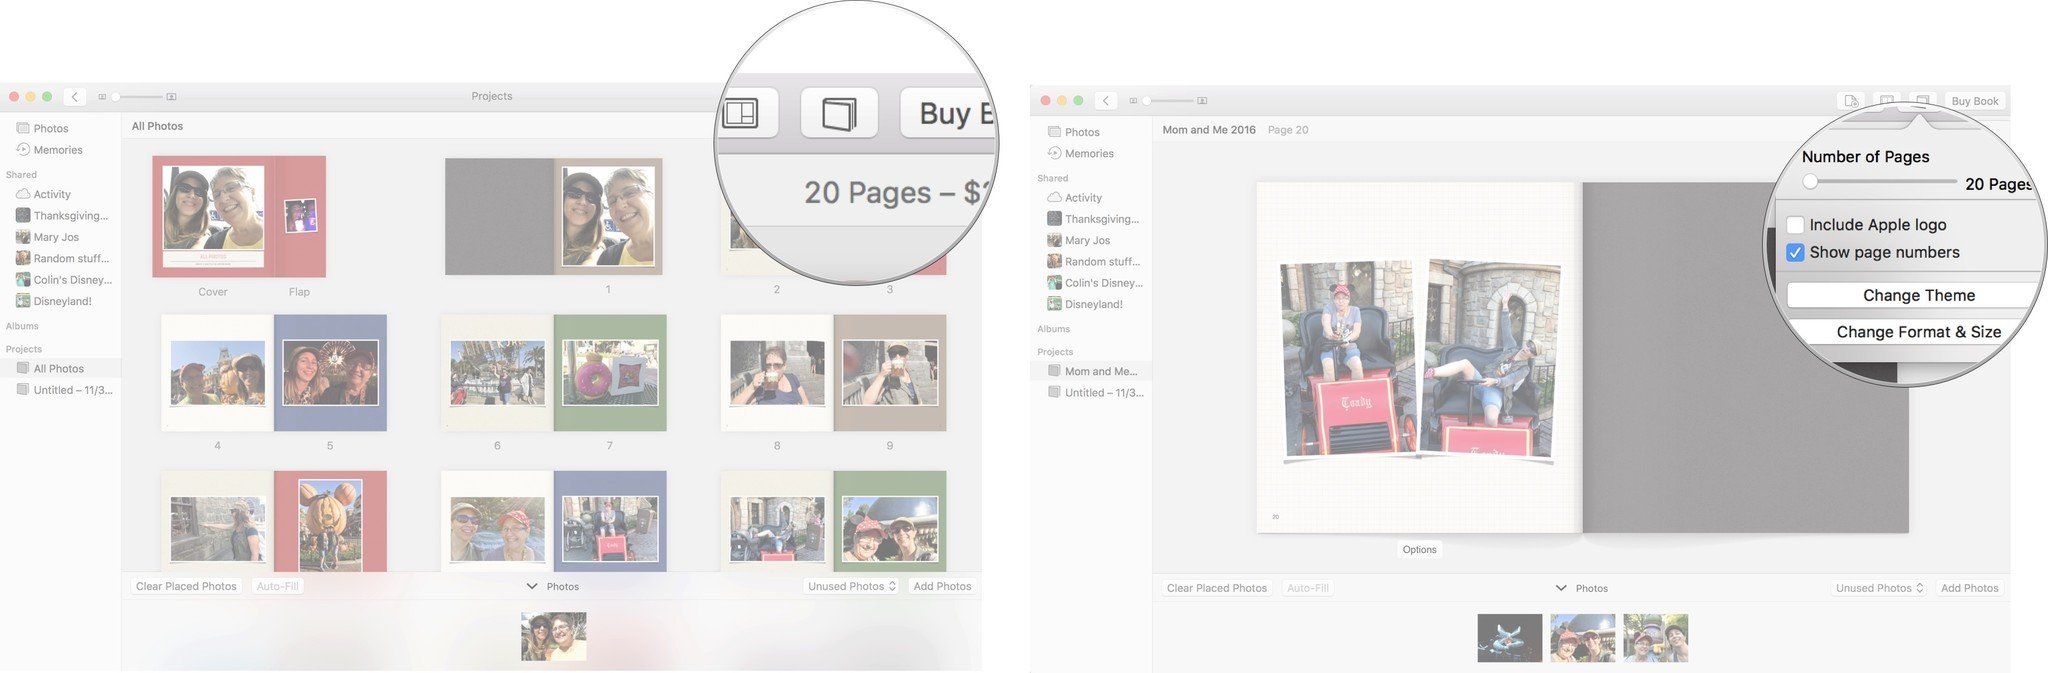
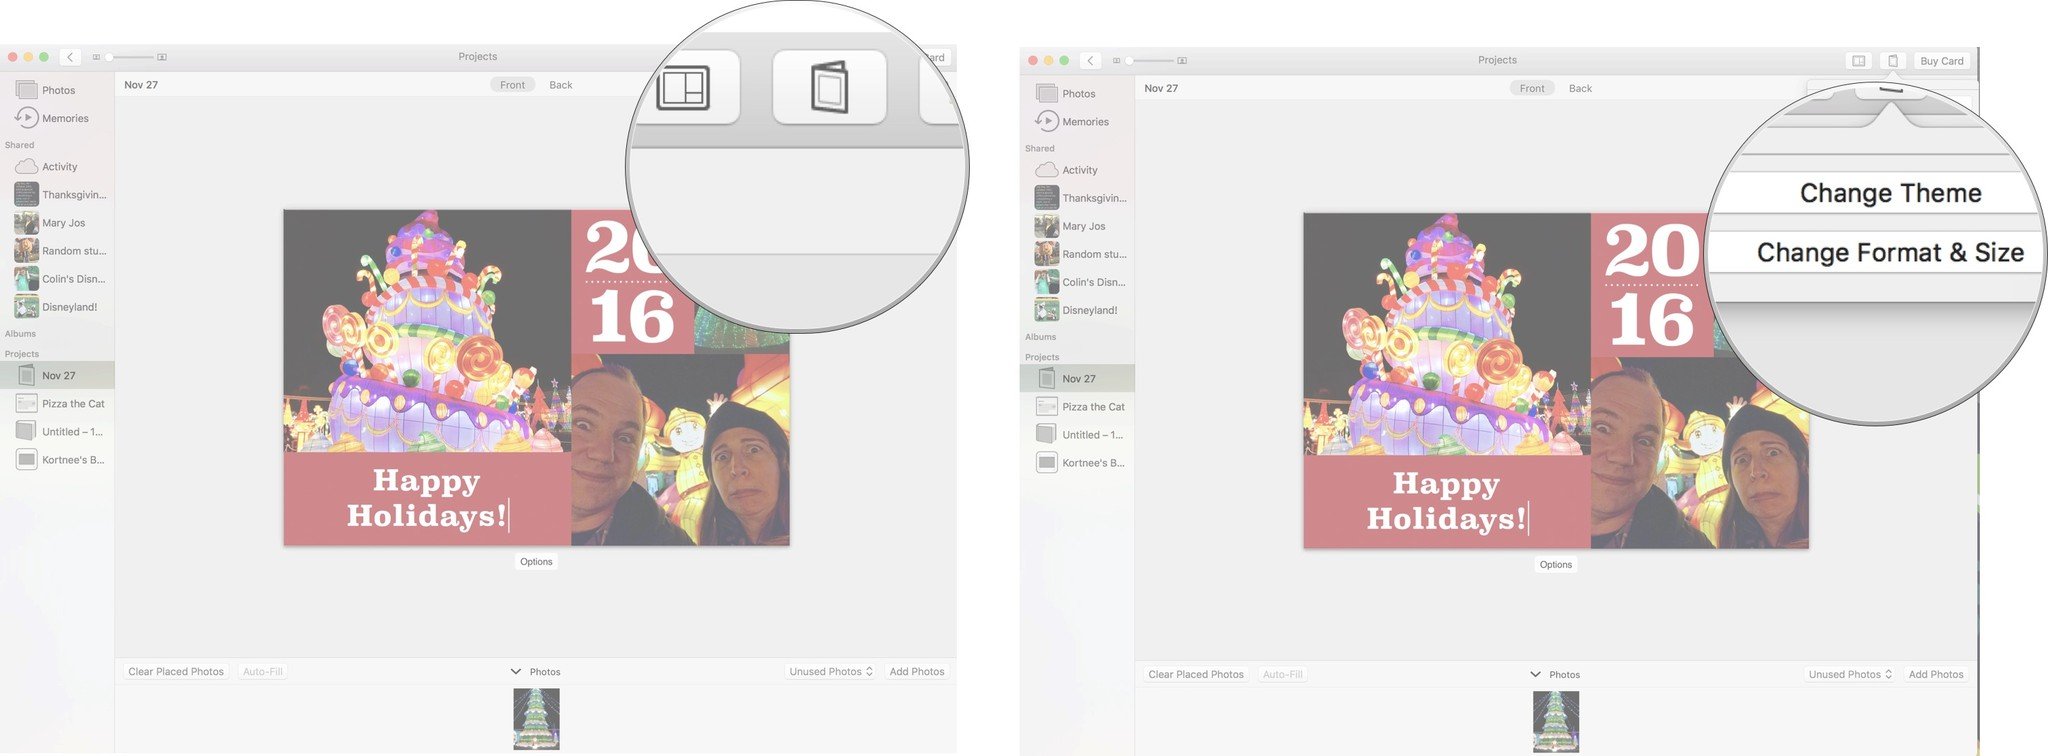
How to change the book theme or format
If you've created a photo book and decide it just isn't working for you, you can change the theme. With the project open, click on the change settings button in the right corner of the Photos window. It looks like a small booklet. Then click on Change Theme. This will delete all text and change the order of some photos, so don't change themes too often or you'll get frustrated with having to fine tune things every time.
You can also change the book format and size in the same way. Click the change settings button and then select Change format and size.
In this settings section, you can also include page numbers and remove the Apple logo. You can also increase the number of pages by dragging the page slider bar to the right.
How to order a photo book
After you've edited your pictures and page templates, added or removed extra pages, written all of your memories down, reformatted everything, and made sure it looks exactly the way you want, you can place your order.
- Click Buy Book.
Enter a shipping address. If you are sending something to someone in your contacts, you can search for a name. The address will populate in the address form automatically.

- Check to make sure everything is correct.
- Click Place Order.
Enter your Apple ID and password if prompted.

It will take a few minutes to upload your project to Apple's servers. When the process is complete, you will receive a notification and an email.
How to make a calendar in the Photos app on Mac
Making a calendar in the Photos app follows the same basic format as making a photo book: Select photos, edit, order, rinse, repeat.
- Launch the Photos app on your Mac.
- Select at least 12 pictures from your Photo library (you can select as many as you like, but you'll need at least 12 to fill every month of one year).
- Click on the Add (+) button in sidebar next to My Projects
Click Calendar.
- Choose a month length. You can start at 12 and go all the way up to 24.
- Choose a month and year to start the calendar. Generally, you'll select January of the following year, but you do have options.
- Click Continue.
- Select a Calendar theme. Different calendars offer different templates both inside and on the cover. You can always change the theme later if you don't like the one you chose.
Click Create Calendar.

The photos will automatically populate onto each month. You can then manually edit each month, or simply buy the calendar as-is.
How to edit a calendar month
- Double-click on a month to select it.
- Click on a picture and drag your cursor to the left or right to reposition it.
- Click Options just under the month to edit the template.
Select a new template. You can change the layout of the month, add more photos, or remove photos from a month. Depending on the theme you choose, you could have dozens of template options. If you see words on a template, that means you are supposed to write in your own content.

- Double-click a picture to edit it. You can add filters, zoom and crop, and adjust the picture with your photo editing tools.
Click on a text box to add your own title or sentiment.

How to add pictures
If you are short on pictures or know there is one specific pic you want to include, you can add them after you've created a calendar. Tap add Photo in the bottom right corner of the Photos app window. When you are done selecting pictures, click Add in the upper right corner.
You will be shown groups of photos based on the albums you originally selected pictures from. This makes it easier to find more pictures based on your current events. However, you can scroll down further to view and select photos from anywhere in your library.
Newly added pictures will appear in a tray at the bottom of your project screen. Drag a photo to a month to add it to the calendar. Or, you can click the auto-fill button to automatically add new pictures to empty spots on the calendar.

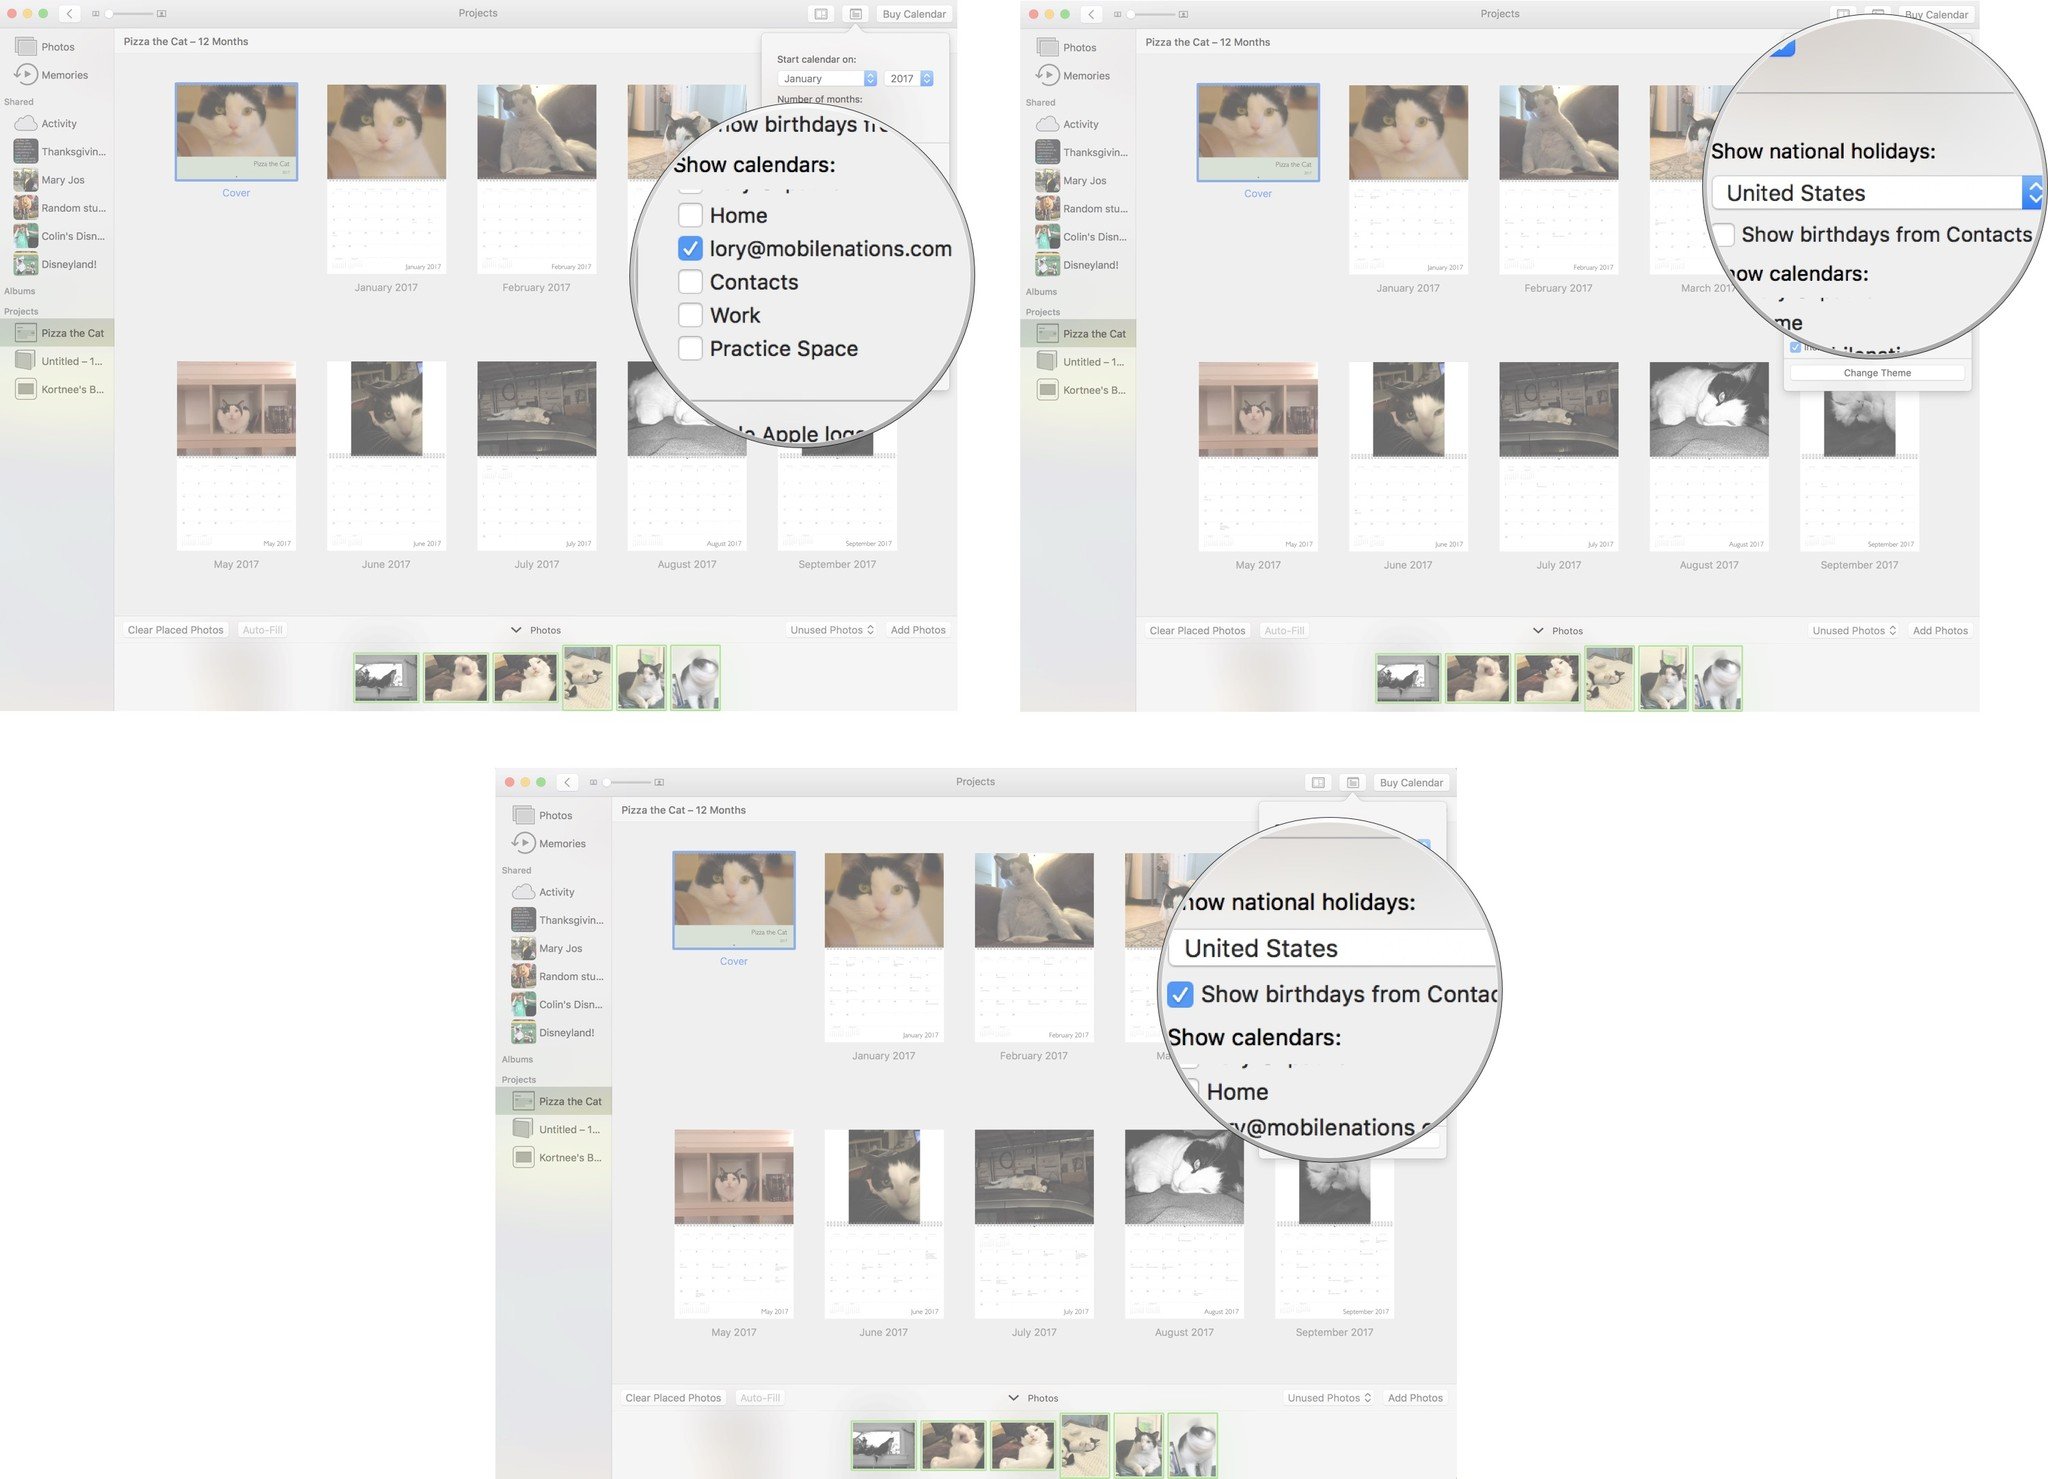
How to add holidays or personal calendars
You can actually add your own Calendar app content to a physical calendar if you so choose. If for example, you share an iCloud calendar with your fiancé, as a gift, you could include all of the upcoming wedding-related events. Just make sure you don't have any spam invites in it!
- Tap the Calendar settings button in the upper right corner of the Photos app window.
- Under Show Calendars, select a calendar.
- To add national holidays, click the drop down menu under Show national holidays and select a country.
Tick the box for Show birthdays from Contacts to include birthdays.
How to order a calendar
After you've edited your pictures and month templates, written all of your memories down, reformatted everything, and made sure it looks exactly the way you want, you can place your order.
- Click Buy Calendar.
- Enter a shipping address. If you are sending something to someone in your contacts, you can search for a name. The address will populate in the address field automatically.
- Check to make sure everything is correct.
- Click Place Order.
Enter your Apple ID and password if prompted.

It will take a few minutes to upload your project to Apple's servers. When the process is complete, you will receive a notification and an email.
How to make a card in the Photos app on Mac
Of course, cards can be the simplest, least expensive way to send holiday greetings, while still having a personal touch. You may not be able to fit as many pictures, but you can certainly share your memories!
- Launch the Photos app on your Mac.
- Select a few pictures from your Photo library. I was able to select six to create a Letterpress card with some photos appearing on the inside.
- Click on the Add (+) button in the sidebar next to *My Projects.
Click Card.
- Select a Card style from Letterpress, Folded, or Flat.
- Choose a card theme. Different cards offer different templates on the front and back. You can always change themes later if you don't like the one you chose.
Click Create Card.

The photos will automatically populate onto the card's front, inside, and back, depending on which template you chose. You can then manually edit each page, or simply buy the card as-is.
How to edit the card
- Click on Front, Inside, or Back to edit a section.
- Click on a picture and drag your cursor to the left or right to reposition it.
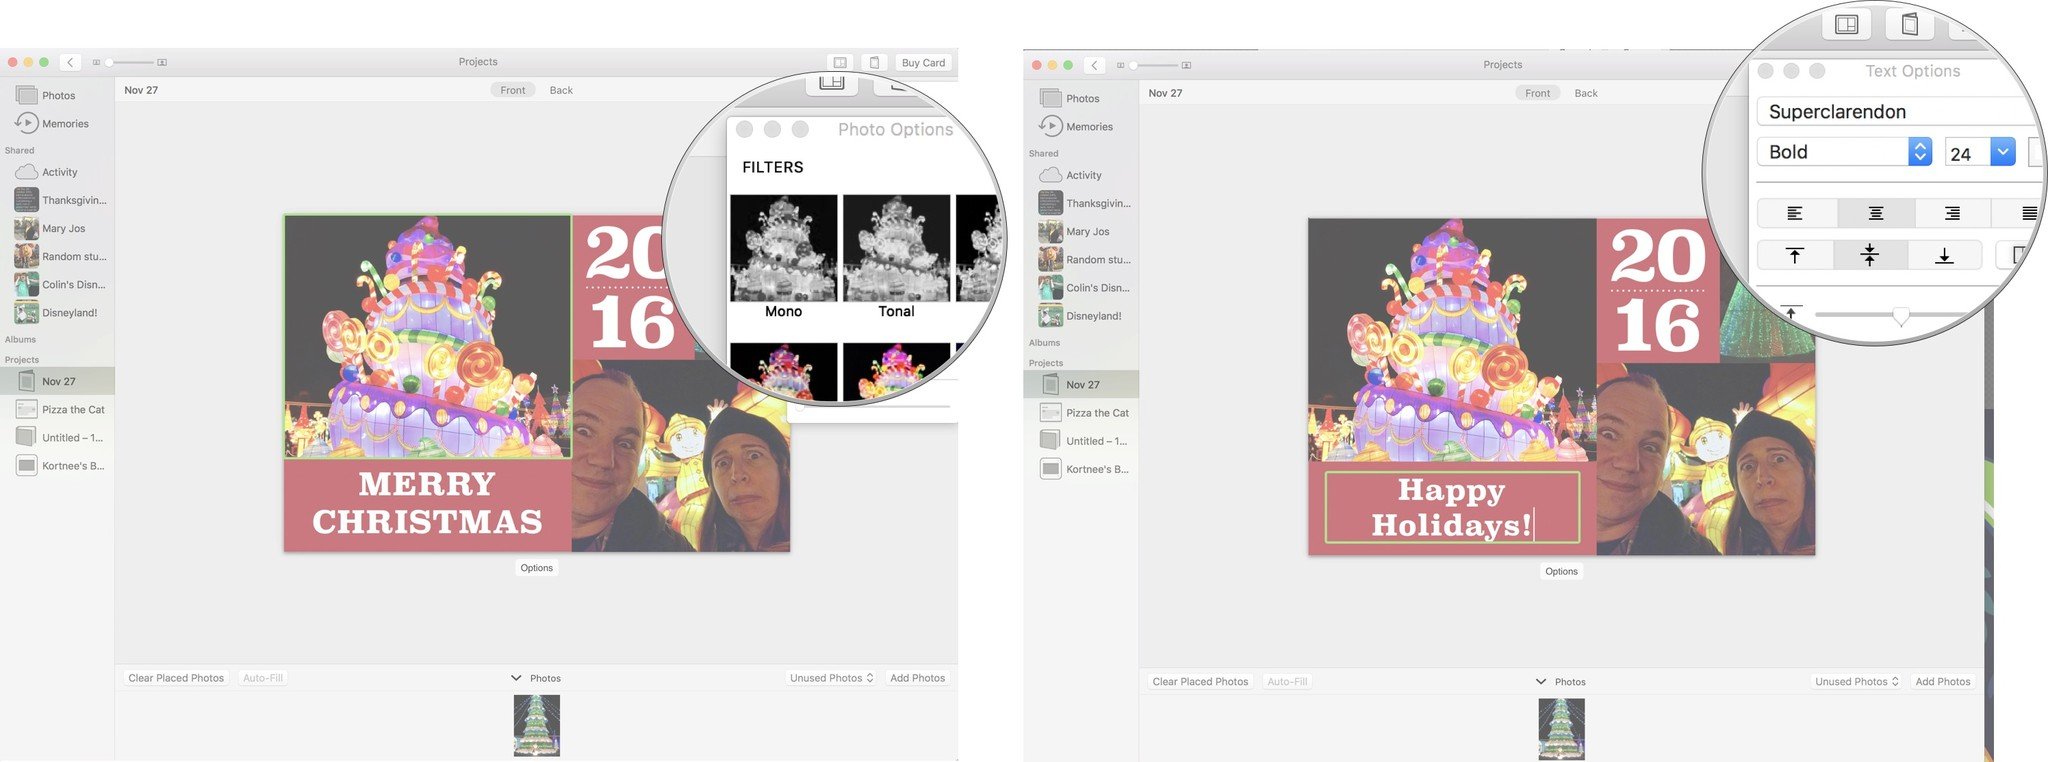
- Click Options just under the card to edit the template.
Select a new template. You can change the layout of the pictures on the card, add more photos, or remove photos from the card. Depending on the card theme you choose, you could have a variety of template options. Don't forget to write your own content!

- Double-click a picture to edit it. You can add filters, zoom and crop, and adjust the picture with your photo editing tools.
Click on a text box to add your own title or sentiment. Don't forget to include your personalized greeting on the inside or back of your card.
How to add pictures
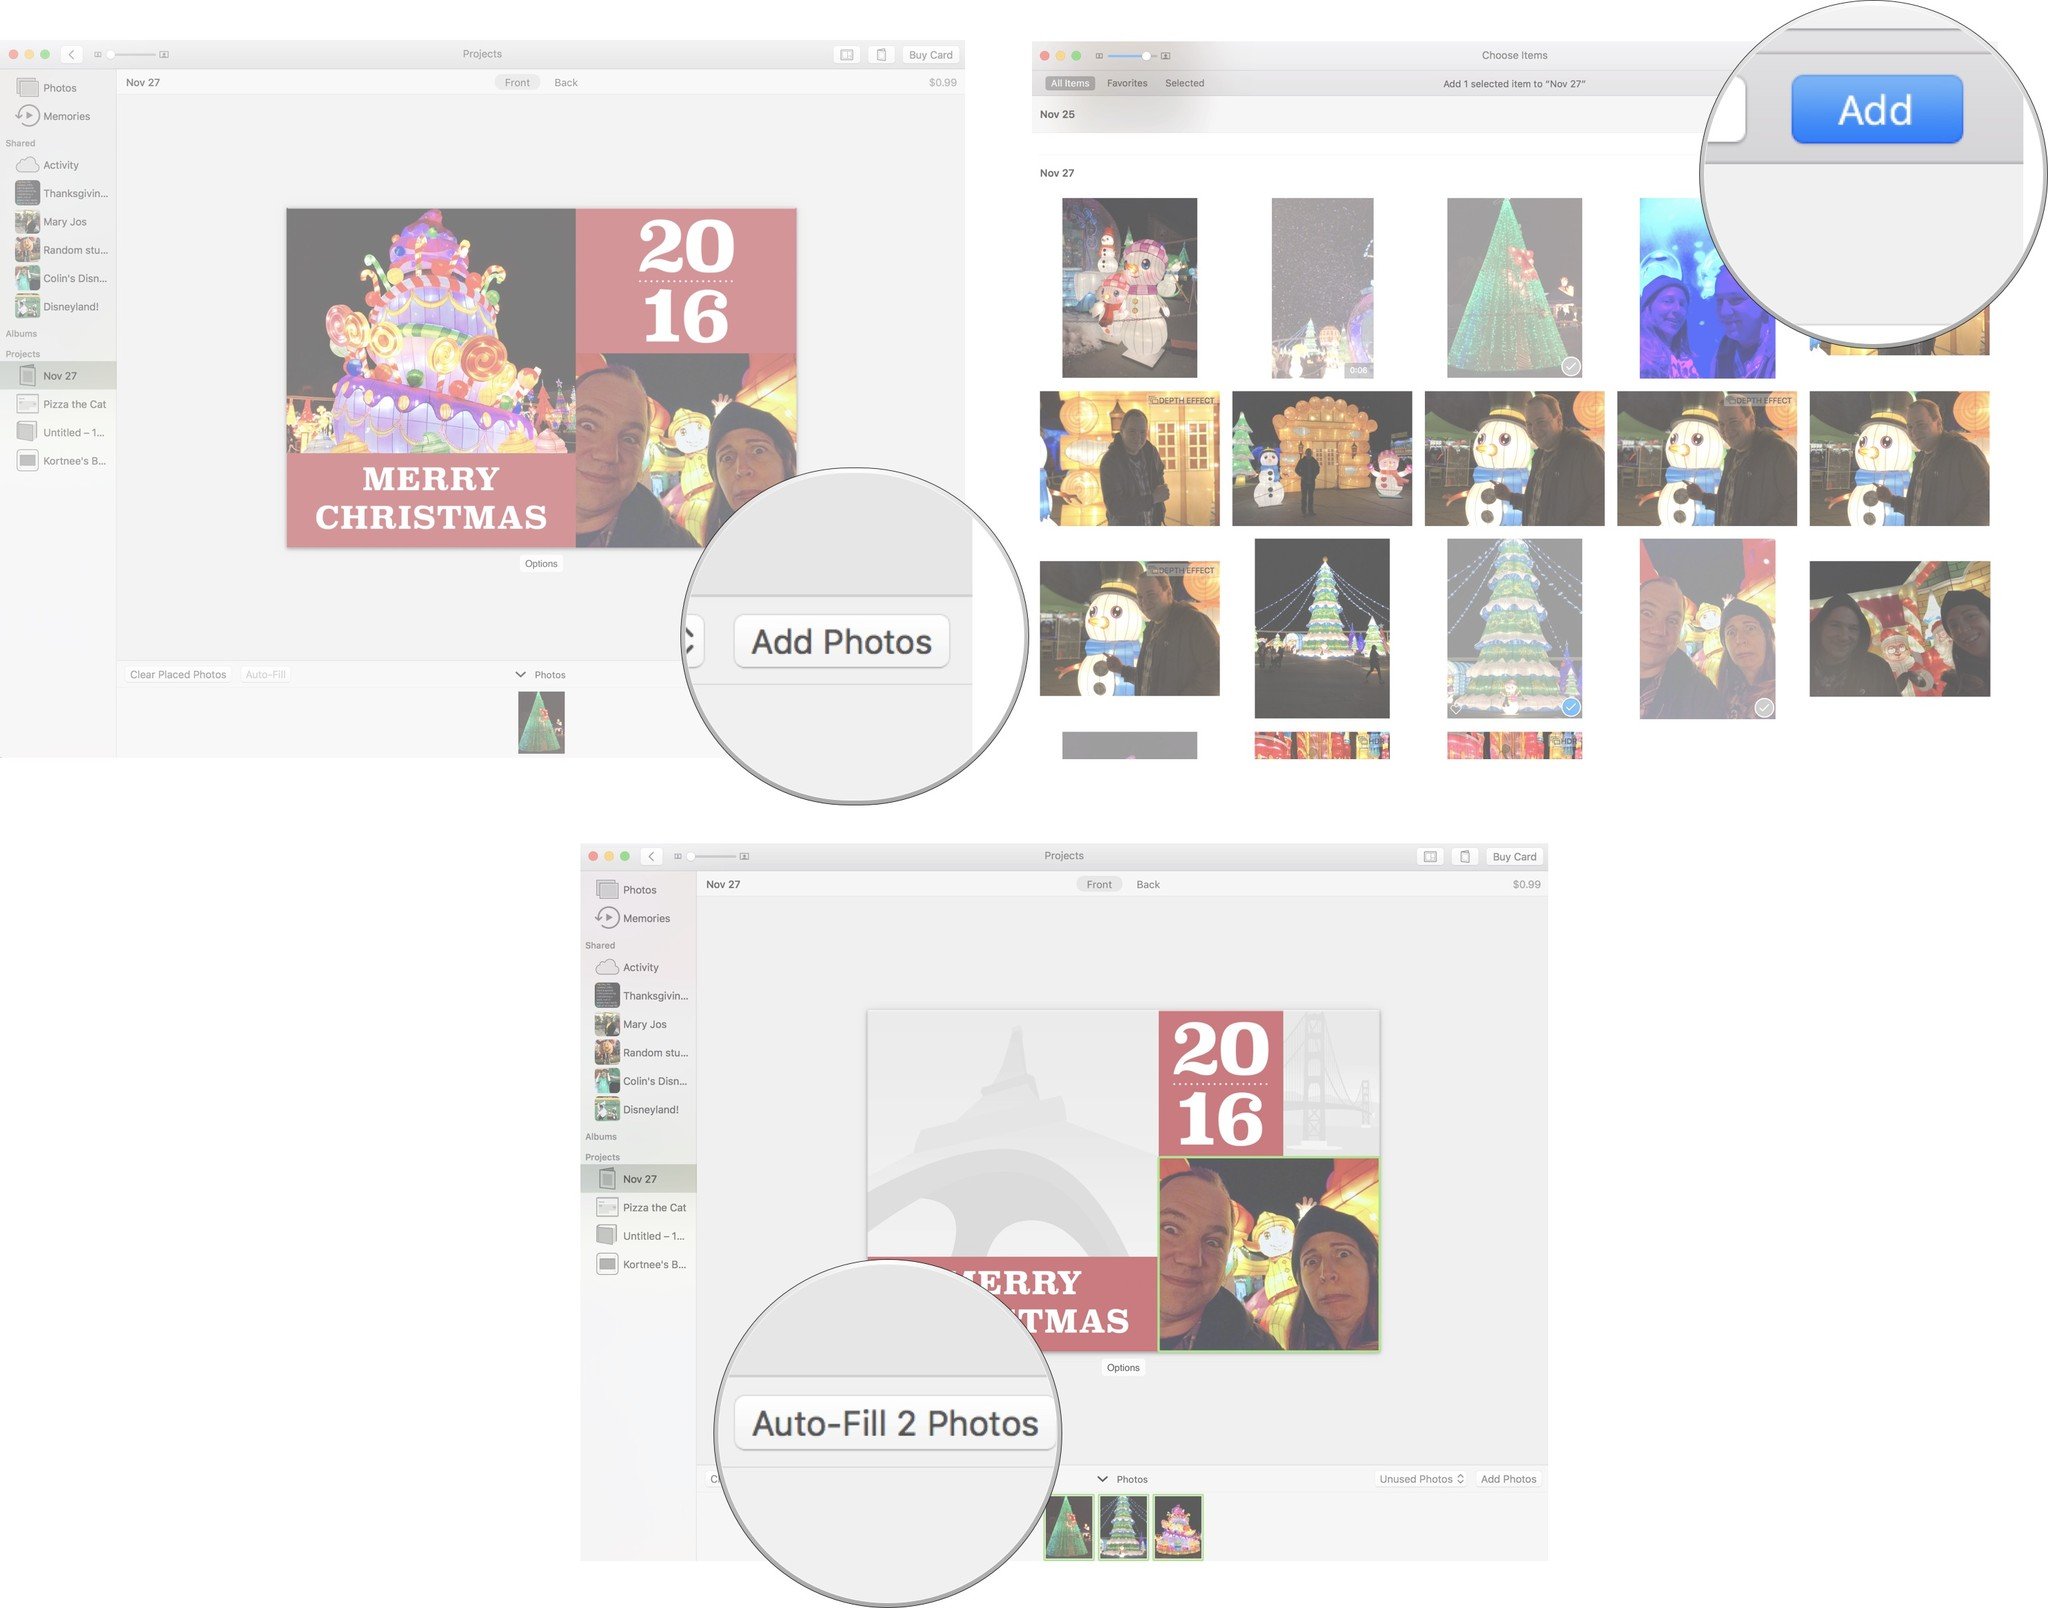
If you know there are specific pics you want to include, you can add them after you've created a photo book. Tap add Photo in the bottom right corner of the Photos app window.
You will be shown groups of photos based on the albums you originally selected pictures from. This makes it easier to find more pictures based on your current events. However, you can scroll down further to view and select photos from anywhere in your library. When you are done selecting pictures, click Add in the upper right corner of the Photos app window.
Newly added pictures will appear in a tray at the bottom of your project screen. Drag a photo to the card to add it. Or, you can click the auto-fill button to automatically add new pictures to empty spots on the card.
How to change the card theme or format
If you've created a card and decide it just isn't working for you, you can change the theme. With the project open, click on the change settings button in the right corner of the Photos app window. It looks like a small booklet. Then click on Change Theme. This will delete all text and change the order of some photos, so don't change themes too often or you'll get frustrated with having to fine tune things every time.
You can also change the card format in the same way. Click the change settings button and then select Change format and size.
In this settings section, you can also remove the Apple logo.
How to order a card
After you've edited your pictures and template, written your greeting, reformatted everything, and made sure it looks exactly the way you want, you can place your order.
- Click Buy Card.
- Enter a shipping address. If you are sending something to someone in your contacts, you can search for a name. The address will populate in the address field automatically.
- Check to make sure everything is correct.
- Click Place Order.
Enter your Apple ID and password if prompted.

It will take a few minutes to upload your project to Apple's servers. When the process is complete, you will receive a notification and an email.
How to order prints in Photos for Mac
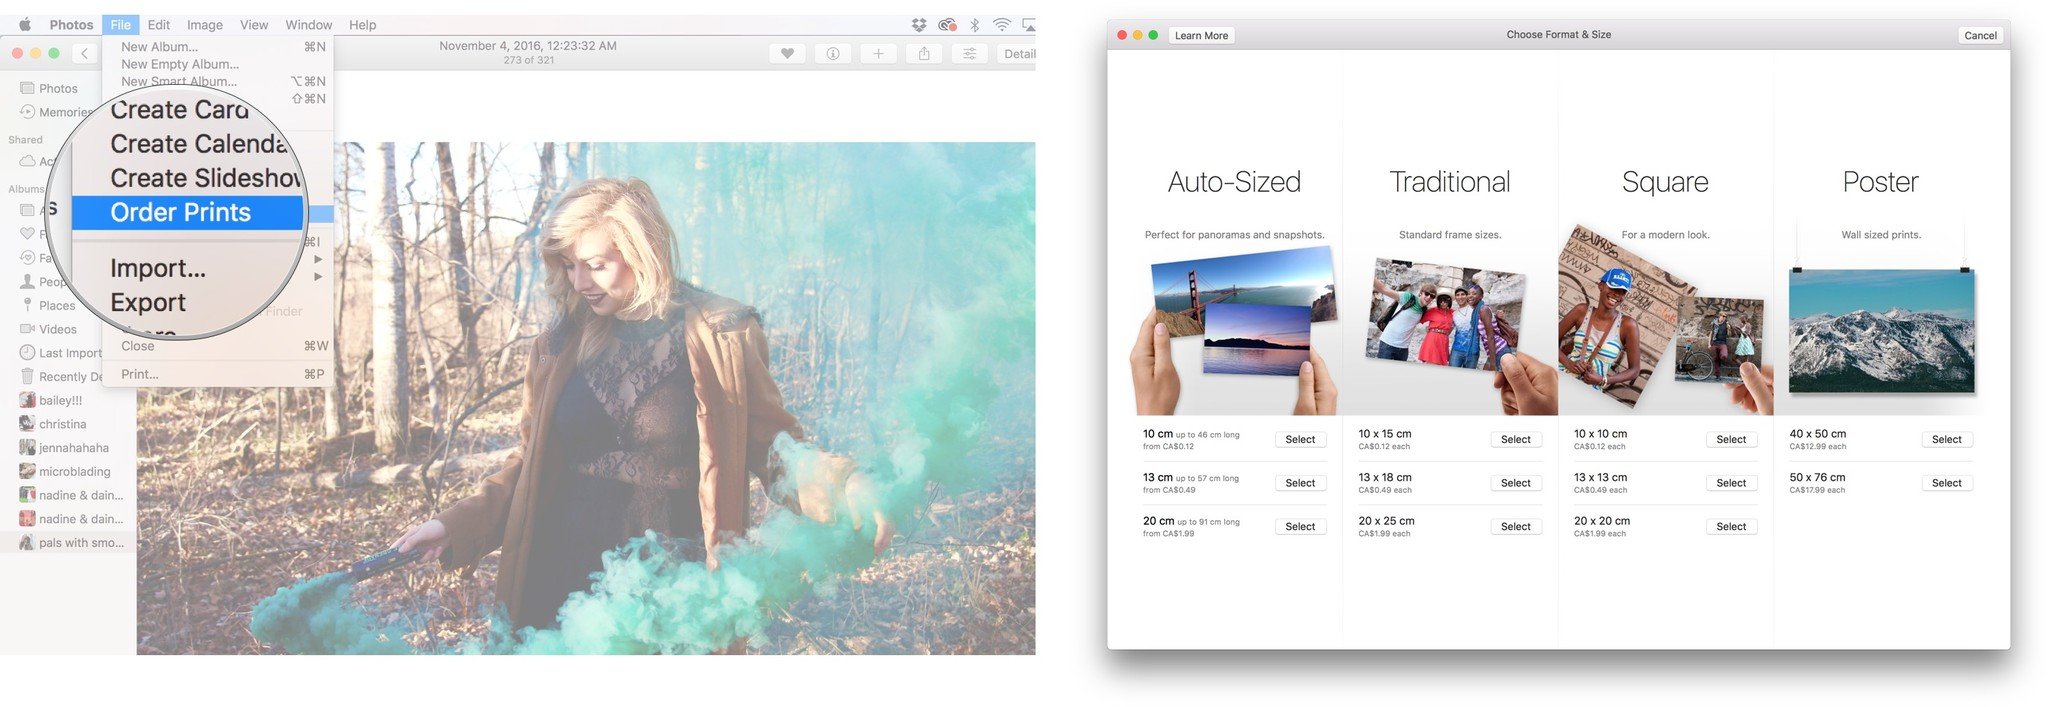
- Launch the Photos app on your Mac.
- Select the photo or photos you'd like to order prints of. (You can select non-contiguous prints by holding down the command key on your keyboard.)
- Click on the Add (+) button in sidebar next to My Projects
Click Prints.
Click the Select button to choose which print options you'd like
- Select options like white borders around the photos, or a glossy finish in the upper right corner.
If you click on the Cancel Order button, you can also save the order if you'd like to come back to it later.

- Click the Order Prints button when you're ready to check out. You may have to agree to the terms and conditions.
Click the Add Shipping Address button and select an address to send it to. If you're getting them, use your own address, but you can also send them to friends or relatives in your address book — a great way to order prints for folks who don't have a computer or smartphone!
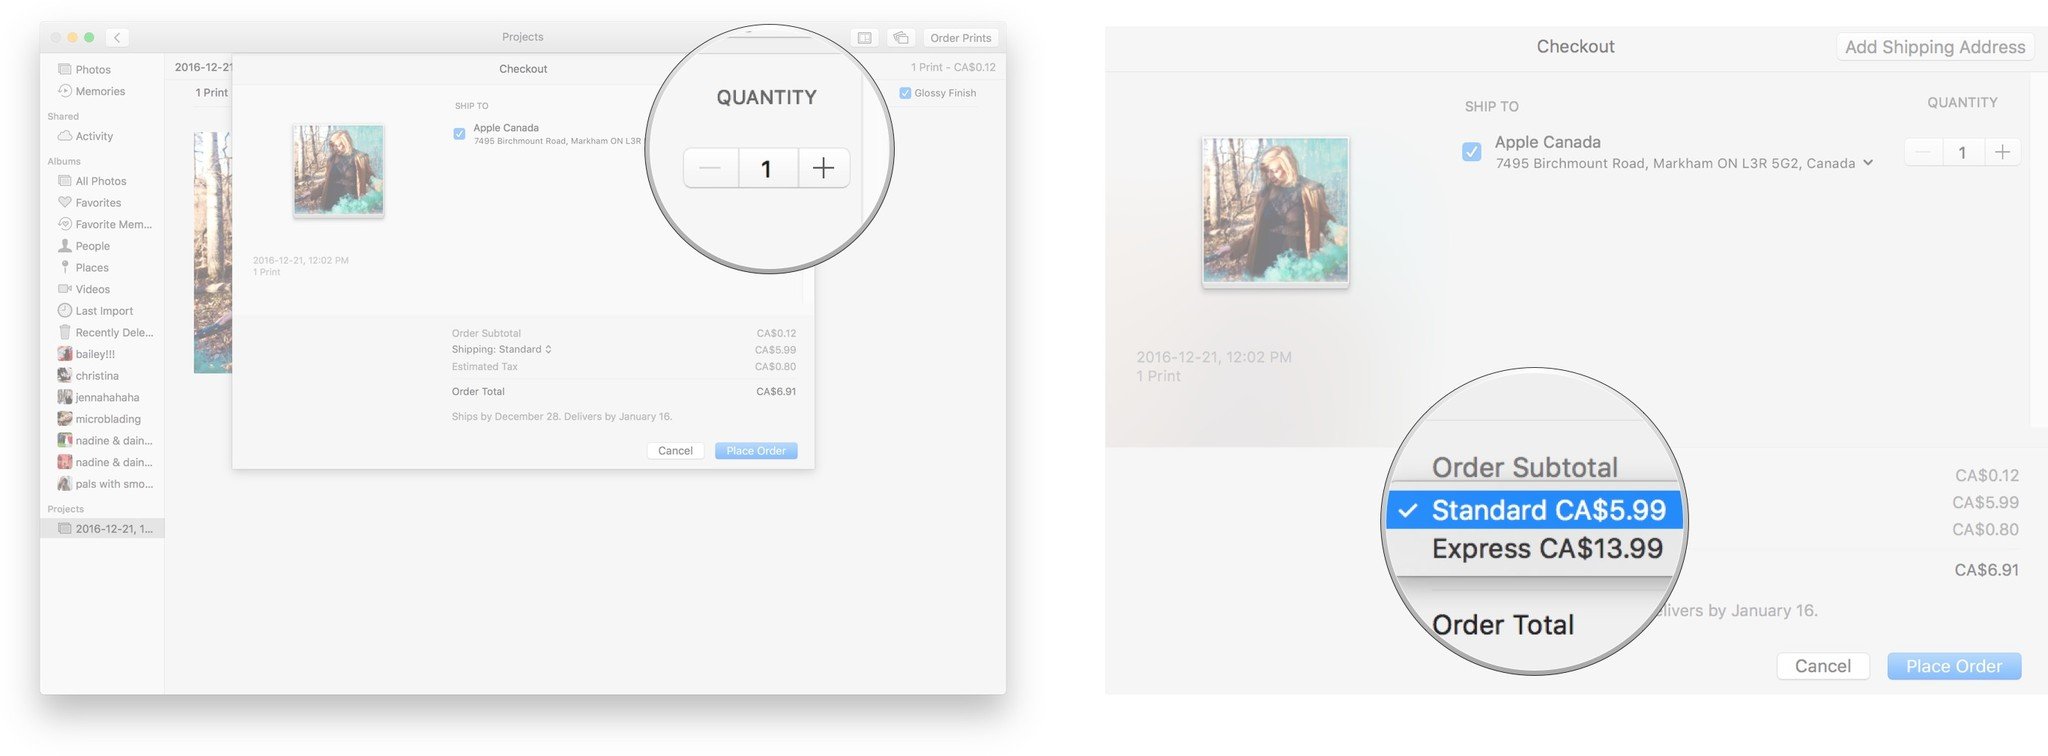
- Click on Quantity and, if you want to order more than one set of prints, adjust accordingly.
You can choose standard or express shipping (depending on your region), if you're in a hurry and willing to pay extra. Apple will show your estimated delivery day depending on what you've chosen.
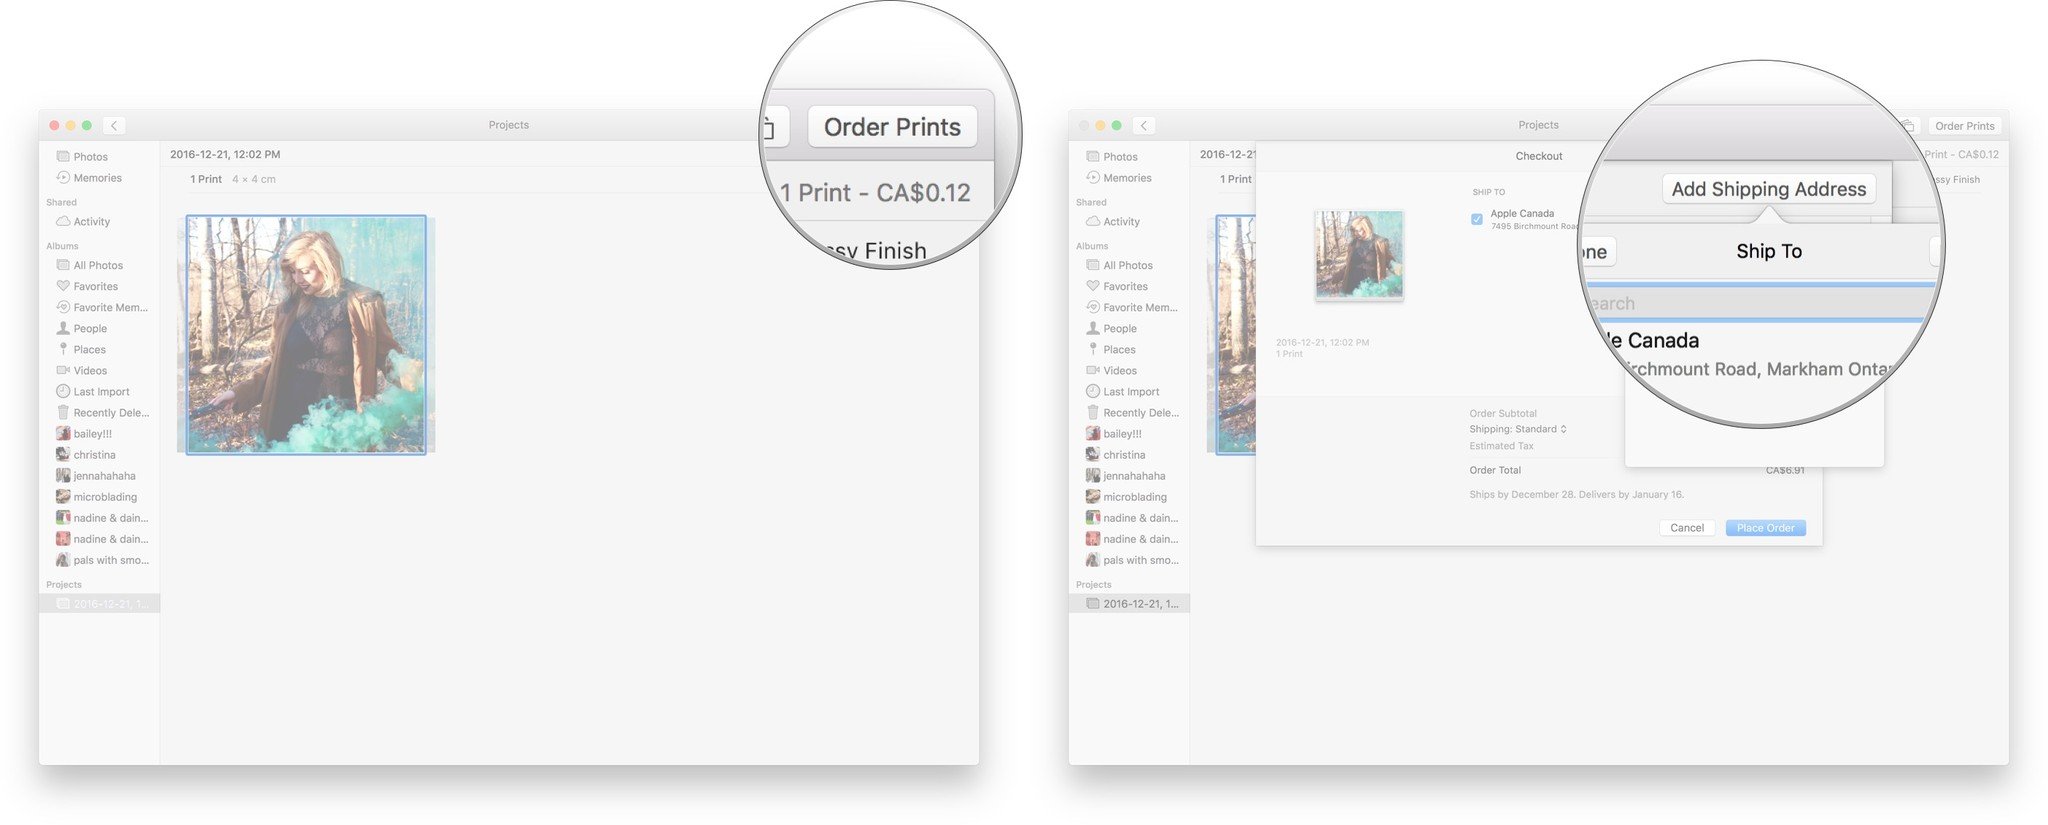
- Click the Place Order button.
Sign in using your Apple ID and password.
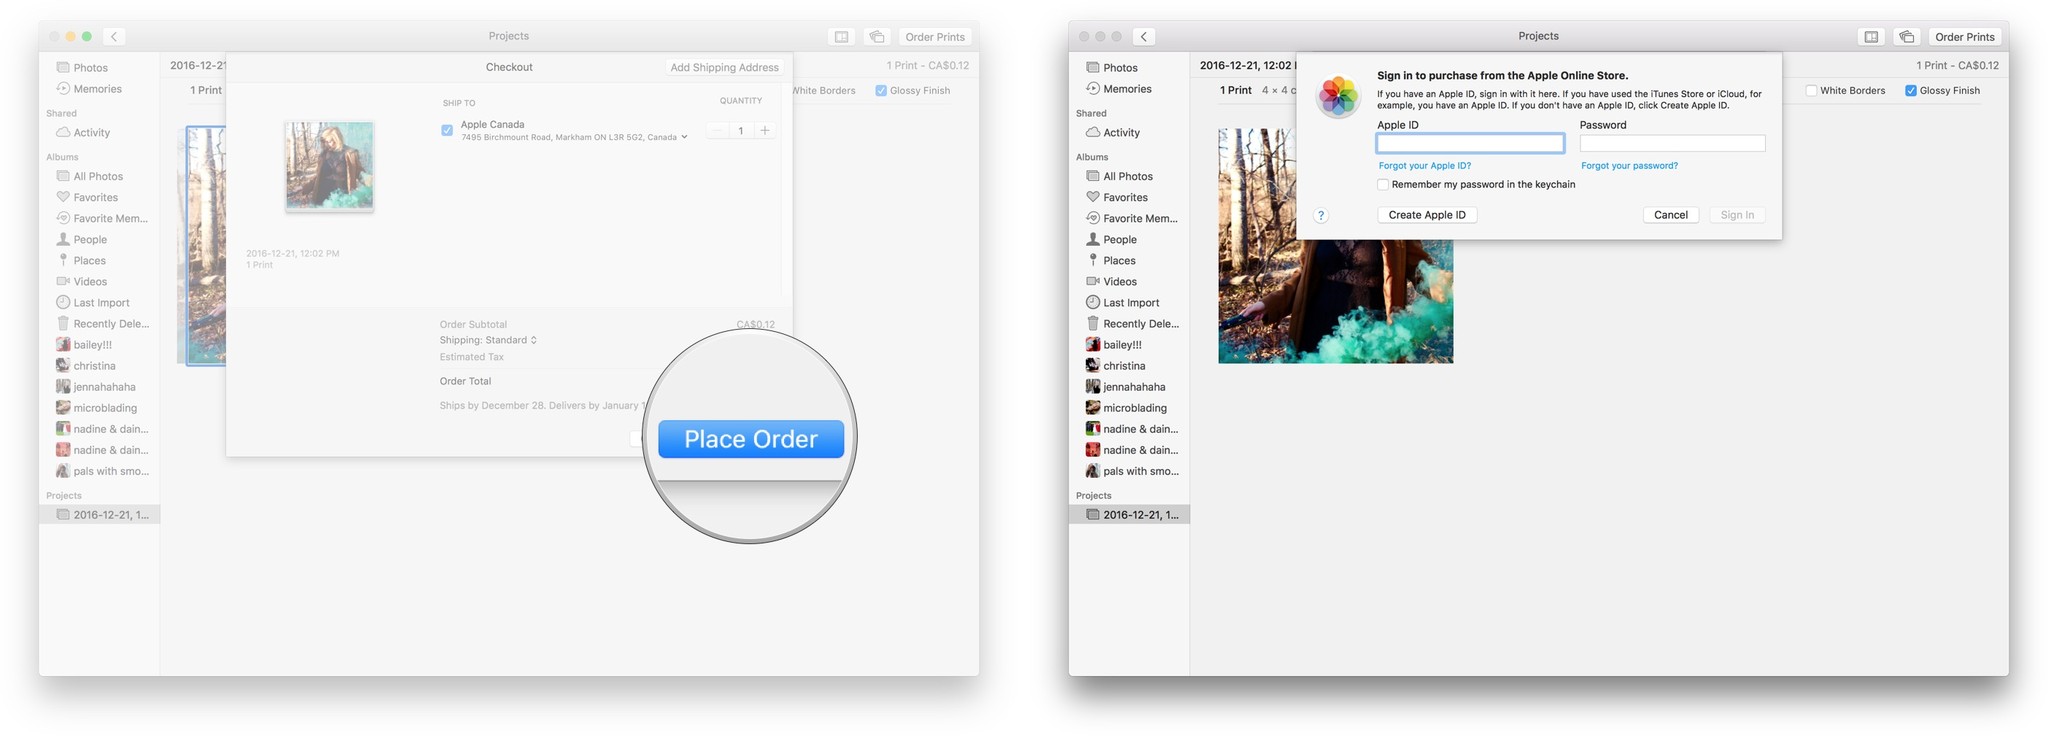
That's it! Within a few days you'll get a package delivered to your door containing your photos!
Any questions?
Do you have any questions about how to create and order photo books, calendars, and cards from the Photos app on the Mac? Let me know in the comments and I'll help you out.
Updated December 2017: Updated for changes in macOS High Sierra.