How to save your iPhone photos directly to an external hard drive on Mac
- dec
- 29
![]()
How do I save my iPhone photos to an external hard drive? Using Image Capture you can cut out half the work!
If you take a lot of photos with your iPhone, you know how just how much space they can take up on your phone and in your iCloud account. Saving your photos to an external hard drive not only will allow you to free up space on your iPhone, it can also give you a safe place to store your photos in case you happen to lose them. Backing up your data is also a good thing!
Instead of transferring your photos from your iPhone to your Mac and then transferring those photos from your Mac to your external hard drive, you can automate the process using Image Capture on your Mac.
How to save your iPhone photos directly to an external hard drive on Mac
- Plug in your external hard drive to your Mac.
- Plug in your iPhone to your Mac. Make sure you select to Trust the computer if you haven't done so already.
- Launch Image Capture from Launchpad.
Click on your iPhone in the sidebar.

- Use the keyboard shortcut Command - A to select all the photos. Alternatively, you can select photos individually.
Click on the destination drop down menu.

- Click Other from the list of options.
Click on your external hard drive.
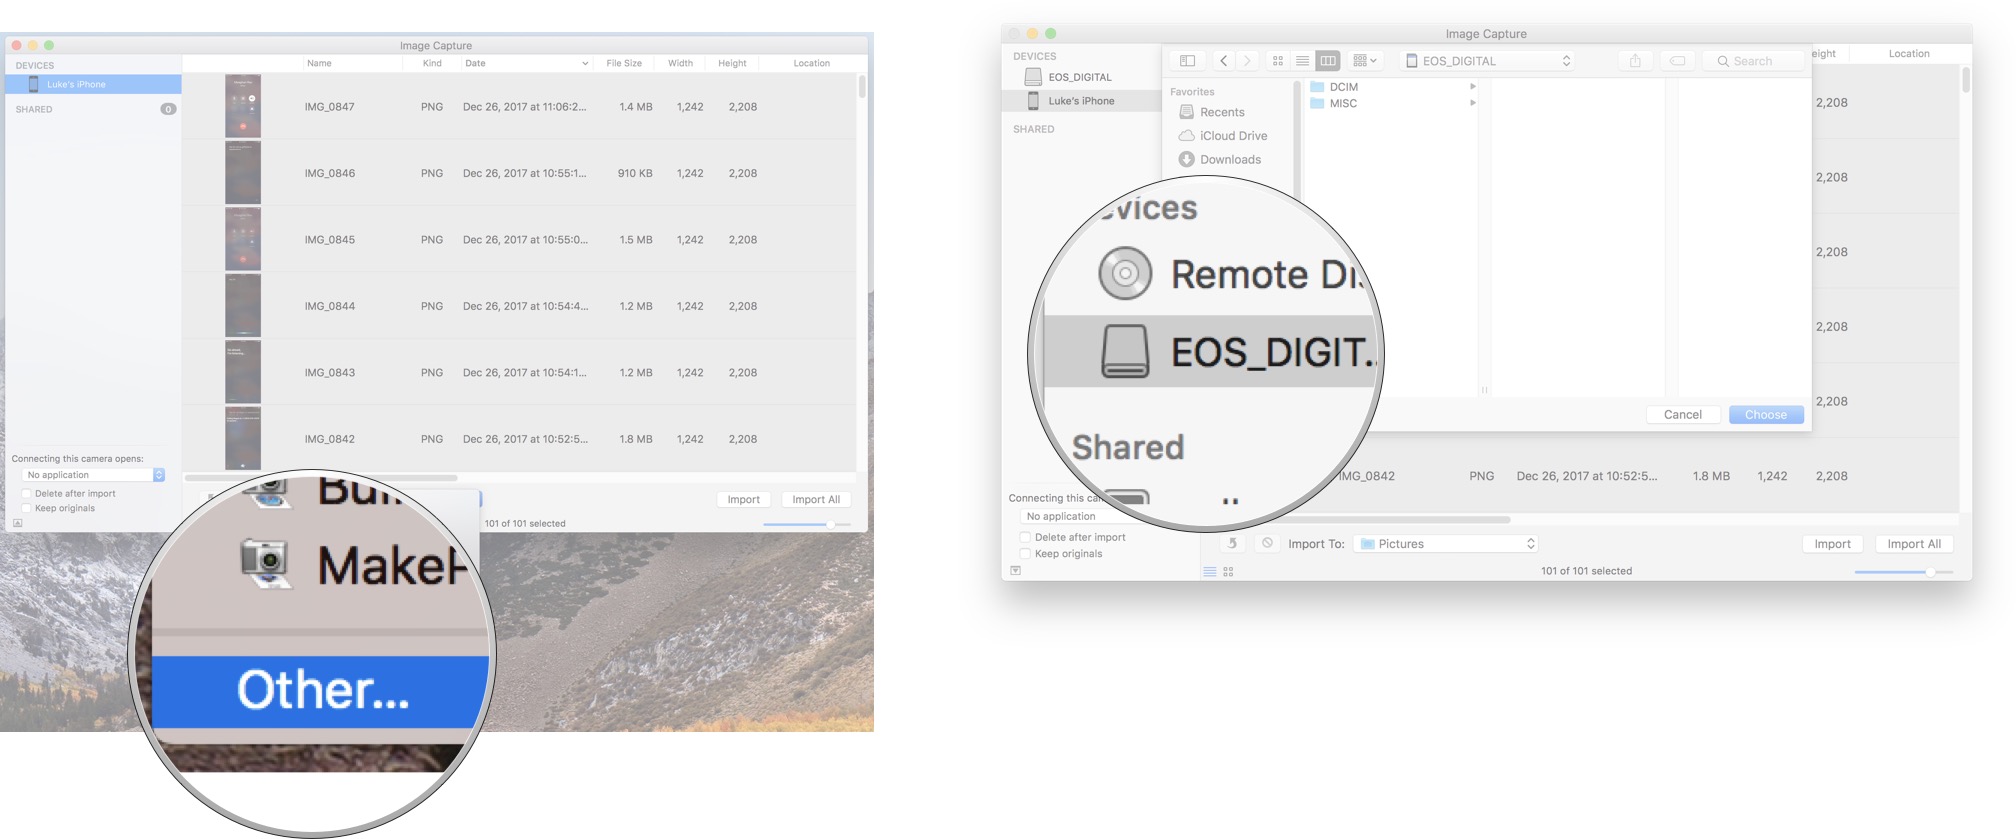
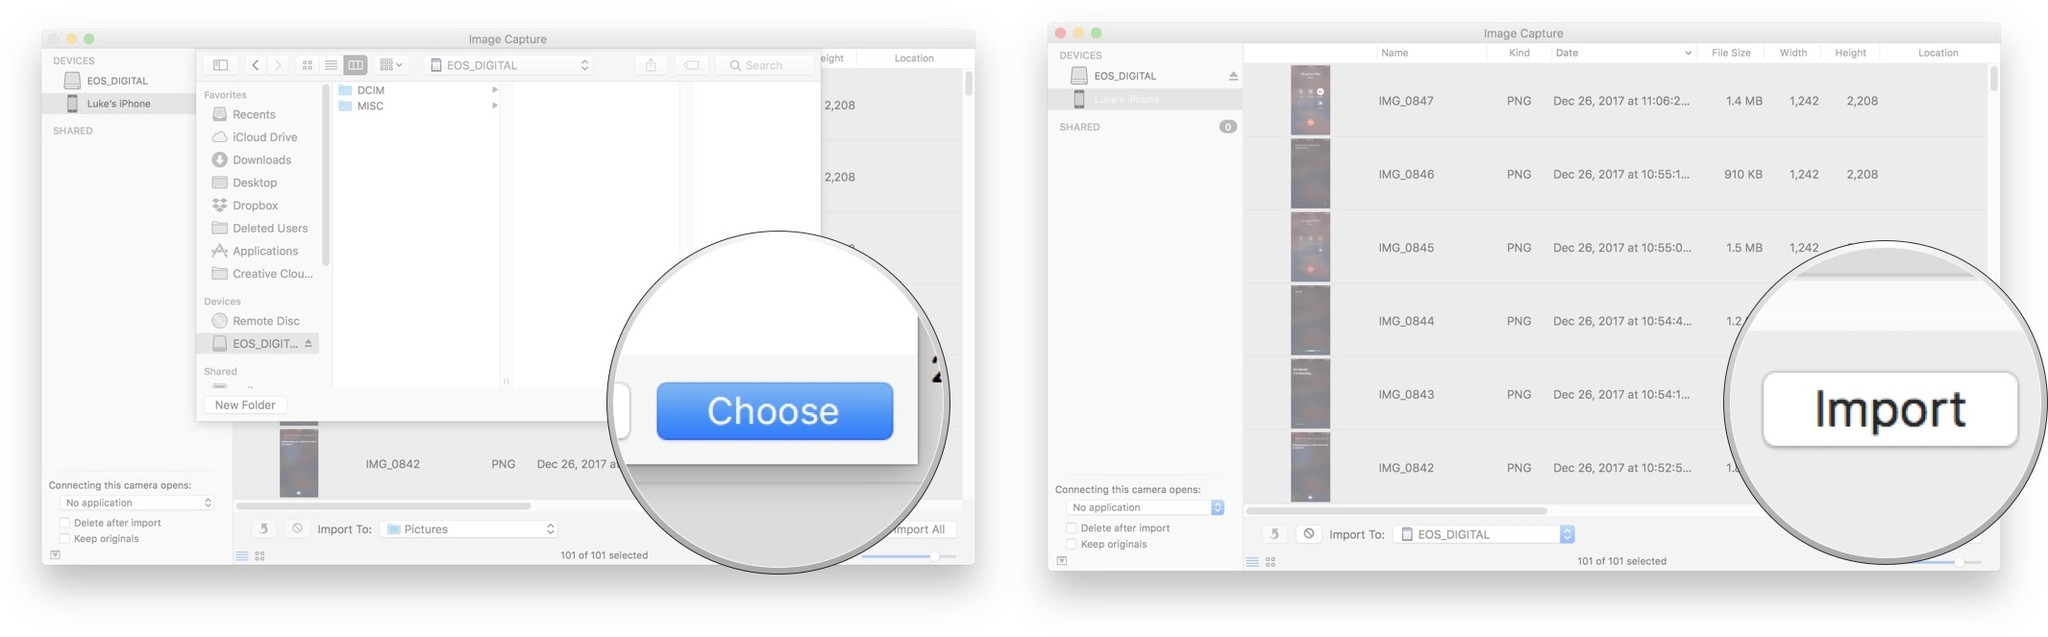
- Click Choose.
Click Import.
Now, your the photos from your iPhone will transfer over to your external hard drive. This will likely take a few minutes and if you have a lot of photos, it could take up to several minutes.
Any Questions?
Let us know in the comments down below.