
How to run Windows 10 on your Mac using VMware’s Fusion 10
- jan
- 31
You can use Windows on your Mac without having to partition your hard drive with VMWare's Fusion 10. It's easy!
Virtual machines are a great alternative to partitioning your hard drive to install Windows using Boot Camp. It means you can use Windows in a window (excuse the pun) or even full screen if you want, and you don't have to cut the amount of space your hard drive has for your current computing needs.
I recently explained how to get the Parallels Desktop virtual machine on your Mac. If you're interested in Parallels, check out my installation guide:
How to run Windows 10 on your Mac using Parallels Desktop 13
I'm covering all the major virtual machines for your benefit and this time its all about VMWare's Fusion 10 virtual machine software. They're similar, but have a few different steps in the set up process.
Here's how to get VMWare's Fusion 10 on your Mac and then install and run Windows 10 from within your macOS operating system without having to switch hard drive partitions.
- Check your system and hardware requirements
- Before you start: Back up your Mac
- How to run Windows 10 on Mac using Fusion 10
Check your system and hardware requirements
Before you get started with installation of Fusion 10, make sure your Mac meets the minimum system requirements for both hardware and software.
The minimum system requirements for installing and using VMware Fusion 10 are:
Hardware
- Apple Mac launched in 2011 or later (except the 2012 Mac Pro Quad Core with Intel Xeon W3565 Processor. The CPU architecture is incompatible).
- Also supports the 2010 Mac Pro "Six Core", "Eight Core" and "Twelve Core" models.
- Minimum 4GB of RAM
- 750MB free disk space for VMware Fusion and at least 5GB for each virtual machine
Software
- Mac OS X 10.11.0 or later
- Operating system installation media (disk or disk image) for virtual machines.
- Microsoft Windows is not included with VMware Fusion.
- Recommended graphics hardware for Windows DirectX 10 or OpenGL 3.3 support:
- NVIDIA 8600M or better
- ATI 2600 or better
- Minimum requirements for Metal support.
Before you start: Back up your Mac
This is one of those awful mistakes that people make, thinking that they don't need to back up their Mac before doing something big. First off, you should be backing up your Mac on a regular basis, but even if you don't do so multiple times per day, you should definitely do so right now, before you continue with this guide. Seriously. Back it up.
How to run Windows 10 on Mac using Fusion 10
You'll need a copy of Fusion 10 or Fusion 10 Pro in order to install it on your Mac. Fusion 10 costs $79.99 and the pro version costs $159.99. The main differences between them is in the advanced features. The Pro version includes extra features specific for multiple-computer use. For example, if you to be able to create linked clones on different Macs or if you need to network your computers together. You can buy the full license right now or download a free 30-day trial and make your full purchase later.
You'll also need a copy of Windows 10. You might already have a full copy or you might need to buy a copy. VMWare requires that you have a copy on a disk, drive, or an ISO image file in order to run it on your Mac.
Download Windows 10
- Navigate to the Microsoft Windows 10 ISO download page from your web browser.
- Click on Select Edition and select Windows 10.
Click Confirm.

- Click on Select the product language and select your language.
Click Confirm.

- Click on 64-bit Download.
Click Save to start the download.

This may take a while, so have a cup of tea and watch an episode of Black Mirror while you wait.
Download and install VMWare Fusion 10
The first step is to download Fusion 10. You can buy a full license right now or download the free 30-day trial to get started.
Once the program download is complete, follow these steps to install Fusion 10 on your Mac.
- Double-click on the VMwareFusion.dmg file to open it (it might be in finder or on your desktop. You can search for it in Spotlight if its not easy to find).
Double-click on Double-click to Install.

- Click Open if prompted to confirm that you want to open the application.
- Click one of the options for how you want to install Fusion 10, either with a license key, buy purchasing now, or by using the free 30-day trial.
- Click Continue.
- Select whether you want to install Fusion 10 or Fusion 10 Pro if you're running a trial version.
Click Continue.

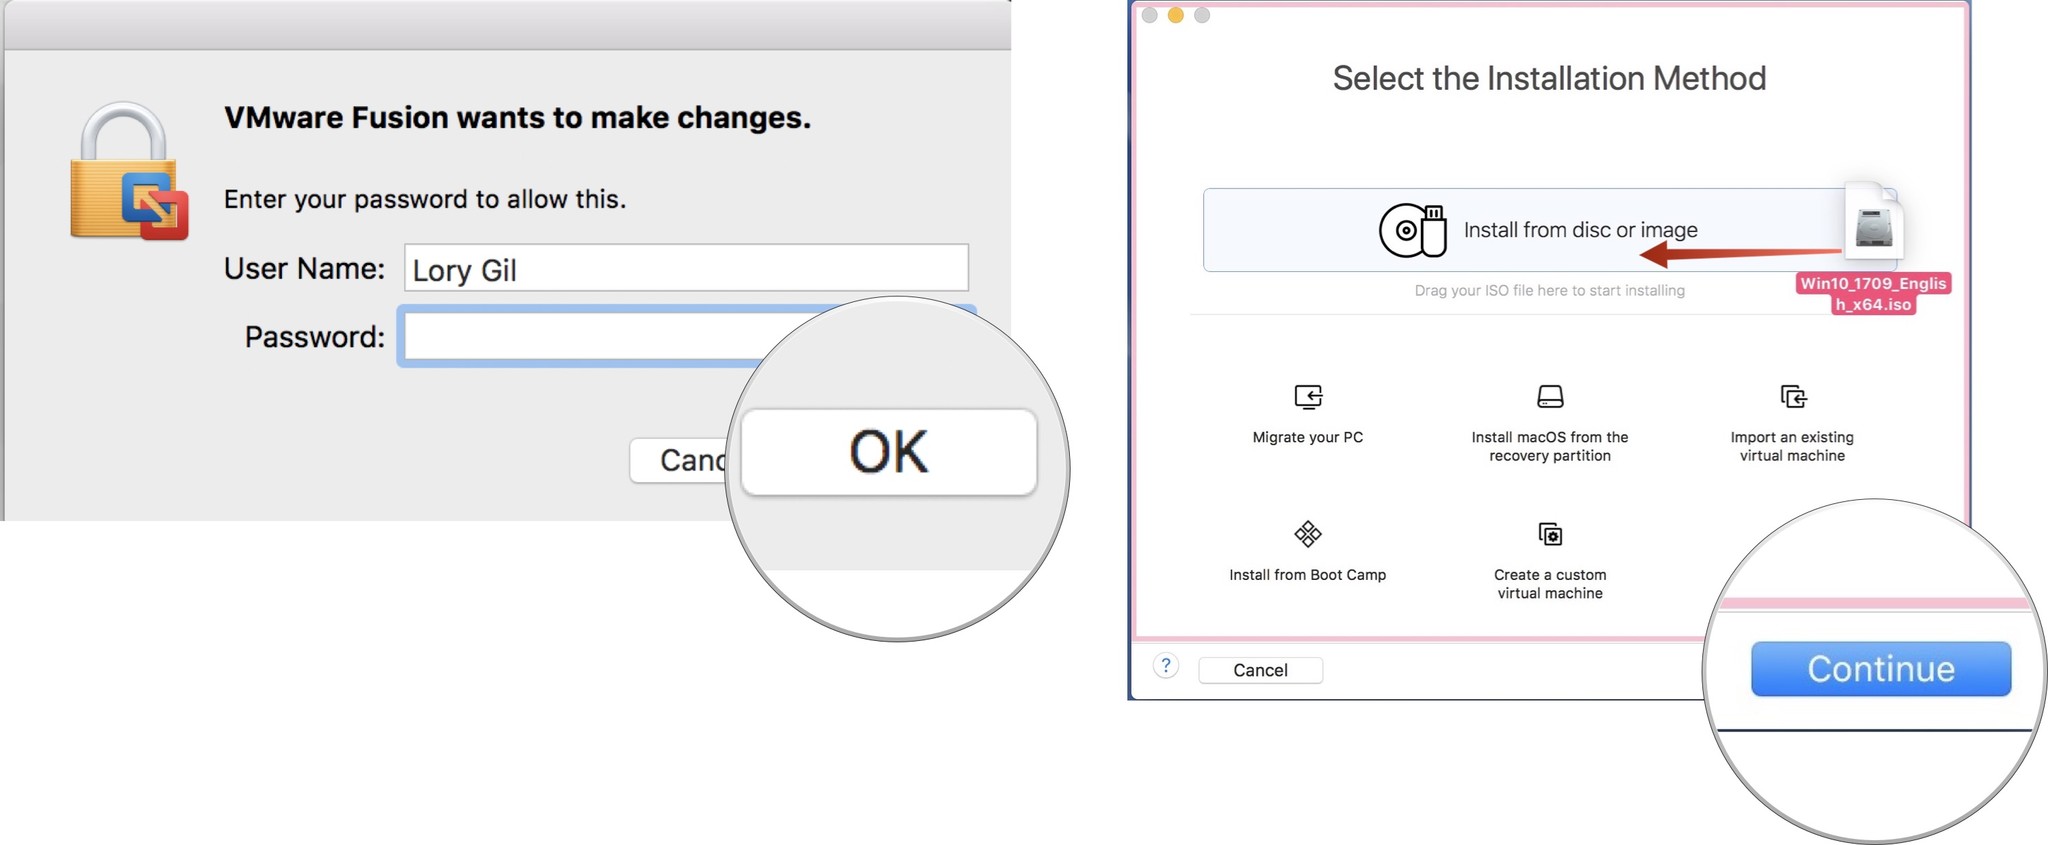
- Enter your Mac log in credentials when prompted.
- Click OK.
Drag the ISO Windows 10 file to the Installation Method Window.
If you're installing from a different method, select that method and follow the steps to install.
Click Continue.
- Tick the box for Use Easy Install. If you feel comfortable setting up the installation settings manually, untick the box.
- Create a Windows login account name and password.
- Enter the Windows Product Key.
- Select the Windows version you're using.
- Select the level of integration. If you want to share your Mac documents with Windows, you'll want More Seamless. If you prefer to keep Windows and Mac data separate, use More Isolated.
Click Continue.

- Click Finish.
Click Save to save this new virtual machine to your Virtual Machines folder.

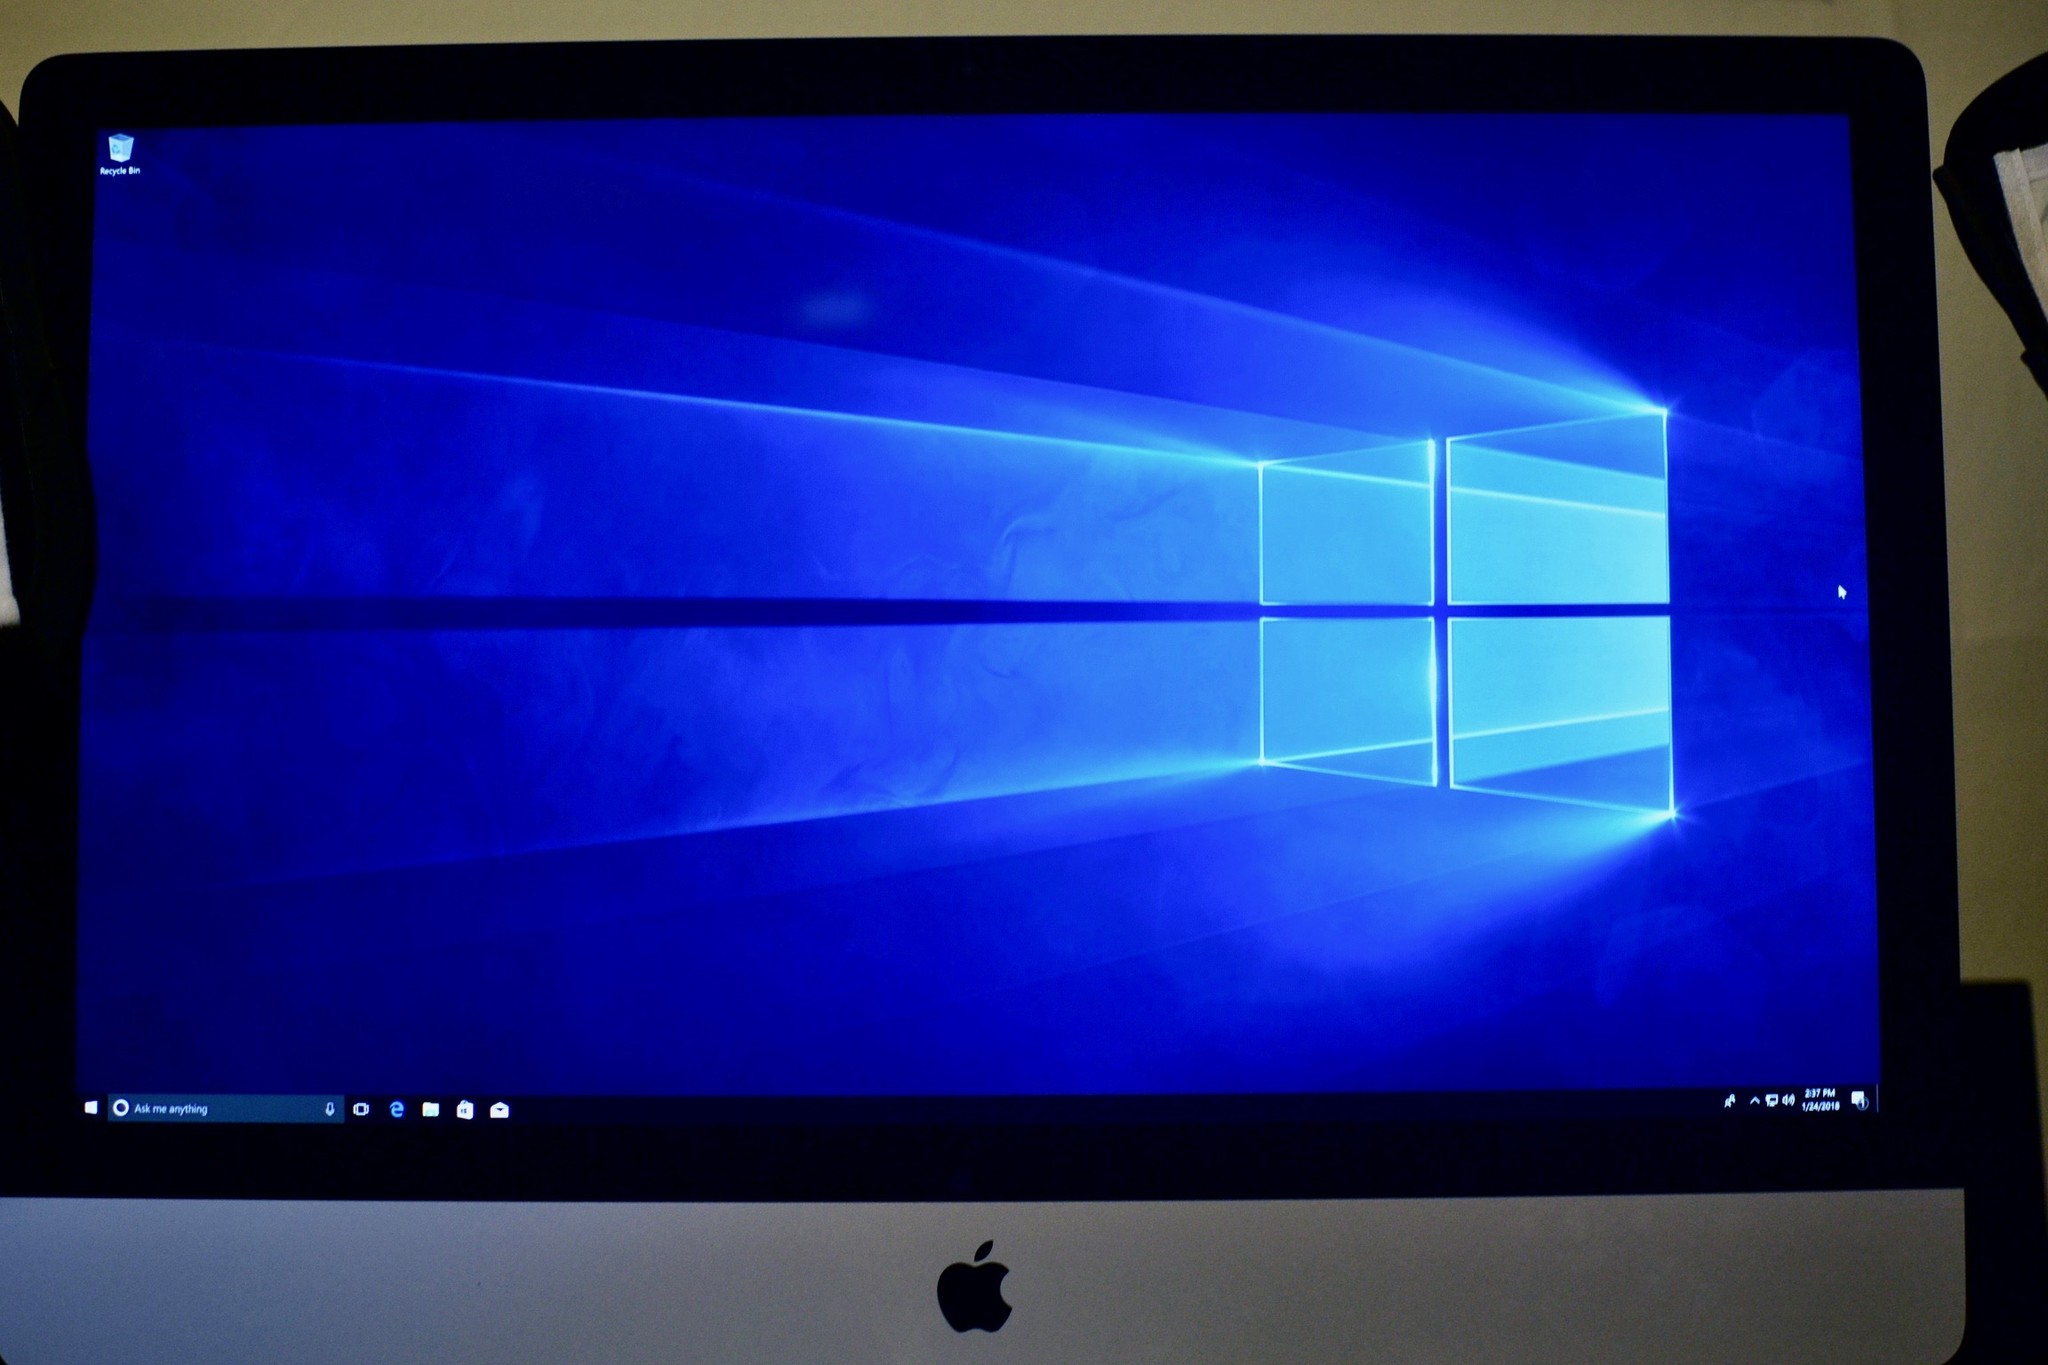
After Windows finishes installing in the virtual machine, Windows 10 will pop up in a new window. It sort of looks like you're just using a new program or web browser, but you've got a virtual simulation of Windows 10, in its entirety right on your Mac!
Any questions?
Do you have any questions about how to run Windows 10 on your Mac using VMware's Fusion 10? Put them in the comments and I'll help you out.