
How to use albums and libraries in Photos for Mac
- feb
- 01
How do I use albums and libraries in Photos for Mac?
If you have plenty of photos and videos on your Mac, then it's important to keep them organized so you don't lose your mind when you're looking for something in particular!
Here are a few different ways you can get the best out of Photos' albums and libraries.
- How to add pictures and videos to albums in Photos for Mac
- How to organize albums and folders in Photos for Mac
- How to use smart albums in Photos for Mac
- How to navigate Photos for Mac faster with the sidebar
- How to navigate moments, collections, and years views in Photos for Mac
- How to create a new library for Photos for Mac
- How to switch between libraries in Photos for Mac
- How to move your Photos library to an external hard drive
- A note on reference libraries
How to add pictures and videos to albums in Photos for Mac
If you have a lot of photos on your Mac, you'll want to organize them into albums and folders. That way, whether it's an album of vacation pictures and videos or a folder for a special project, you'll always know exactly where in Photos for Mac you can find them.
Better yet, if you're using iCloud Photo Library, those newly organized albums and folders will also show up on your iPhone and iPad!
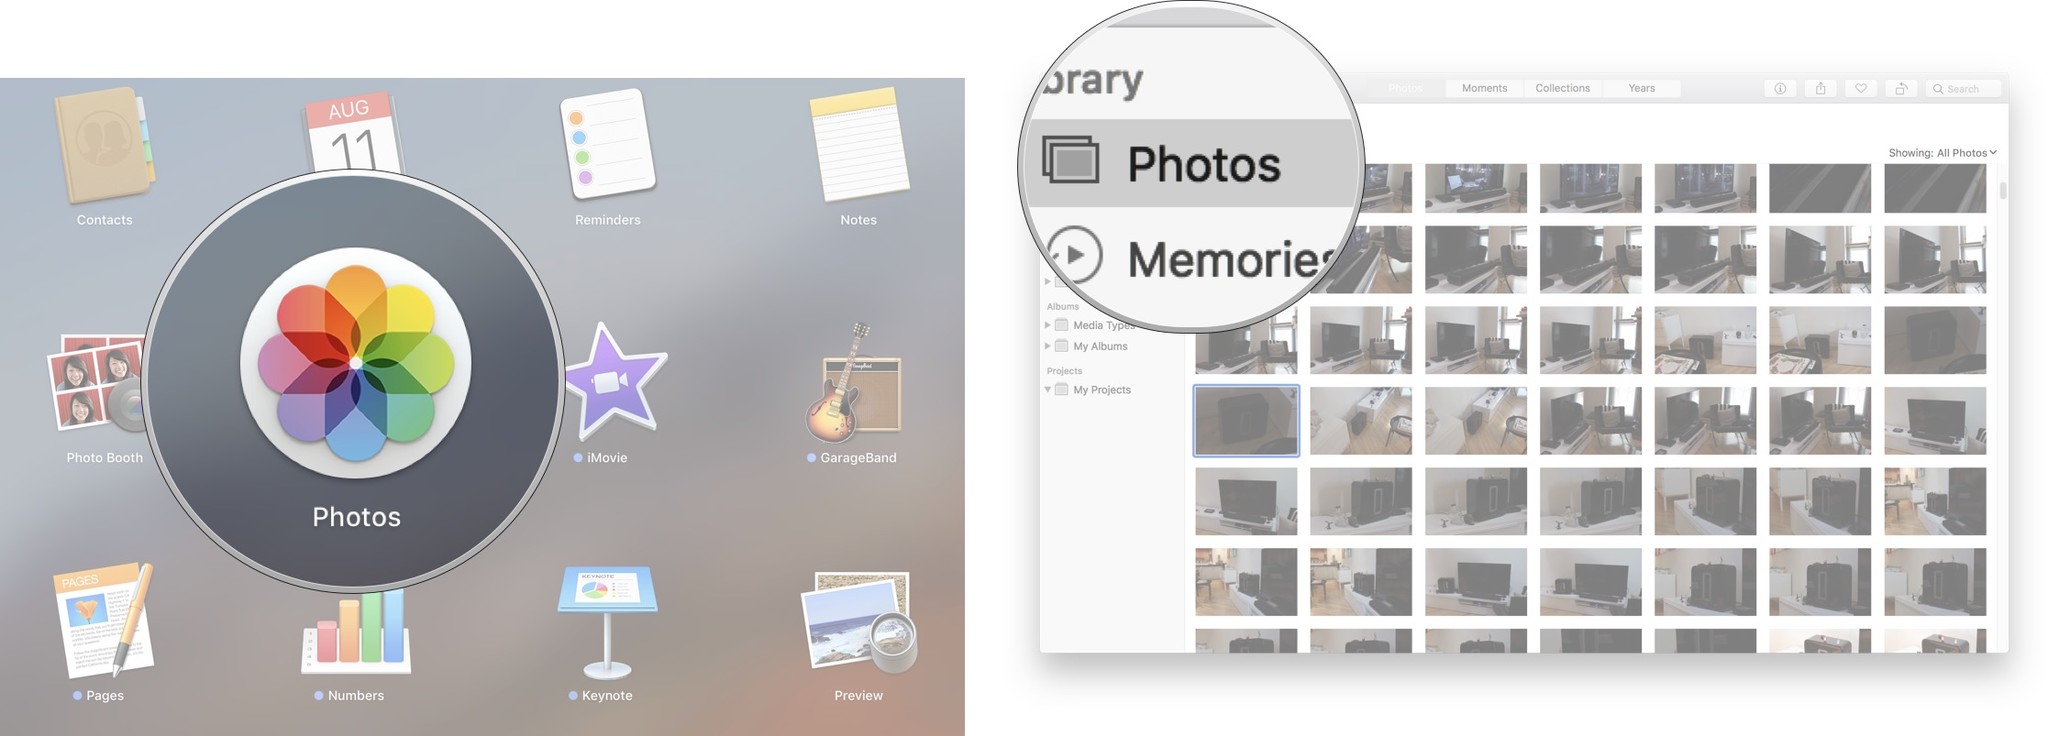
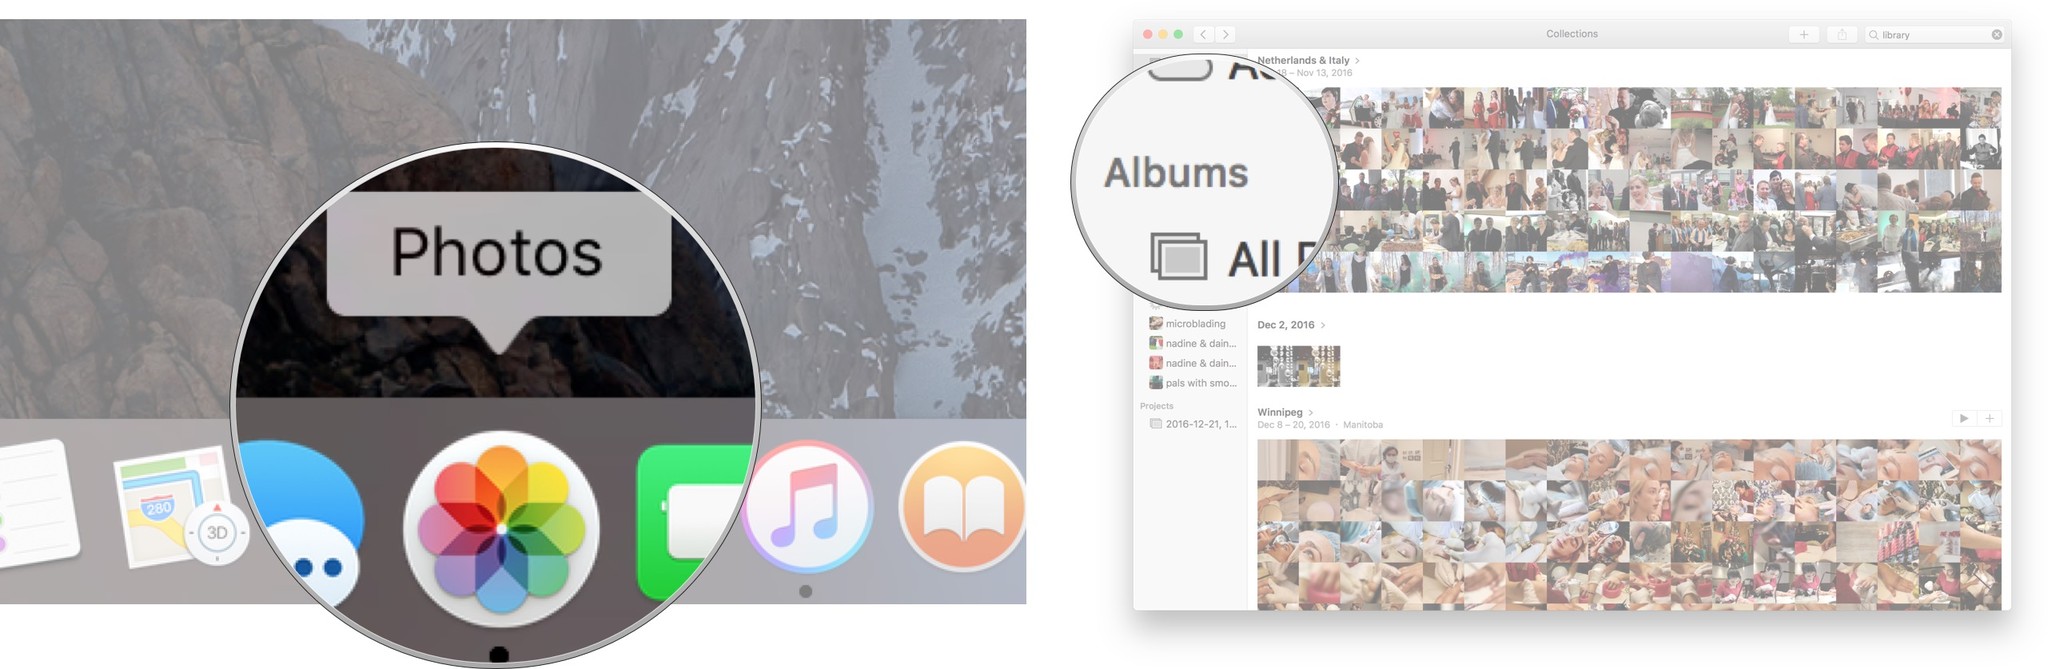
- Launch Photos on your Mac.
Click on the Photos in your sidebar under the Library section.
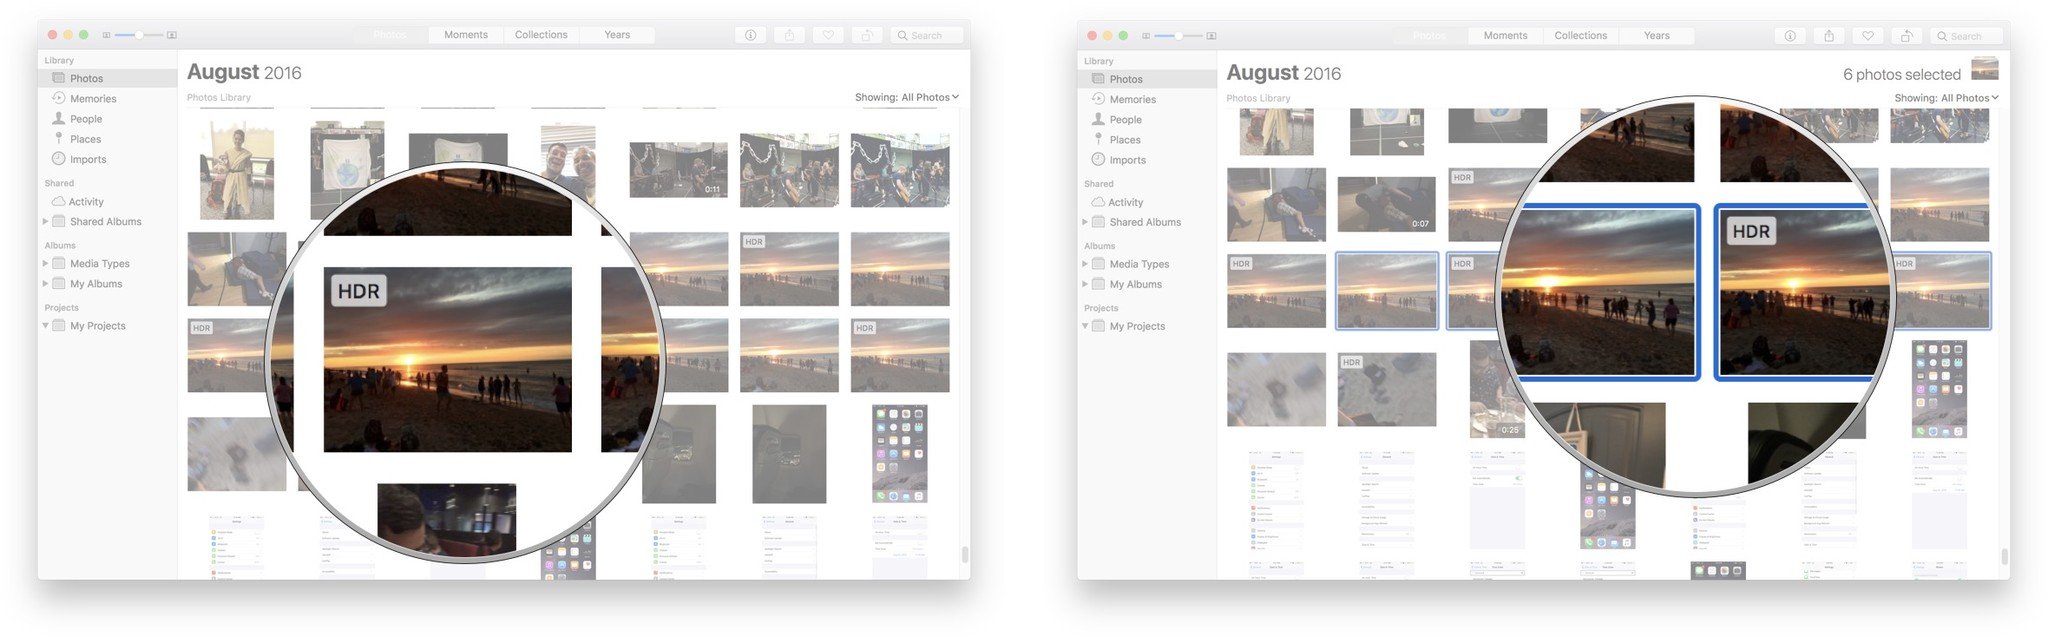
- Select the photos you'd like to put in your album, new or old. You can hold down the command key on your Mac's keyboard to select multiple photos at once.
Right-click on your selected photos.
- Hover your cursor over Add to.
Click on the Album you want to place your photos into. You can also create a new album and name it.
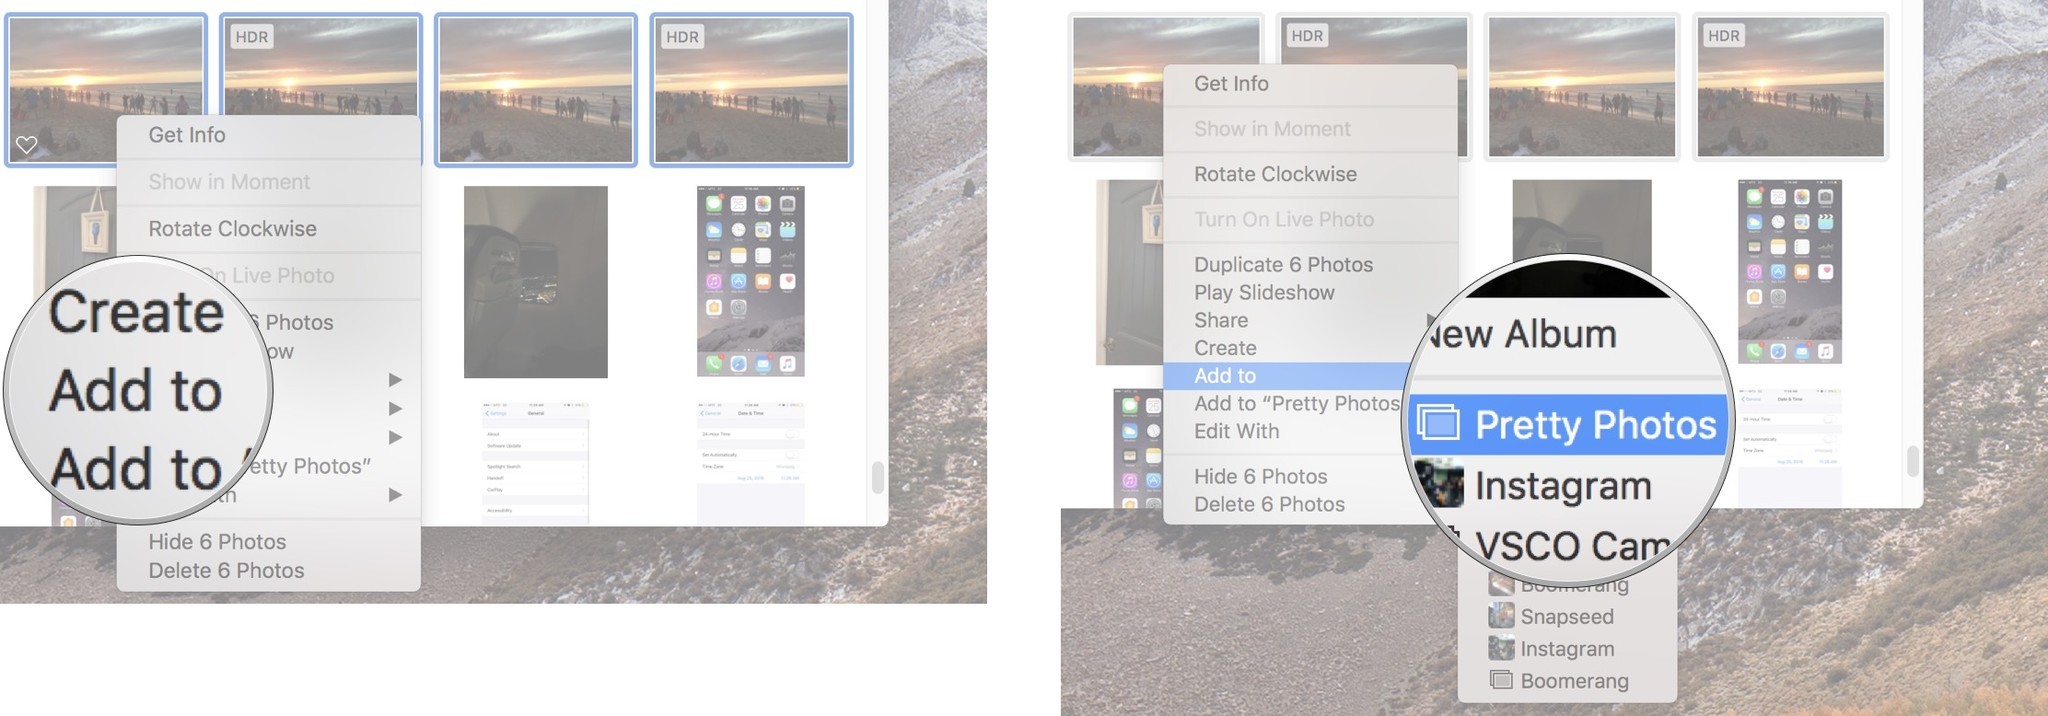
Your photos will then be available in the album you chose.
You can also create a new album in the Albums section by right clicking anywhere in the main window and choosing New Album. You can then name it and add photos to it later.
To rearrange the order of albums in the sidebar, simply grab them and drag them up or down into whatever position you wish.
How to organize albums and folders in Photos for Mac
If you find that you've accumulated a lot of albums on your Mac, you can organize them into folders.
- Launch Photos on your Mac.
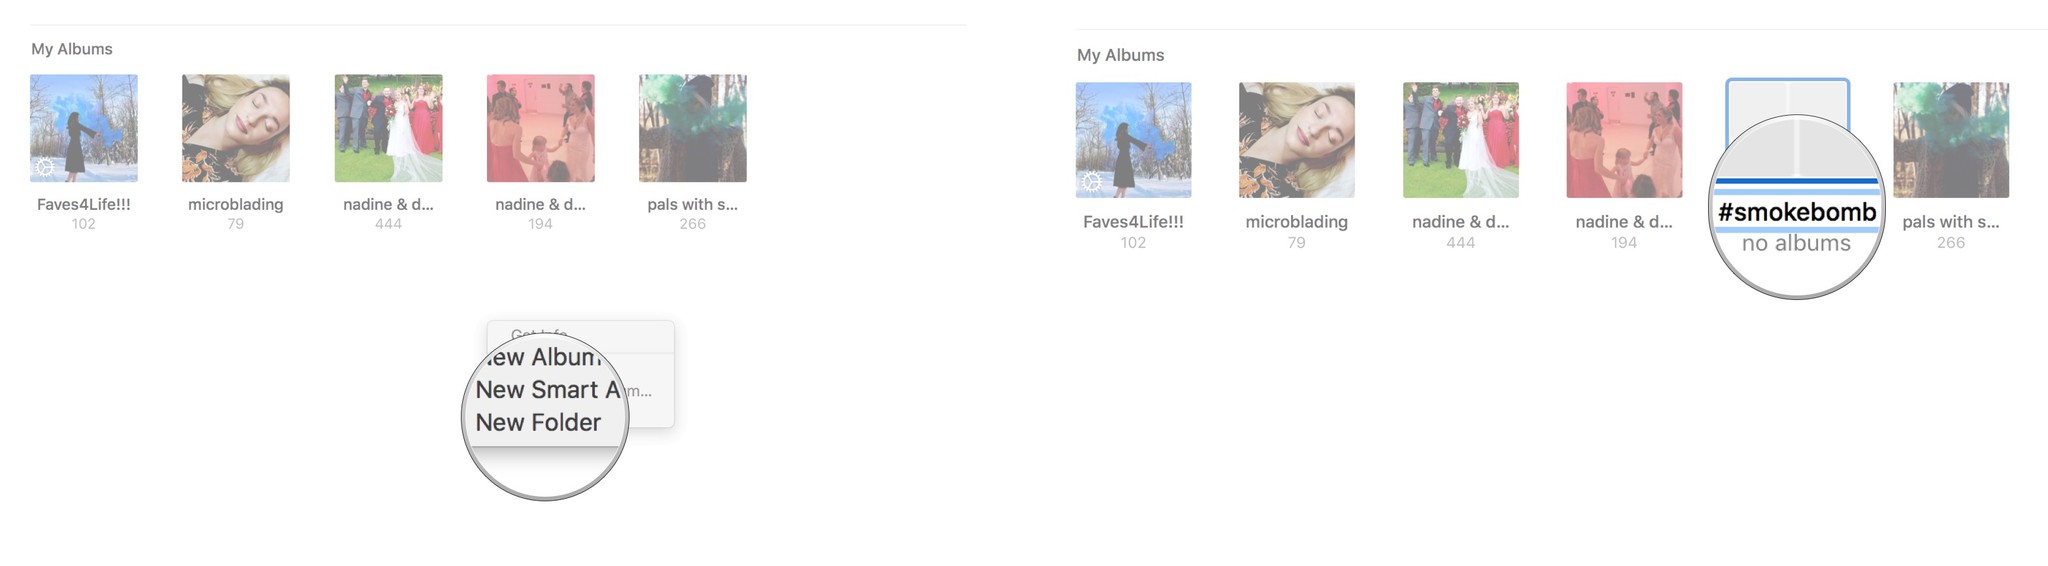
Click on the My Albums in your sidebar.
- Right-click anywhere in the main window and select New Folder.
Give your folder a name.
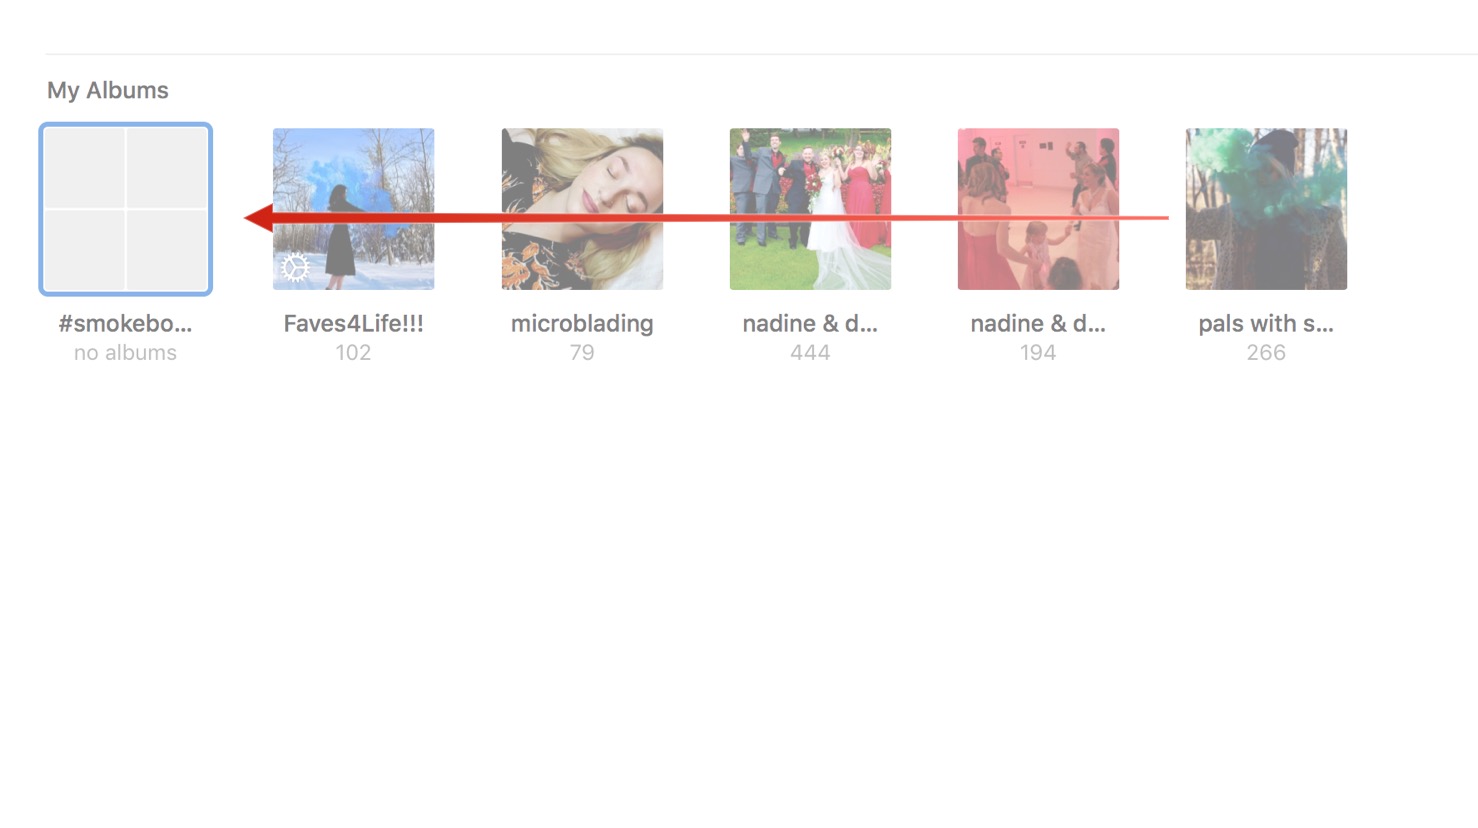
Drag any albums you'd like into that folder.
How to use smart albums in Photos for Mac
Need to find a group of pictures quickly? Hook yourself up with Photos for Mac's smart albums.
Smart albums have long been a great way to quickly organize your images without the hassle of having to manually add each individual photo.
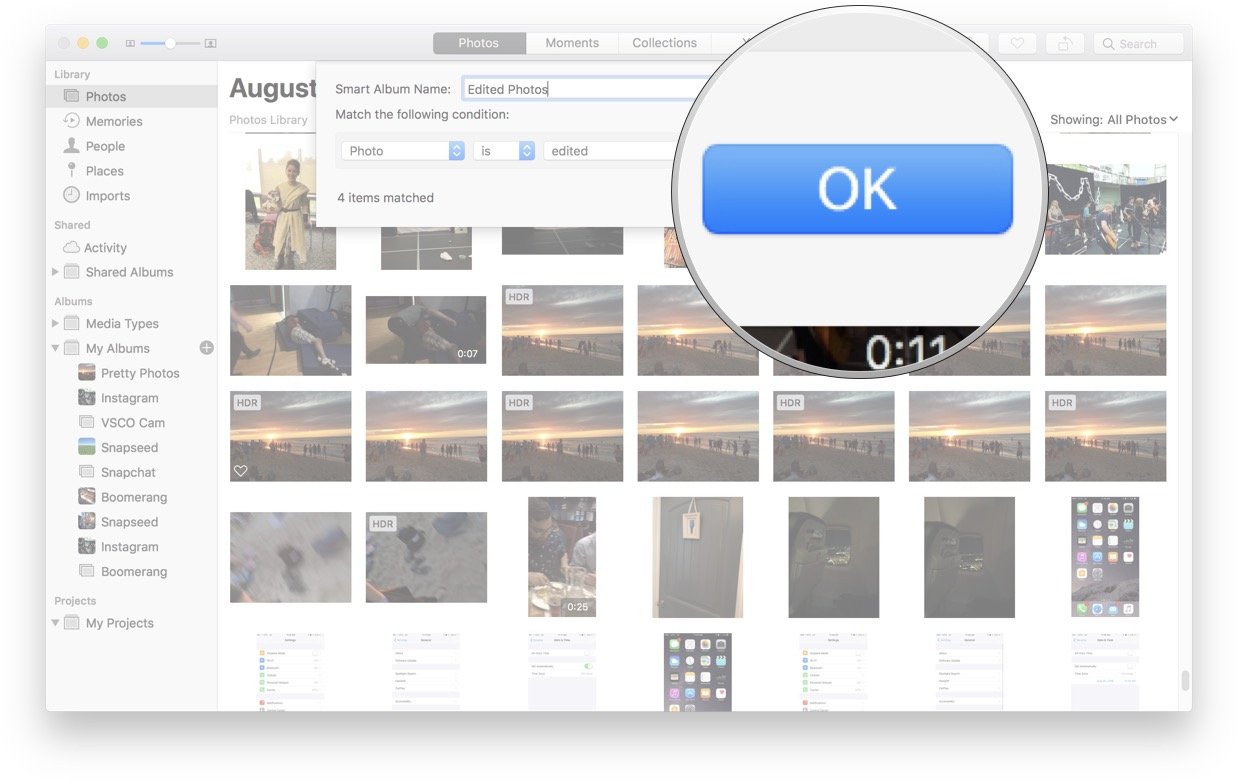
Like other workflow-type actions, Smart Albums use a series of if statements to automatically select a certain subset of your images. For instance, if you wanted to see all your edited photographs, you could make a condition that said "Photo [is] [edited]". Here are the steps to make a smart album!
How to create a smart album in Photos for Mac
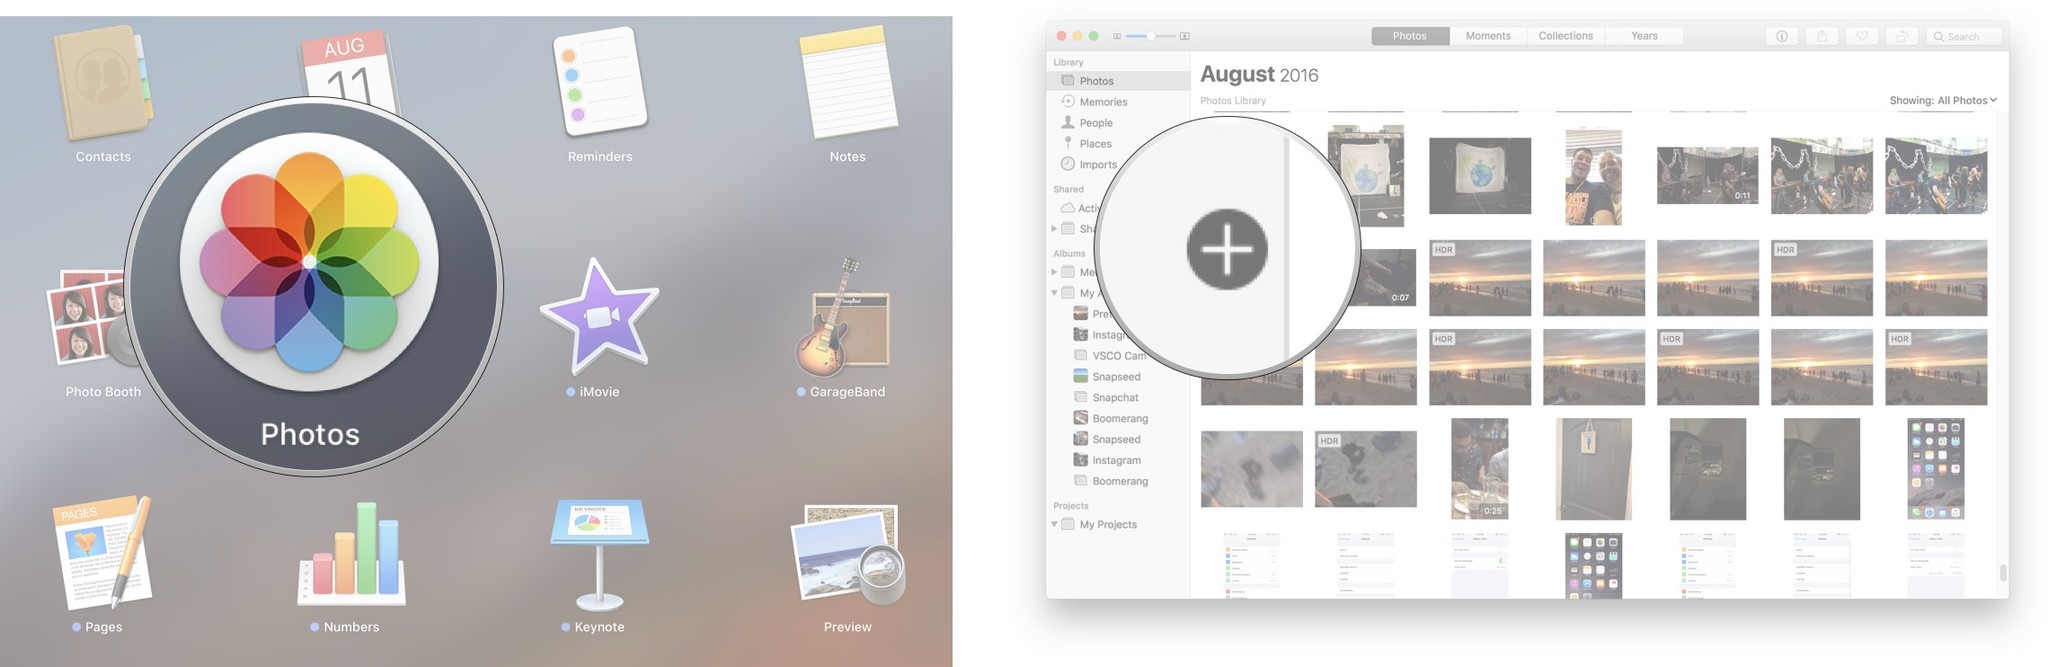
- Launch Photos on your Mac.
Click on the + beside My Albums in the sidebar.
- Type a name for your smart album
Choose the parameters for your smart album.
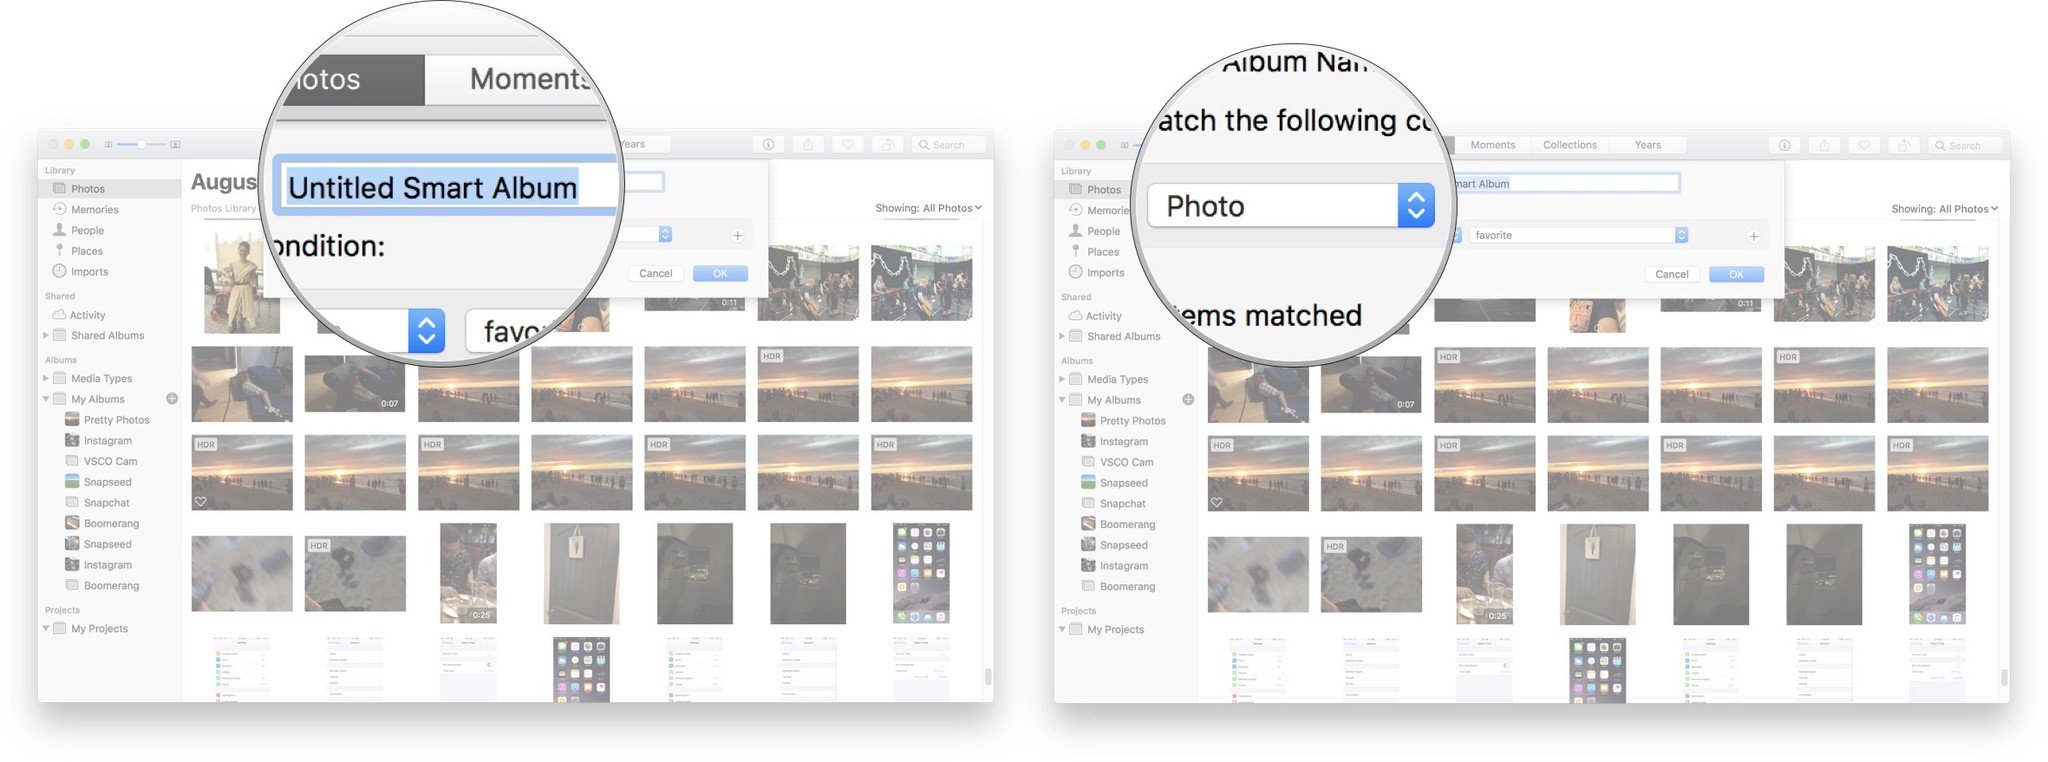
Click OK.
You can build a wide variety of conditions into your smart albums, including photos contained in a specific album, keywords, camera model information, aperture setting, Faces, and more.
How to edit a smart album in Photos for Mac
Not happy with what your smart album returned? You can tweak the conditions by clicking on the gear icon next to the Smart Album's title.
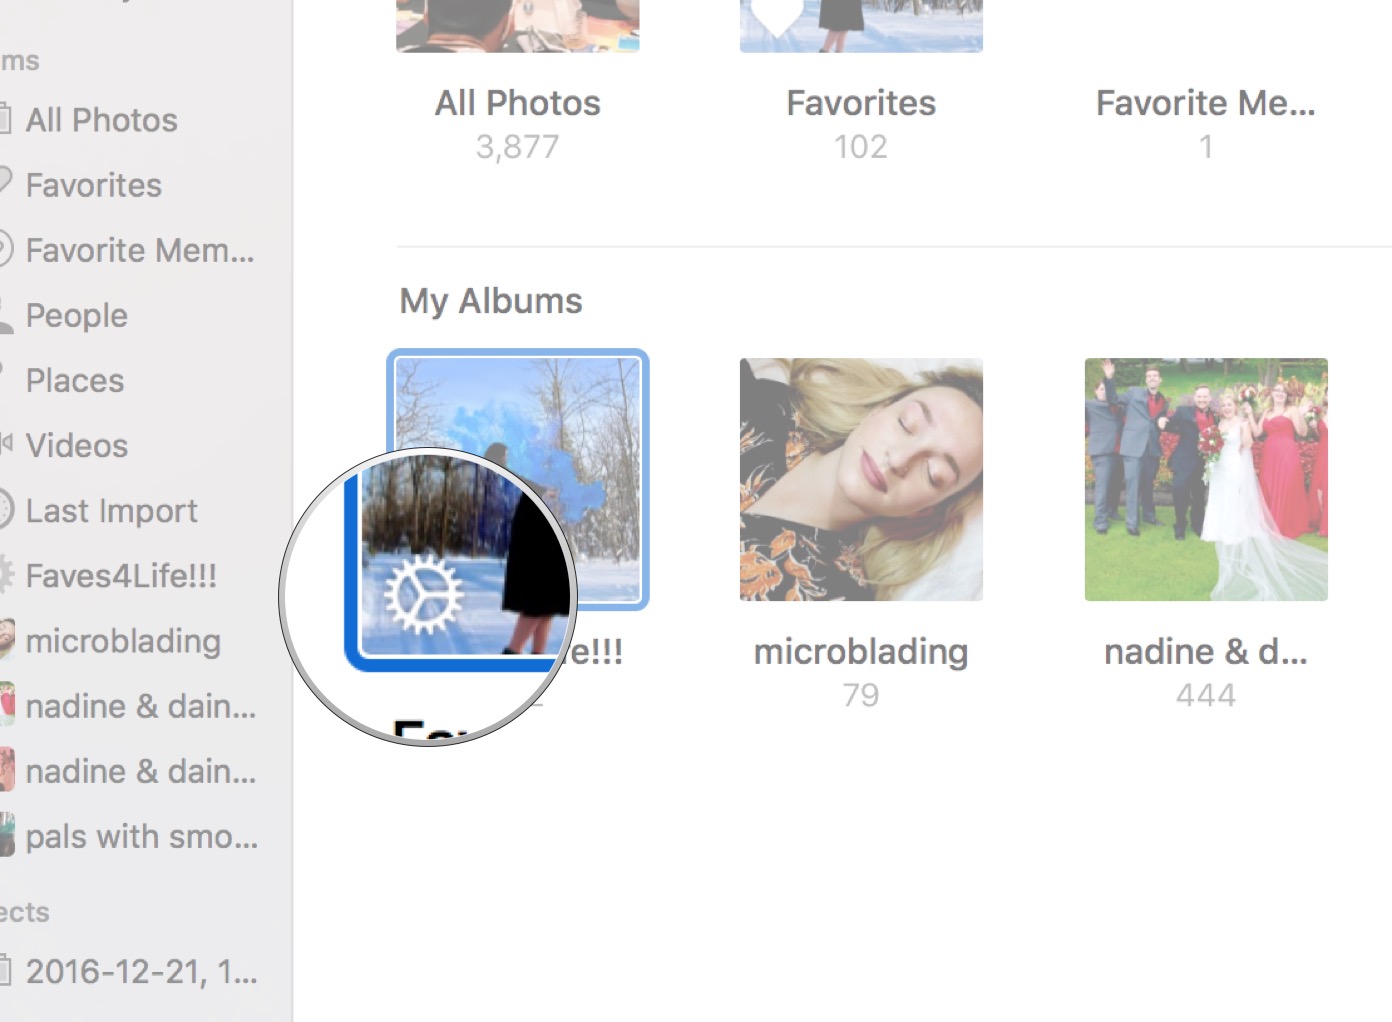
From here, you'll be able to edit conditions using your original conditions screen.
Smart albums and iCloud Photo Library
Smart albums are a wonderful way to organize your images in Photos for Mac; unfortunately, they won't currently sync with iCloud Photo Library, so you won't see them appear on your other Macs or iOS devices.
How to navigate Photos for Mac faster with the sidebar
Full-screen thumbnails, pictures, or videos are great if you want to browse, but for added context and options, there's nothing like the sidebar. It puts your most important albums right at your fingertips.
How to enable the sidebar in Photos for macOS High Sierra
In High Sierra, the sidebar is already enabled, and actually can't be disabled. Apple decided that design-wise, it was better for the user interface to have the sidebar always-on. It's easier to find albums that might normally be hidden without the sidebar on display.
How to toggle on the sidebar in Photos for macOS Sierra and older
If you're running macOS Sierra and older, you can hide or unhide the sidebar as you prefer.
- Launch Photos for Mac
- Go to View and click Show Sidebar in the menu.
Your Sidebar should appear on the right side of the screen.
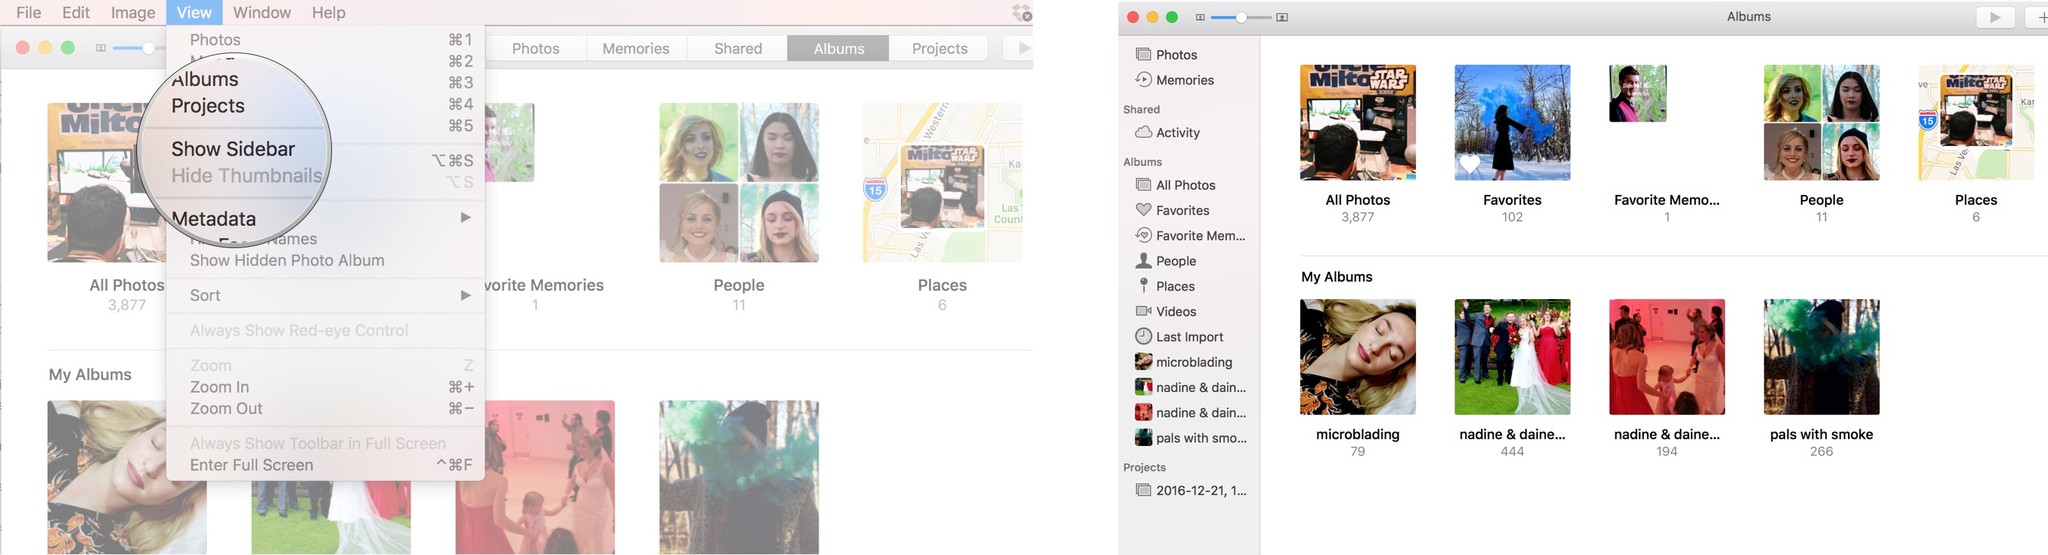
To hide it, repeat the same steps. Note, you can't show or hide the sidebar while in edit mode, so if the command is grayed out or not working, make sure you finish any edits and then try again.
How to navigate moments, collections, and years views in Photos for Mac
Photos for Mac uses the same hierarchy as Photos for iOS — intelligently grouping images and videos into moments, collections, and years.
That lets Photos for Mac show you small moments in time and space, like yesterday at the park, but also collections of moments marked by larger changes, like that party across town or that week at the beach, and even an entire year all at once.
That way you can quickly zoom out, drill down, or scrub through to find exactly the photos and videos you want to look at, edit, or share. And all it takes is a few clicks and swipes!
Note: You can't manually add an item to a specific moment, collection, or year — not without some metadata hackery, at least. They just take whatever you bring in and intelligently sort them into the right time and place.
How to move between Moments, Collections, and Years smart groups
- Launch Photos for Mac.
- Click the Photos, Moments, Collections, or Years button at the top of the window.
Click on a section of a year to move to that collection, or a section of a collection to move to that moment, or an item in a moment to move to that image or video.

- Press an arrow key on your keyboard to move between photos and videos in a moment.
- Click on a photo or video to select it or double-click on a photo or video to go to it.
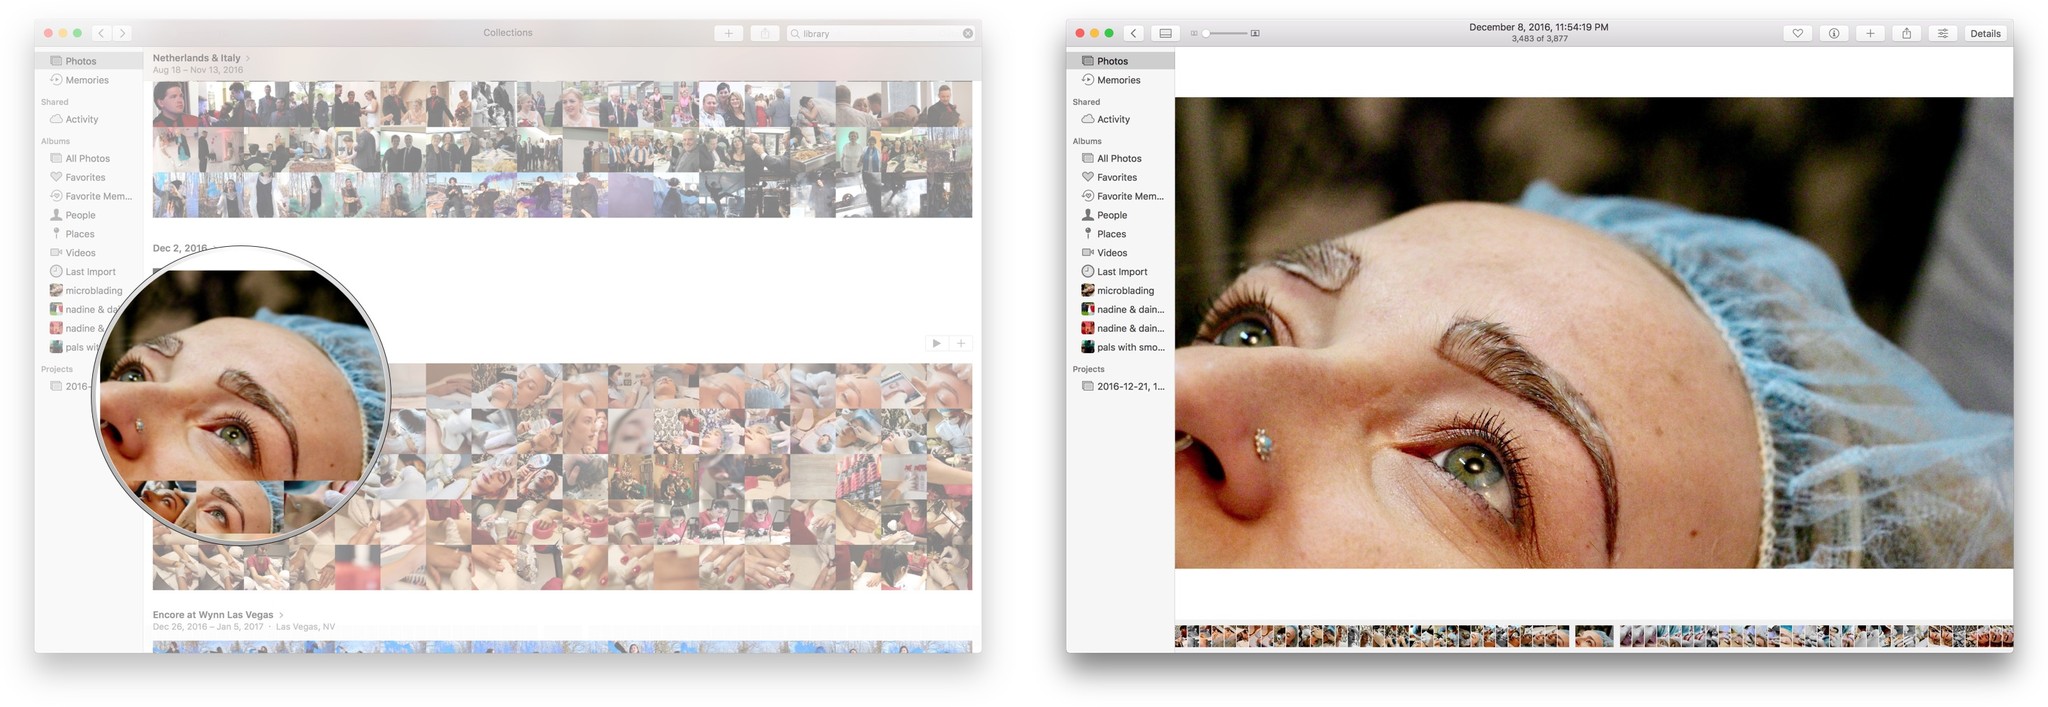
How to scrub through and quickly jump to a picture or video in Collections or Years
Because of the volume of photos in collections or years view the thumbnails are small and can be hard to see. Luckily there's a scrubbing gesture that not only lets you get a better look, it also lets you jump immediately to that picture or video so you don't have to click all the way through.
- Click and hold down on the year or collection view.
- Move your mouse or trackpad pointer around, in any direction, to get a larger thumbnail preview.
Let go when you get to the picture or video you want, and you'll be taken directly to it.
How to create a new library for Photos for Mac
If you have Photos open, you'll have to quit and reopen it with the following method to be able to access the library options.
- Hold down the Option key on your keyboard.
- Double-click on Photos.
- Click the Create New... button in the Choose Library window.
- Name your library.
Click OK.

Unfortunately, there isn't a one-step way from within Photos to migrate pictures and videos to the new library. So you'll need to export the content you want to use in the new library, then import them back in once you've opened the new library.
How to switch between libraries in Photos for Mac
Make sure Photos is not open (quit it if it is).
- Hold down the option key on your keyboard.
- Double-click on Photos.
- Click on the name of the library you want to open.
How to move your Photos library to an external hard drive
Like iPhoto, your Photos for Mac library can run off an external hard drive. Make sure you've quit Photos for Mac, and the rest is easy!
- Launch a Finder window on your Mac.
- Click your Mac hard drive in the menu on left of the window (should be Macintosh HD).
- Click Users.
- Click your user name.
- Click Pictures.
Click Photos Library and drag it to your external hard drive in the menu on the left.

If you're syncing to iCloud Photo Library, it's worth noting that you'll have to have your drive plugged in to sync or view your library; you can't create a second Photos Library that has iCloud Photo Library enabled on your Mac.
A note on reference libraries
Photos technically supports management of images that aren't locally stored within its library — that is, you can keep a set of images in a folder called "October Trip" and manage them within Photos without having to make a separate copy of them. You can do this by navigating to Photos > Preferences from the menu bar, selecting the General tab, and unchecking the "Copy items to the Photos library" box under Importing.
That said, reference libraries won't play nicely with iCloud Photo Library users; you may run into problems when syncing, or not be able to sync at all. So if you plan on using a reference library, you'll have to opt out of iCloud Photo Library.

I also didn't have any luck getting referenced files to sync properly with Photos — I'd delete a photo, but the reference file would stay in its original location, even after deleting it from the "Recently Deleted" folder. Not sure if that's a bug or just not how Photos wants us managing referenced photos, but worth noting.
Questions?
Sound off in the comments below!