
Finder is the gateway to everything on your Mac – here’s how to use it
- nov
- 21

Have you ever wanted to take control of your Mac's Finder? Learn how with this guide!
The Finder is your gateway to all of the files, apps, and downloads on your Mac. Everything, from your Dropbox folders to your cool new desktop wallpaper, can be located in the Finder. You also have a lot of control over what the Finder will show you, and how different parts of the Finder will work.
Follow this guide to take control of the Finder and make it work for you.
- How to open a Finder window
- How to customize the Finder toolbar
- How to use Quick Look
- How to show or hide hard disks, external disks, CDs, and connected servers on your desktop
- How to set a new Finder window's default section
- How to use Tags
- How to create custom Tags
- How to customize the Finder sidebar
- How to use Stacks in macOS Mojave
- How to use Gallery View in macOS Mojave
- How to view file metadata in macOS Mojave
- How to use Quick Actions in macOS Mojave
- How to use Quick Look tools in macOS Mojave
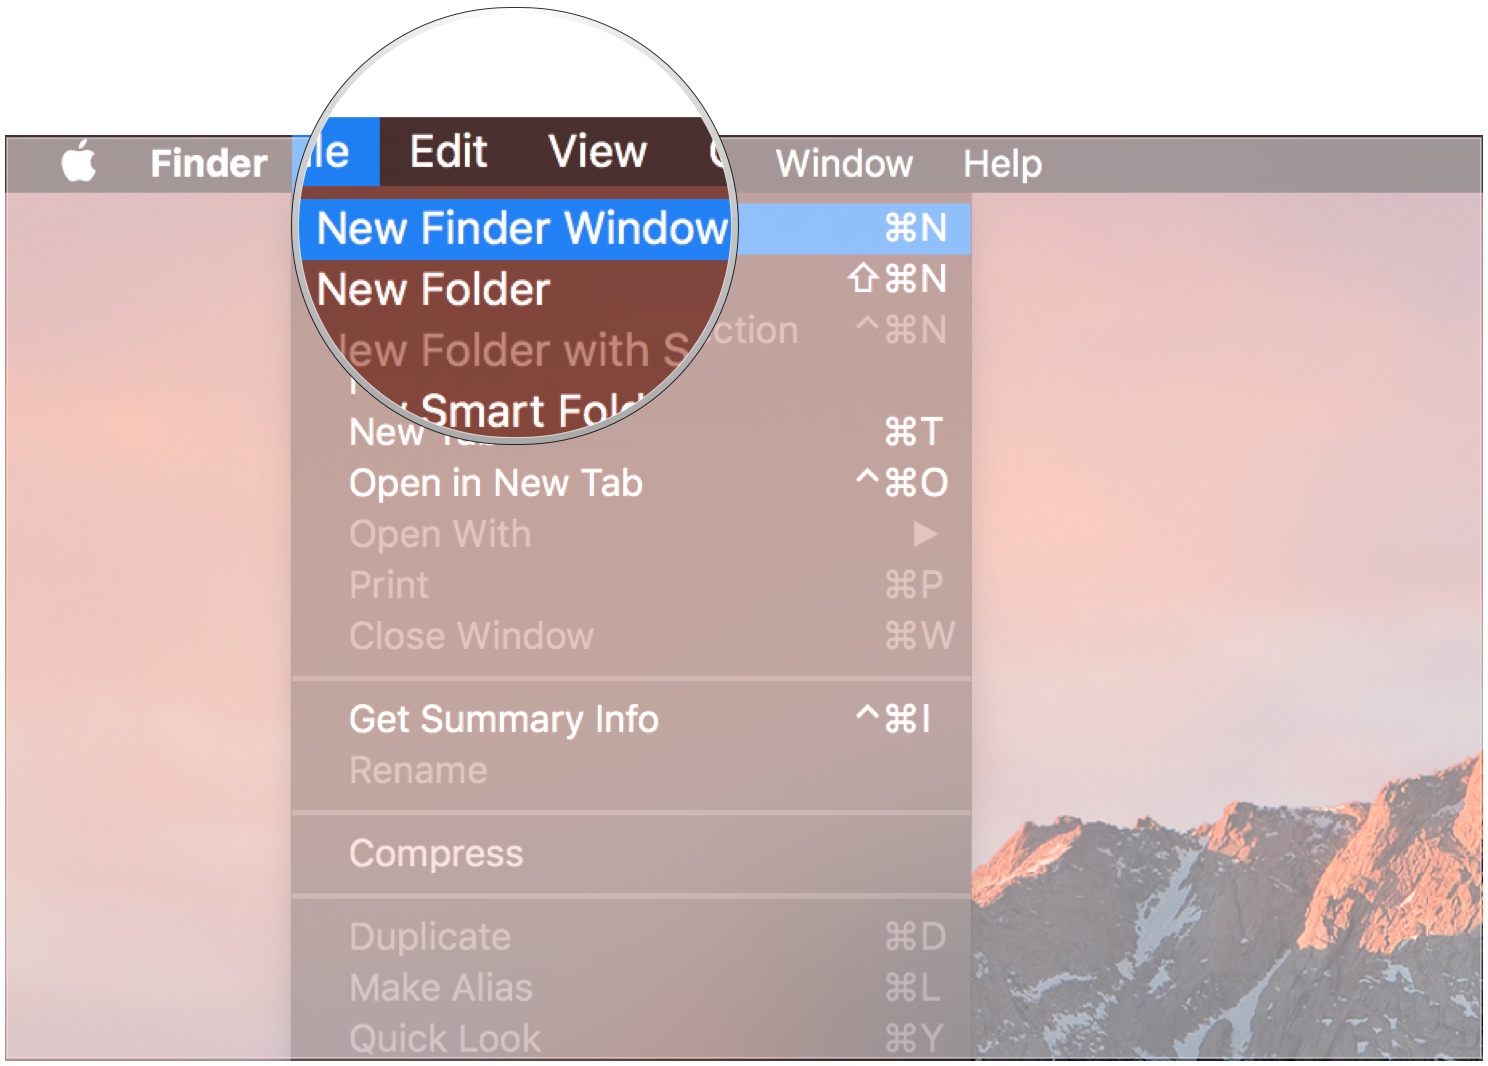
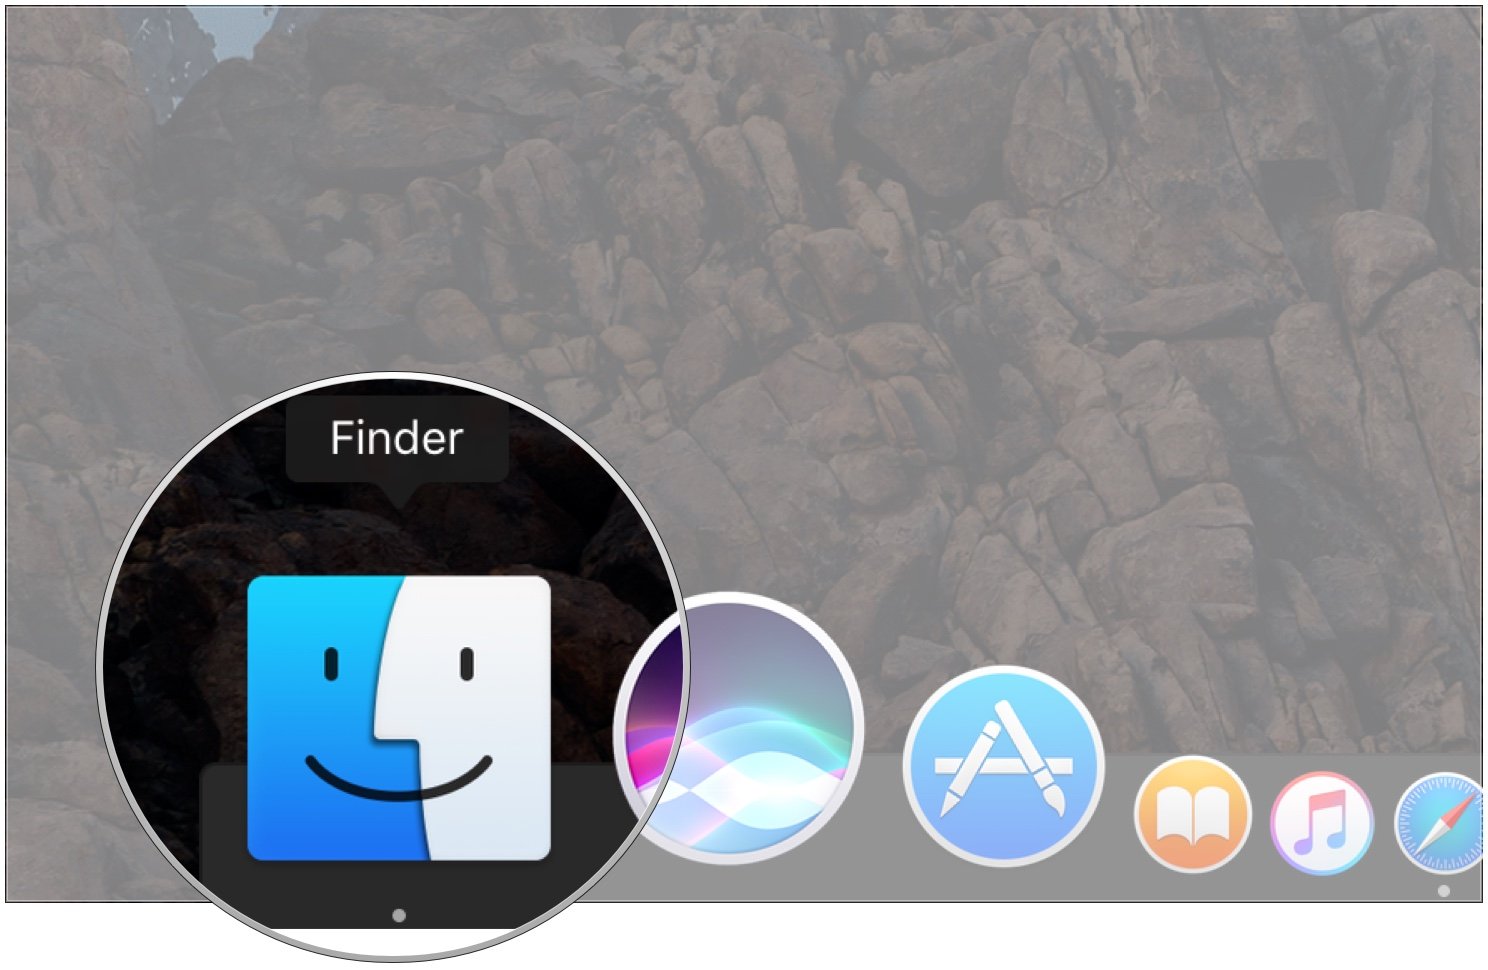
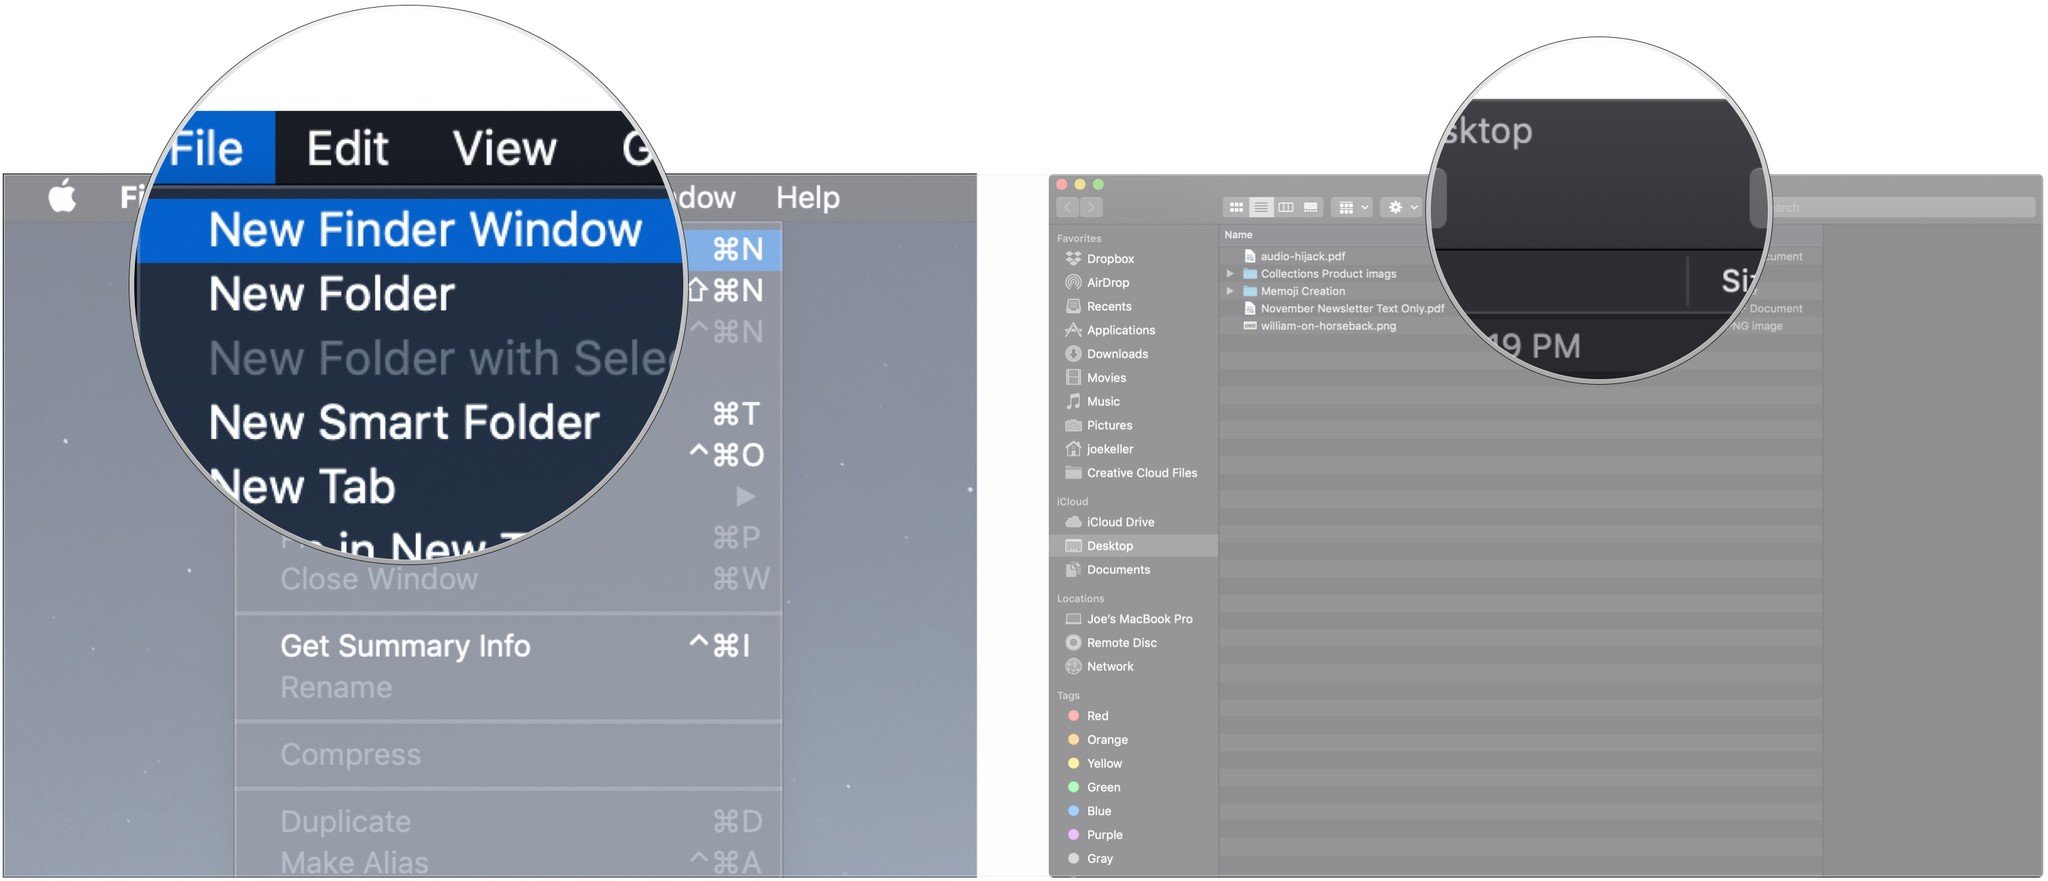
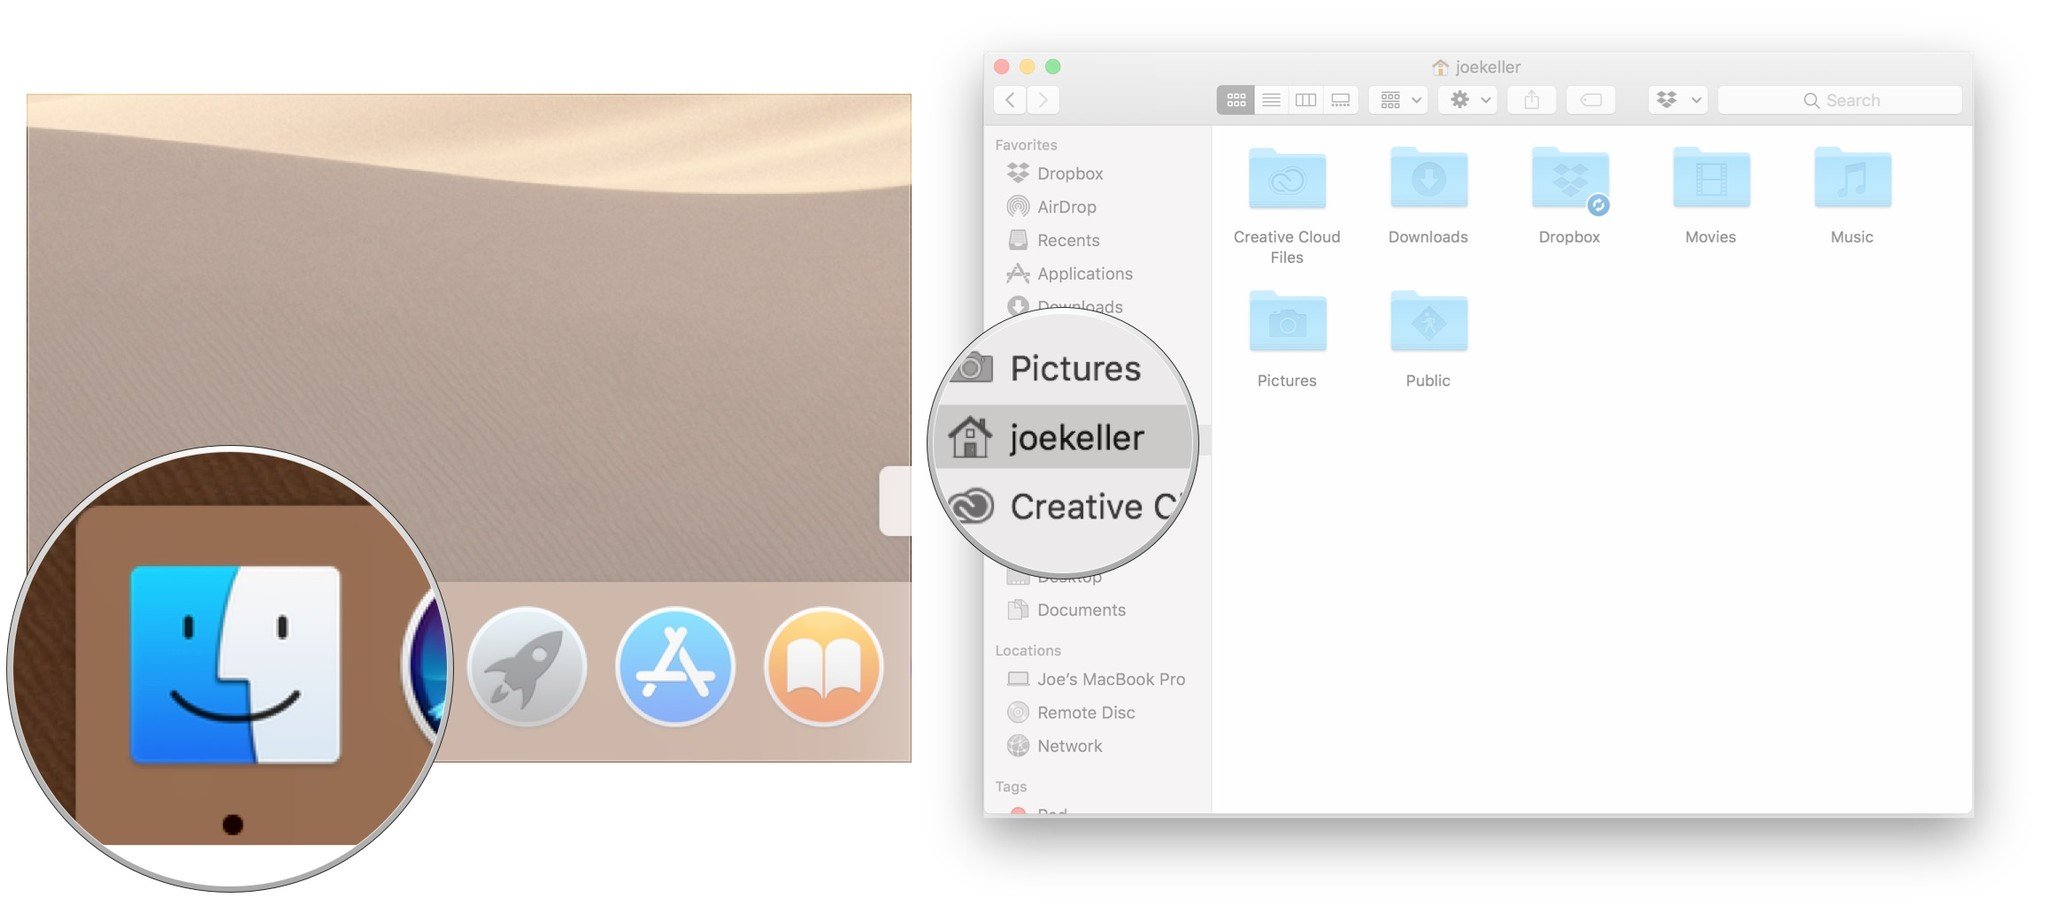
How to open a Finder window
There are a few methods for opening windows in the Finder to let you get at your files.
- Click on your desktop (don't select an app or program), then click on File in the Menu bar and choose New Finder Window.
- On your Dock, click on the Finder icon (looks like a smiling face).
- On your keyboard, hit 'Command-N' while you have the desktop selected.
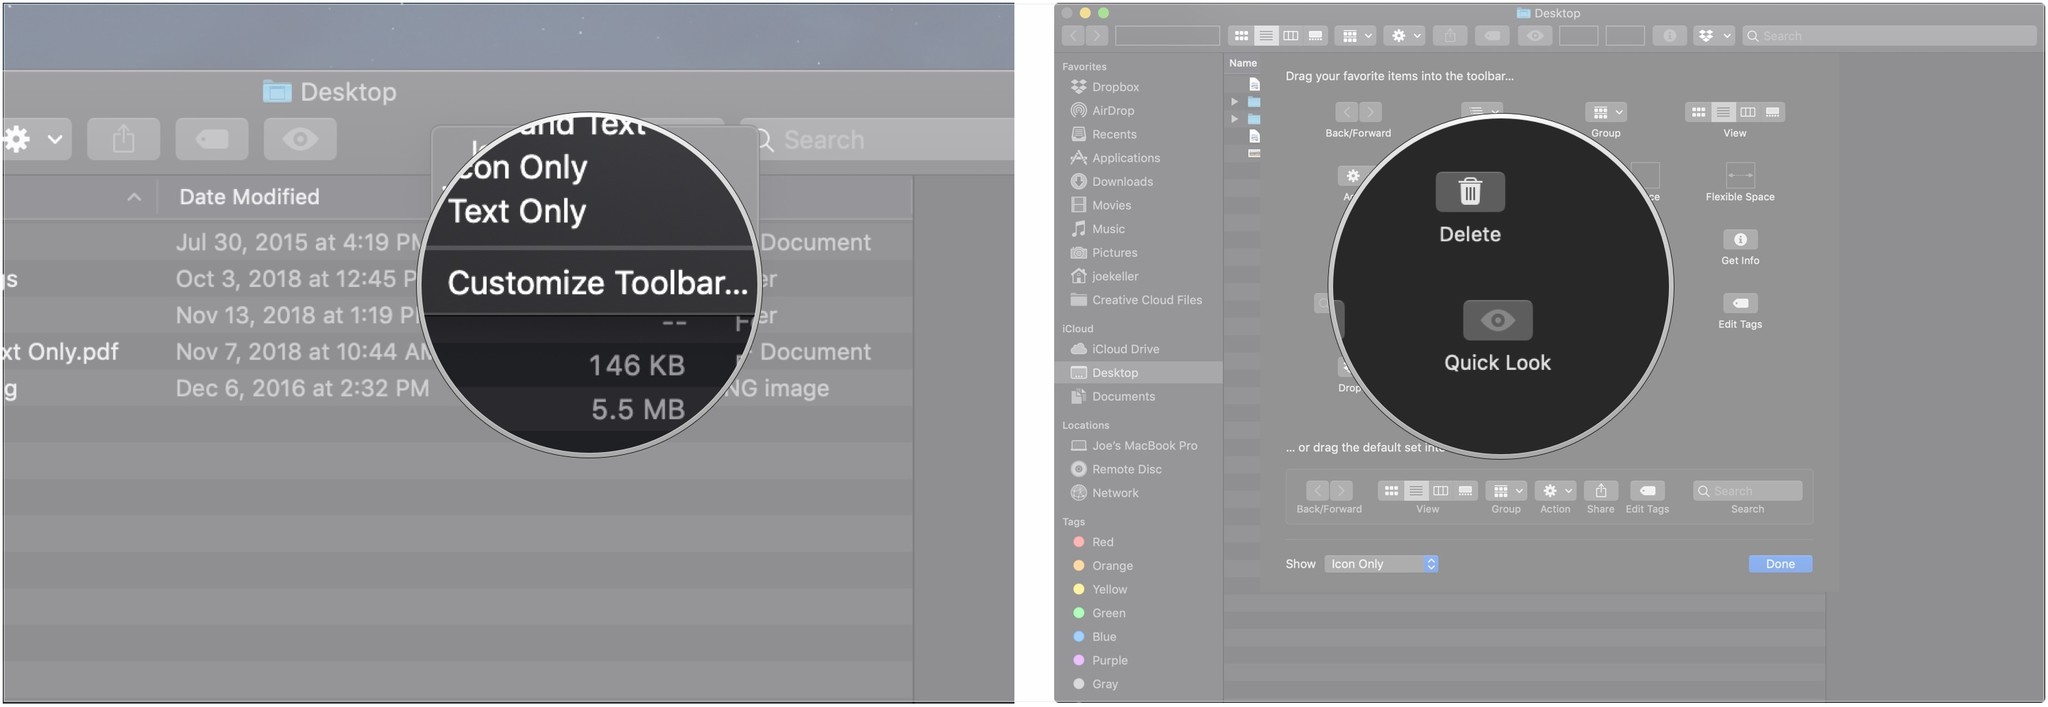
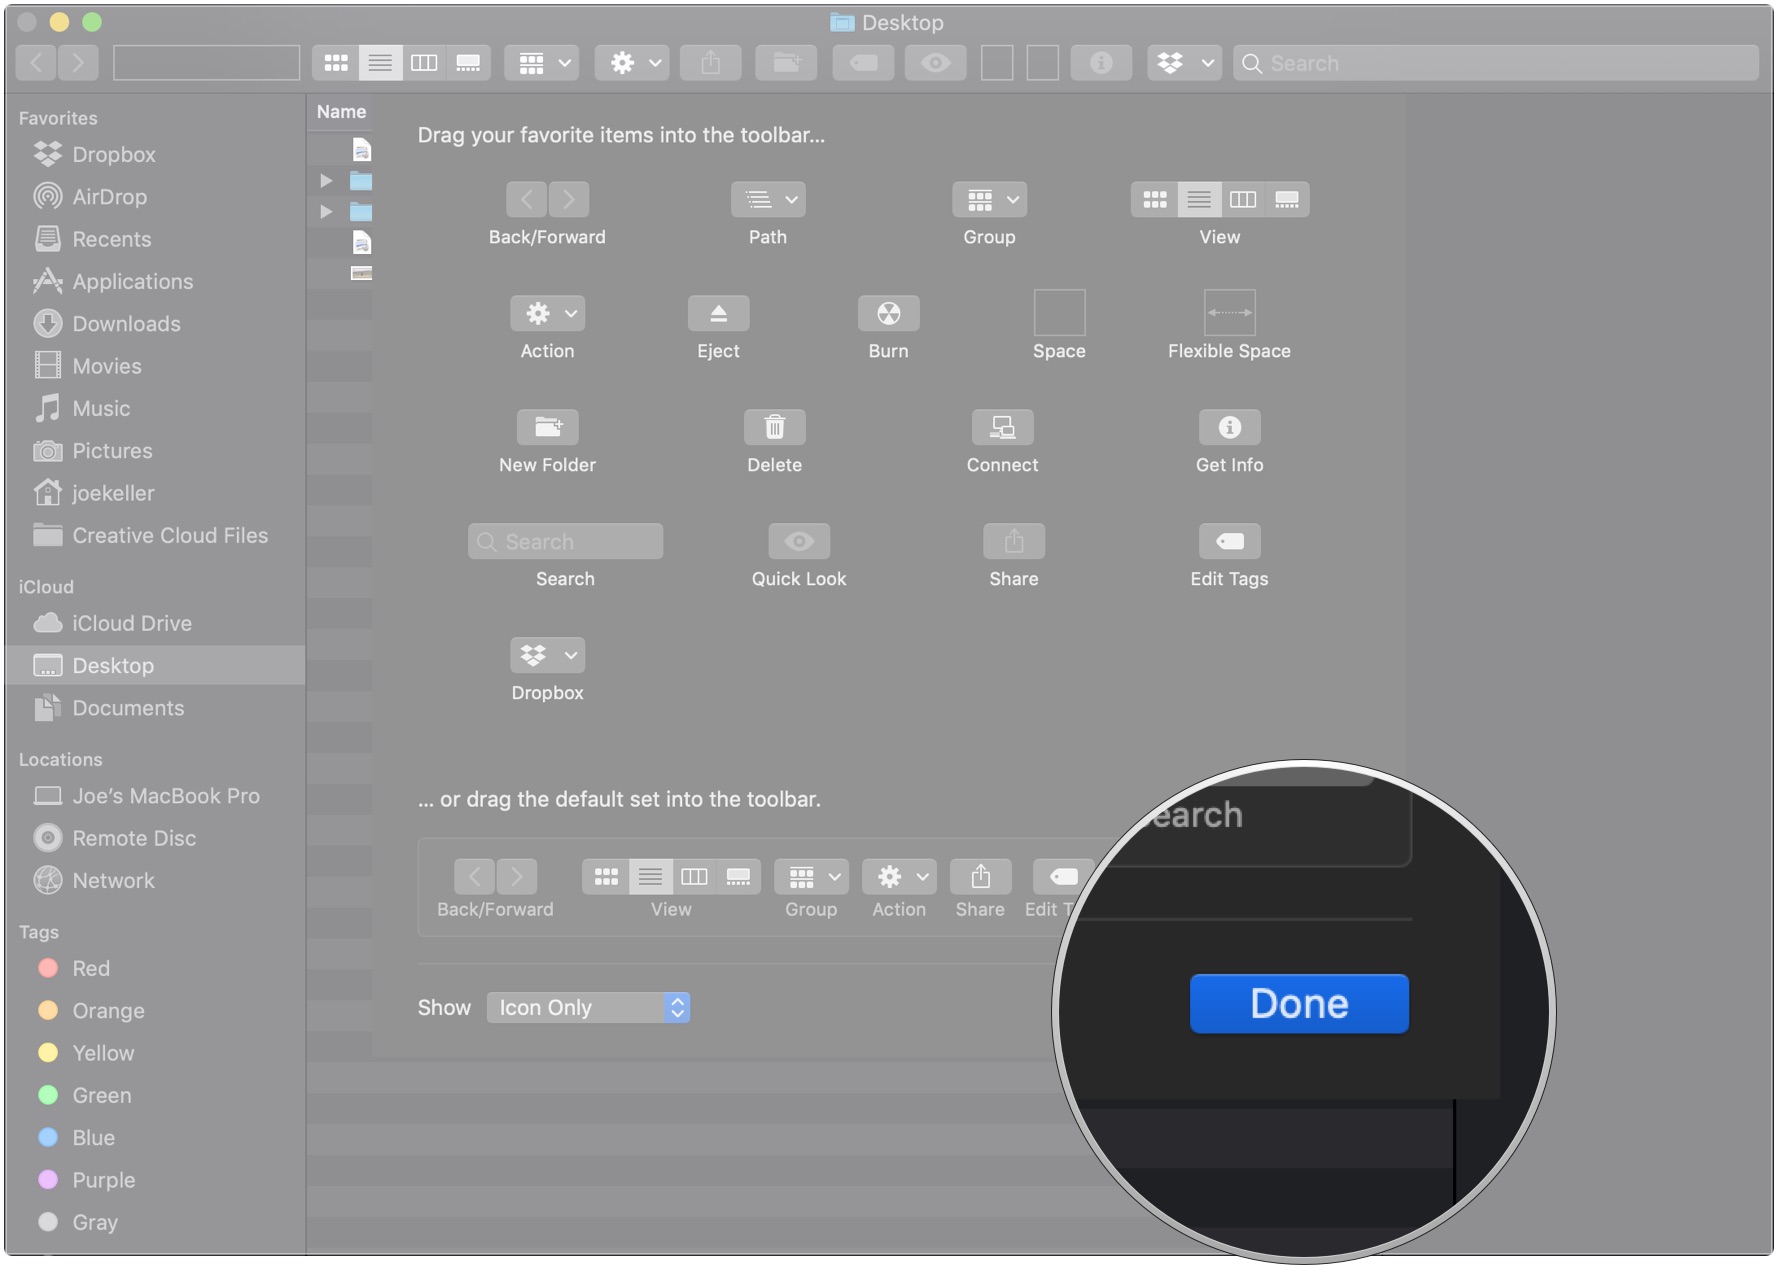
How to customize the Finder toolbar
Be default, the Finder toolbar offers a number of different buttons you can use to do things like change the view of the Finder or perform an action, but you can customize the bar to your liking with several different tools.
- Open a new Finder window.
-
Right-, control-, or two-finger-click on the toolbar.
- Click Customize Toolbar…
-
Click and drag different tools onto the bar. Here are some that you can choose from:
- Quick Look: The first tool I would pick. The Quick Look button is a great way to get a glance at a document or photo that you have in the finder.
- Delete: Delete an item from the Finder after highlighting it.
- Connect: Connect to an external server if you know the address. You can store a number of favorite servers and switch between them using this button.
- Get Info: Highlight something in the Finder and press this button to get a detailed set of information on it.
-
Click Done once you've added all of the tools to the toolbar that you want.
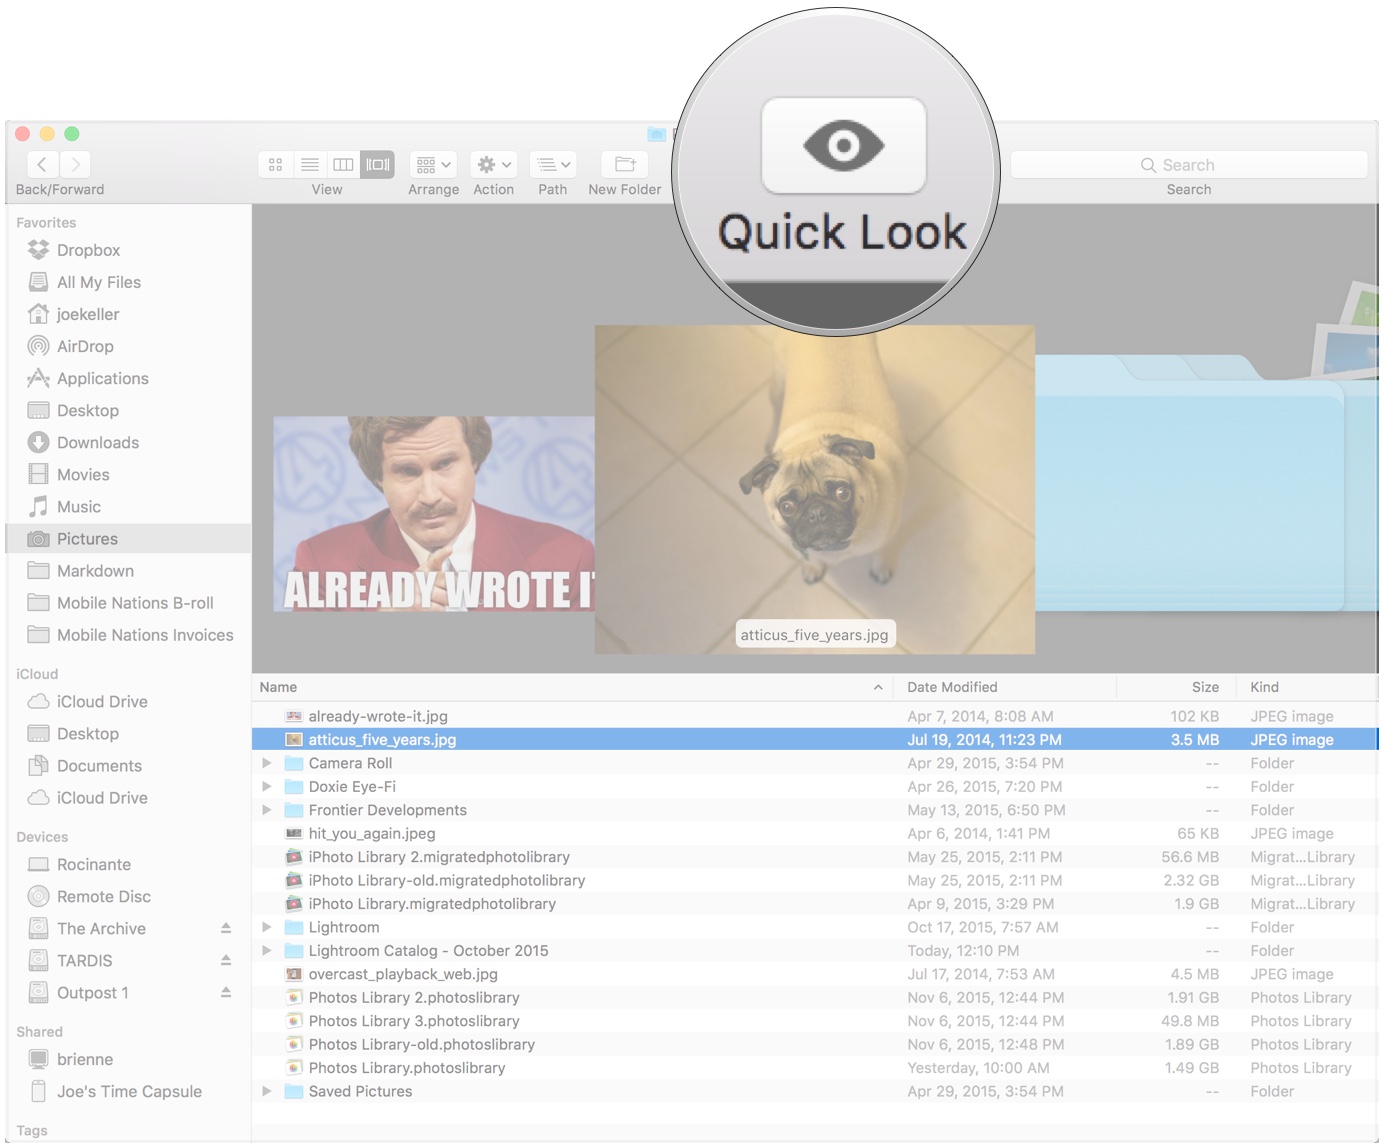
How to use Quick Look
After adding Quick Look to the Finder tool bar, use it to take a peek at a document, photo, or other file that you've got in the Finder.
- Open a new Finder window.
-
Find the file you wish to use Quick Look with and click it once.

-
Click the Quick Look button on your Finder's toolbar
Alternatively, tap the Space bar on your keyboard.
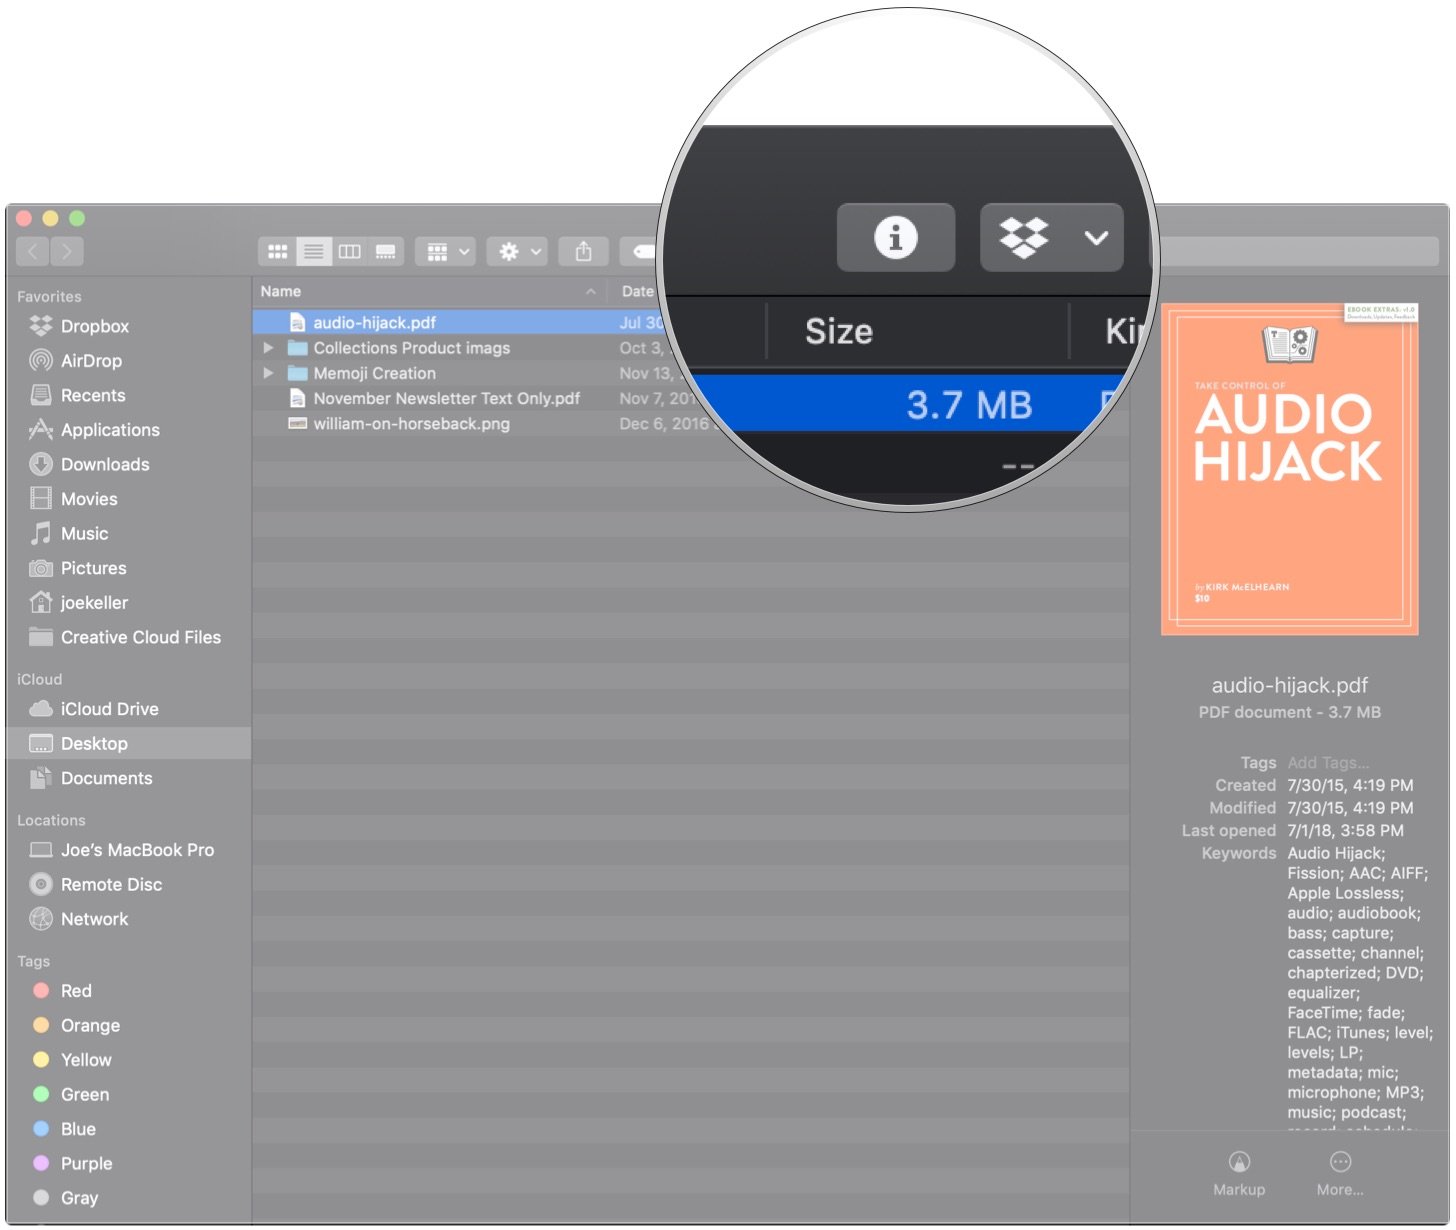
How to use the Info button
After adding the Info button to the Finder's toolbar, you can use it to get information on a given item in the Finder.
- Open a new Finder window.
-
Click on the item for which you want information.

-
Click the Info button.
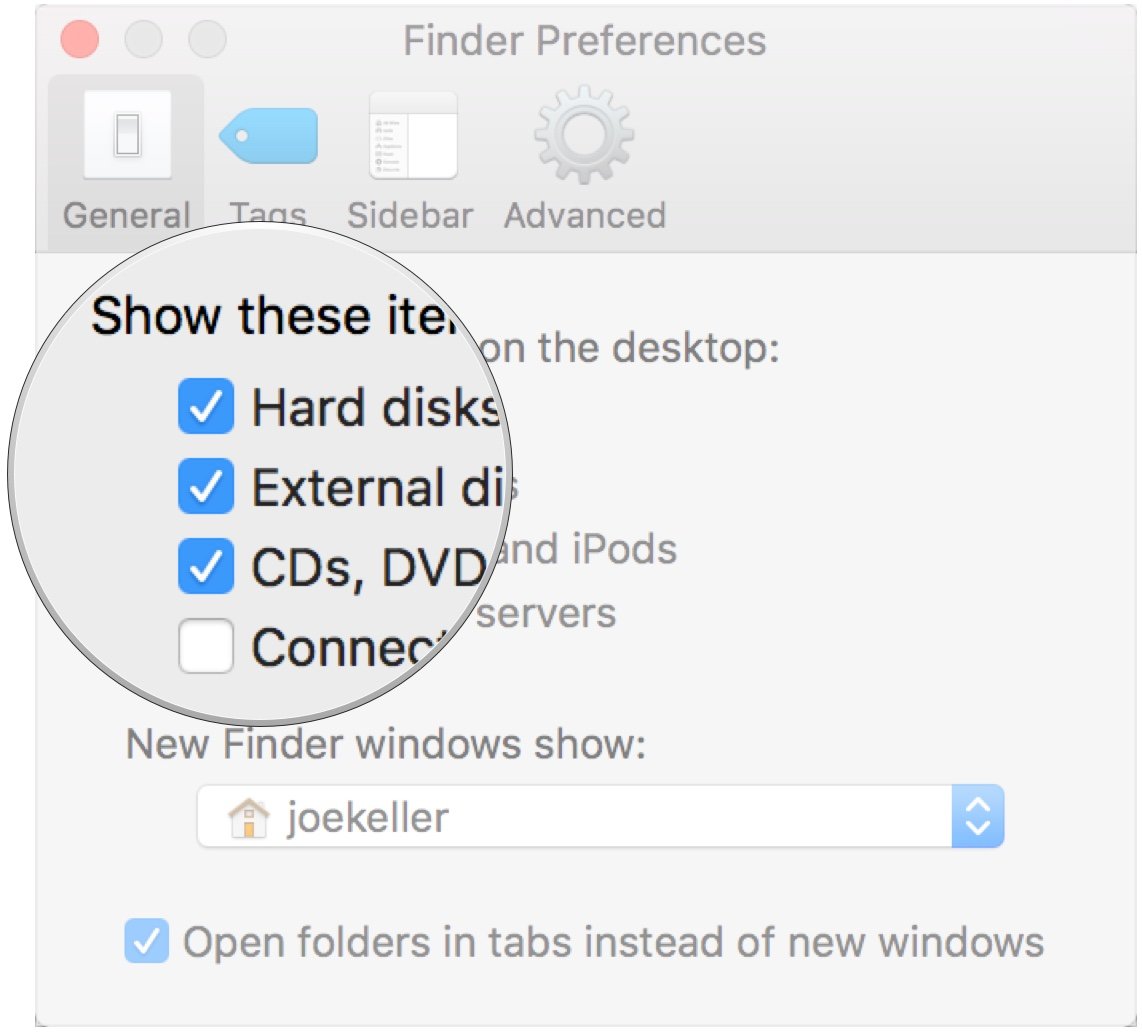
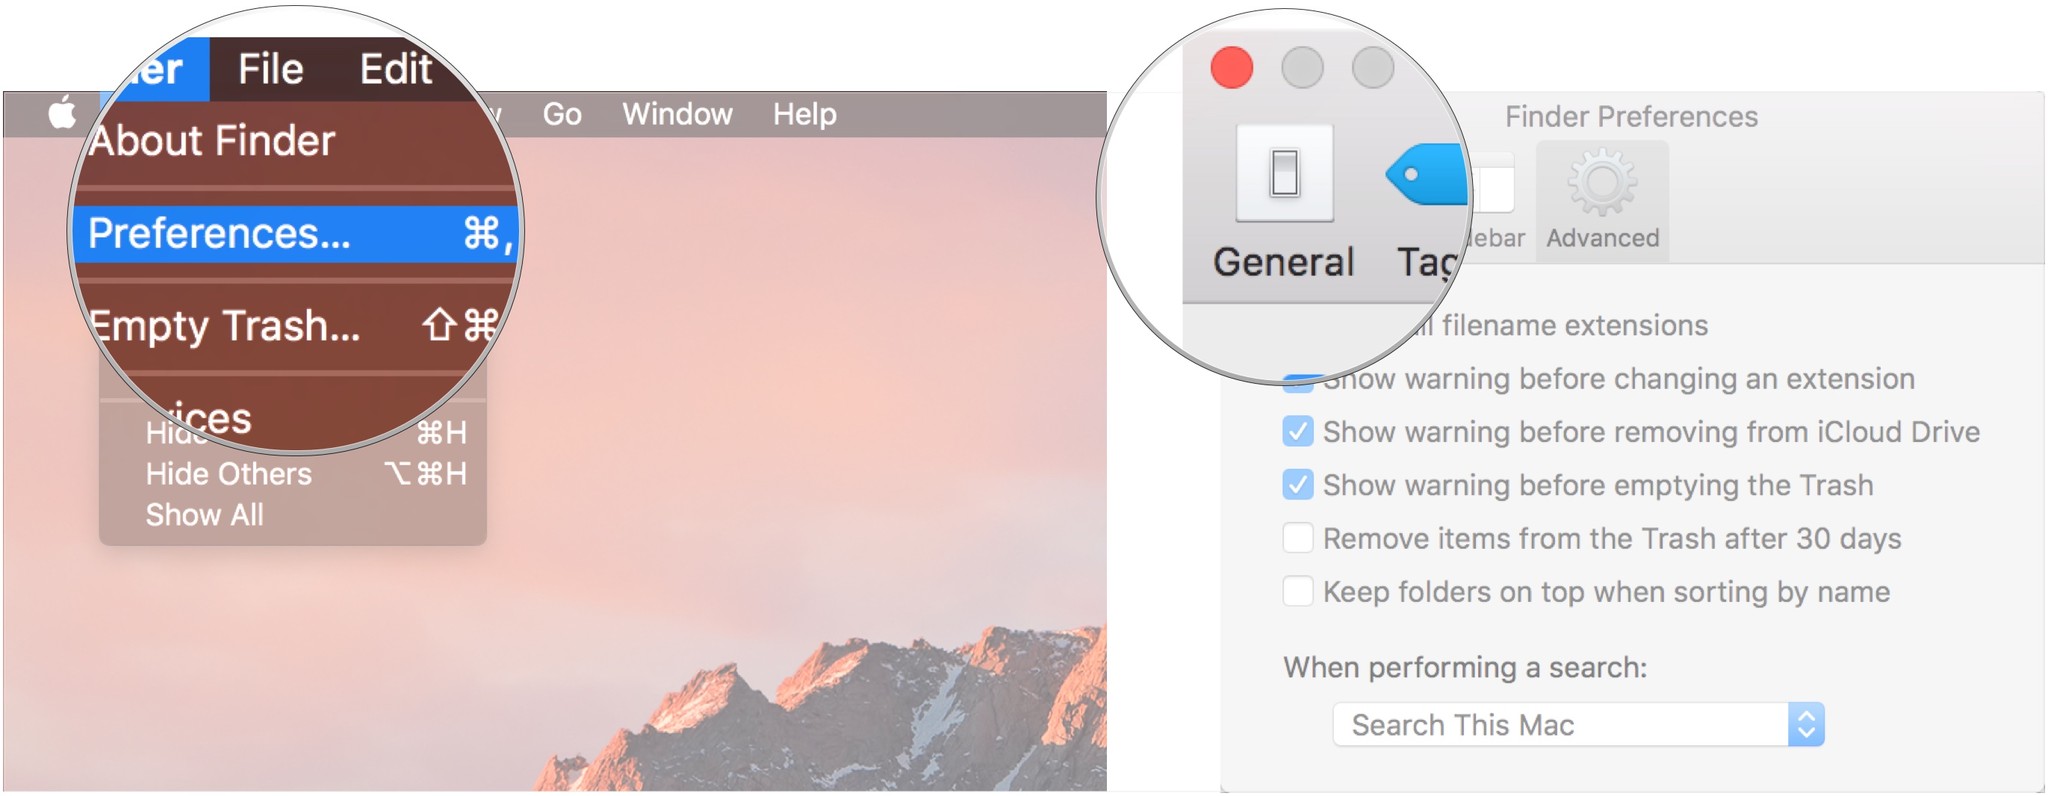
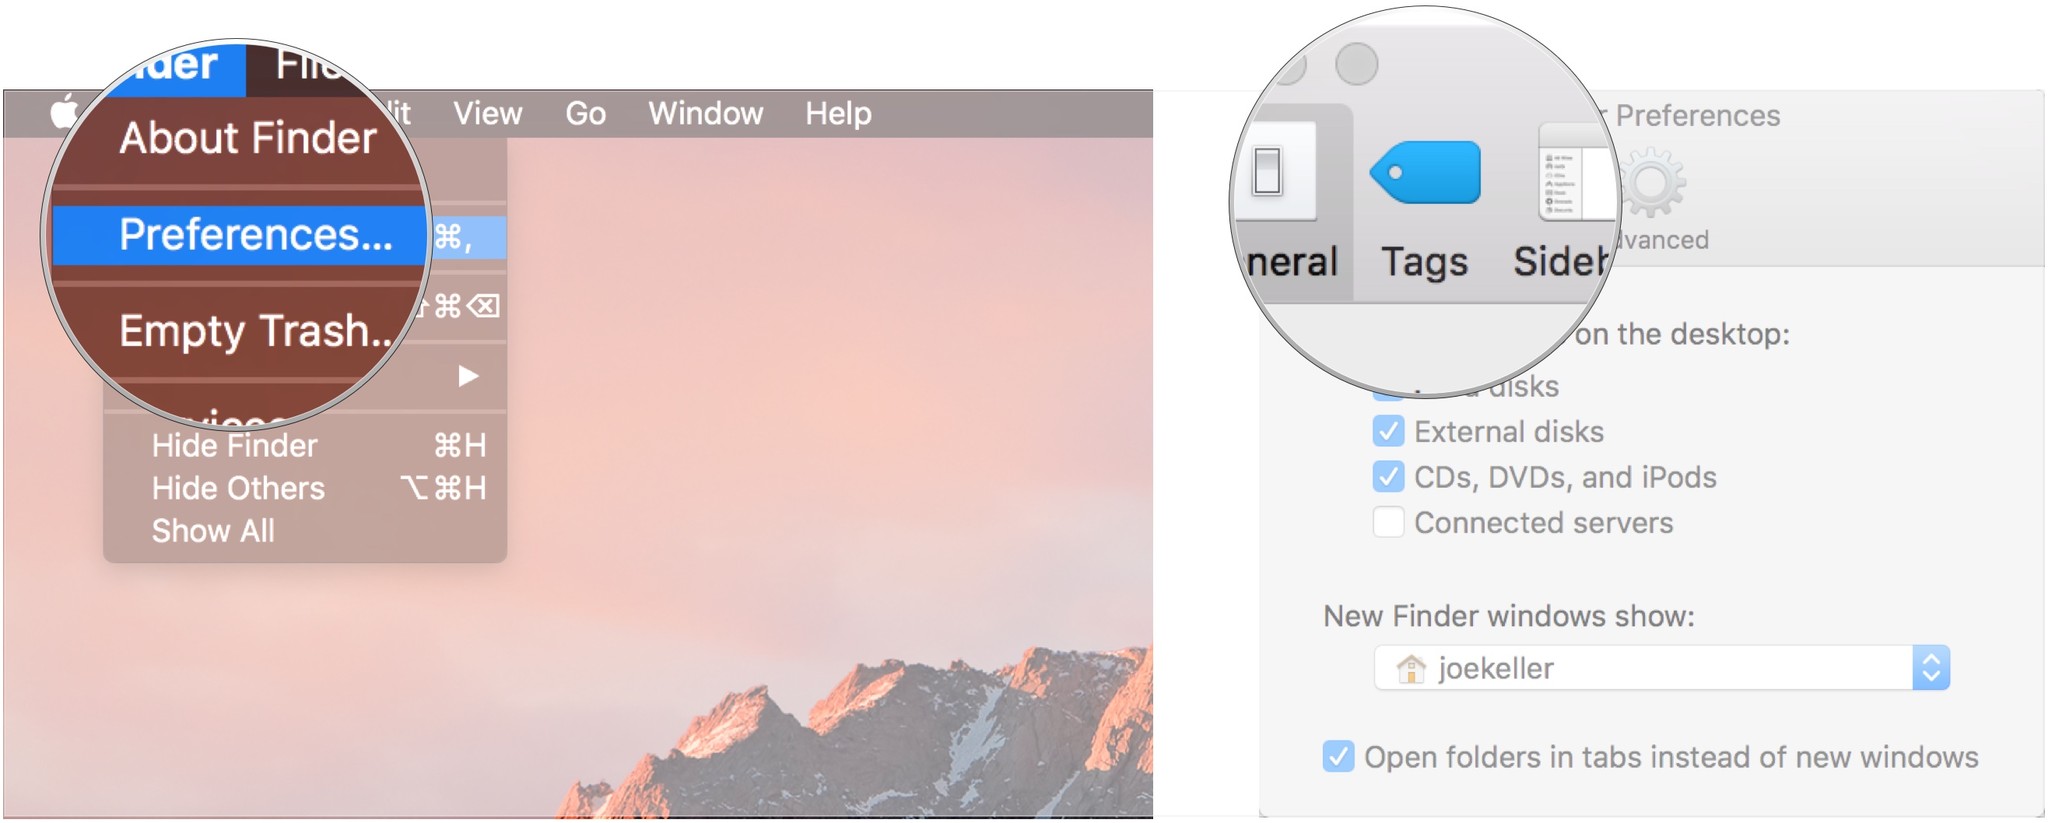
How to show or hide hard disks, external disks, CDs, and connected servers on your desktop
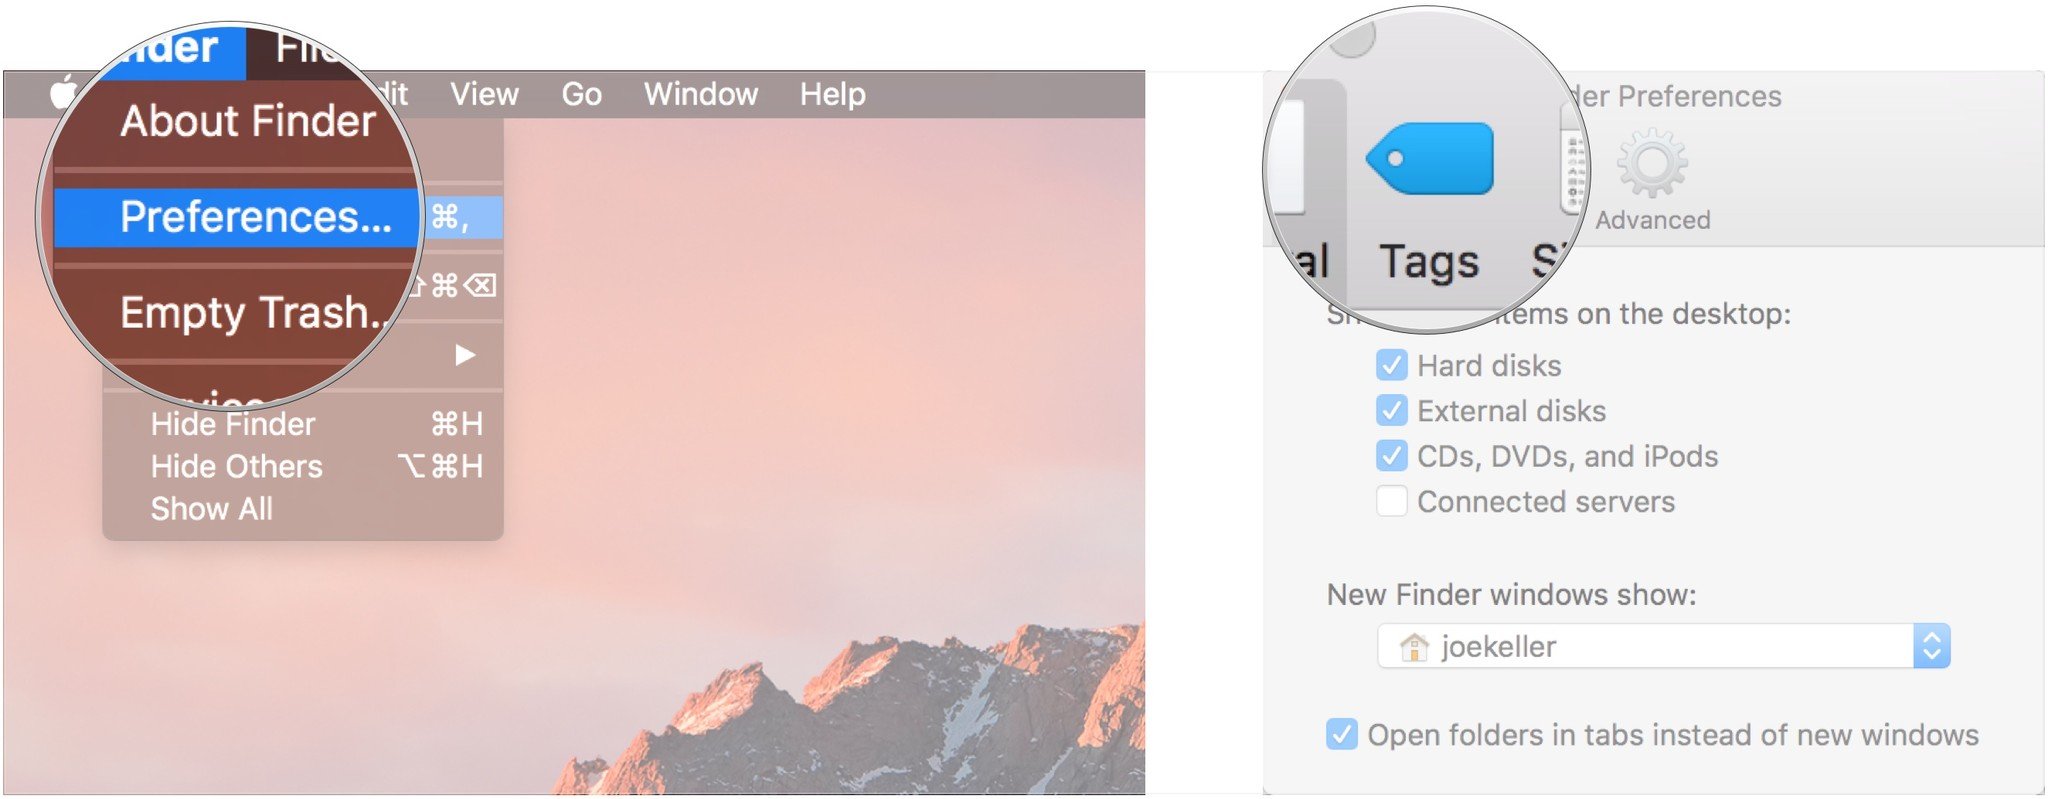
- In Finder, click on Finder in the Menu bar and select Preferences.
-
Click General.

-
Check the boxes for the types of items you want to display on your desktop.
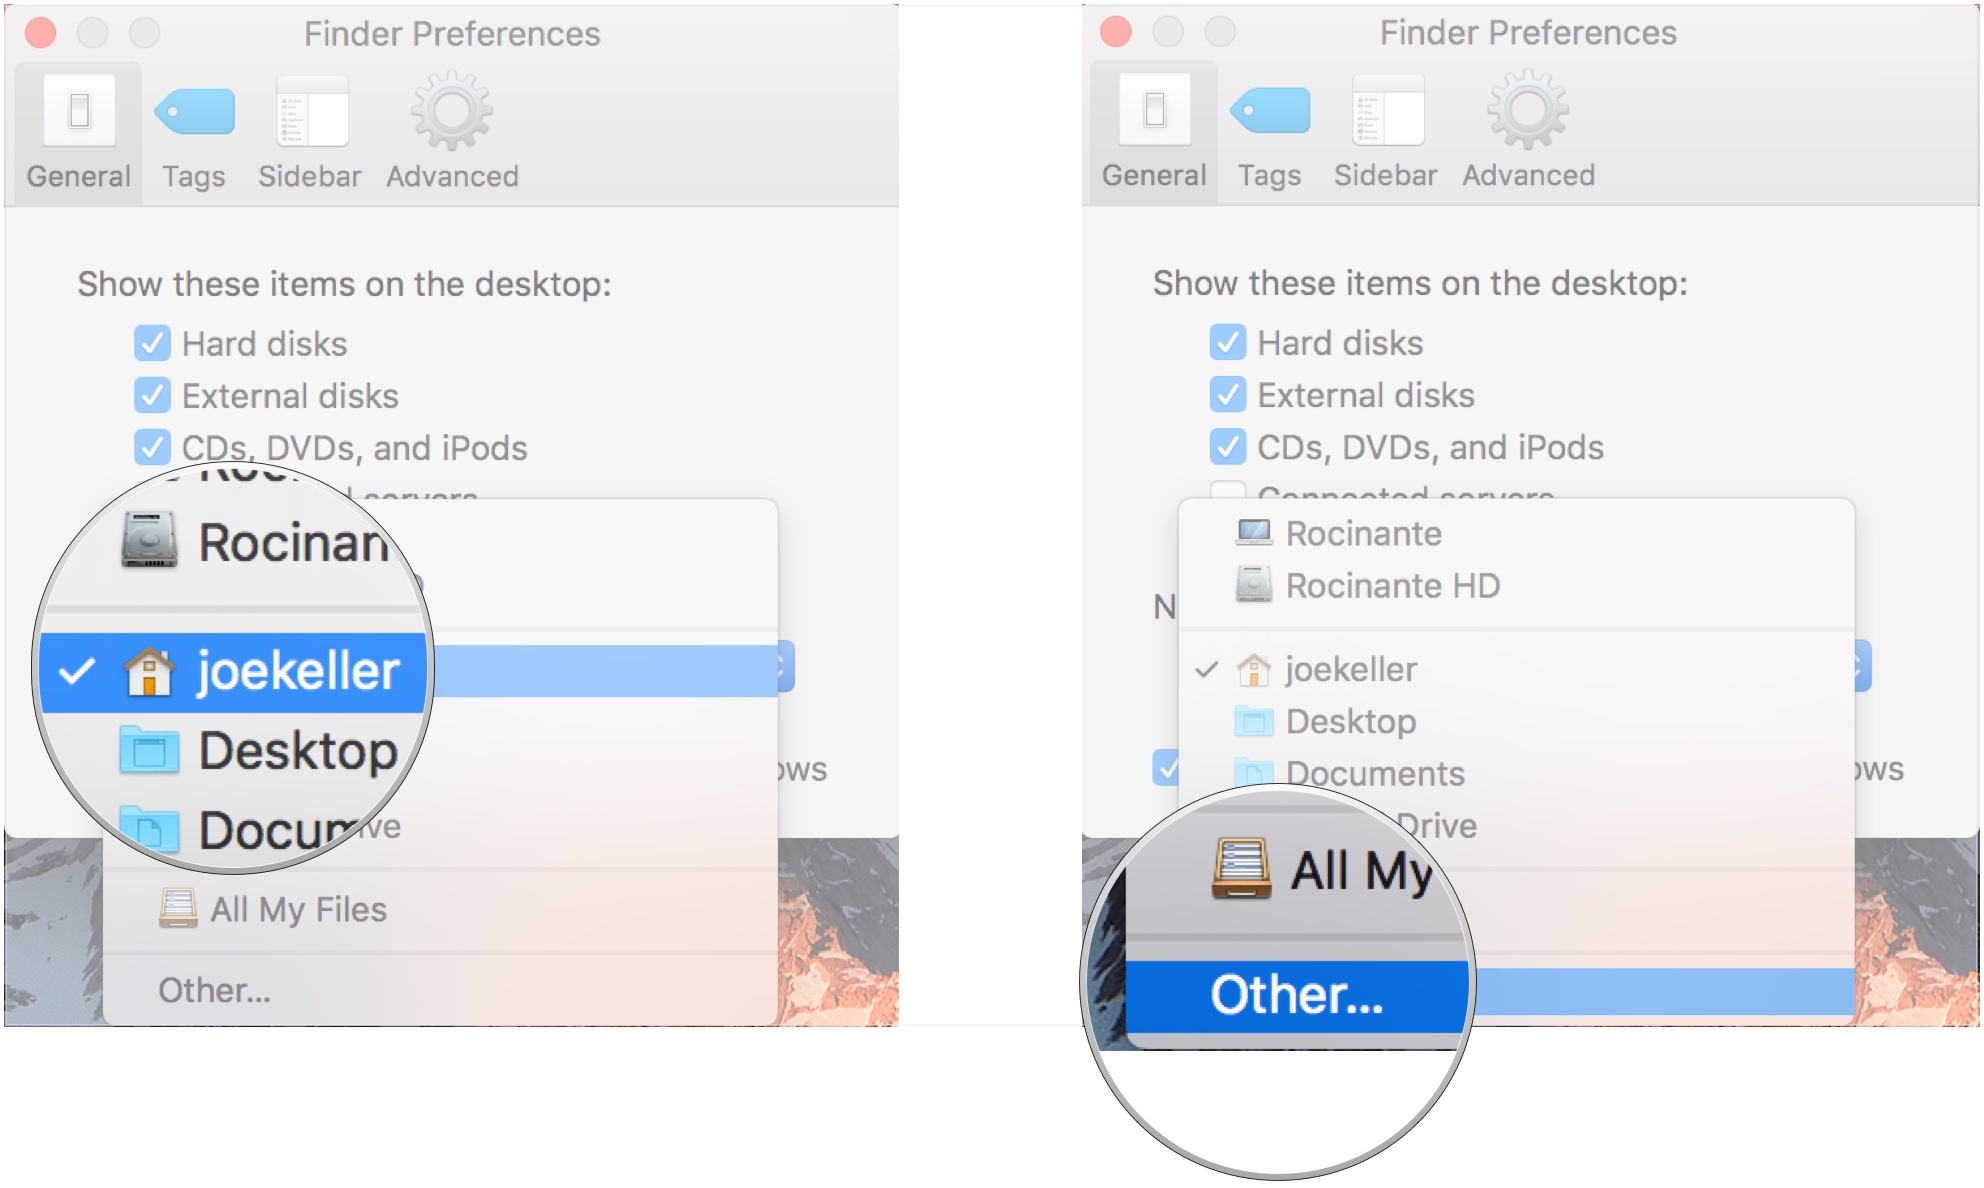
How to set a new Finder window's default section
- In Finder, click on Finder in the Menu bar and select Preferences.
-
Click General.
In the drop-down menu, click on the folder or storage device new Finder windows should show when it opens.
-
If your desired section isn't immediately available, choose Other.
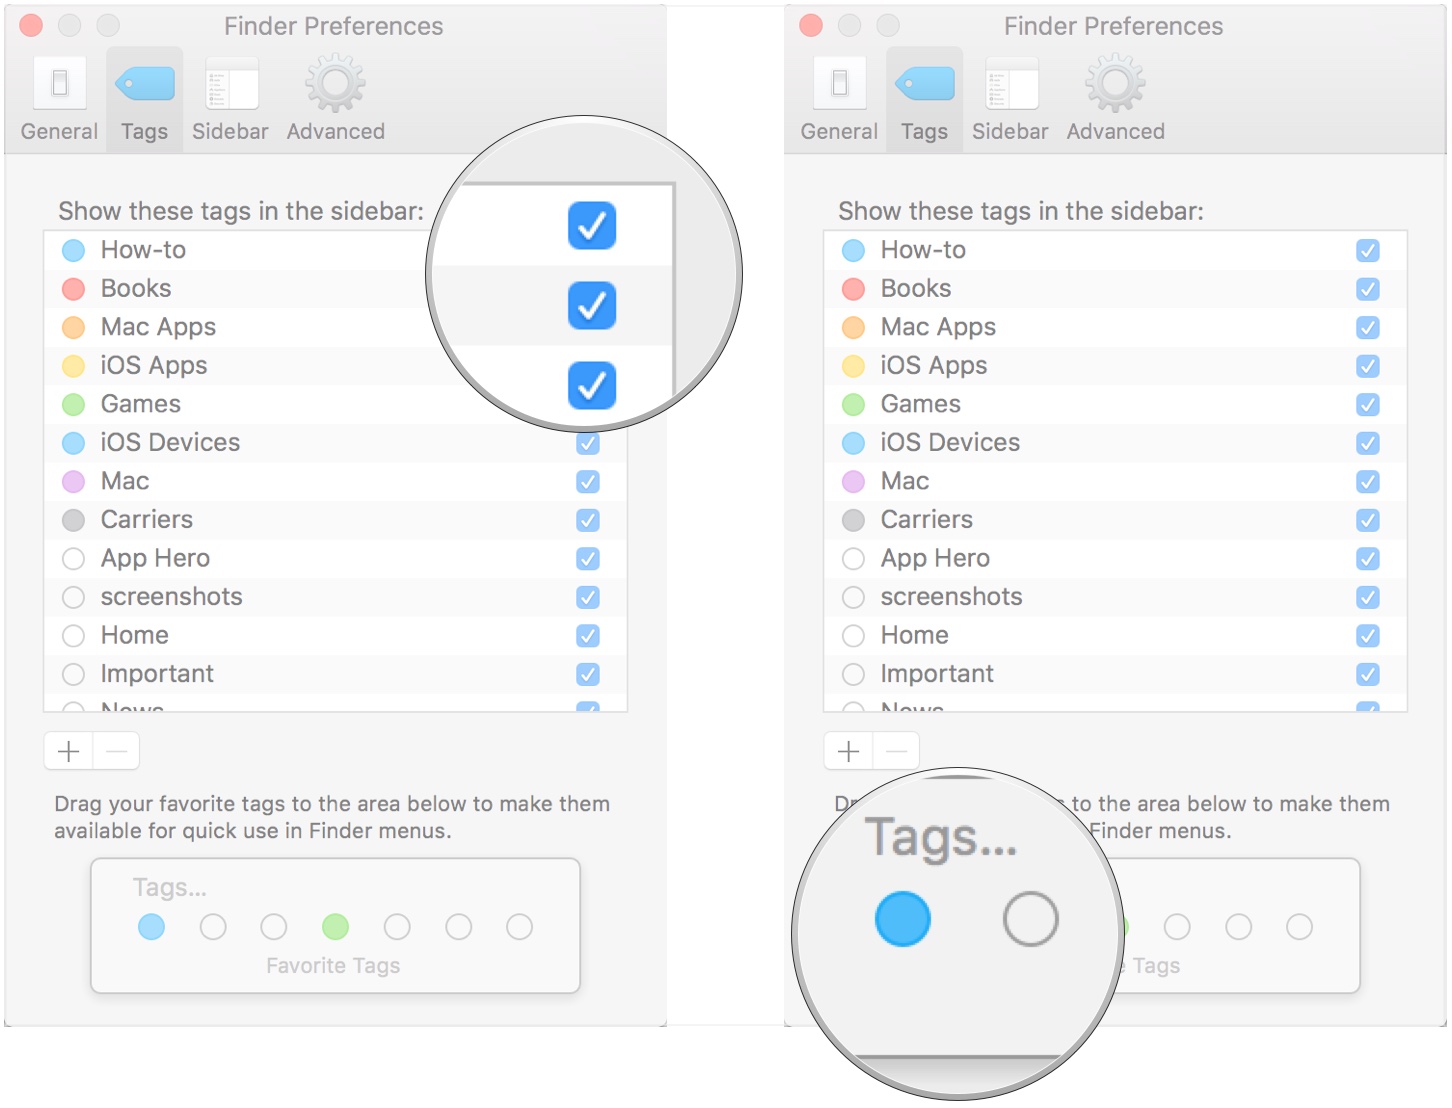
How to use Tags
- In Finder, click on Finder in the Menu bar and select Preferences.
-
Click Tags.
Check the boxes next to your tags to select which tags are displayed in your Finder's sidebar.
-
Drag a favorite tag to the bottom of the Tags tab to make it available for quick access in Finder menus.
How to create custom Tags
- In Finder, click on Finder in the Menu bar and select Preferences.
-
Click Tags.
Below the list of tags, click the + button.
-
Enter a name for your tag.
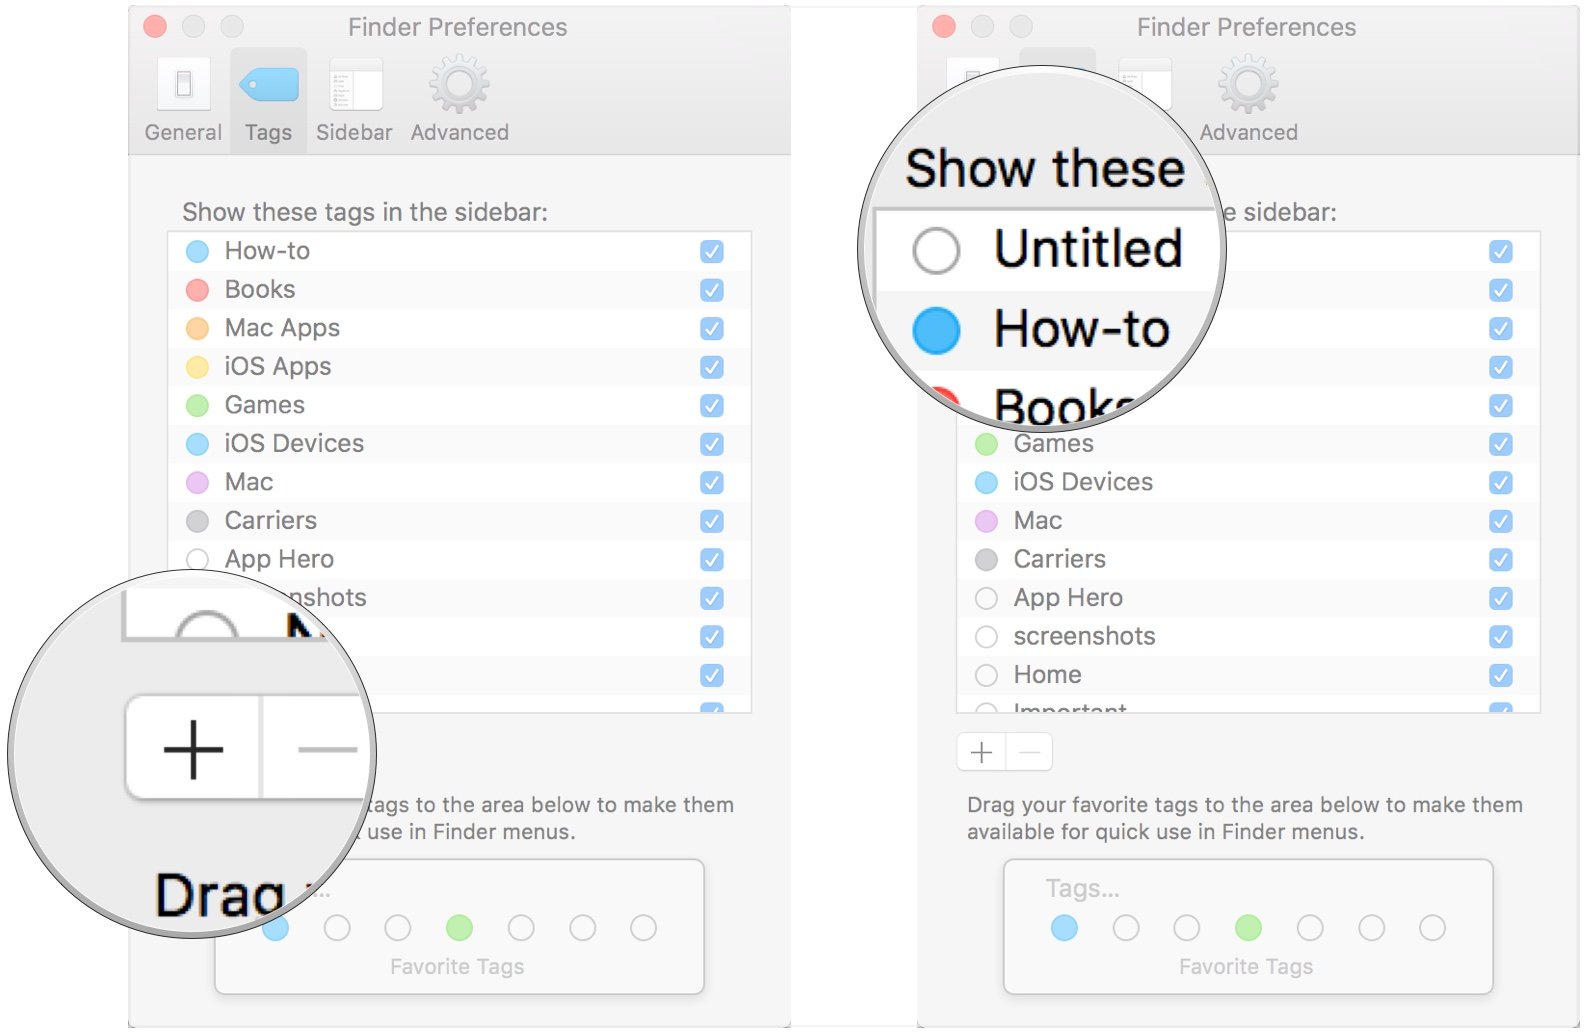
Click the circle next to your tag to assign it a color.

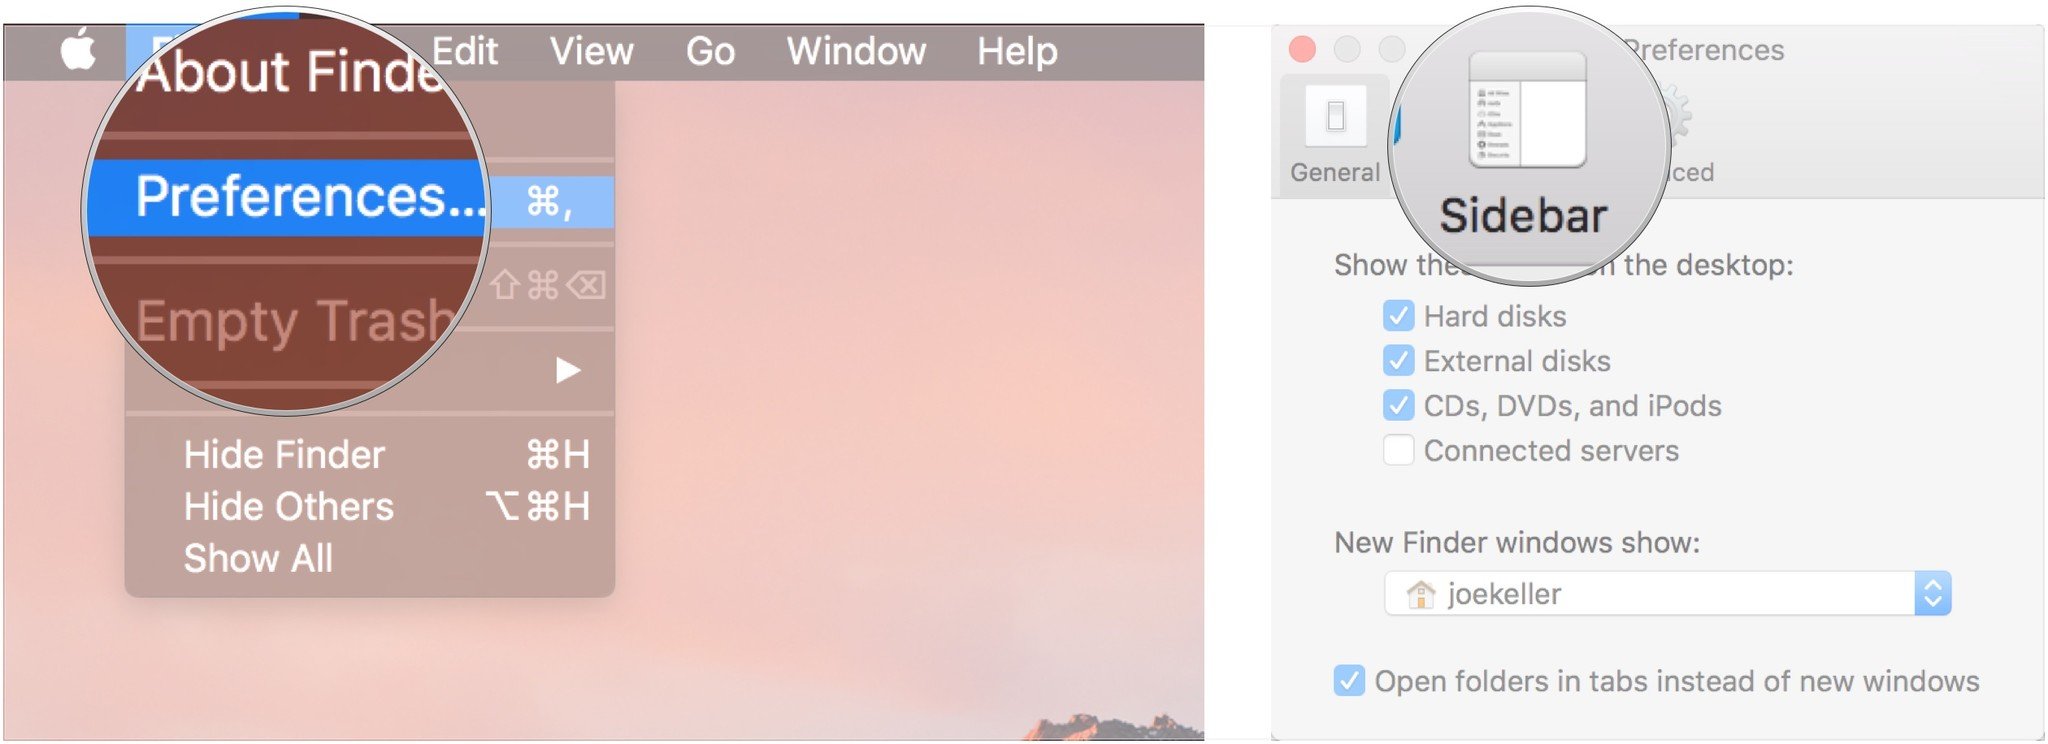
How to customize the Finder sidebar
- In Finder, click on Finder in the Menu bar and select Preferences.
-
Click Sidebar.
-
Check the boxes next to the items you want to see in your Finder's sidebar.

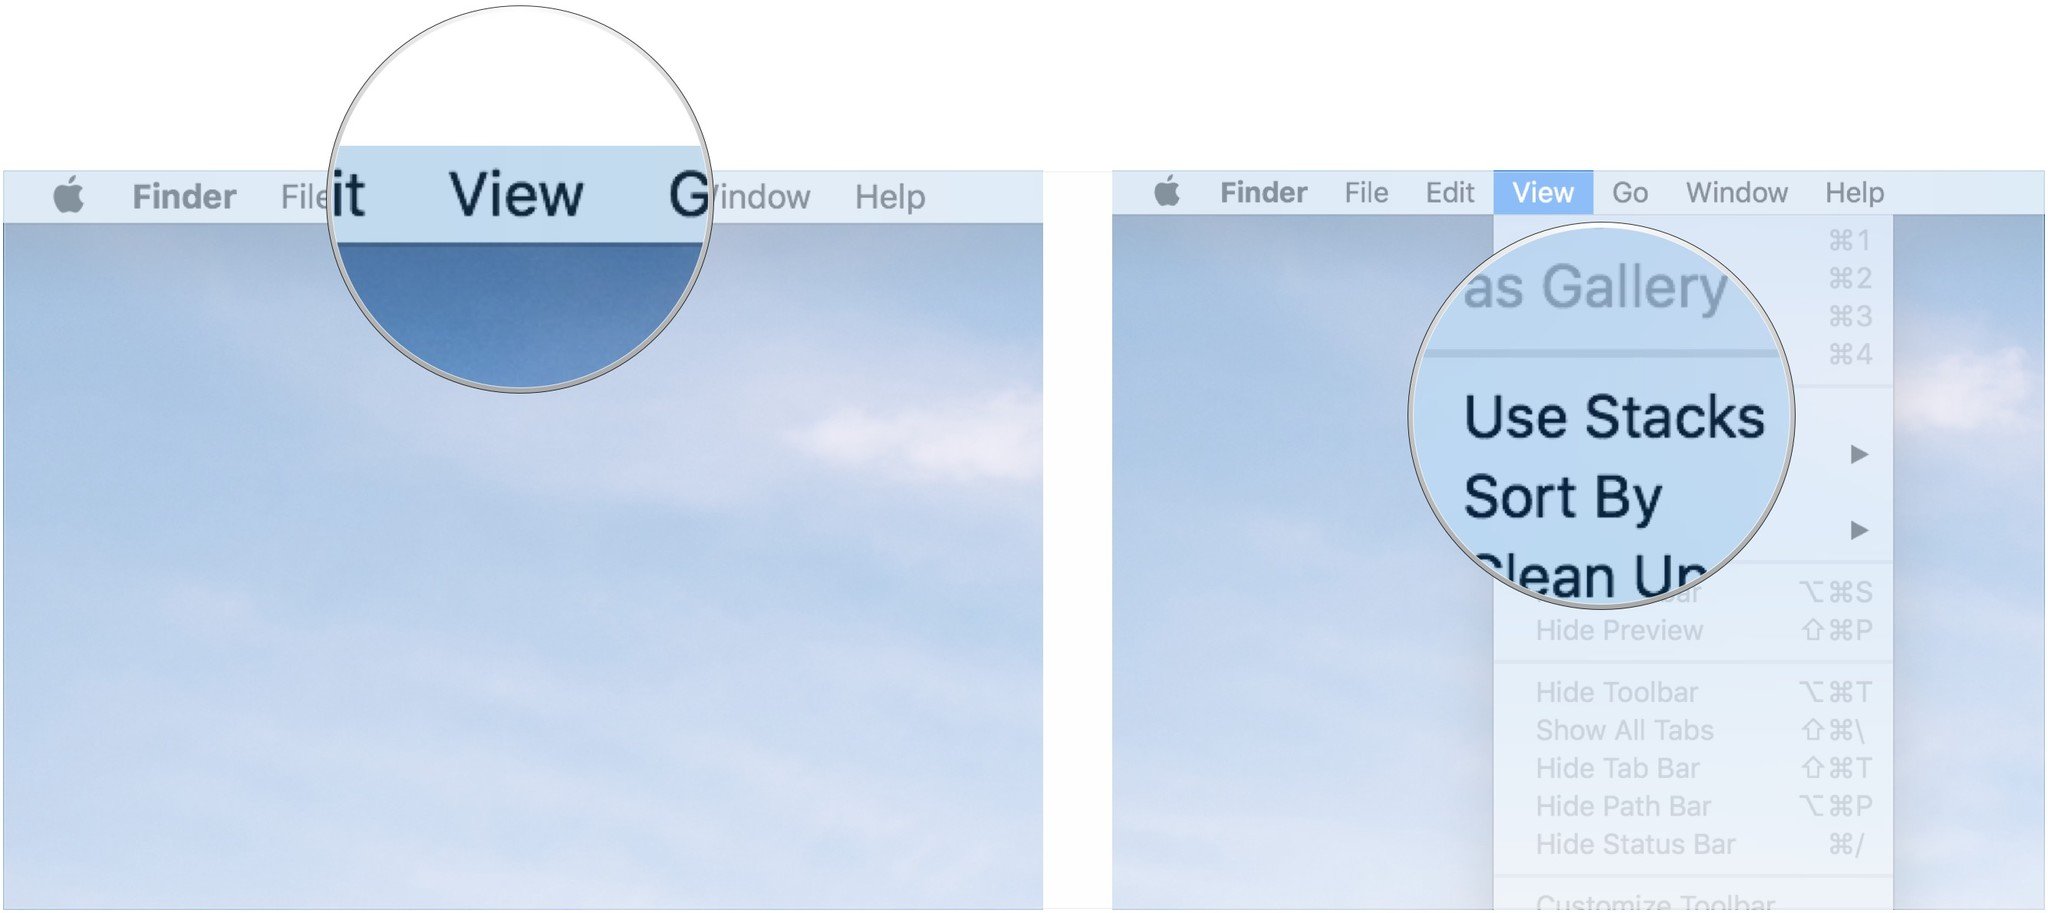
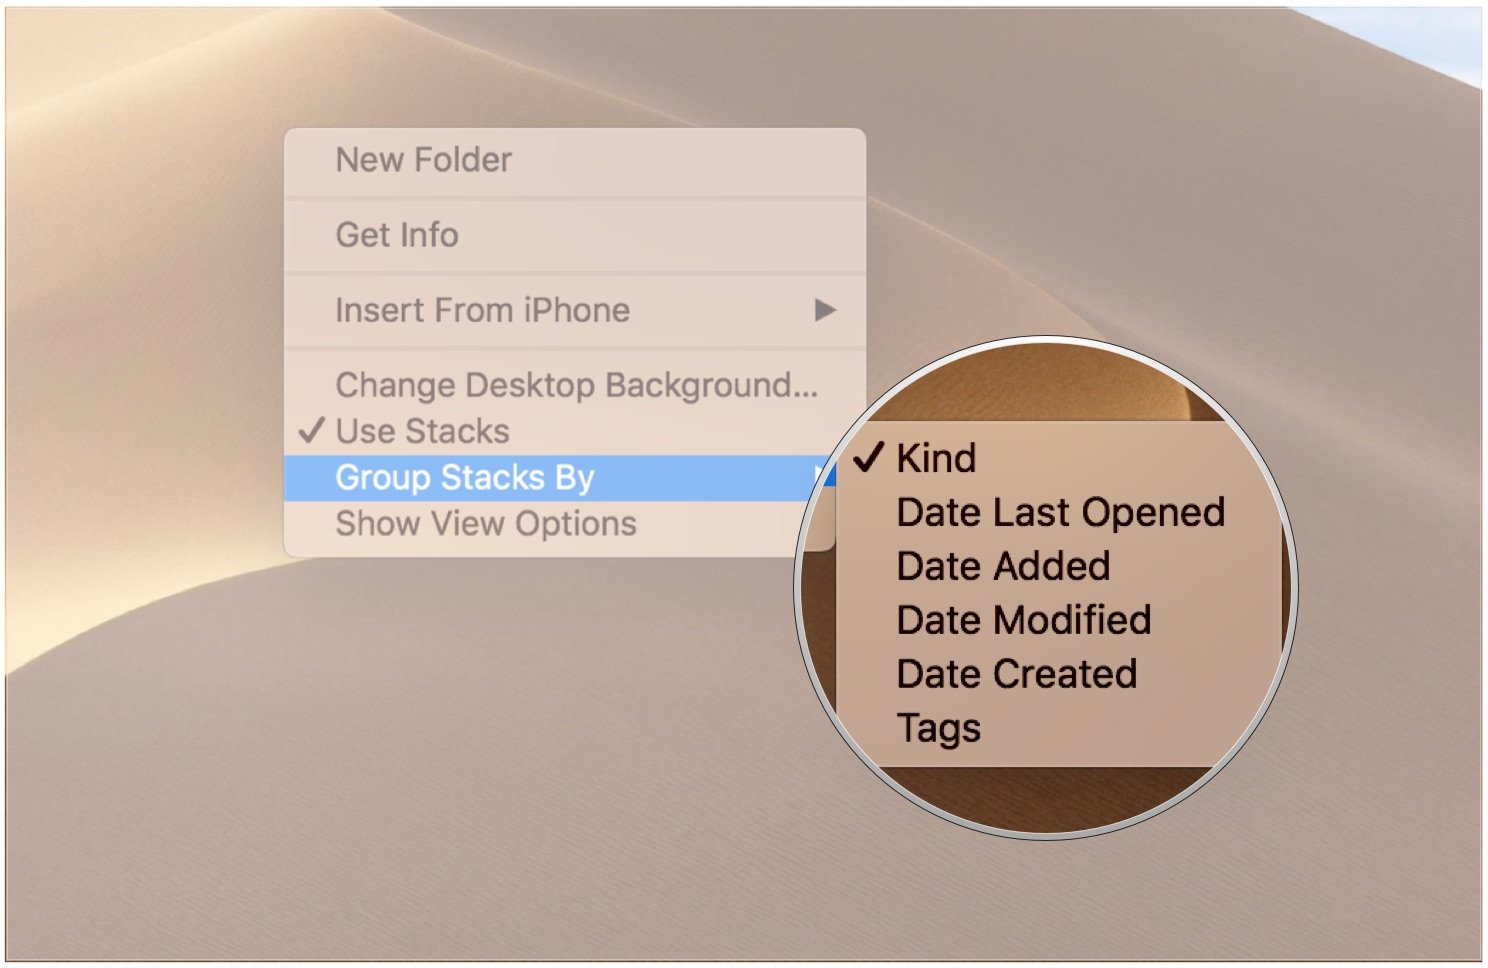
How to use Stacks in macOS Mojave
- Click View in the Menu bar of your Mac when on your desktop with no apps in the foreground.
-
Click Use Stacks.
- Control-click, right-click, or two-finger-click on your desktop.
-
Hover your mouse cursor over Group Stacks By. Choose between Kind, Date Last Opened, Date Added, Date Modified, Date Created, and Tags.
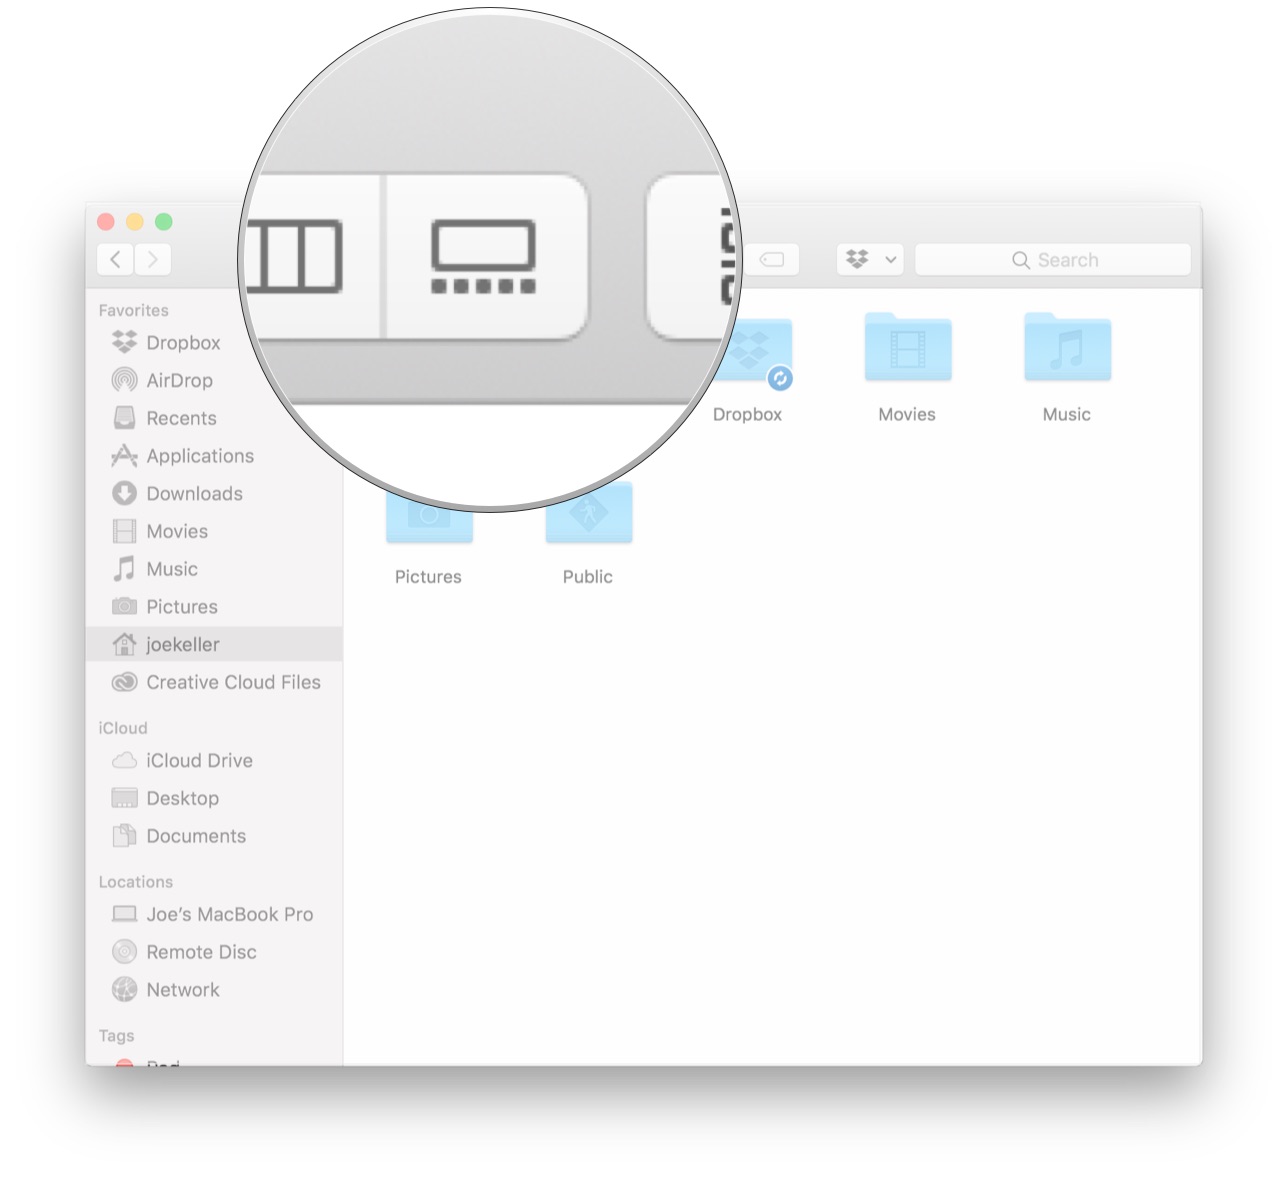
How to use Gallery View in macOS Mojave
- Click on the Finder icon in your Dock to open a new Finder window.
-
Navigate to the folder or section that you want to view.
-
Click the Gallery View button on the right-most side of the view selection buttons on the Finder window.
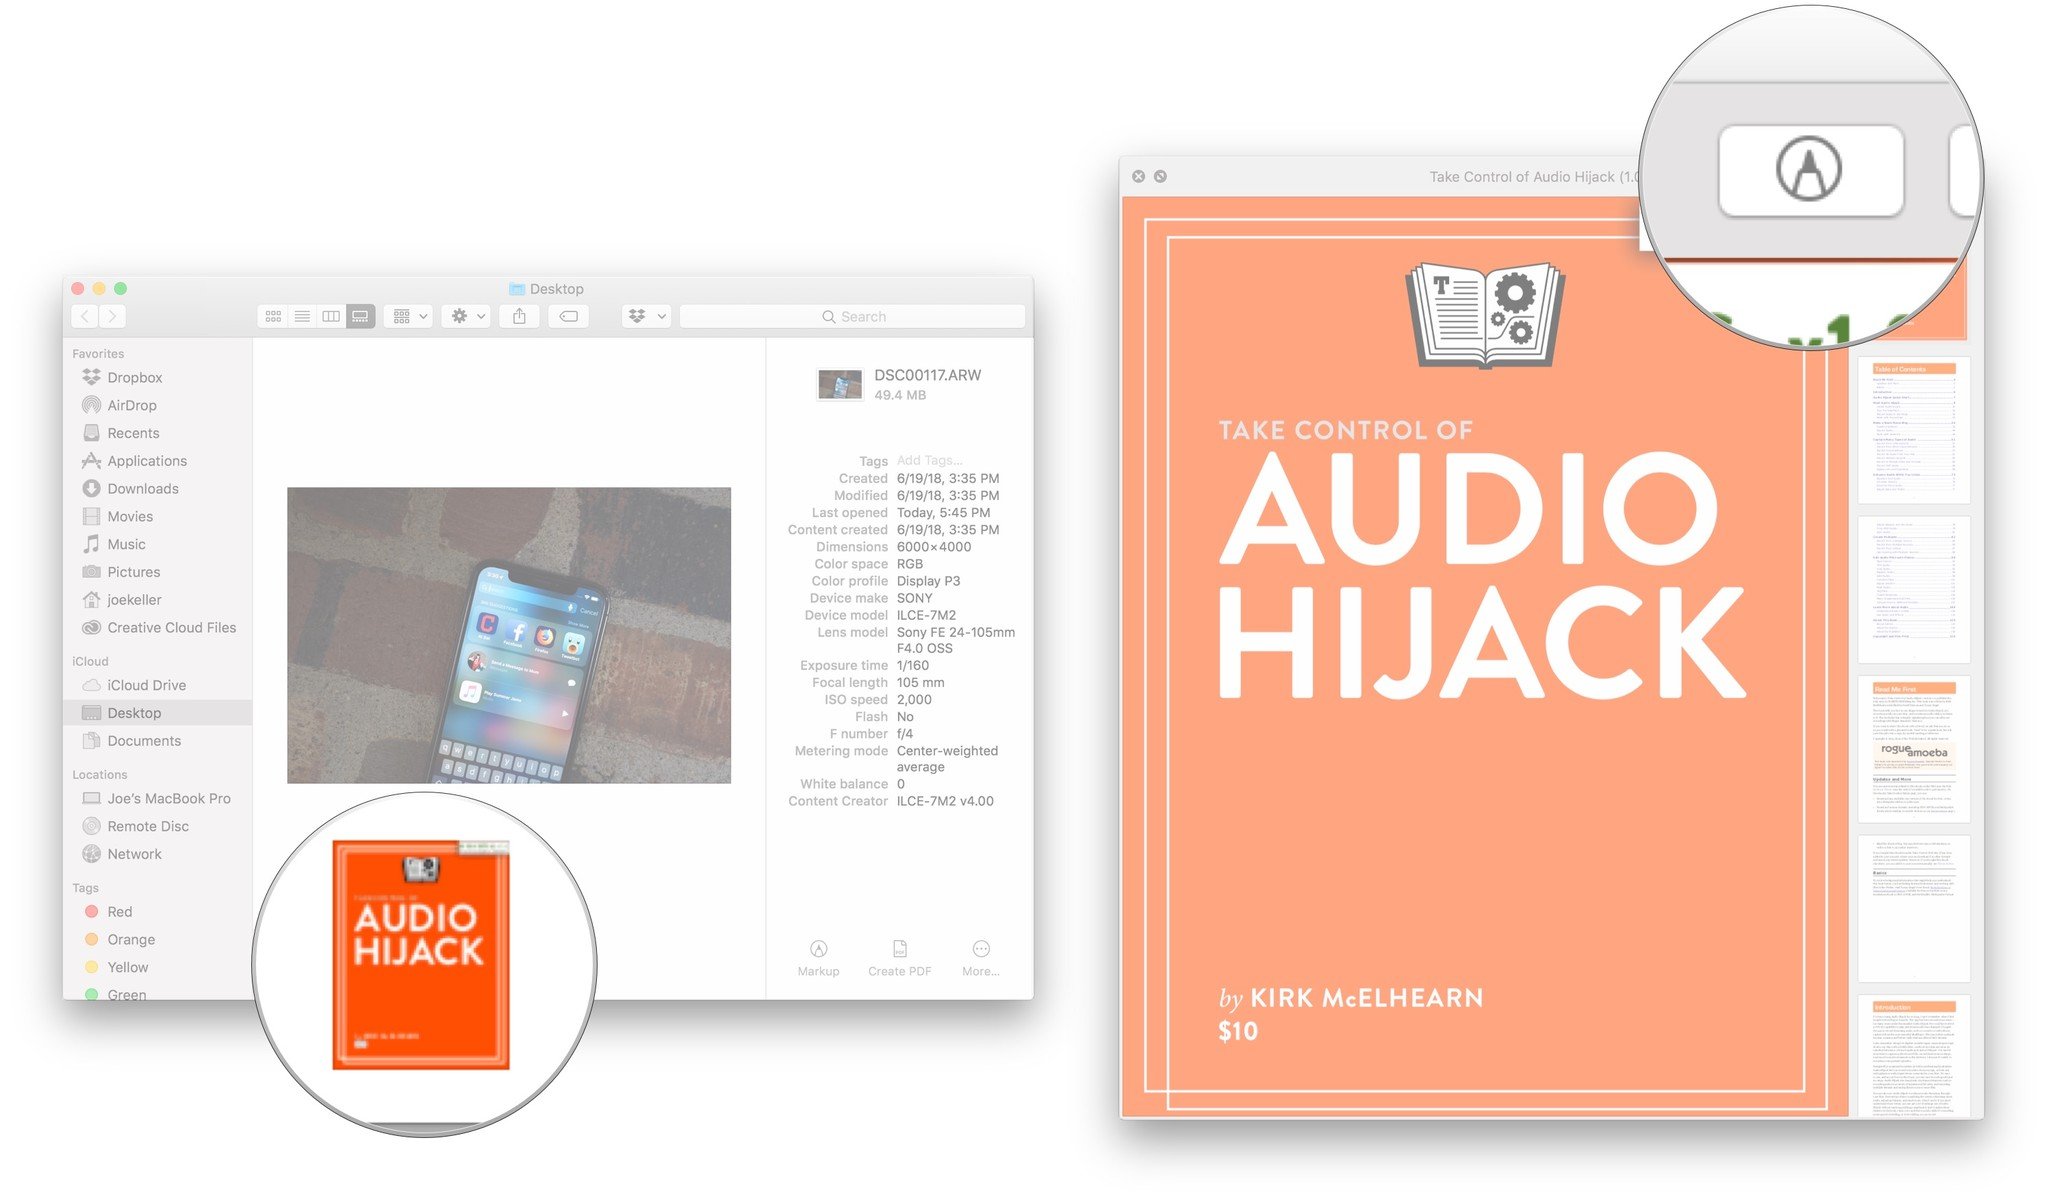
How to view file metadata in macOS Mojave
- Click on the Finder icon in your Dock to open a new Finder window.
-
Choose the view you want to use.
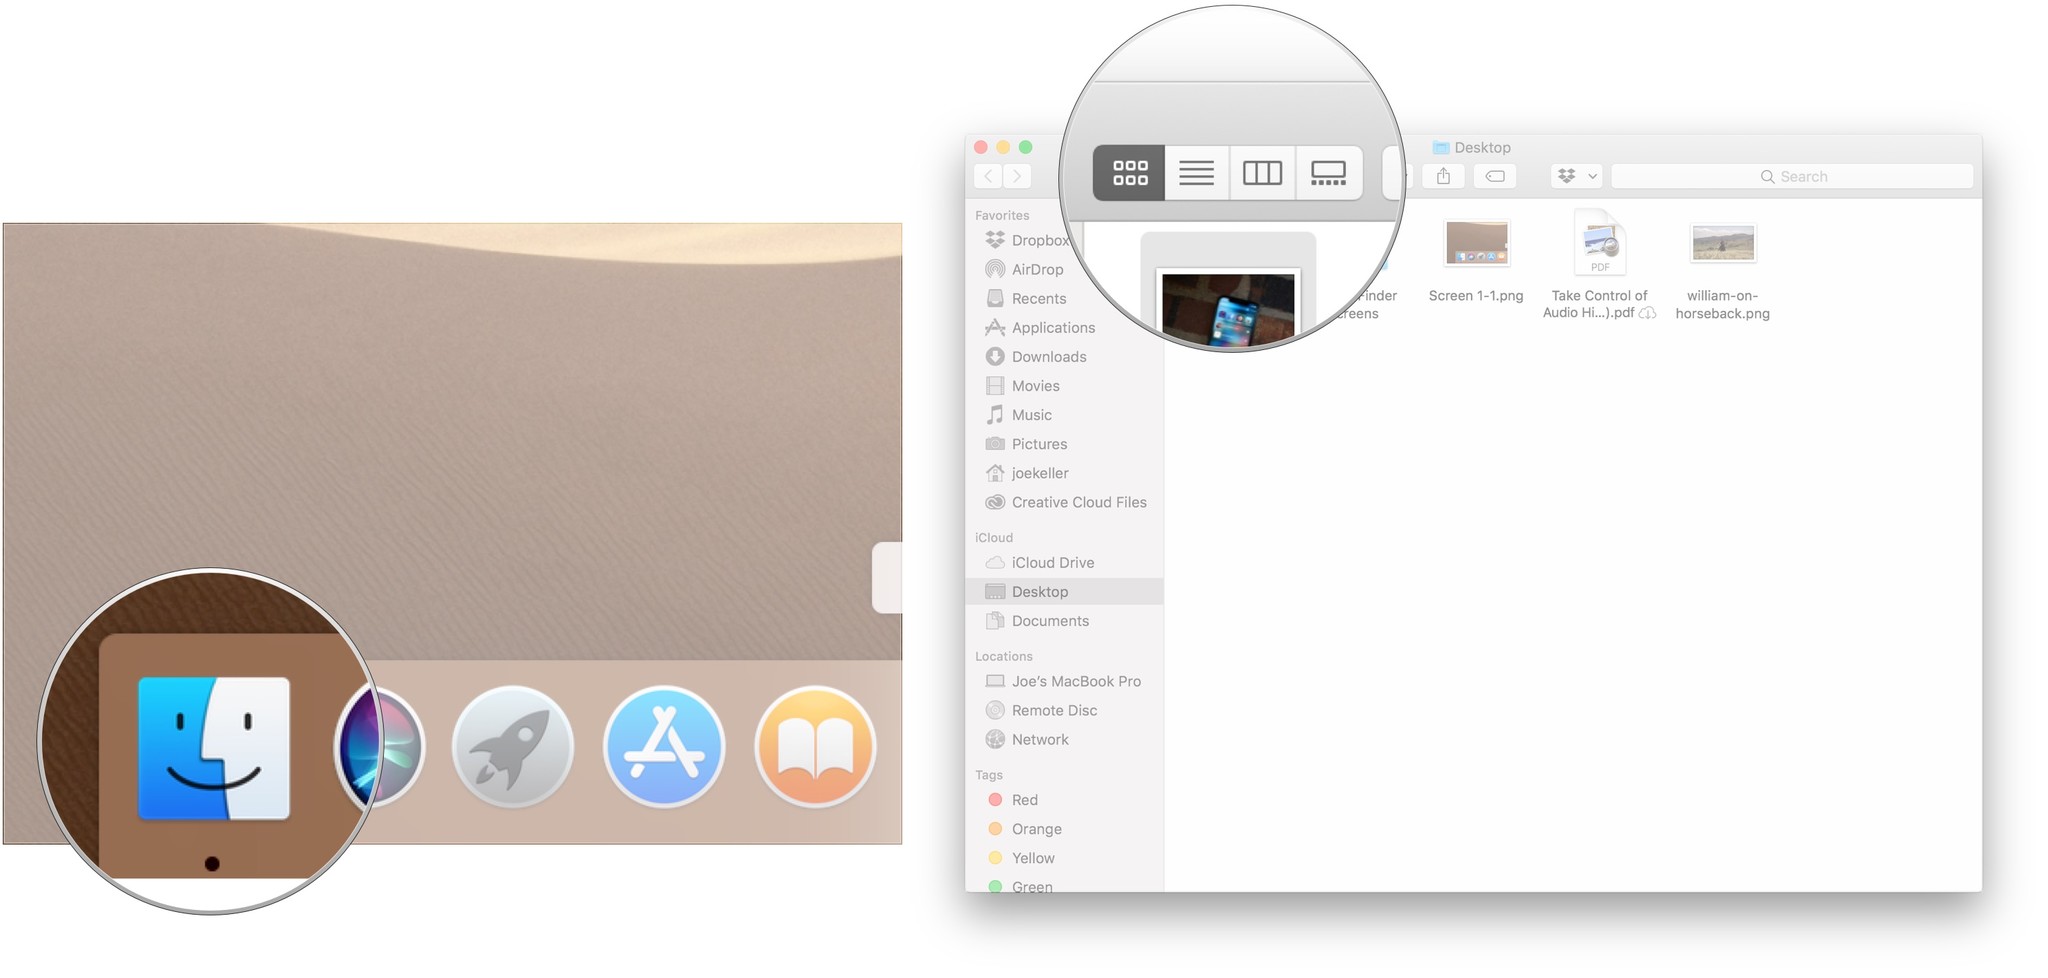
- Click on the file whose information you want to use.
-
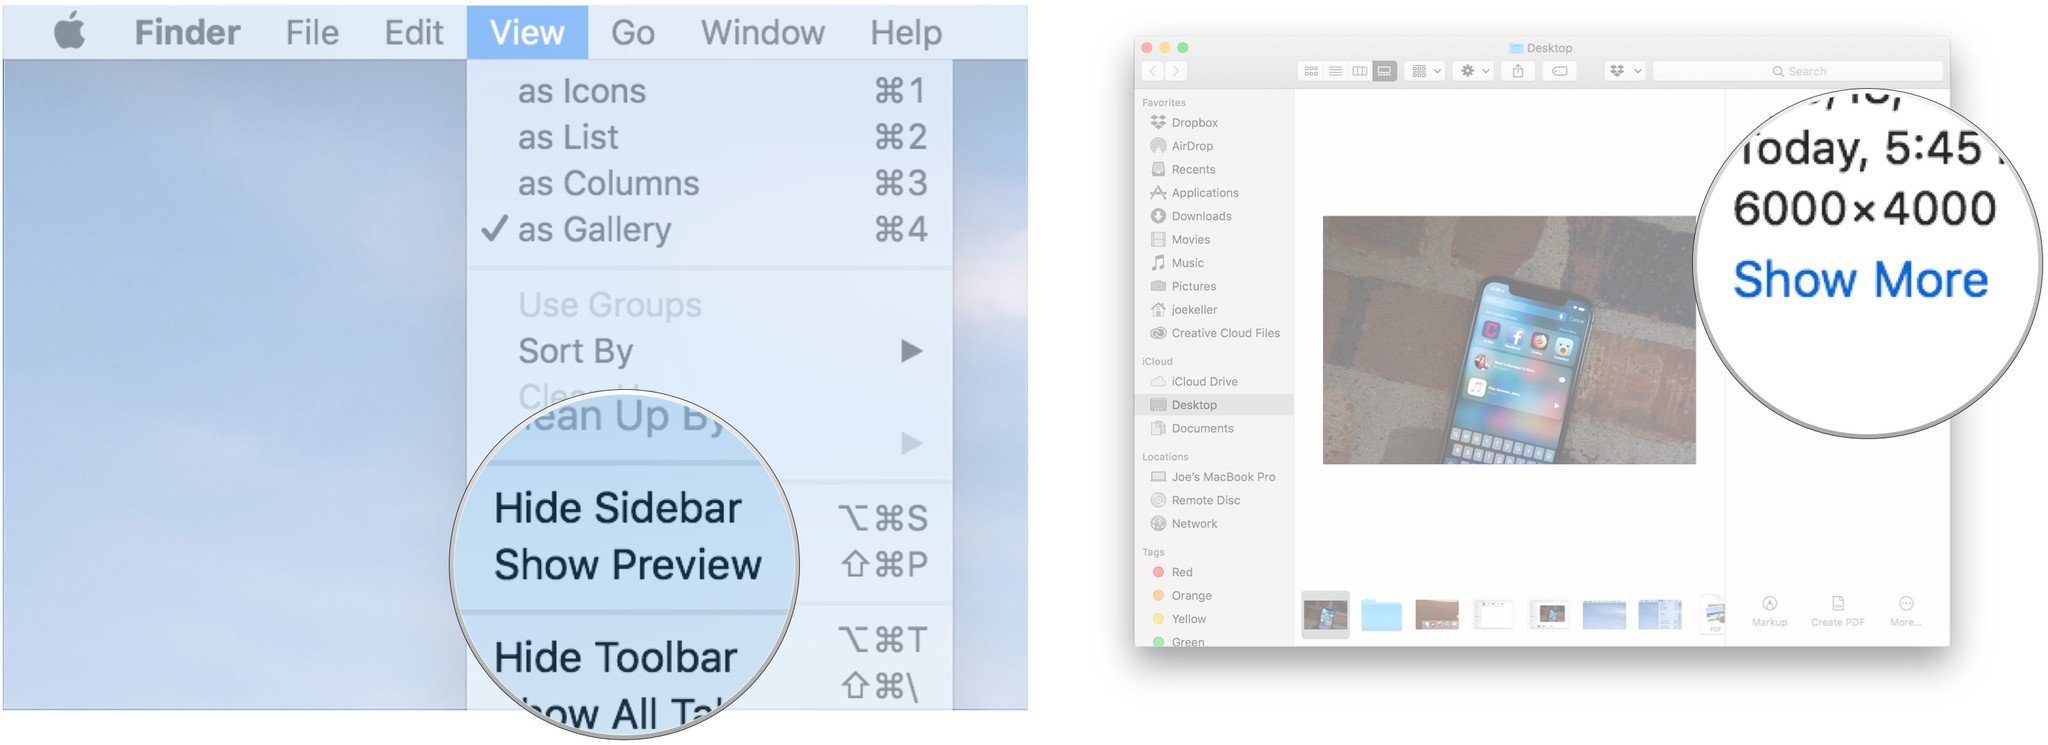
Click View in the Menu bar.
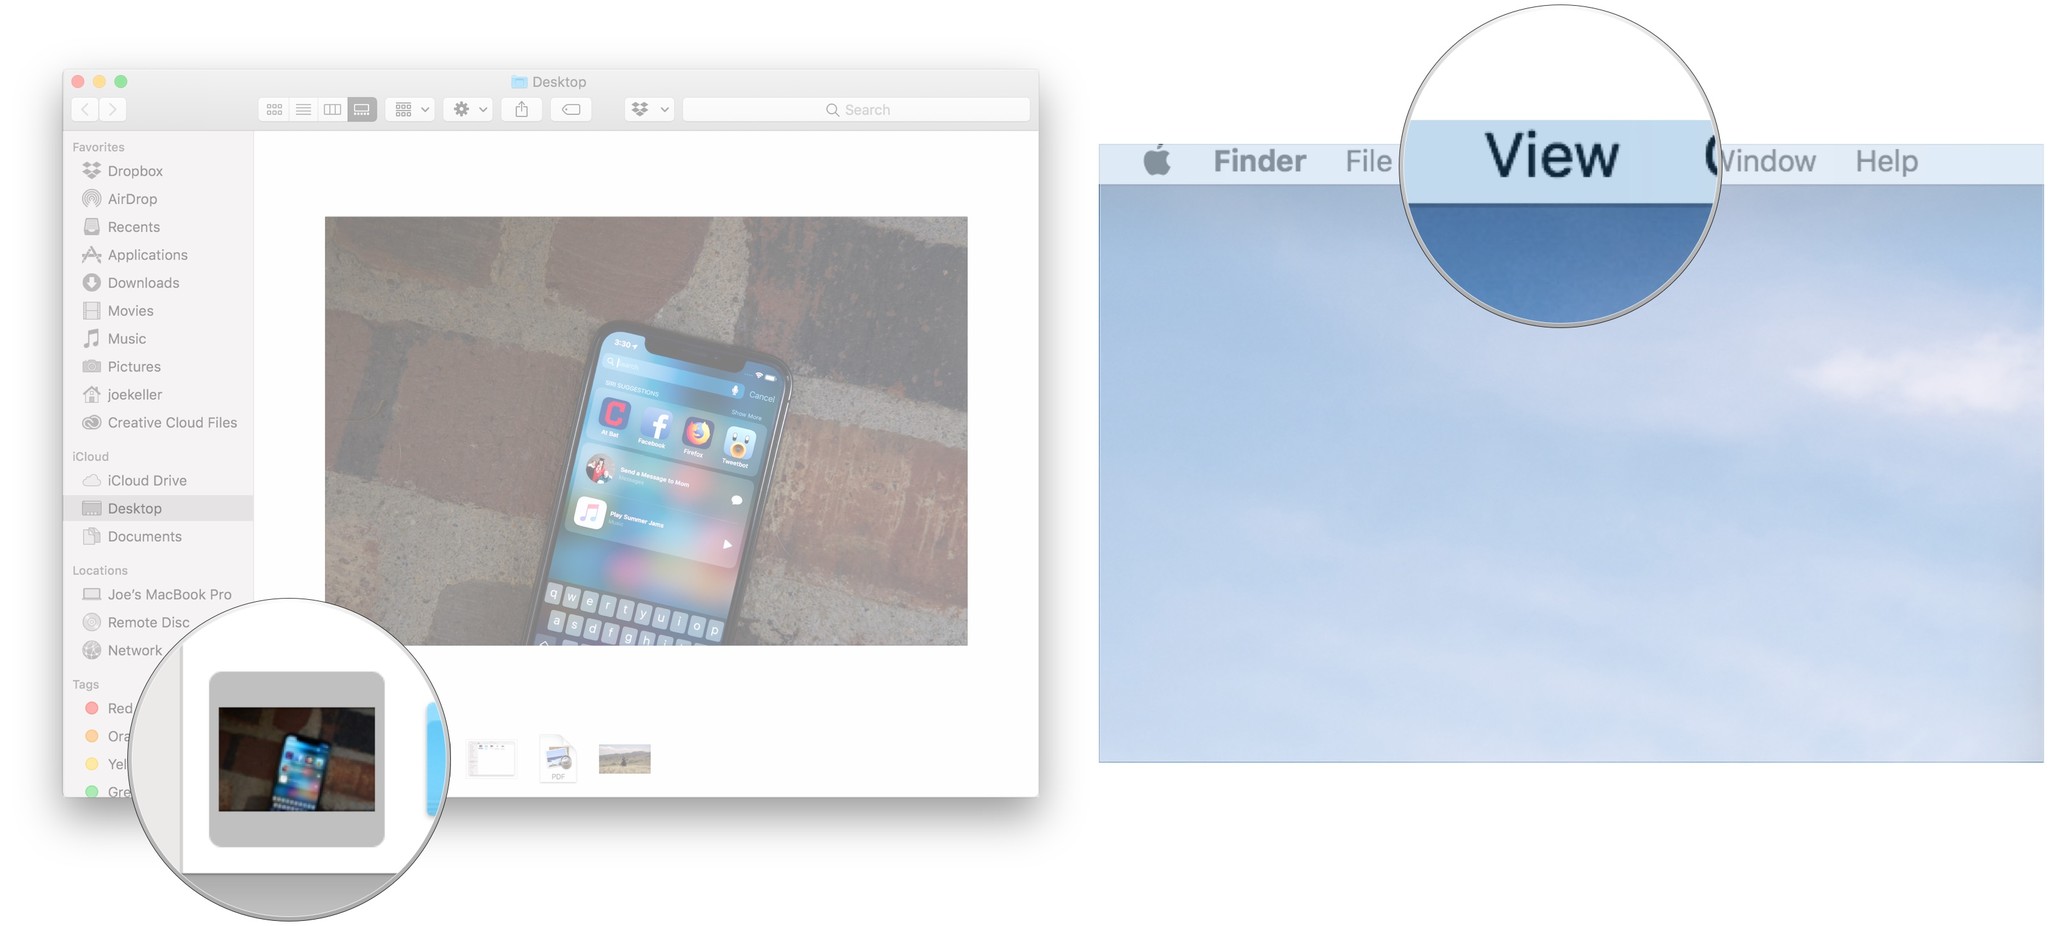
- Click Show Preview.
-
Click Show More in the Preview pane to view additional metadata.
How to use Quick Actions in macOS Mojave
- Click on the Finder icon in your Dock to open a new Finder window.
-
Choose the view you want to use.
- Click on the file or files on which you wish to perform a quick action.
-
Click View in the Menu bar if the Preview pane isn't already visible.
- Click Show Preview.
-
Choose one of the actions available at the bottom of the Preview pane to perform it on the selected file or files.
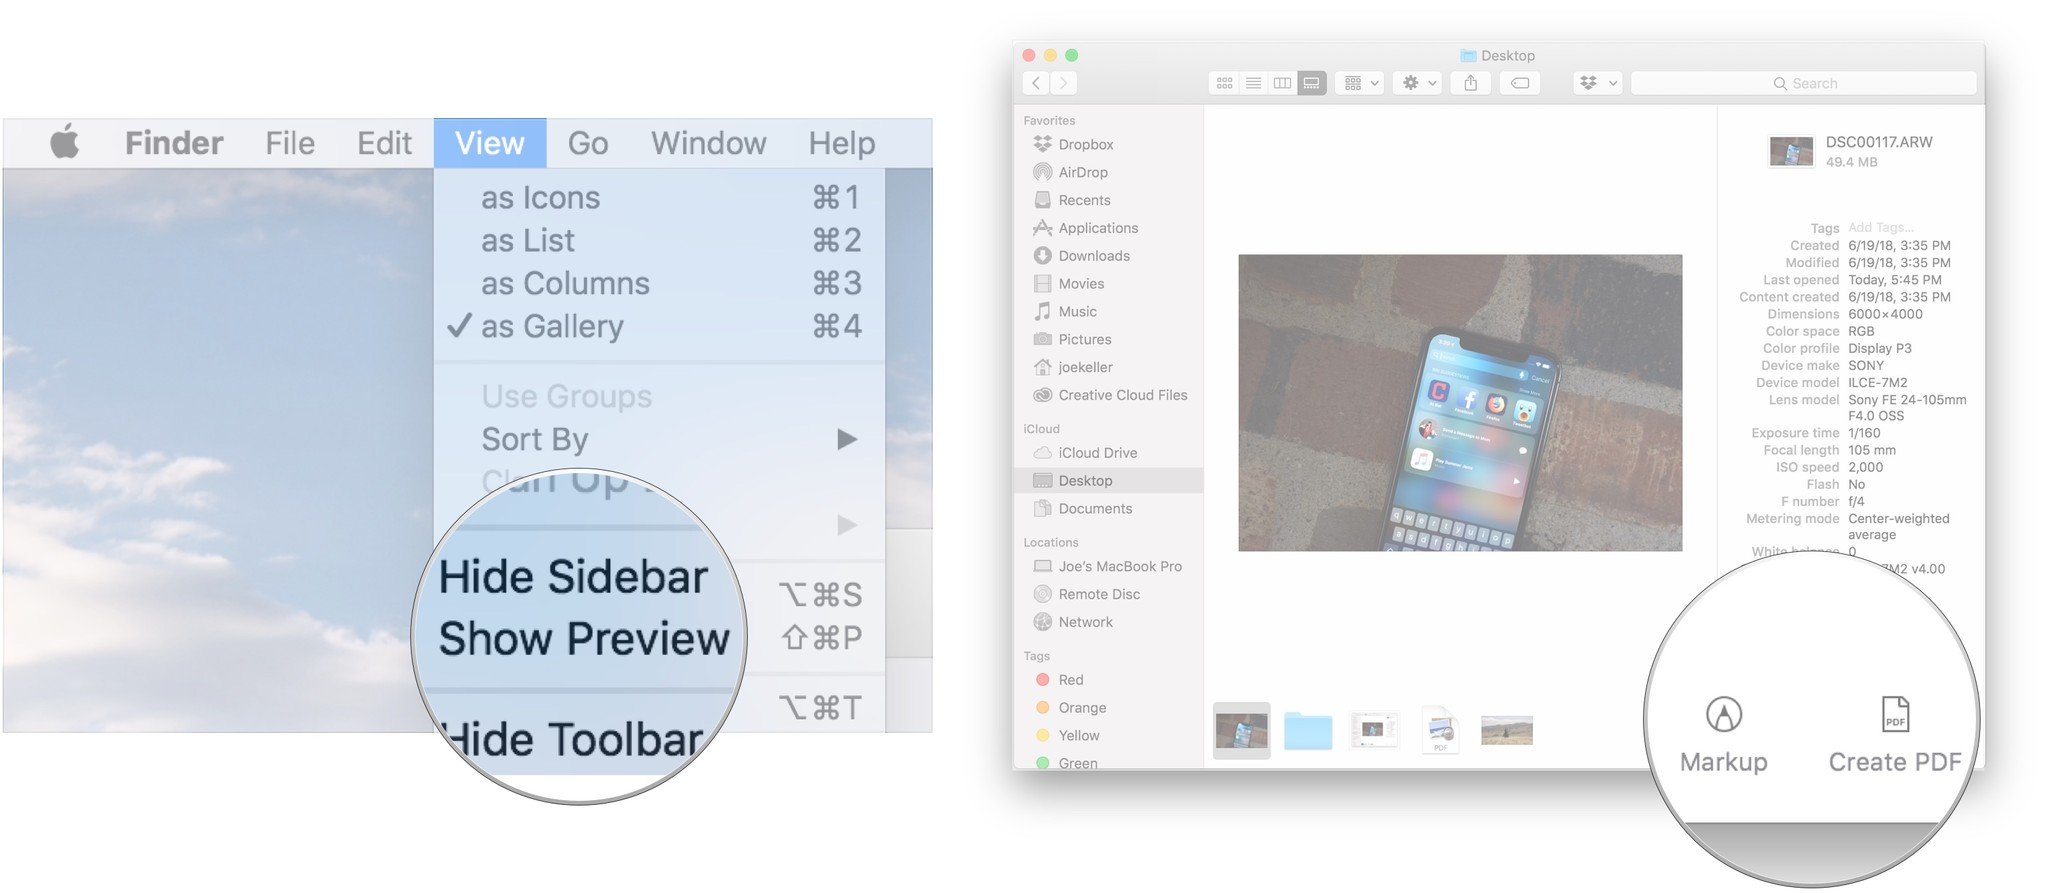
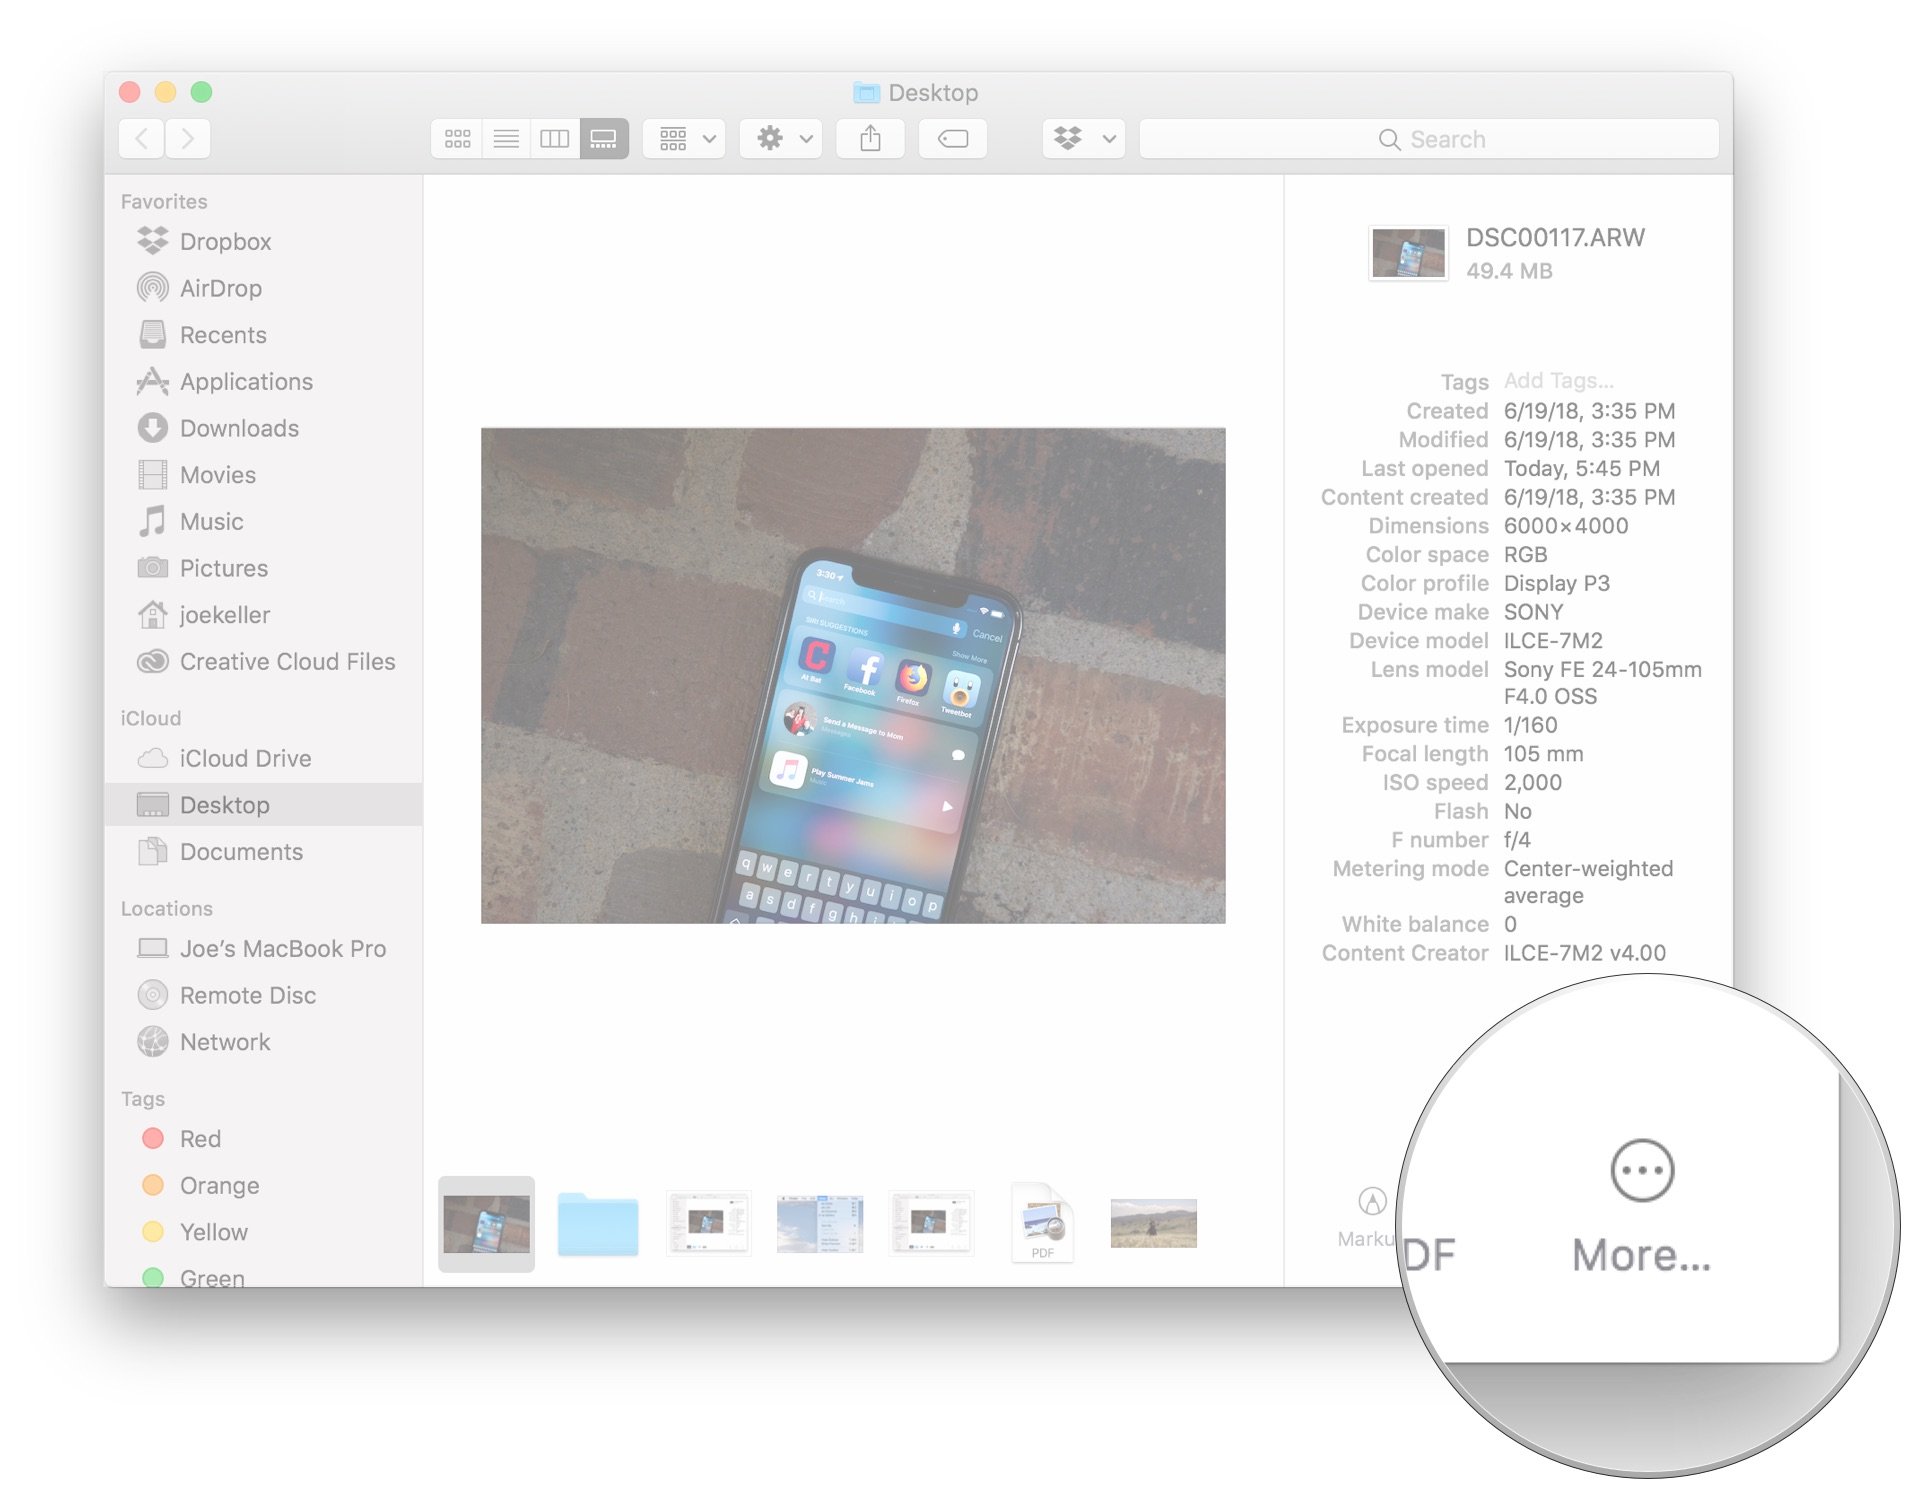
-
Click More… to find any other actions that you might be able to take.
How to use Quick Look tools in macOS Mojave
Quick Look's updates in macOS Mojave make it more powerful than ever. Here's how you use it.
- Click on the Finder icon in your Dock to open a new Finder window.
-
Choose the view you want to use.
- Click on the file you want to use with Quick Look.
- Tap the space bar on your keyboard to bring up Quick Look.
-
Click the action button to take an action on the file. What actions you can take and what the button looks like will depend on the file type.
- Documents will have a Markup button. This allows you to draw, write, and highlight on images and documents, add text boxes to them, and even sign documents with a pre-saved signature. Images can be cropped and rotated as well.
- In addition to Markup, images may also have a Rotate button. Press this to rotate your image to the left.
- Audio and video files will have a Trim button. Press this, then grab the sliders on either end of the Quick Look preview to trim the length of an audio clip or video.
- Tap the space bar again when you're done with Quick Look.
Any questions?
Do you have any questions about how to use Finder on the Mac? Drop them in the comments and we'll help you out.
Update November 2018: Added information about customizing the toolbar, using the Info button, and information about specific Finder features in macOS Mojave.