
How to fix a broken iPhone 6 screen in 10 minutes
- maj
- 23
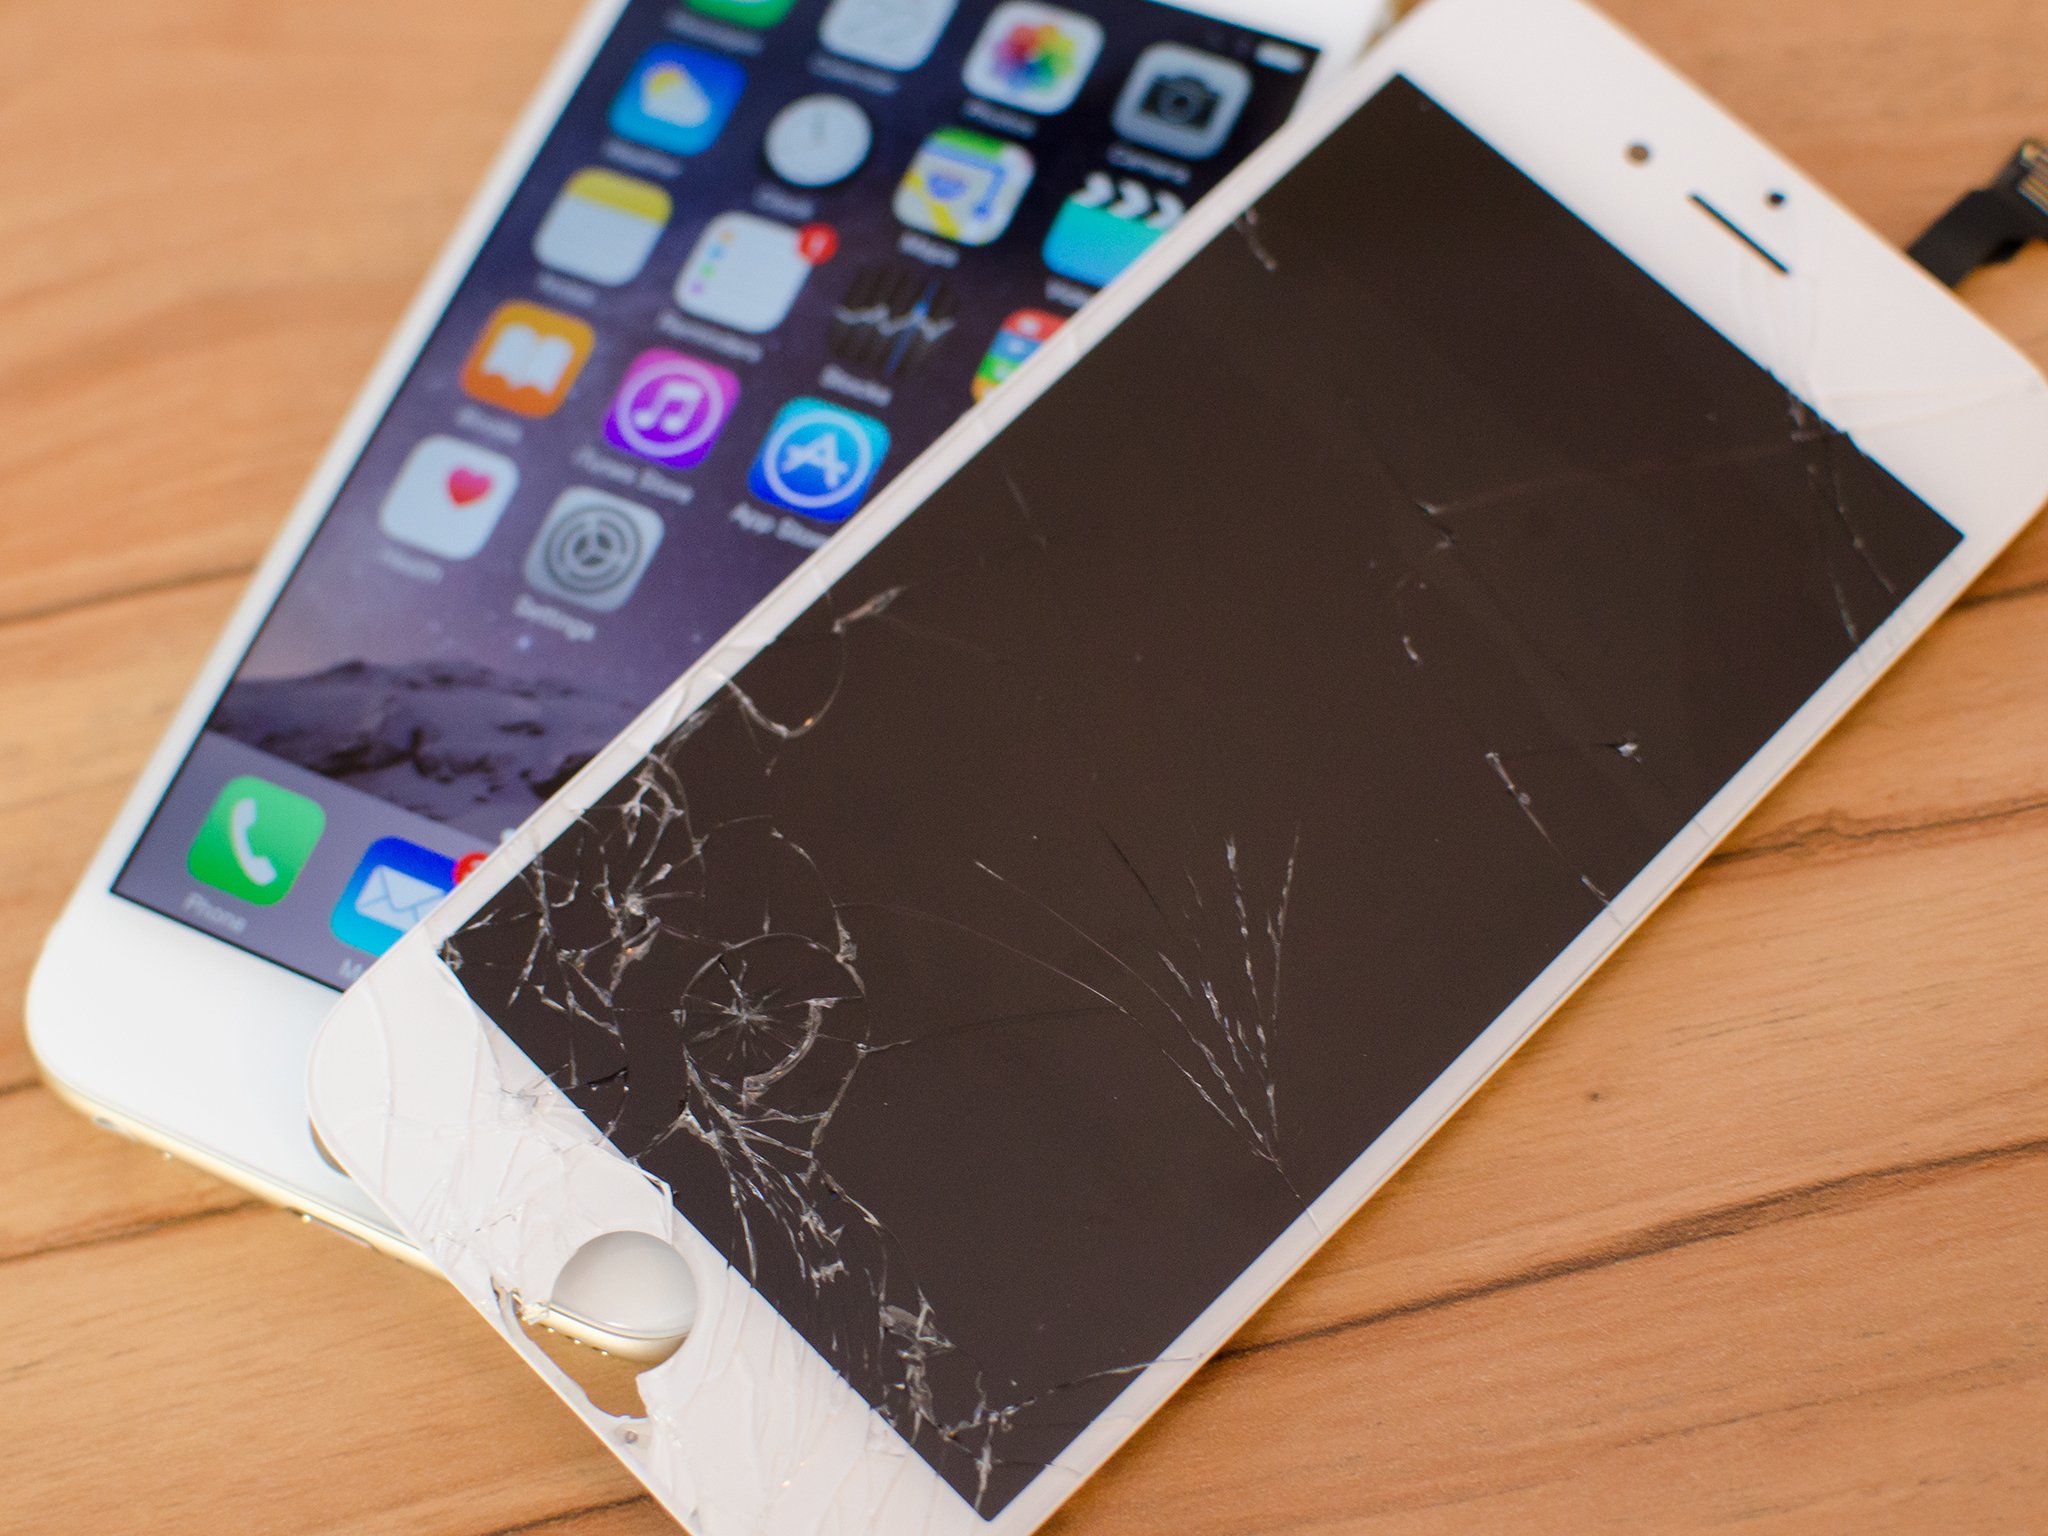
If you broke the screen on your iPhone 6 and Apple isn't an option, we can show you how to fix it yourself!
The iPhone 6, like any other iPhone, is susceptible to the mishaps of us mere humans. If you've found yourself with a cracked or shattered screen, you've got a few options. If Apple isn't one of them, for whatever reason, a DIY repair is worth considering. Not only that, it can take less than 10 minutes, as long as you have the right parts and tools for the job. That's where iMore comes in! Not only can we show you where to find the best parts and tools, we'll walk you through every step of the repair, from start to finish!
Apple vs. DIY Repair
Before performing any DIY repair, you should evaluate all your options. For those that purchased AppleCare+ for their iPhone 6, go straight to an Apple Store or call 1-800-APL-CARE to schedule a mail-in repair. Your warranty covers you for this kind of incident, and it will cost you far less.
If you don't have AppleCare+ but only have a minor crack in your screen and no damage to the frame, Apple may still be your best option. As of writing this, Apple charges $109 plus tax (USD) to replace the screen on an iPhone 6. Just be aware that if for some reason your iPhone 6 fails Apple's calibration process or your frame is bent, they'll charge you the full replacement price, which is currently at $329 plus tax.
For those that don't live near an Apple Store and don't want to mail in their iPhone 6, DIY repair may be the right choice for you. There are lots of reasons people choose DIY repair, including total cost. While Apple's replacement prices don't typically change, the cost to repair an iPhone drops drastically as the phone ages. The iPhone 6 is no exception so be sure to keep checking back on part costs. They can and will continue to fall.
If you've decided DIY is the right choice for you, continue on!
Discounted parts & tools
There are lots of parts suppliers out there, but not all of them are created equal, especially fly by night Amazon and eBay resellers. That's why we recommend always using a supplier that specializes in iPhone parts and offers a warranty on everything you purchase from them. We highly recommend eTech Parts. They ship to many countries throughout the world, and their customer service and part quality just can't be matched.
30% off high-quality parts and tools
eTech has been kind enough to offer up a coupon code for all the iMore DIY'ers in tons of countries throughout the world that will give you 30% off your entire order. Just use the following coupon code when checking out:
- eTech coupon code: iMore
Here's a complete list of parts and tools we recommend for this particular repair. Clicking any of the buy links will take you directly to that item on eTech's site.
- iPhone 6 replacement screen, including small parts - Buy black screen now, Buy white screen now
- iPhone 6 tool kit
- Razor blade - Buy Now
Note: Some people have trouble getting the screen off with a suction cup if it is extremely spidered. This why we recommend picking up a razor blade. We will show you an alternate way of removing the display in case you run into this problem. A razor blade is also useful in peeling off the Touch ID cable.
Power off your iPhone 6
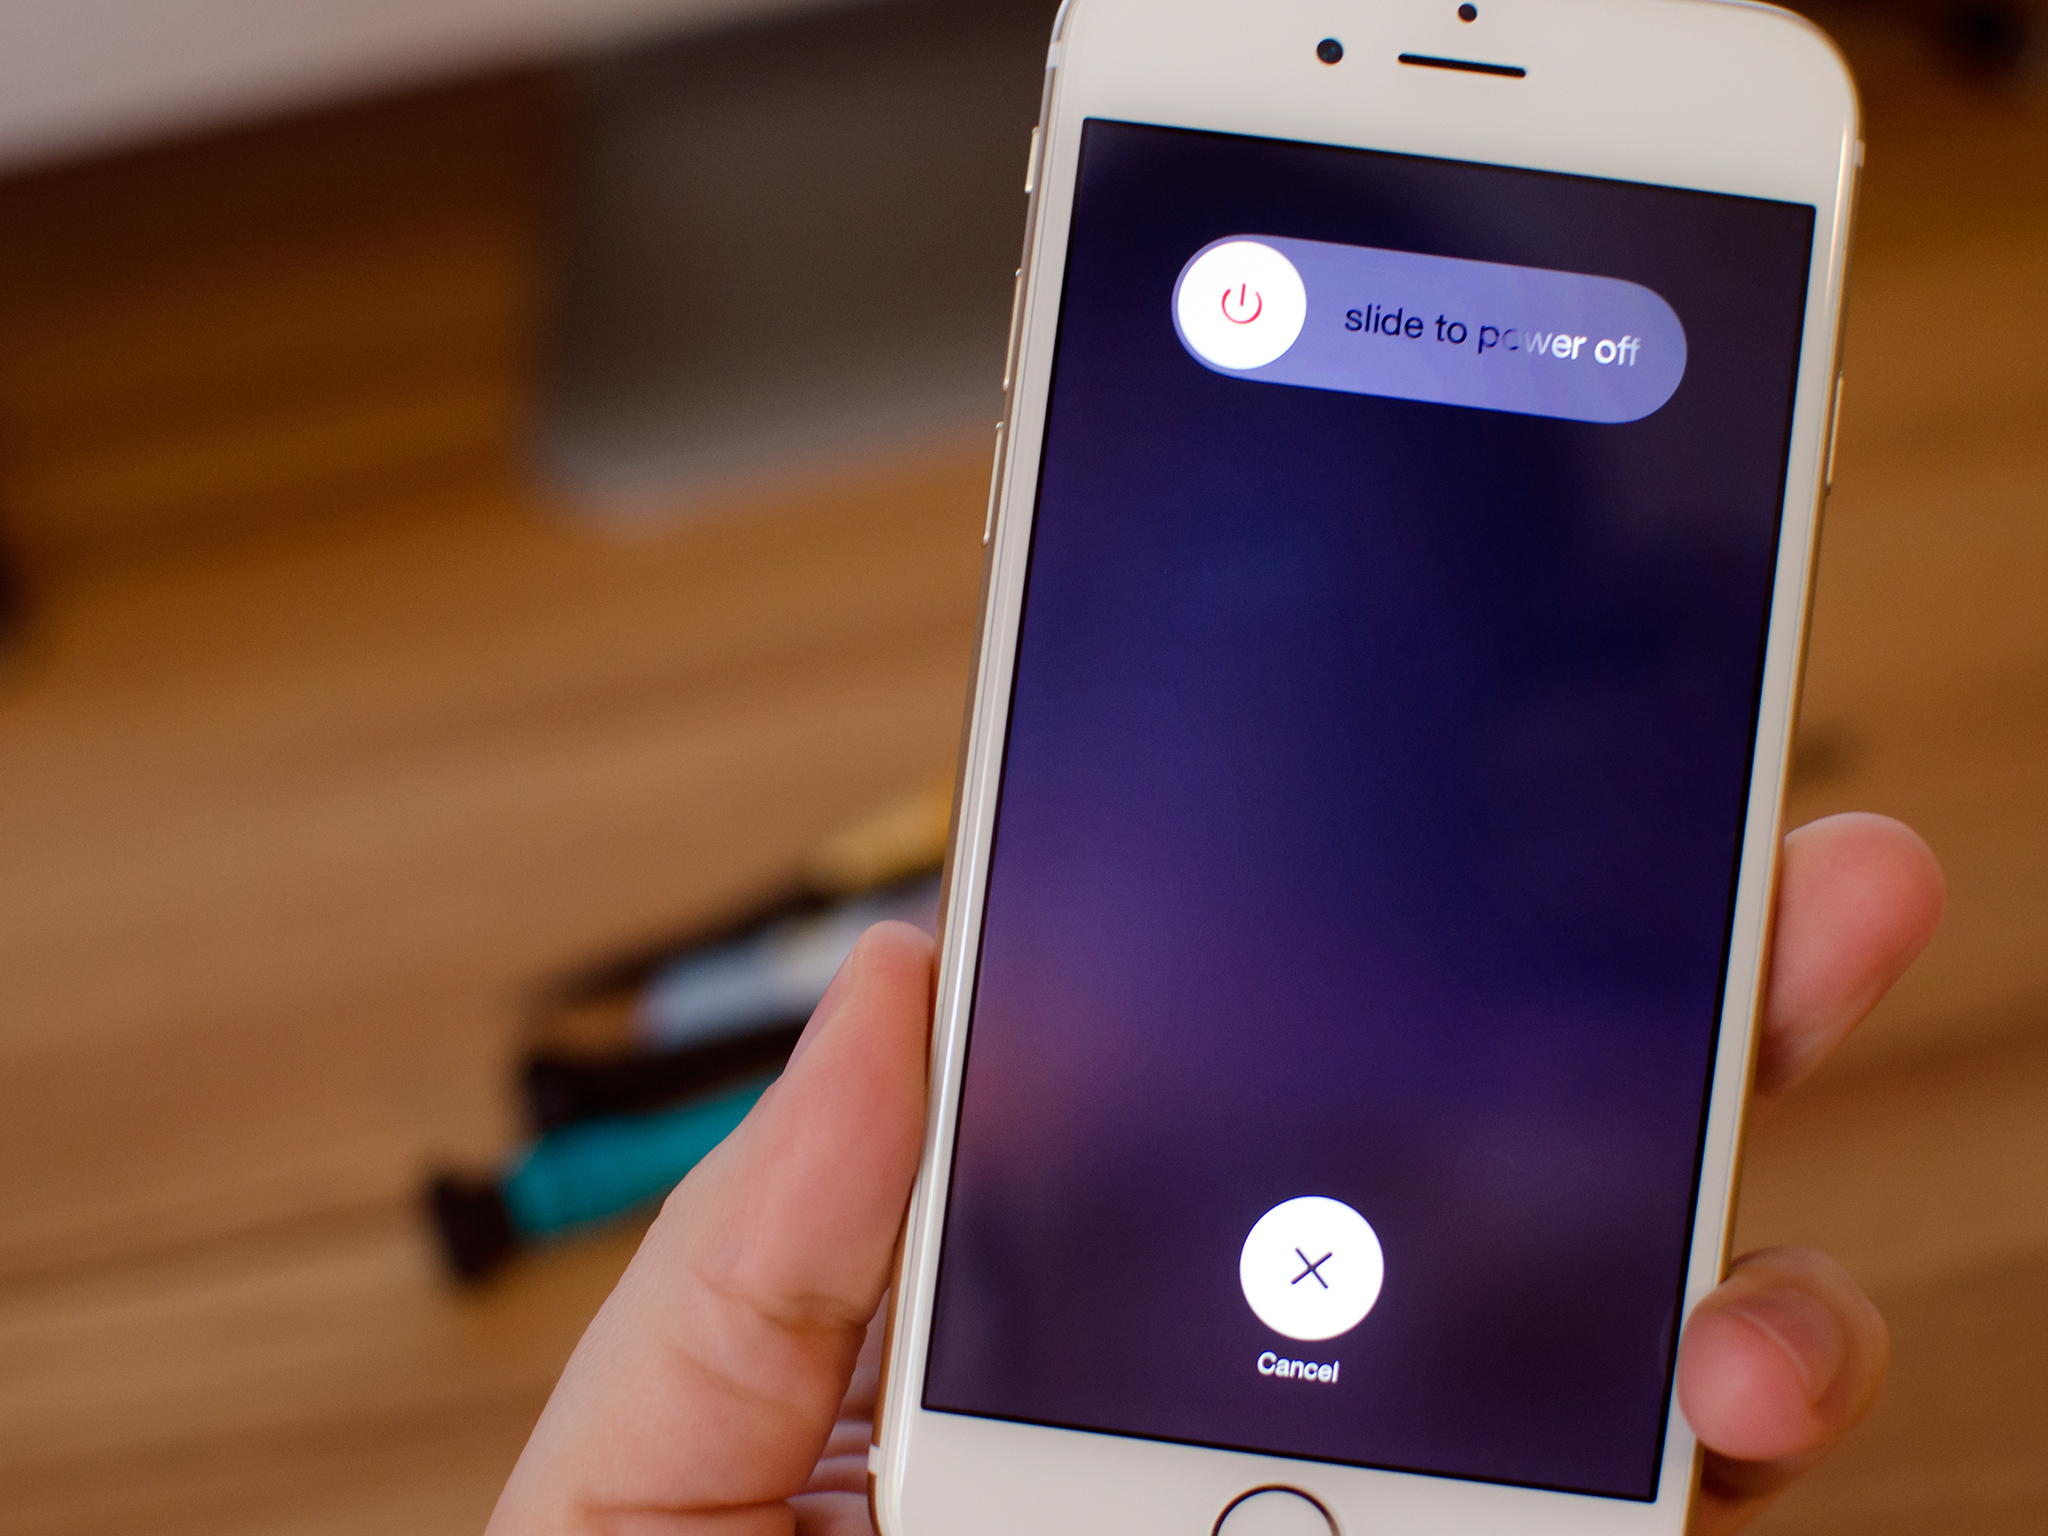
Before performing any DIY repair, always completely power down your iPhone. Press and hold the Power button until you see the Slide to Power Off indicator. Power the iPhone down completely before continuing any further.
Remove dock screws
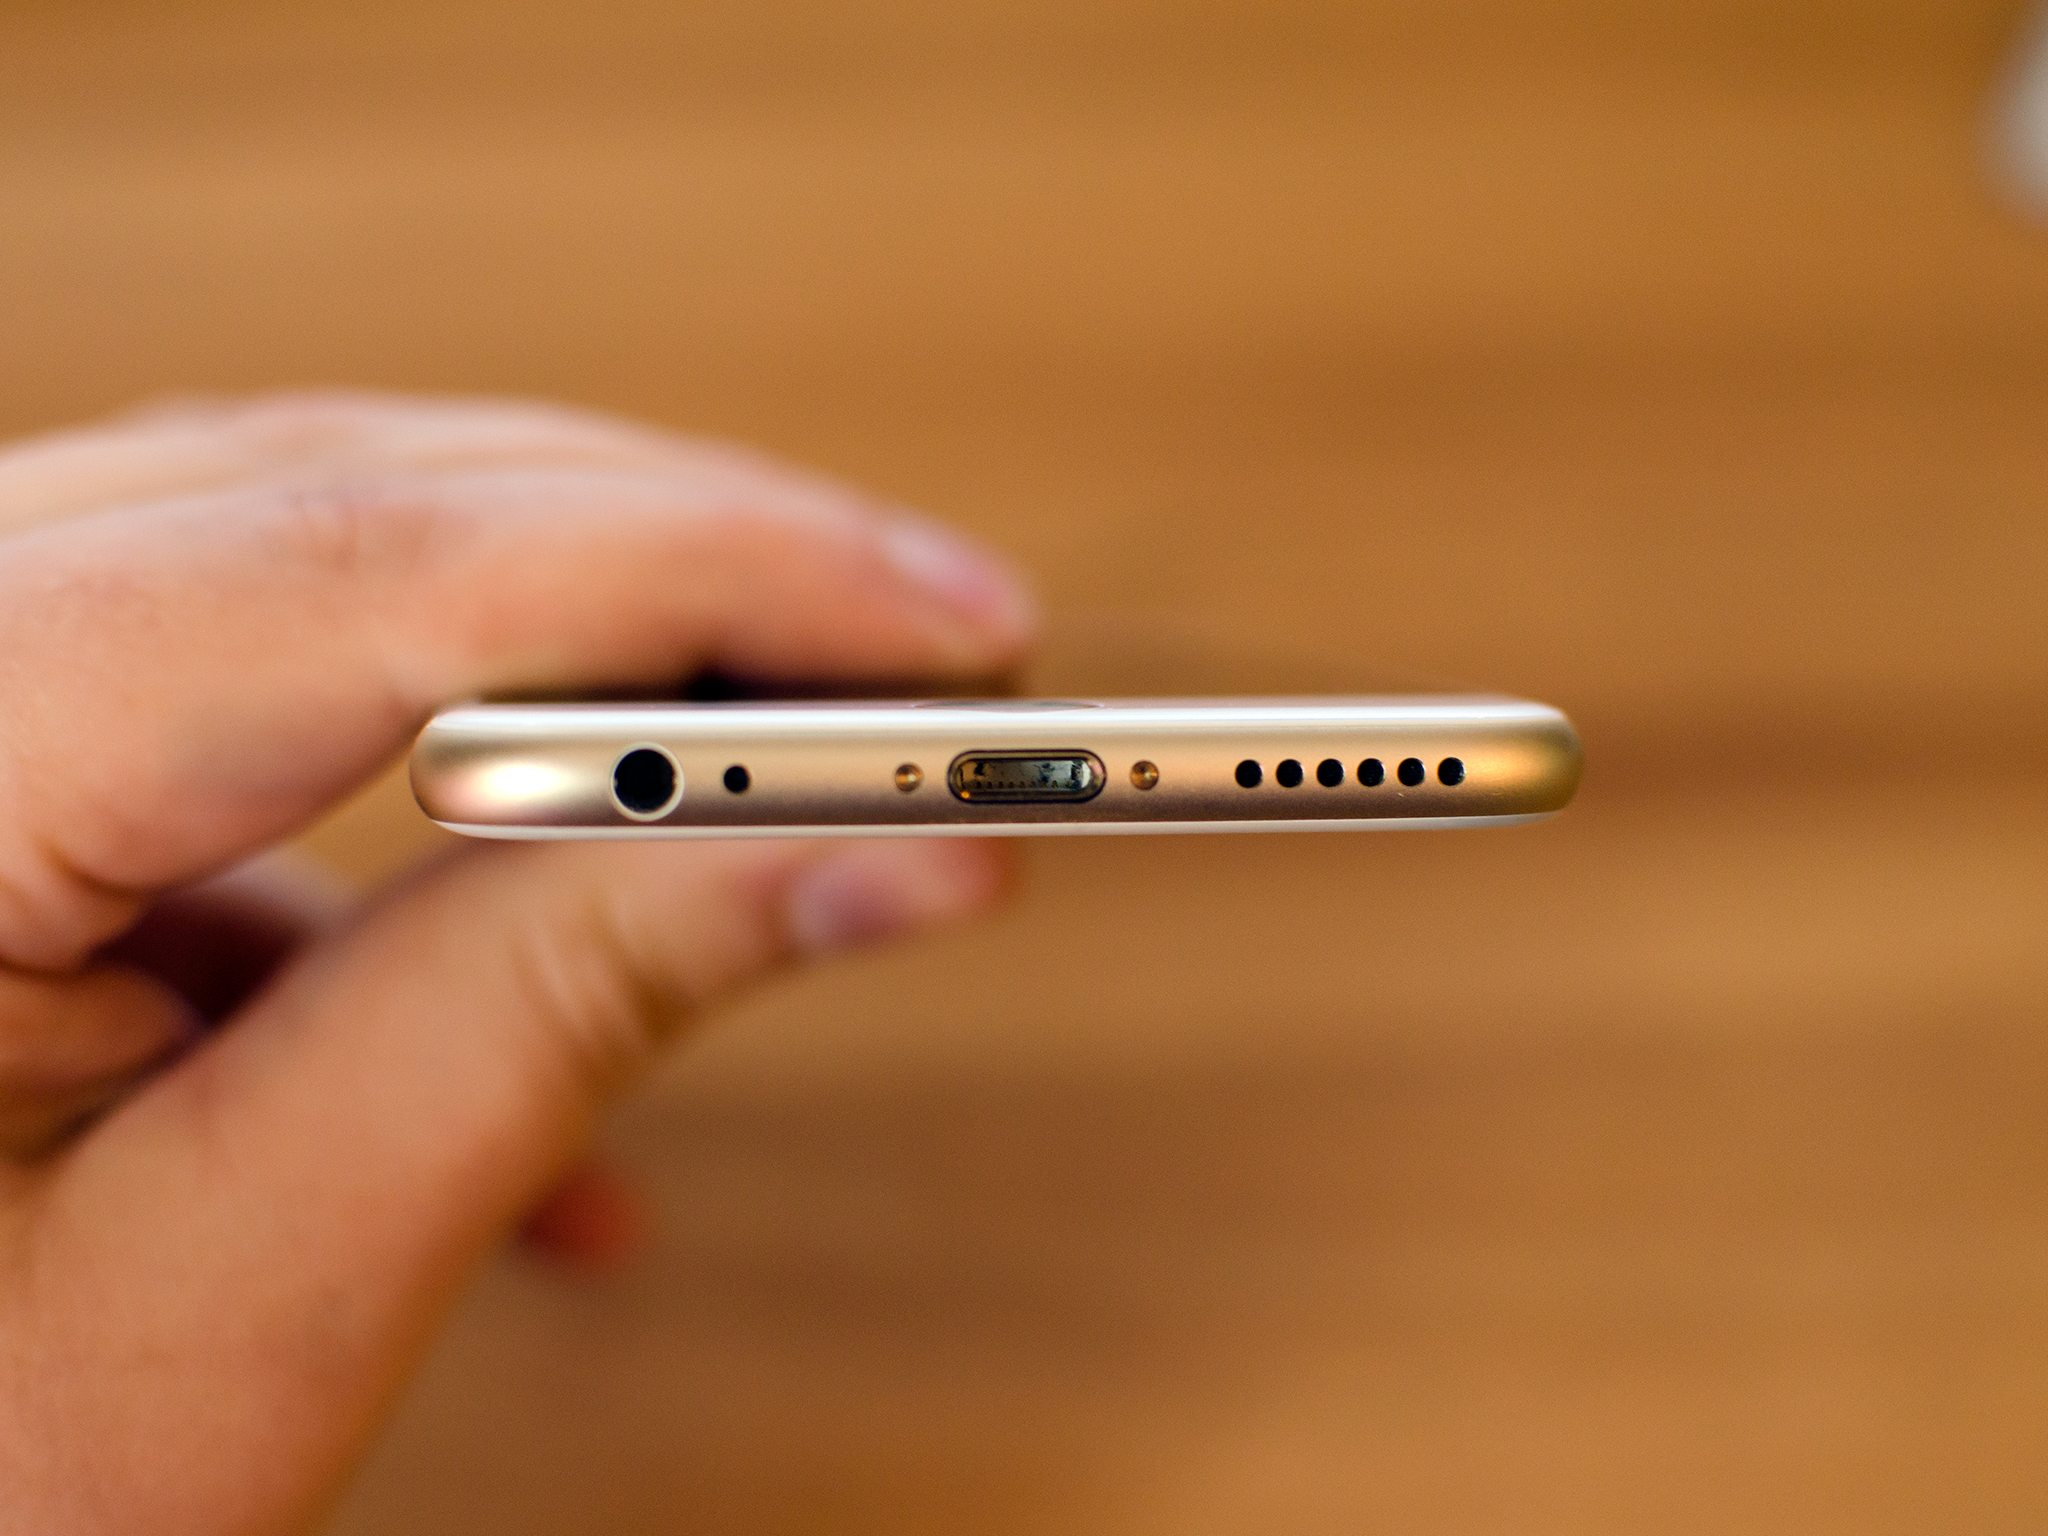
Use your security or 5-point screwdriver to remove the two screws that sit on either side of the Lightning Dock. Set these screws aside. You can mix them up as they are exactly the same.
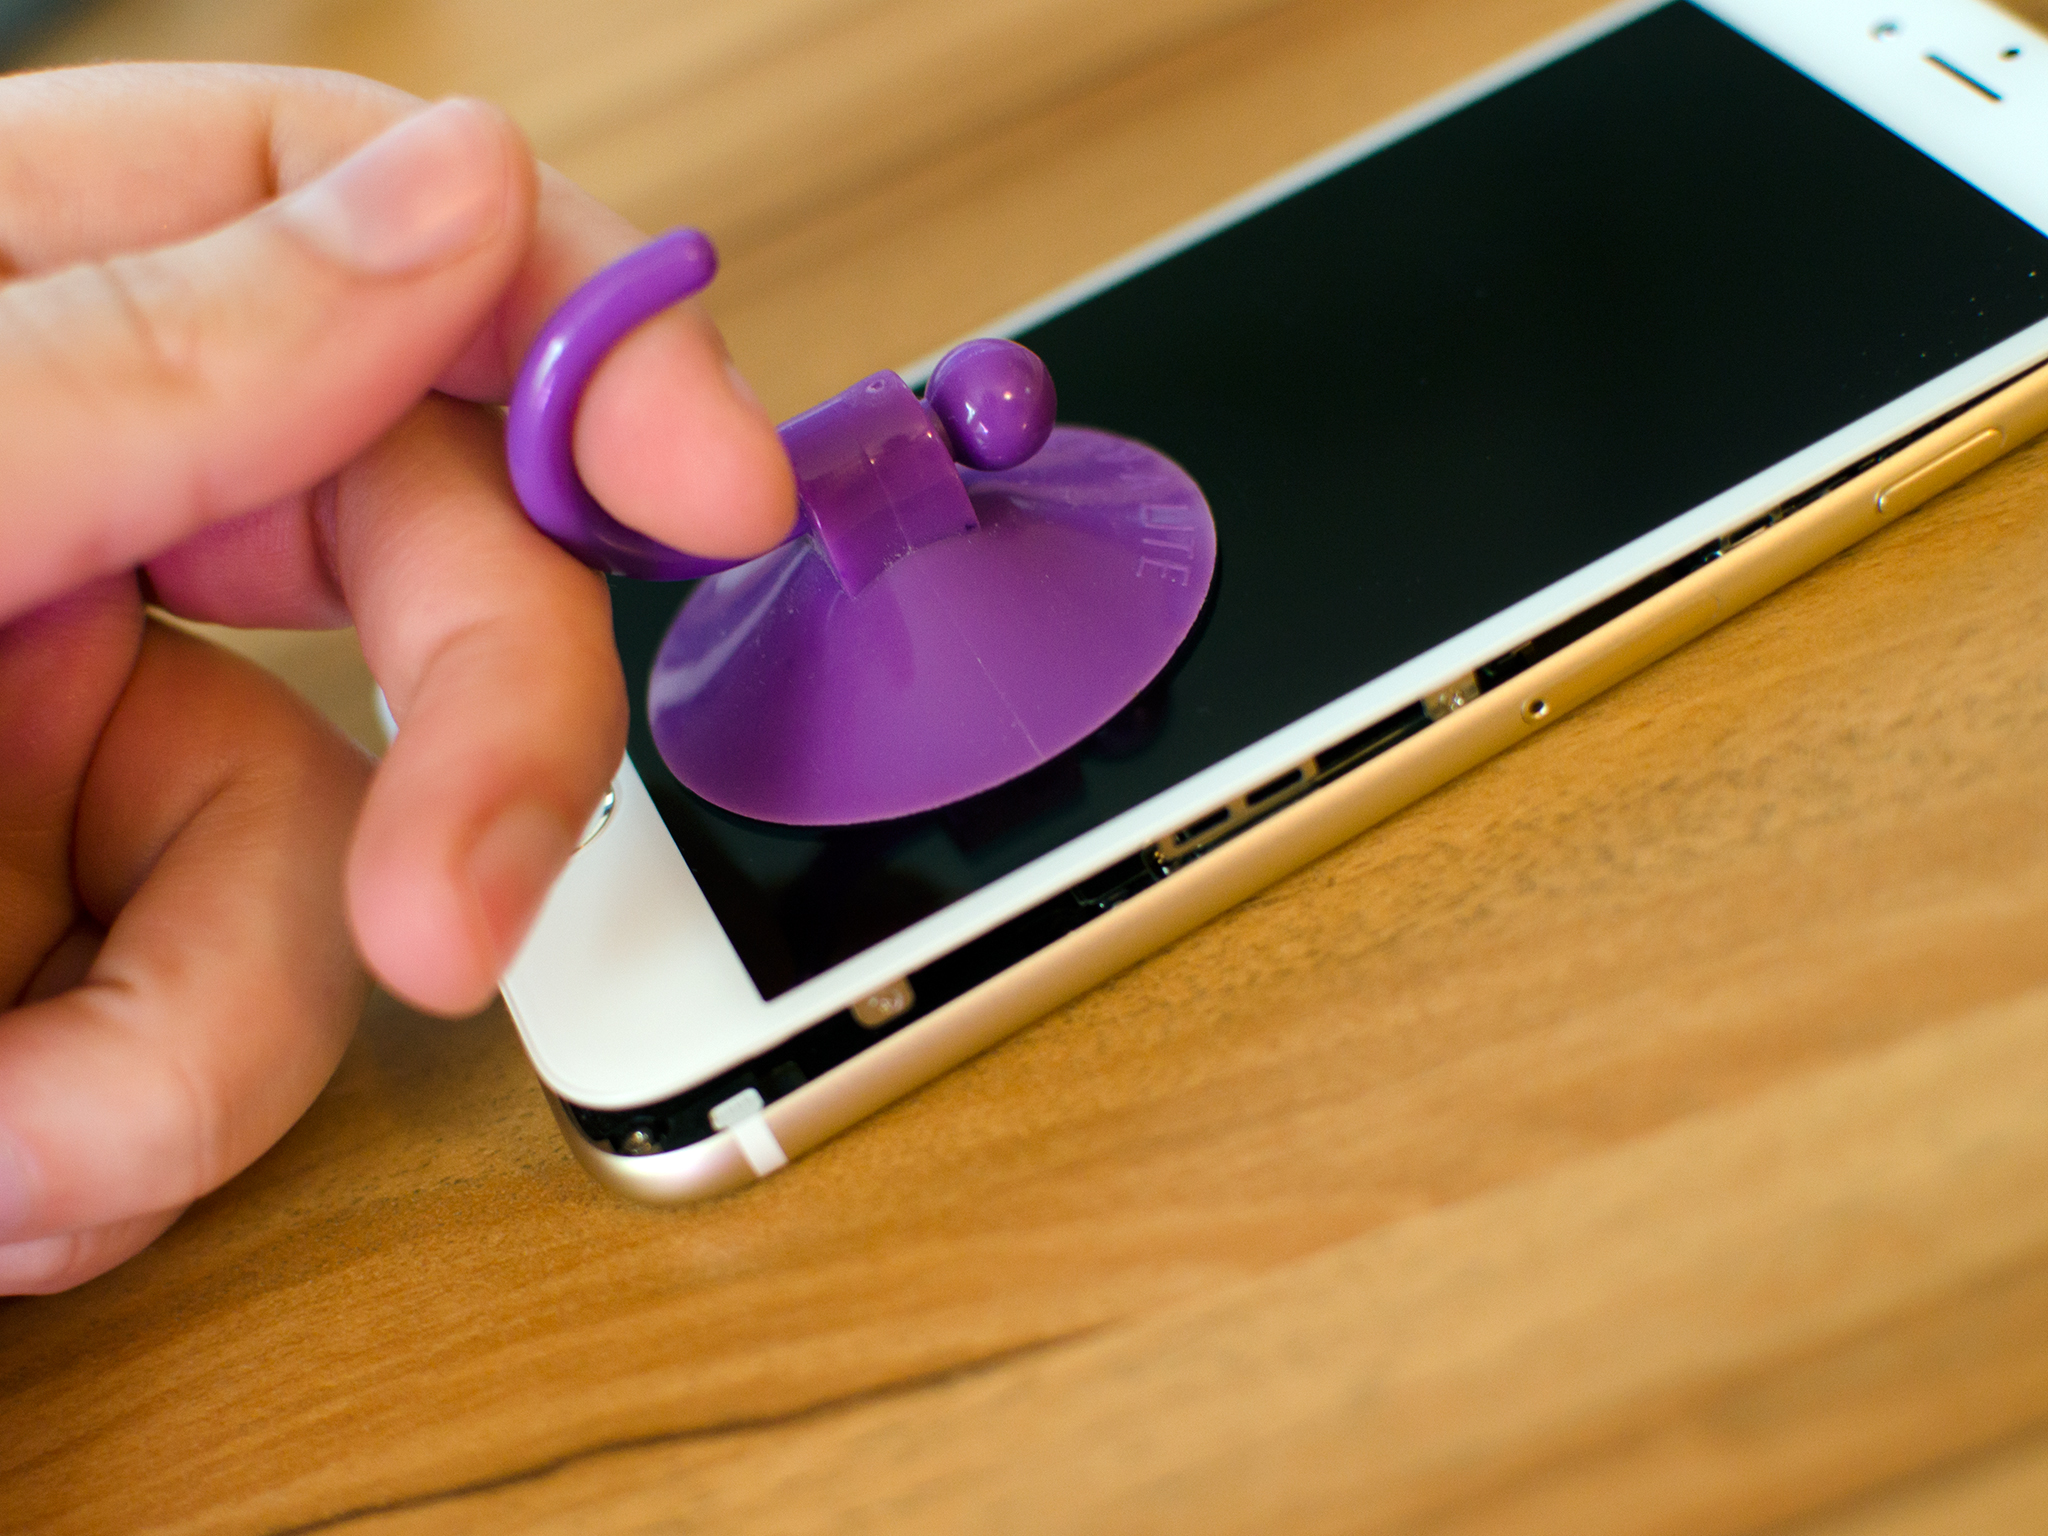
Remove broken display
- Use your suction cup to carefully pry up the bottom of the display. Position the suction cup right above the Home button as shown in the photo below. Just take care not to pull up too hard as there are still cables at the top holding the display to the logic board.
- Swing up the display enough to reveal the top right of the inside of the iPhone. This is where the cables sit that we need to disconnect.
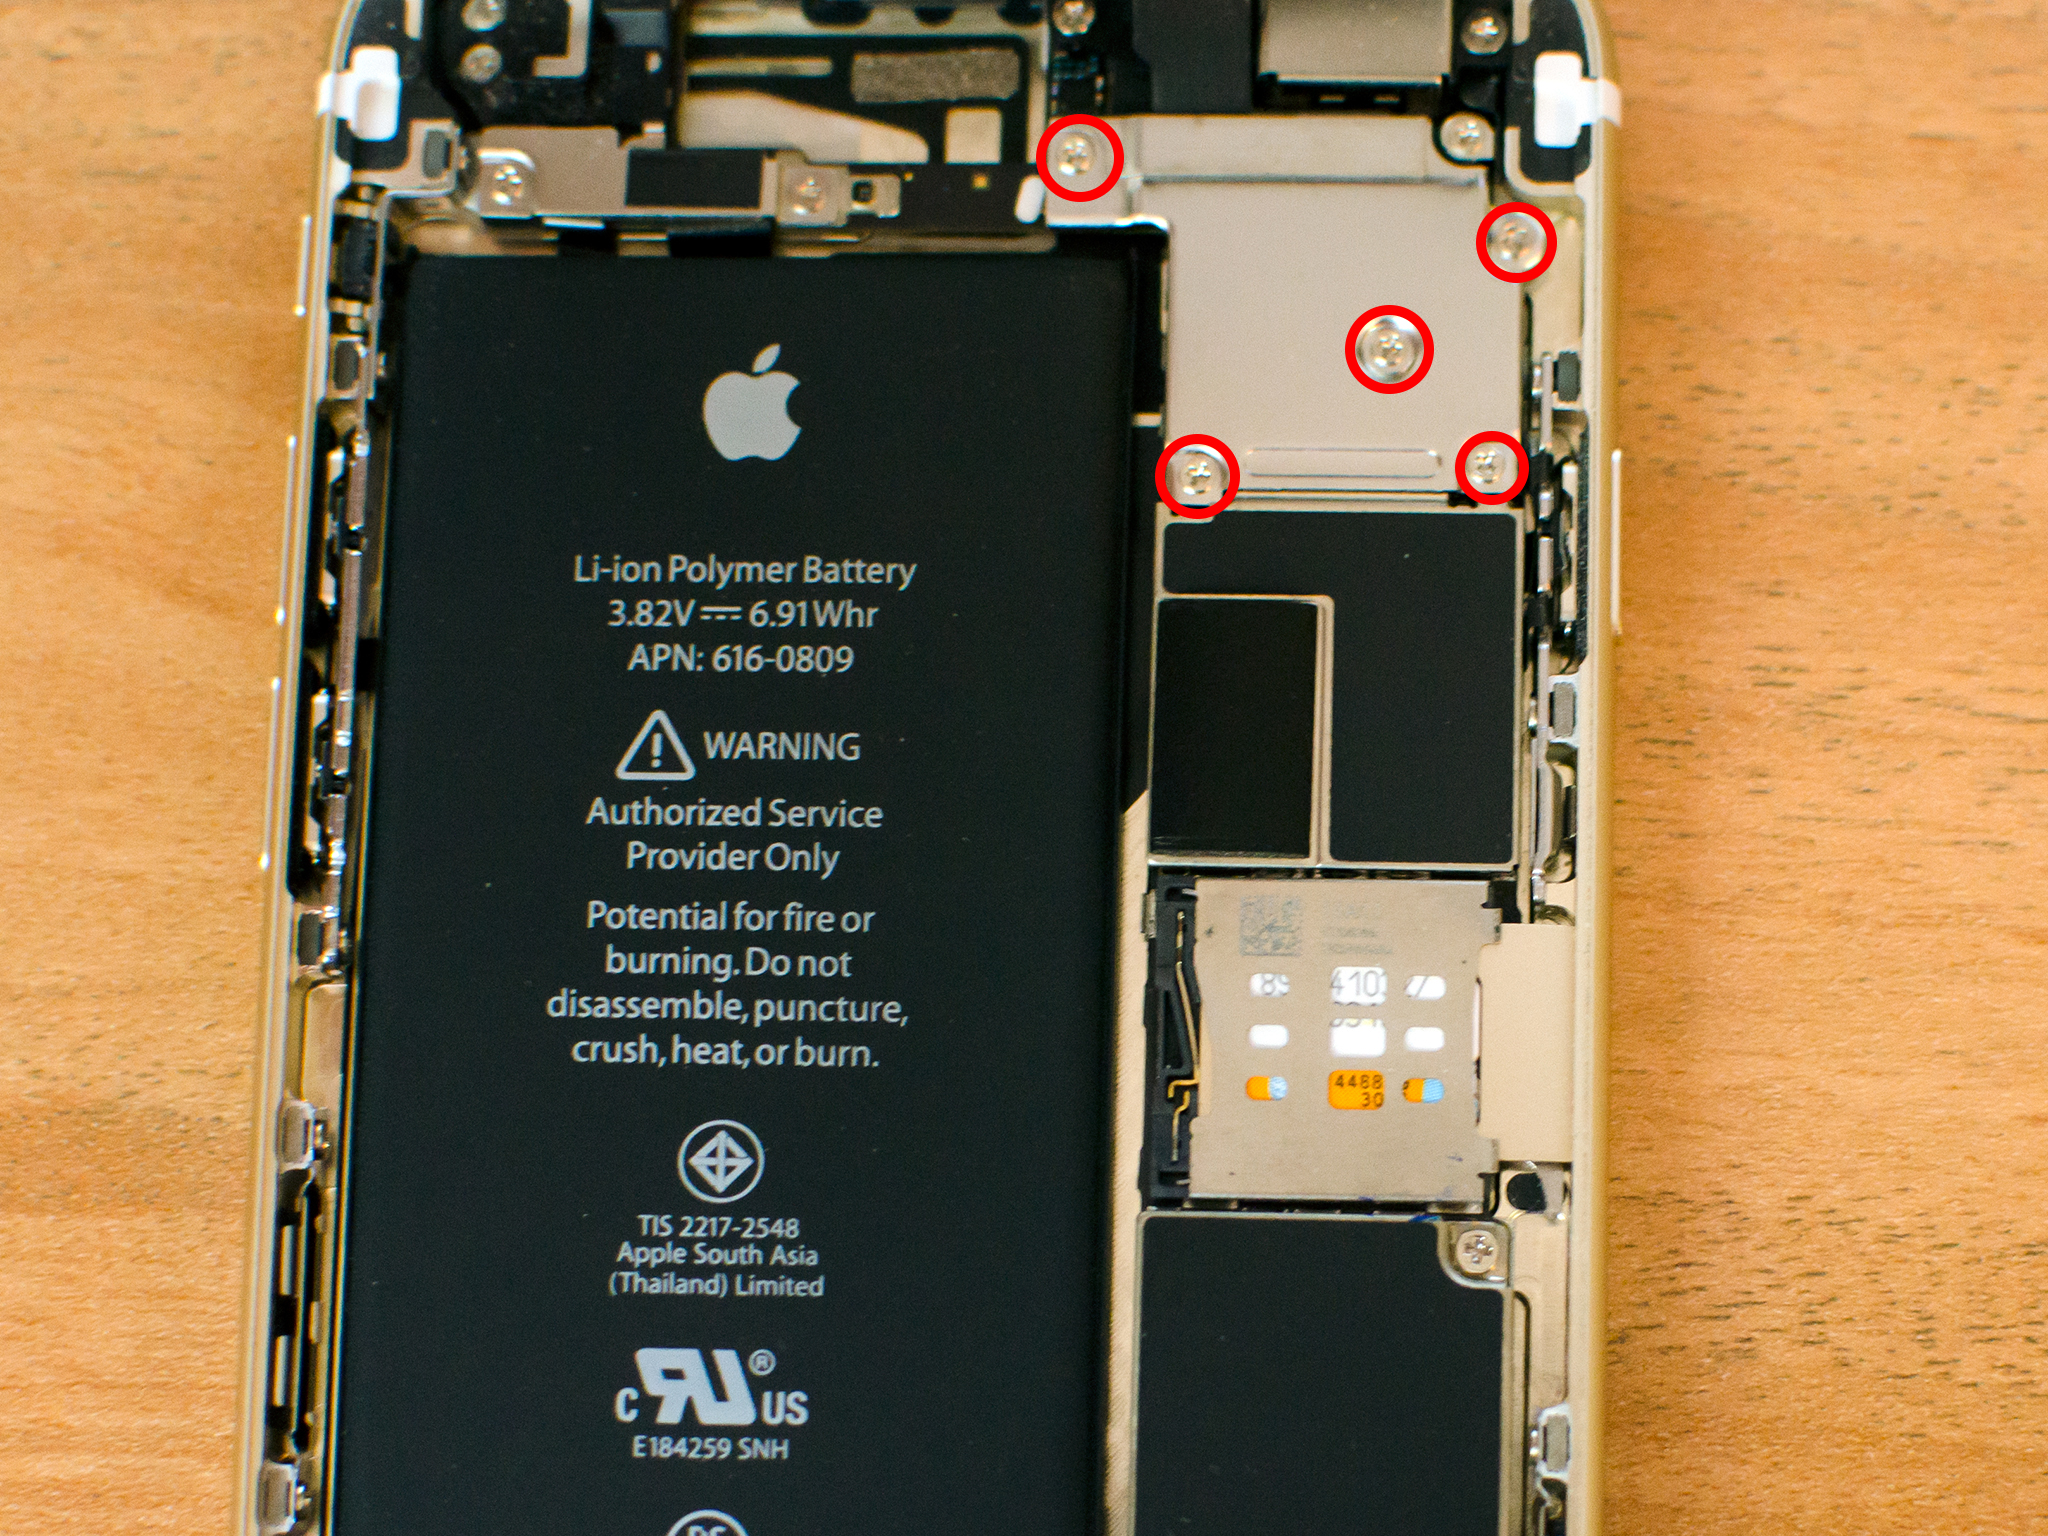
- Use your #000 Phillips screwdriver to remove the five screws shown in the photo below. Be sure not to mix up these screws as they are all different sizes and should be put back in the same order. It always helps me to put them in a pattern similar to how they go in the shield.
- Remove the display shield using your fingers or small tweezers. Just take care not to snag the cables underneath.
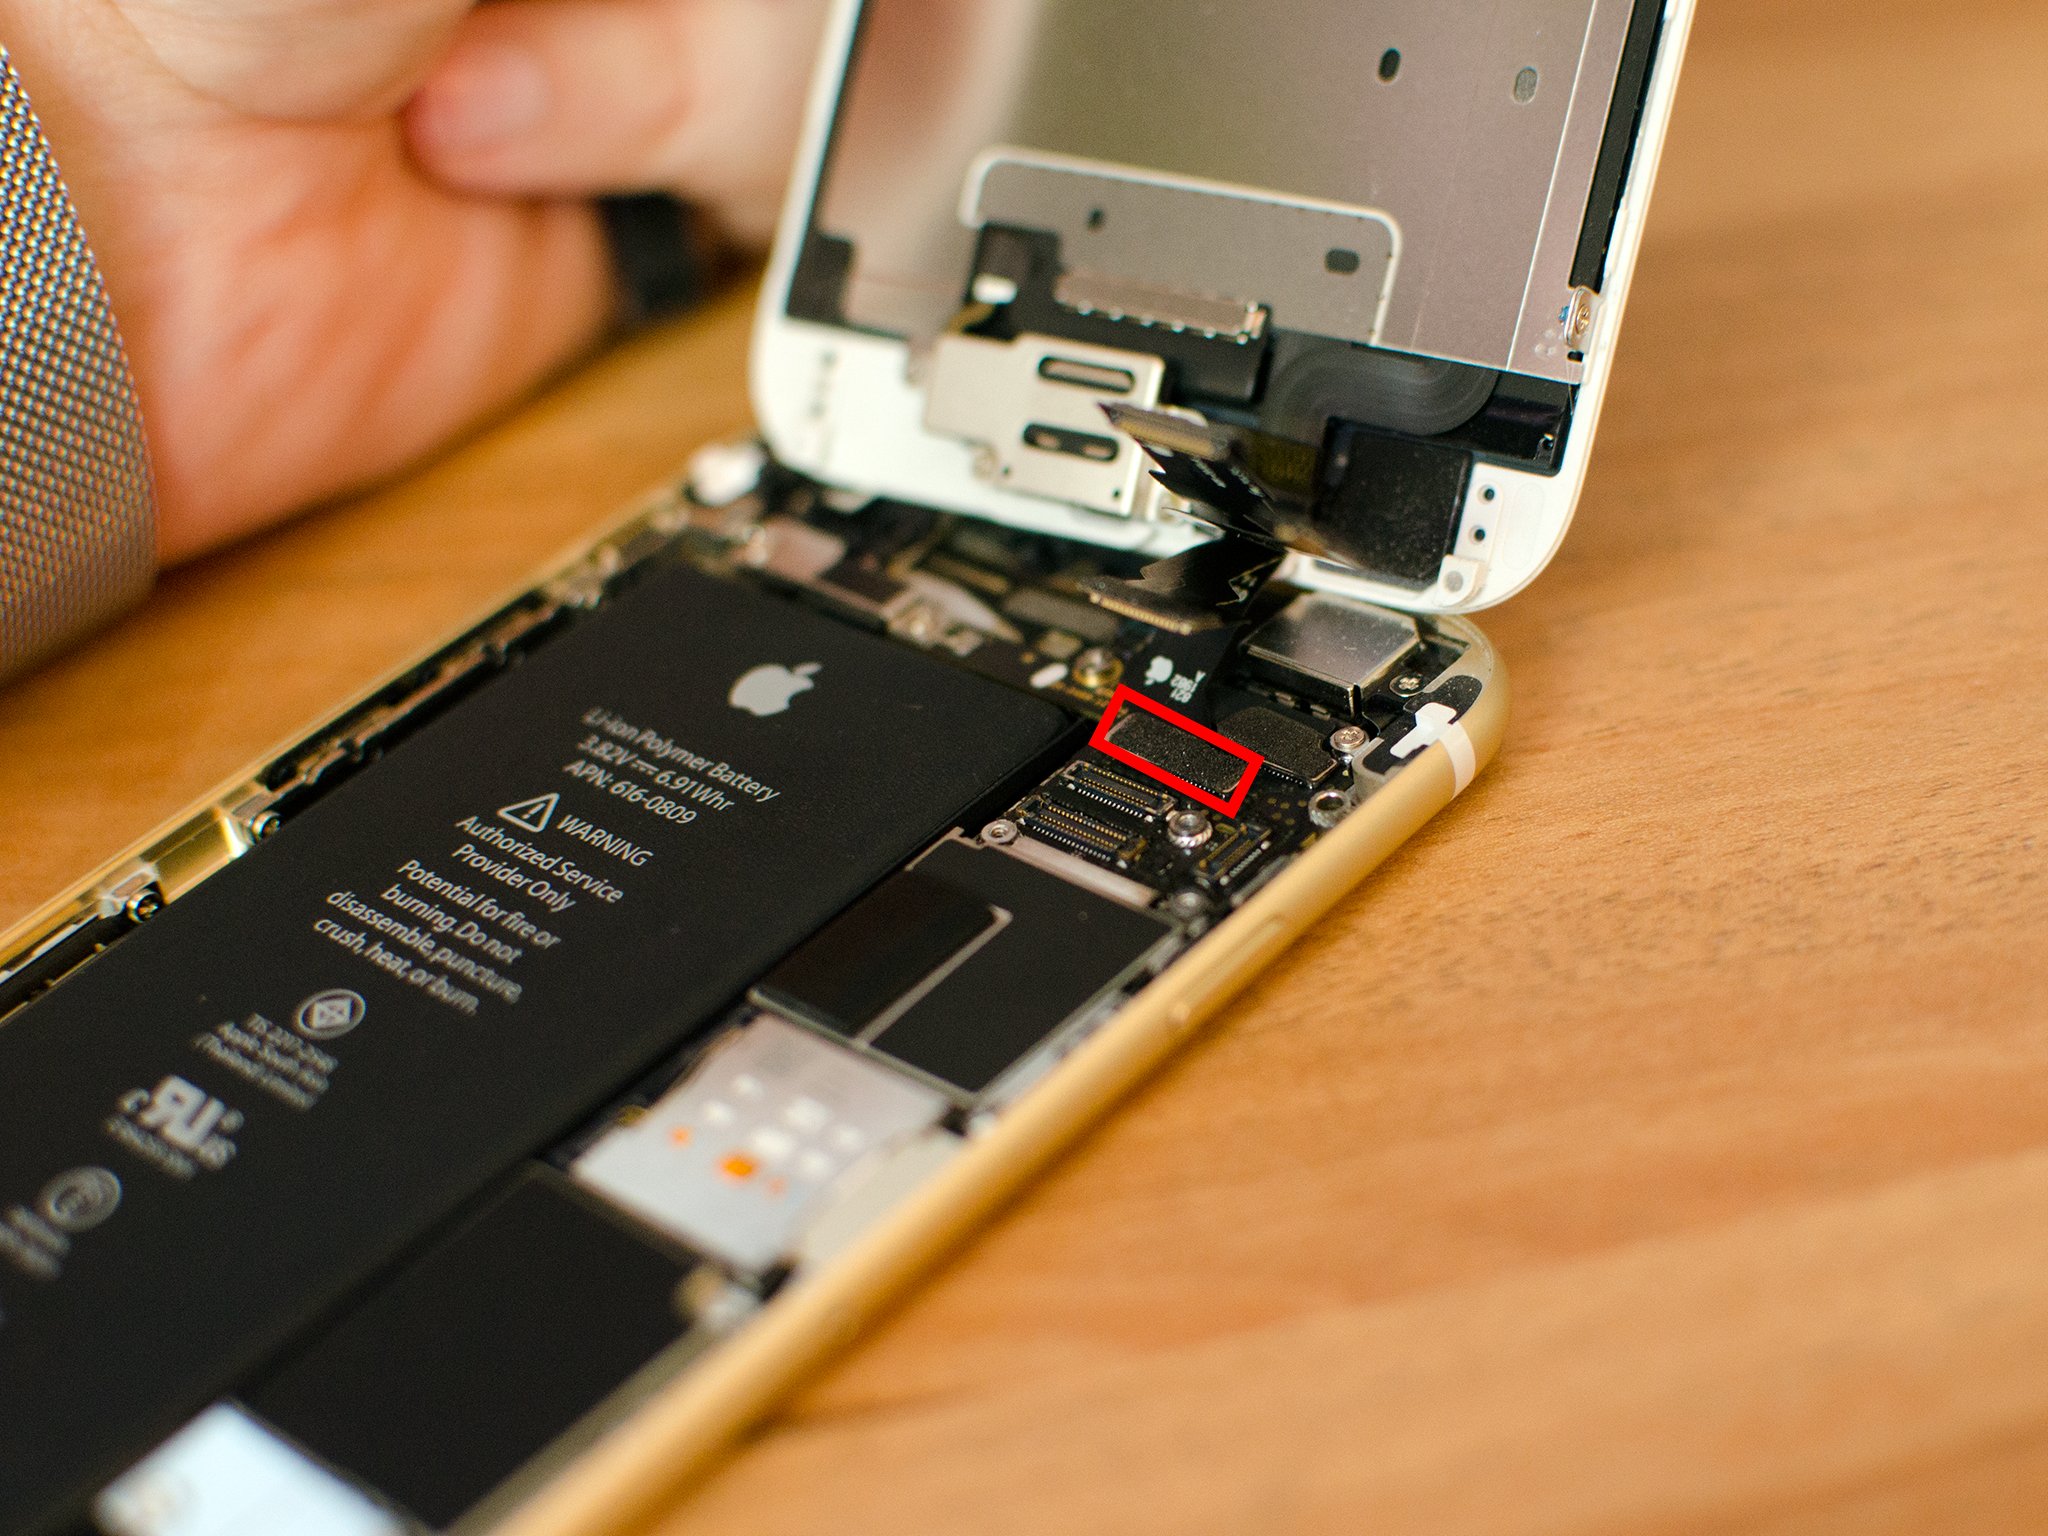
- There are four cables holding the display to the logic board. Remove the first two cables shown in the photo below using the flat end of your spudger tool. Be very careful not to pry at the board and only at the cables themselves. They should come free rather easily.

- After removing the first two cables, a third cable is now visible. Remove it the same way you did the previous two.

- You should see one remaining cable underneath the third cable. Remove it the same way. The display assembly should be free.
Note: If your iPhone 6's screen is extremely shattered, you may have a hard time removing the display with a suction cup. It just won't be able to grab hold. Instead, use a razor blade to carefully pry the bottom of the display up just enough to get the flat end of your spudger tool underneath. From there you should be able to use your fingers to free it.
Transfer Touch ID
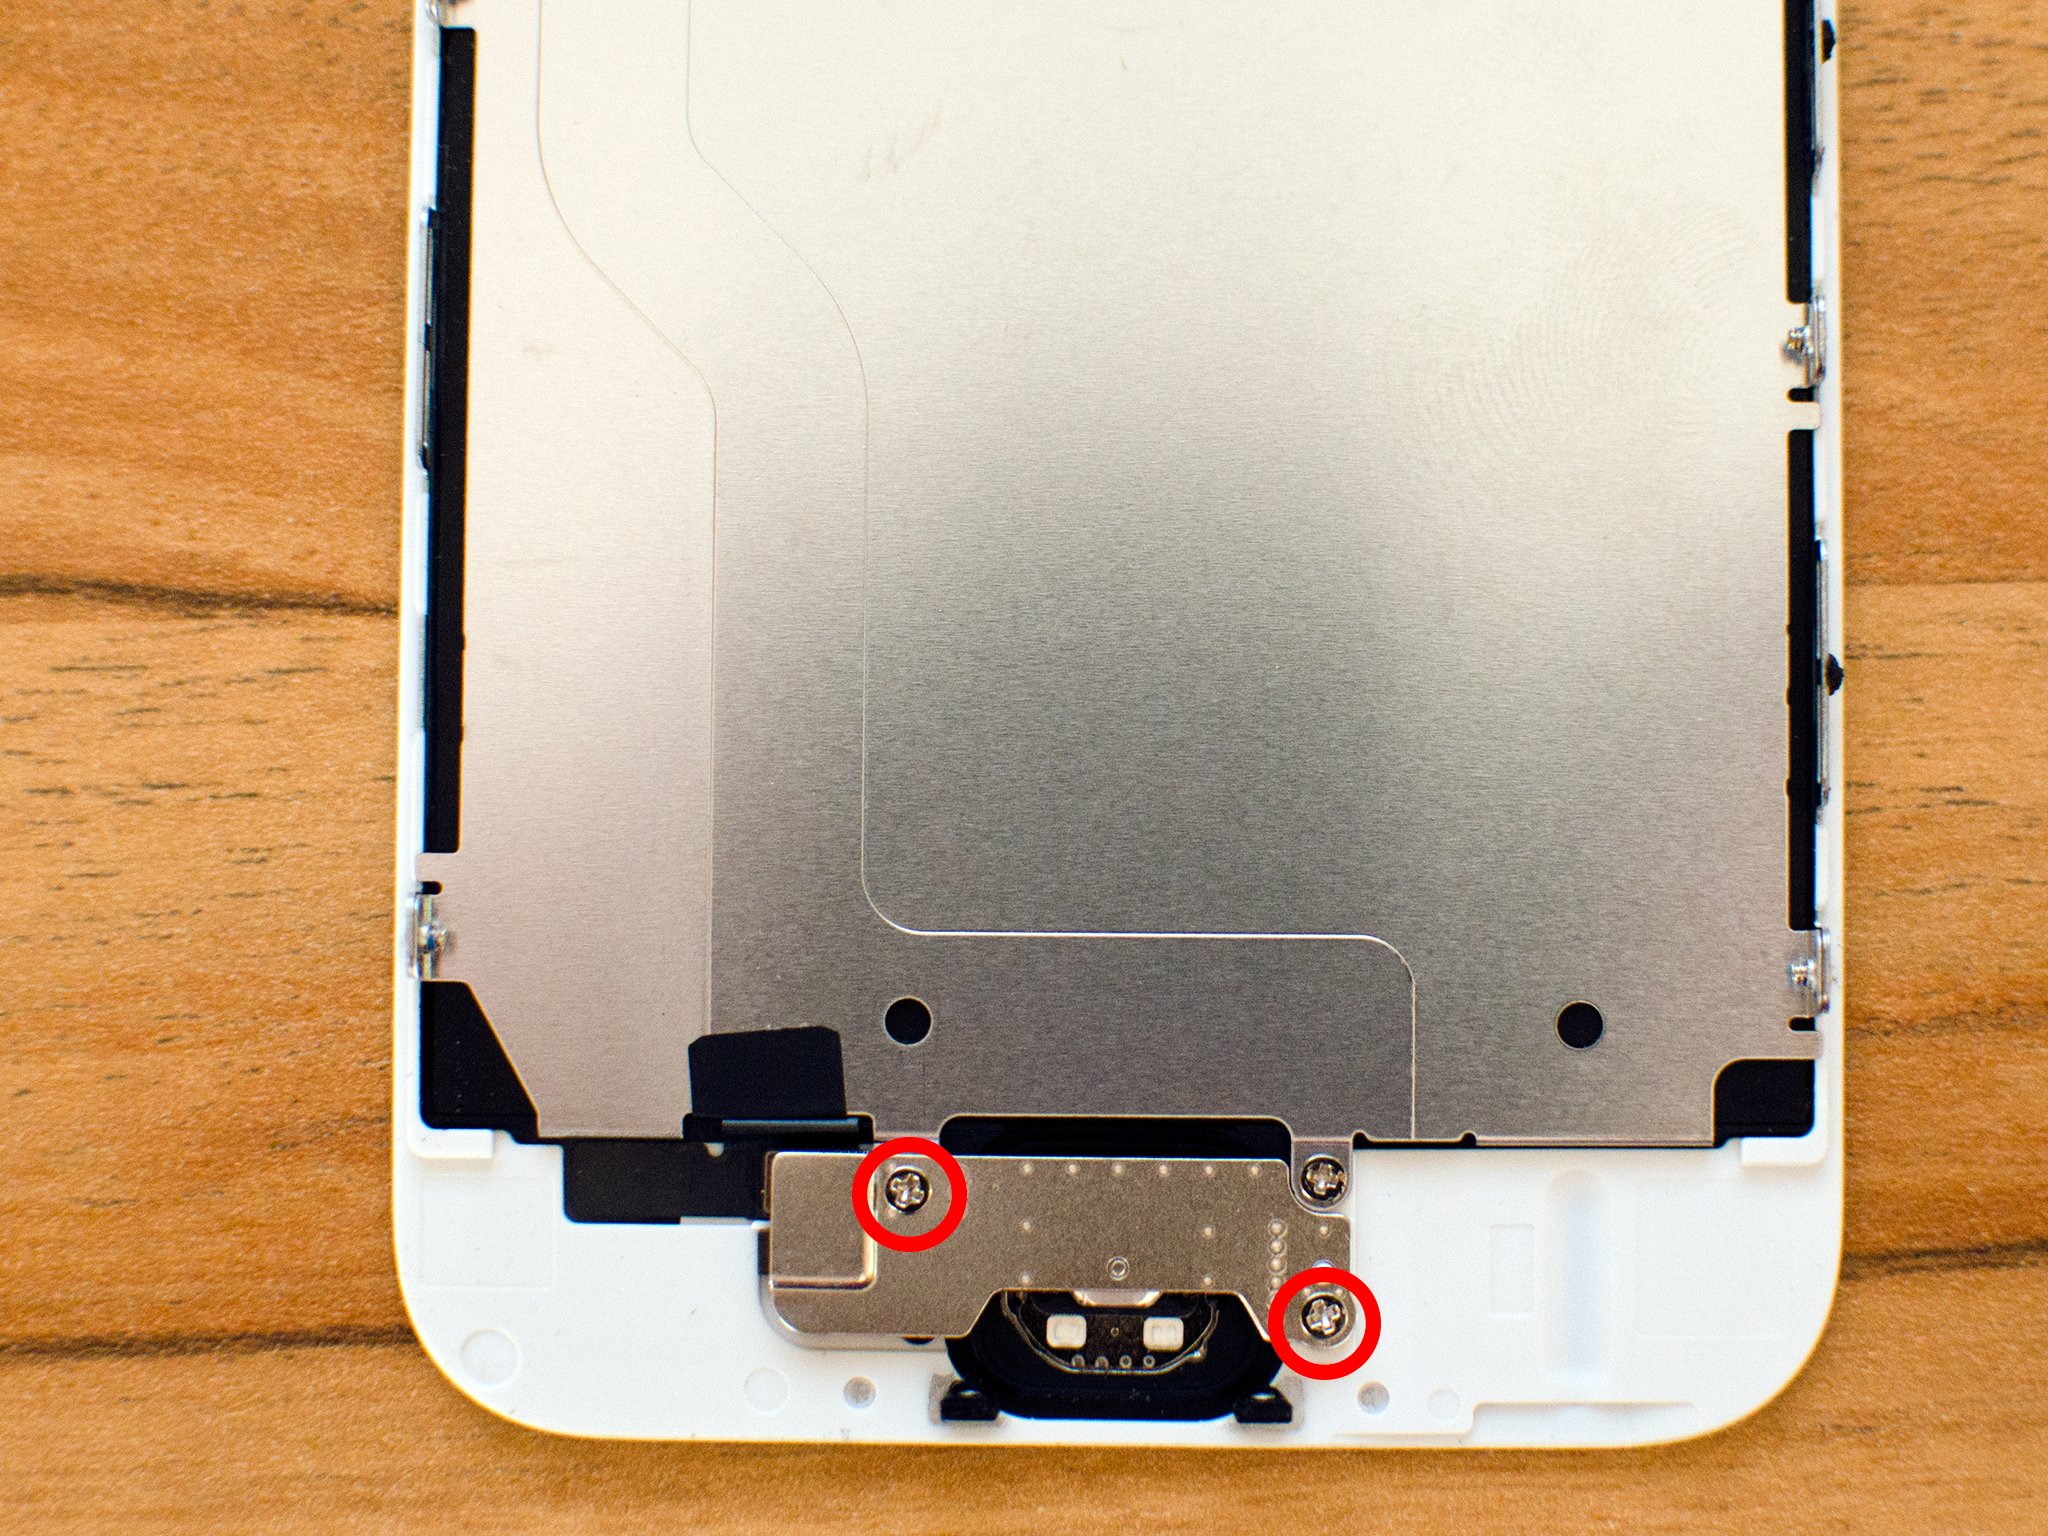
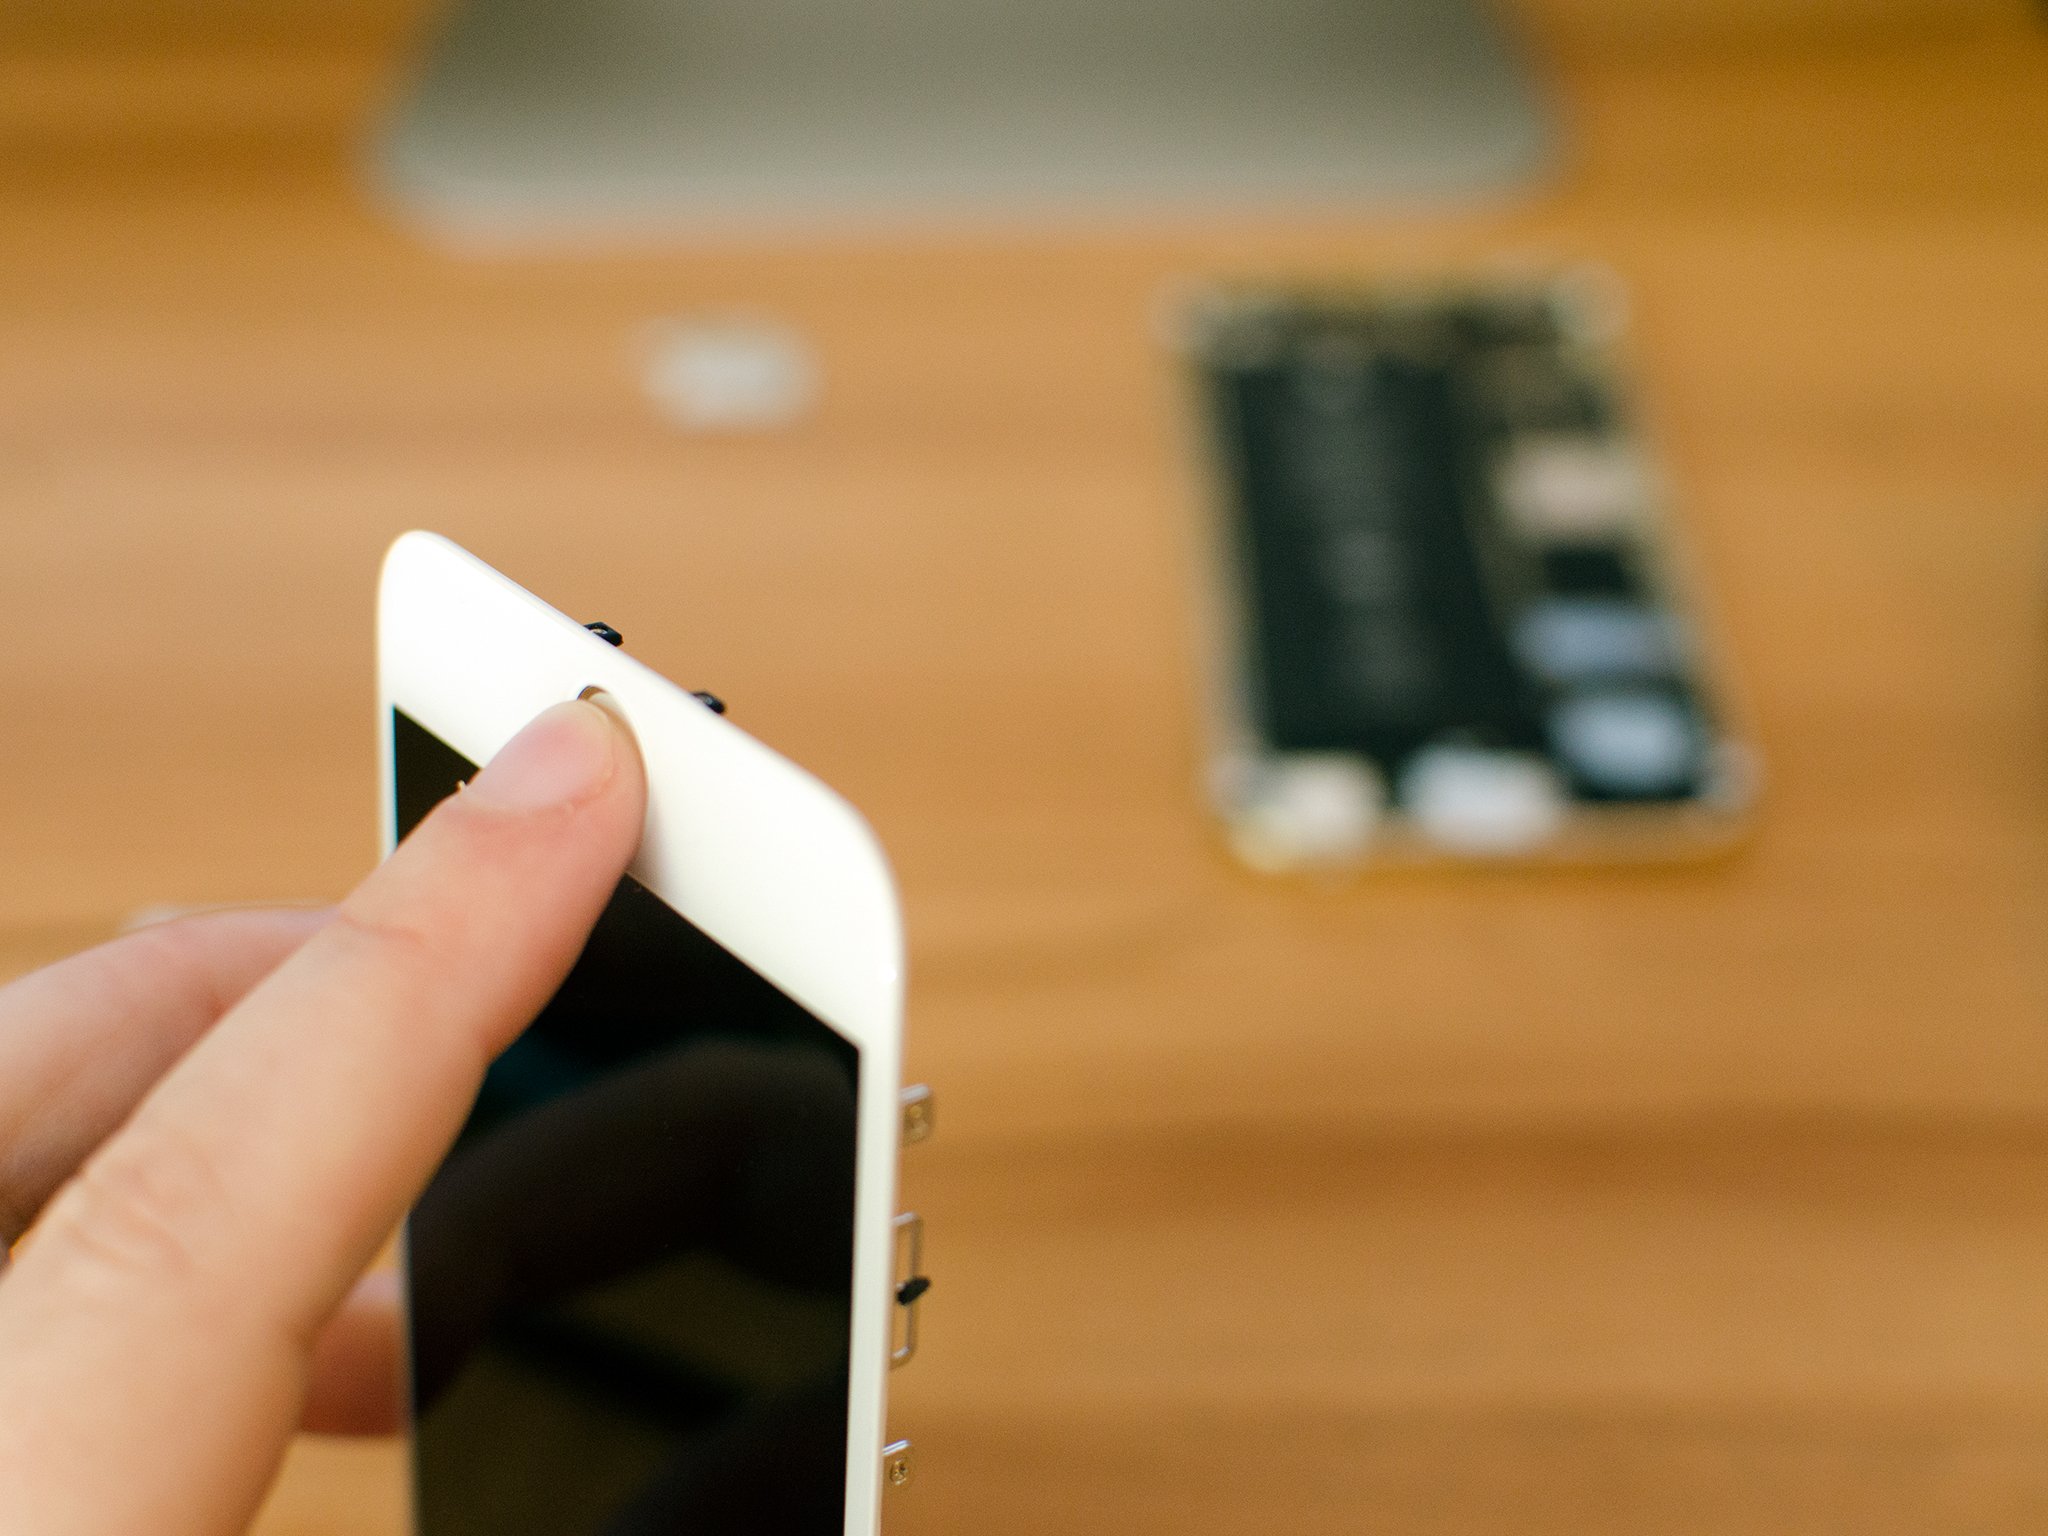
- On the back of your broken display, remove the two screws on the Touch ID shield. Again, remember not to mix up any screws.
- The silver shield holding Touch ID in place can now be removed.
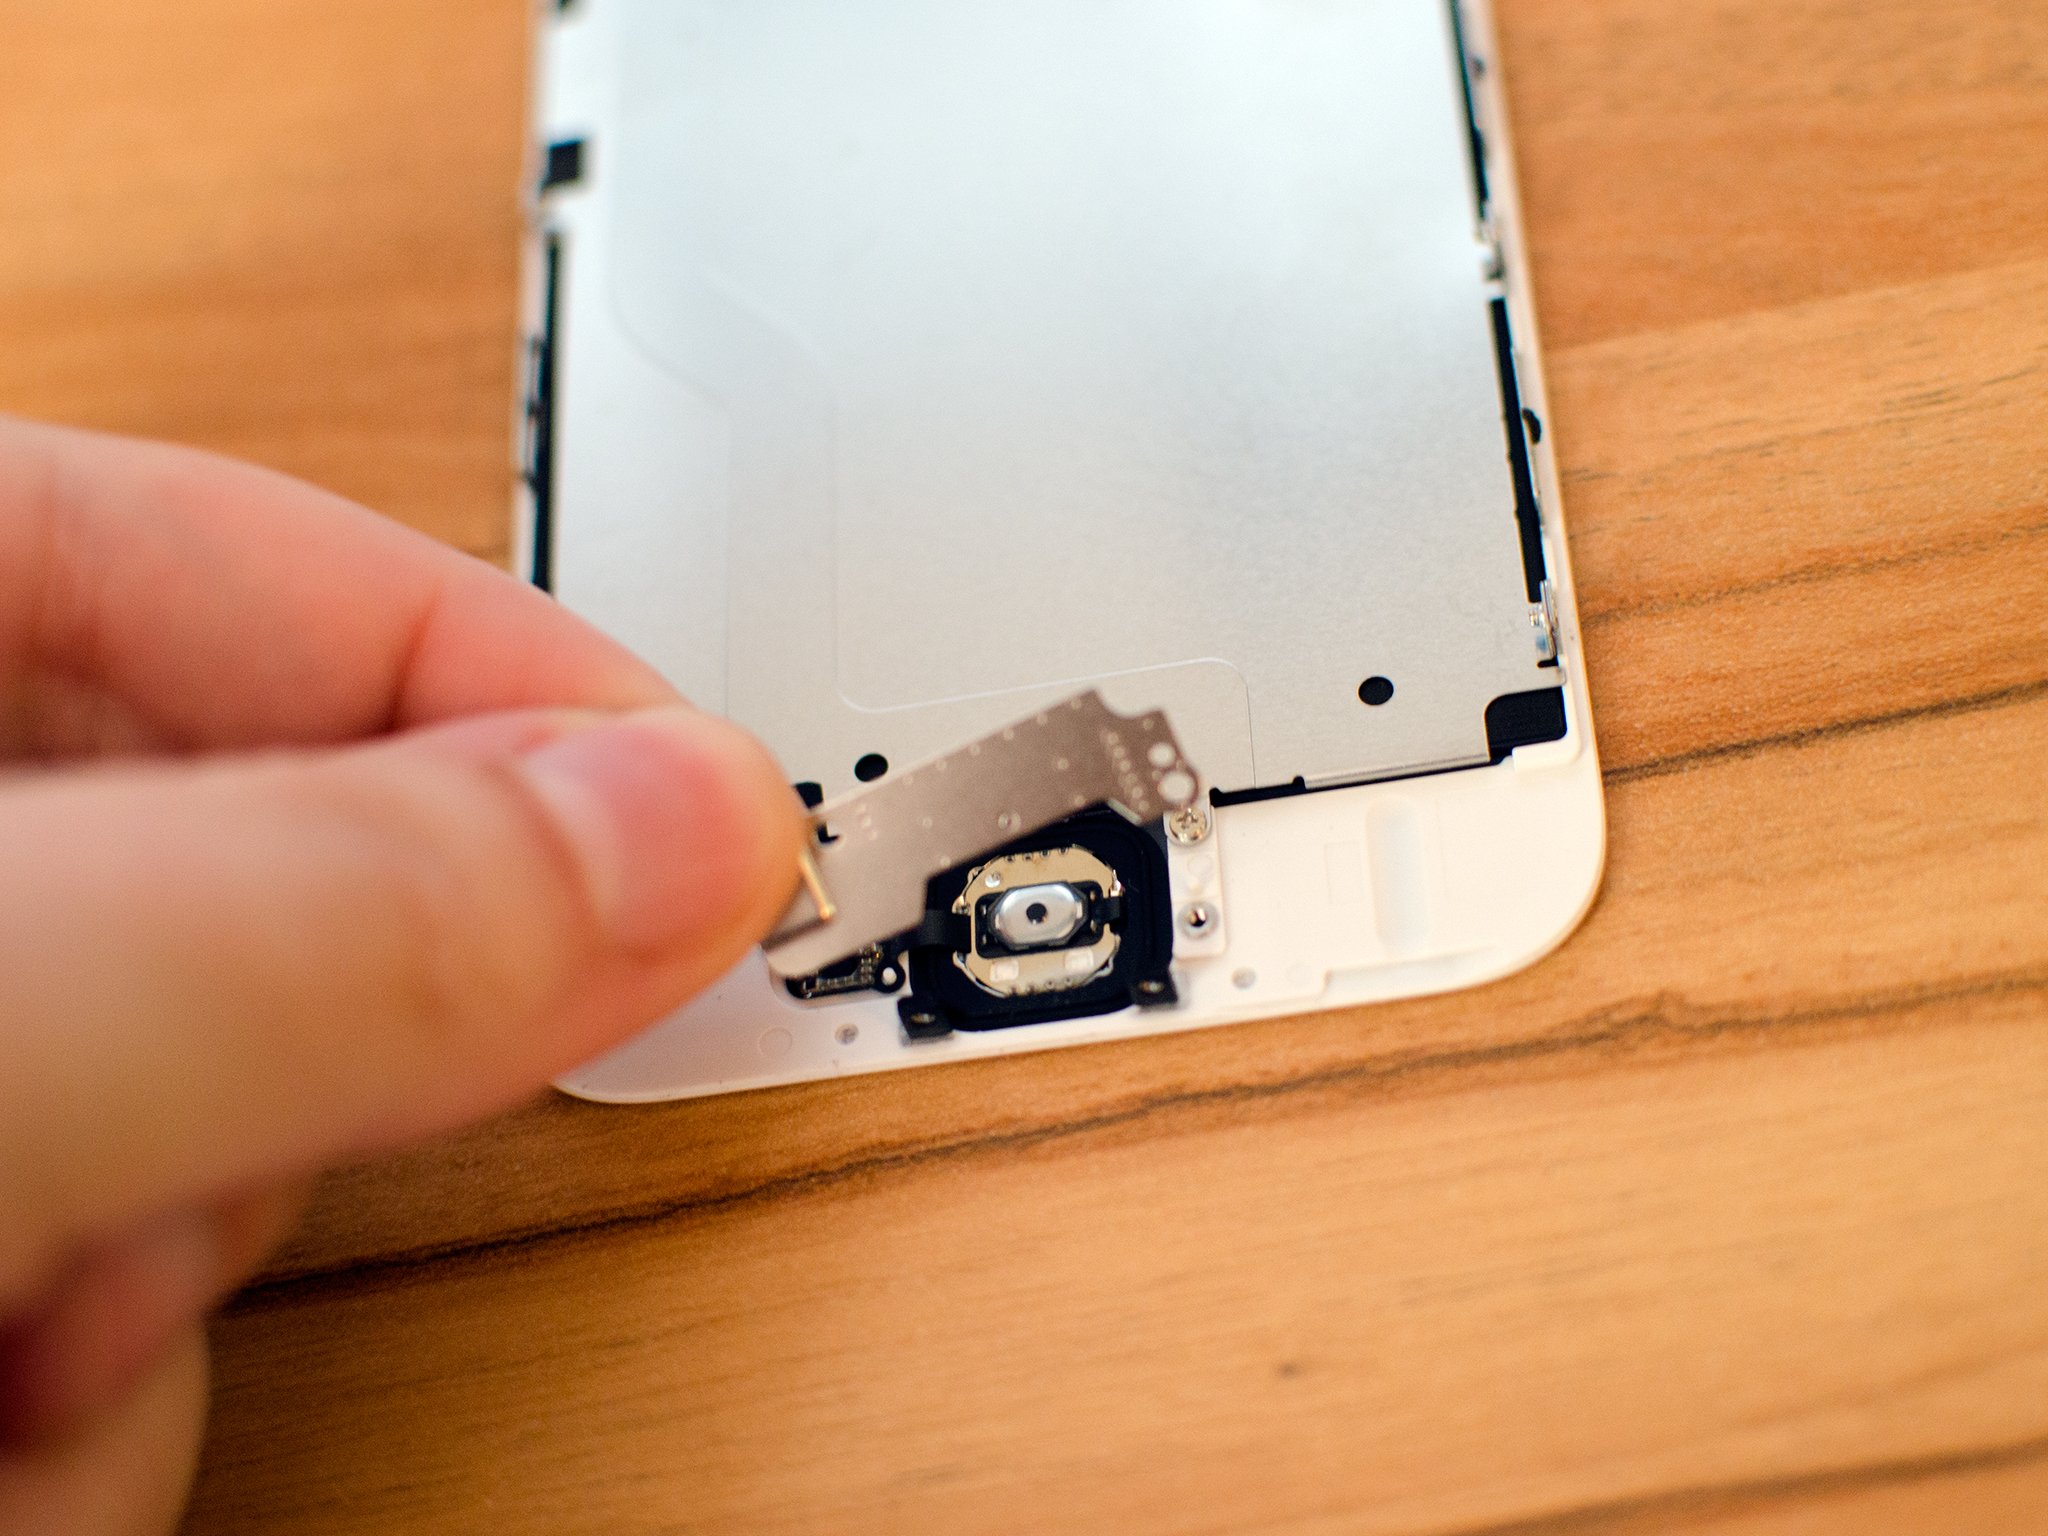
- Use the pointed end of your spudger tool to remove the single cable connecting the Touch ID and Home button assembly.
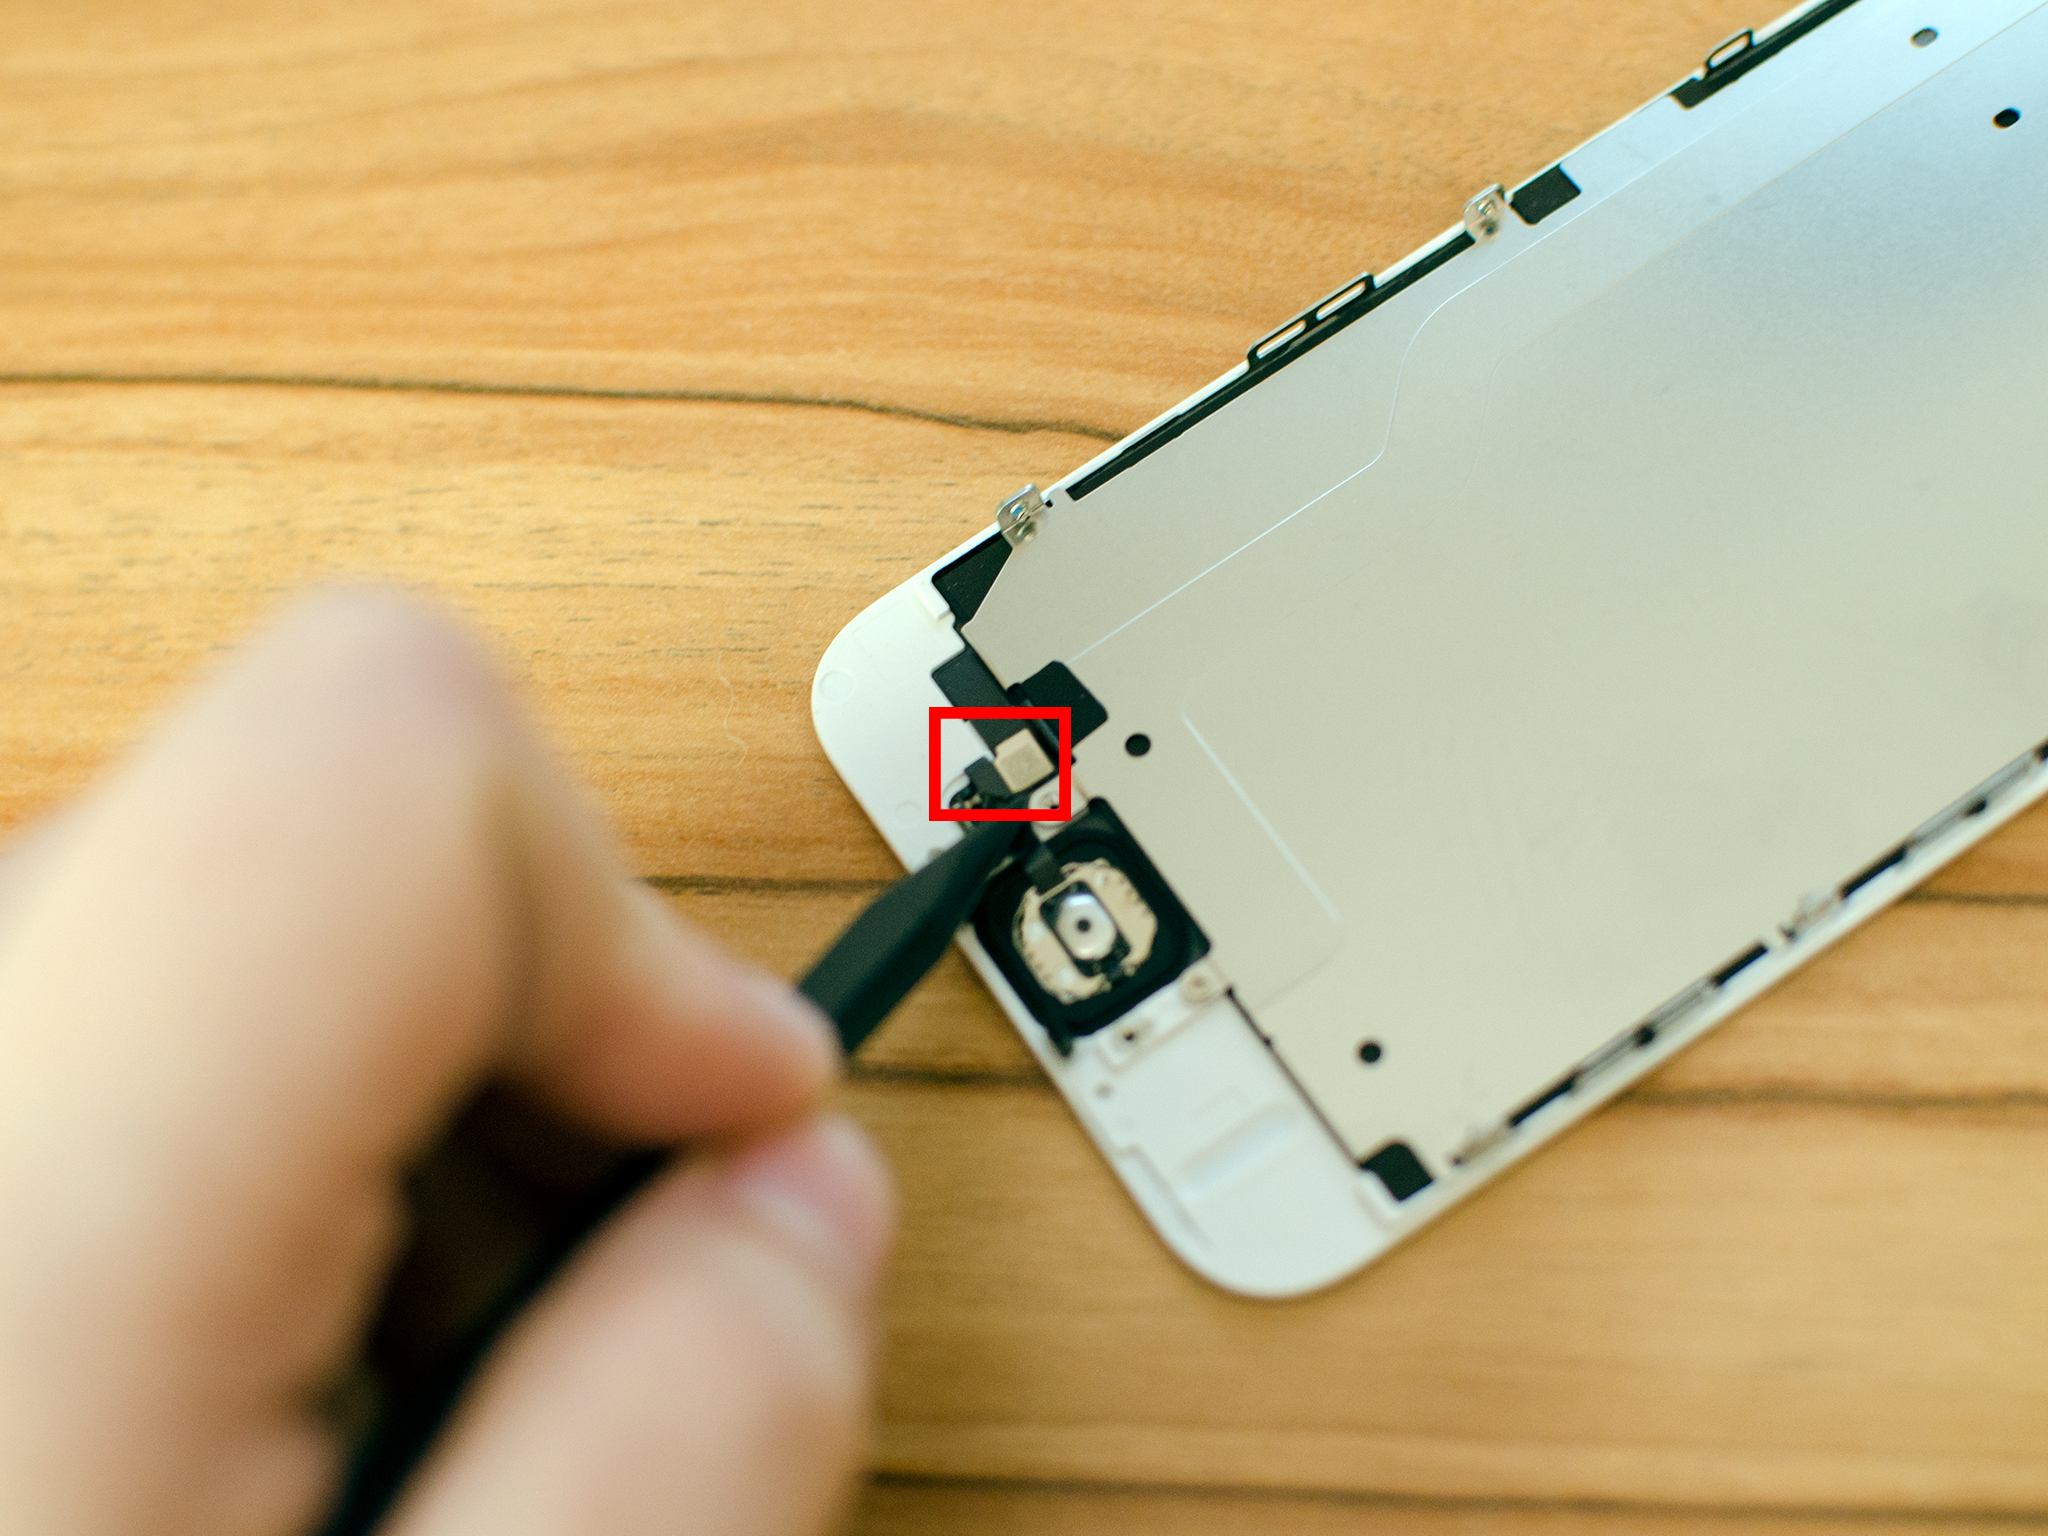
- Gently push the Home button from the front of the display. The only thing holding it in place is adhesive. You can apply a small amount of heat with a hair dryer if you'd like to make the removal process easier.
- Place the entire Touch ID and Home button assembly in the replacement display, making sure it is lined up correctly.
- Secure the single cable holding Touch ID to the front assembly.

- Replace the silver shield and the two screws holding it in place.
Install new display
- Secure the four cables on the new display assembly to the logic board of your iPhone, in reverse order of how you removed them.
- Replace the display shield and the five screws that hold it in place, using your #000 Phillips screwdriver.
- Line up the top of the display, paying attention to the indents in the frame and the grooves at the top of the display.
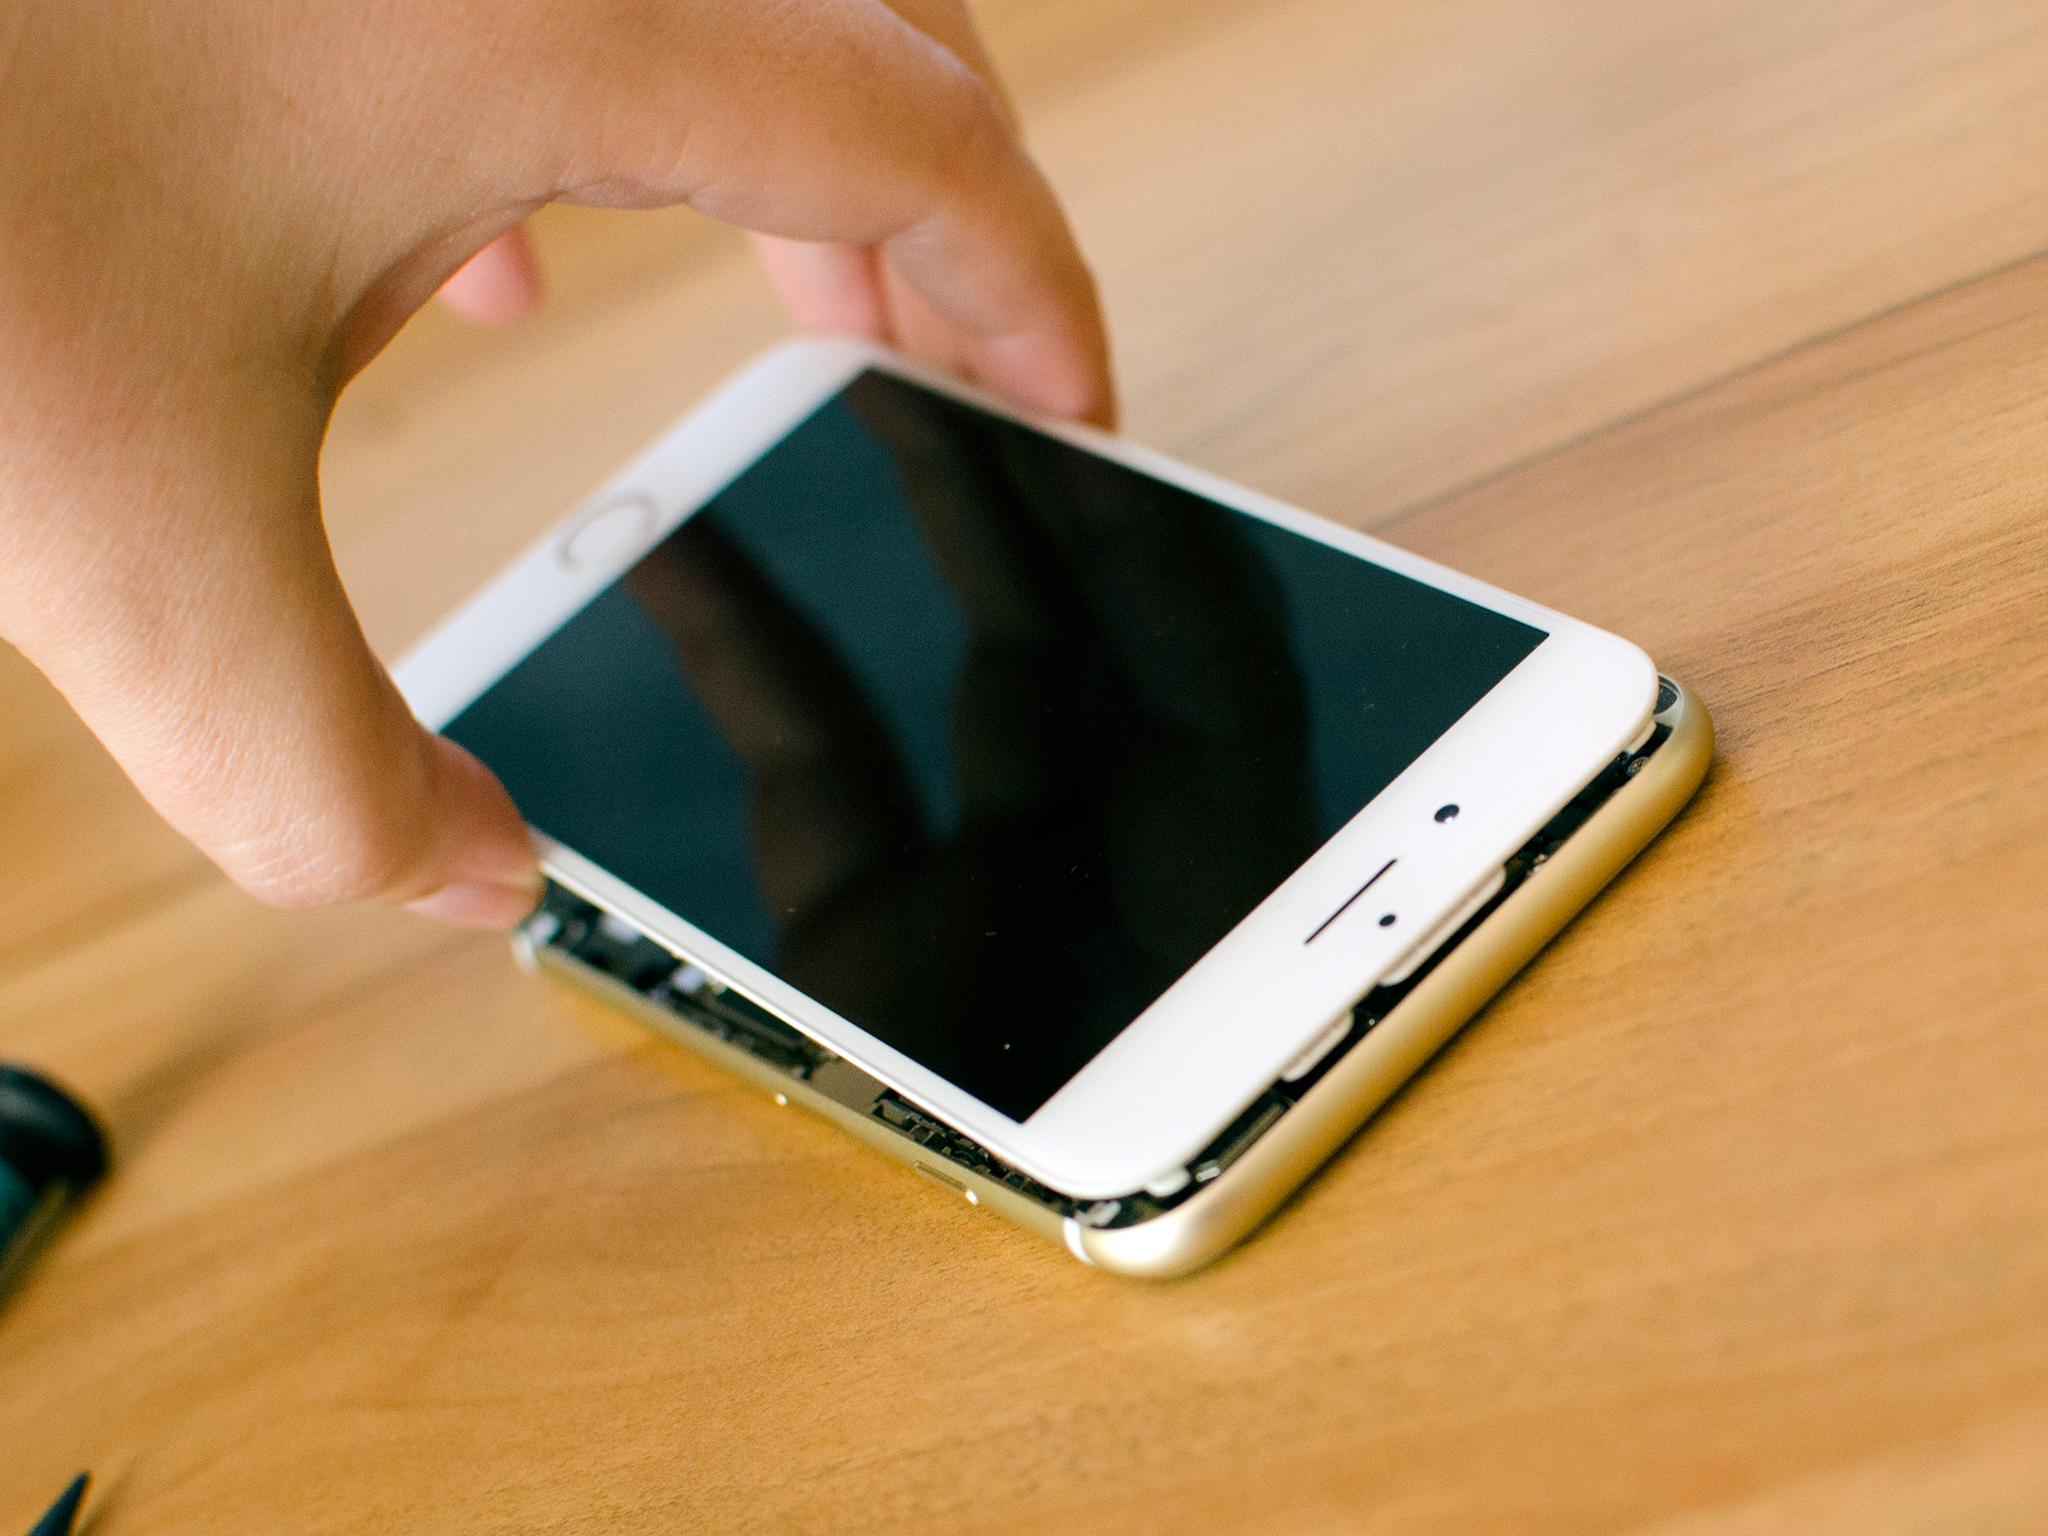
- Carefully push the display down, starting at the top. Do not force it. If something isn't lining up, try again. You do not need excessive force. If you do, something isn't lined up correctly.
Replace dock screws
Replace the two screws on either side of the Lightning Dock. Be sure not to screw them in too tight, which could result in you stripping them. Stripped screws make it difficult to remove them later if you need to.
Test new display
![]()
Once your iPhone 6 is back together and you're sure you have no spare parts (hint: you shouldn't!), it's safe to power it back on. If all went well, you should see an Apple logo (if you see lines or a black screen, refer to the note below).
Once it boots back up, you're ready to start testing everything! To ensure everything is working as it should, test the following functions:
- Test the touch screen by typing on a keyboard and testing for dead spots on the screen
- Place a test call and put your finger over the top sensors to make sure the screen goes dark like it does when your face is against it during a call
- Ensure you can hear calls out of the earpiece
- Transfer a call to speakerphone or play music
- Test Touch ID and Home button functionality to ensure both are working properly — I suggest adding a new fingerprint to verify Touch ID
If all of the above tests out ok, you're good to go!
Note: If powering on your iPhone 6 resulted in lines through the display or a blacked out display, hold down the Power button and Home button together to reboot it. If rebooting doesn't work, re-open your iPhone and ensure that all cables are securely fastened to the board. A partially secured display cable is the most common cause of this issue.
More DIY repairs
Need a different iPhone DIY repair? From smashed screens to broken headphone jacks and everything in between, we've got what you need!