
Use your iPhone’s built-in tools make your photos stand out
- aug
- 06
How do you quickly and easily fix lighting and color issues, or make your photos black and white? With smart adjustments!
Smart adjustments in Photos let you enhance your images, either automatically, intuitively, or precisely. The magic wand is still there, of course, but you can also change light, color, and black and white with a swipe, or dive down into brightness, warmth, and other details. Crank it up, crush it down, or go gray. It's all up to you!
- How to enhance images in Photos
- How to enhance images in iOS 13
- How to change lighting with smart adjustments in Photos
- How to change the lighting in your photos in iOS 13
- How to change color with smart adjustments in Photos
- How to change color in your photos in iOS 13
- How to convert to black and white with smart adjustments in Photos
- How to convert photos to black and white in iOS 13
- How to fine-tune smart adjustments in Photos
- How to revert back to the original in Photos
- How to revert back to the original photo in iOS 13
How to enhance images in Photos
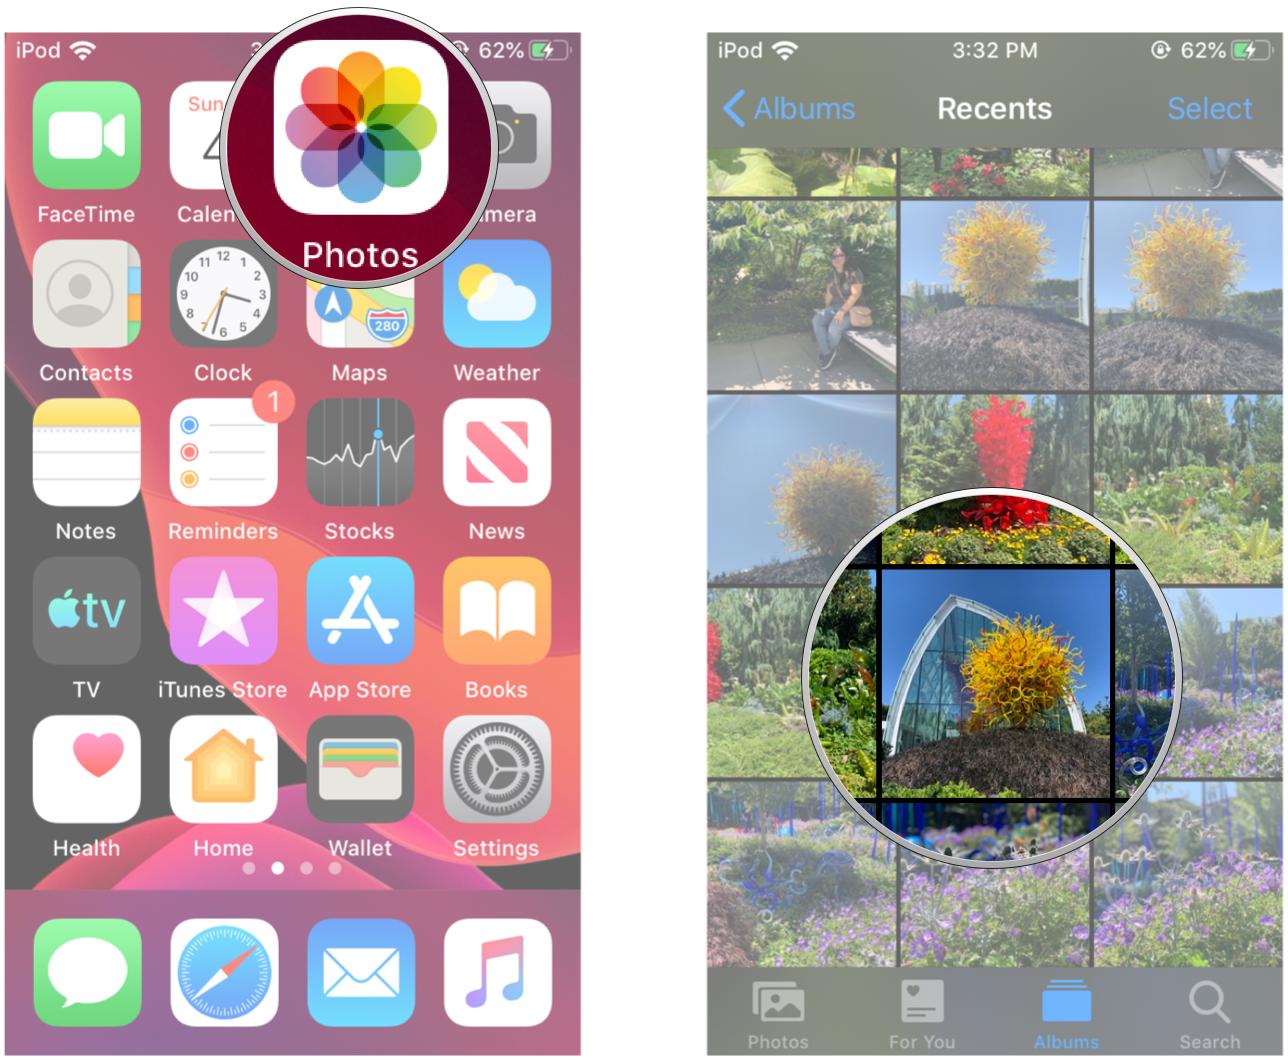
- Launch the Photos app on your iPhone or iPad.
- Find the photo you'd like to enhance and tap on it to open it.
- Tap on the Edit button in the upper right corner of the screen.
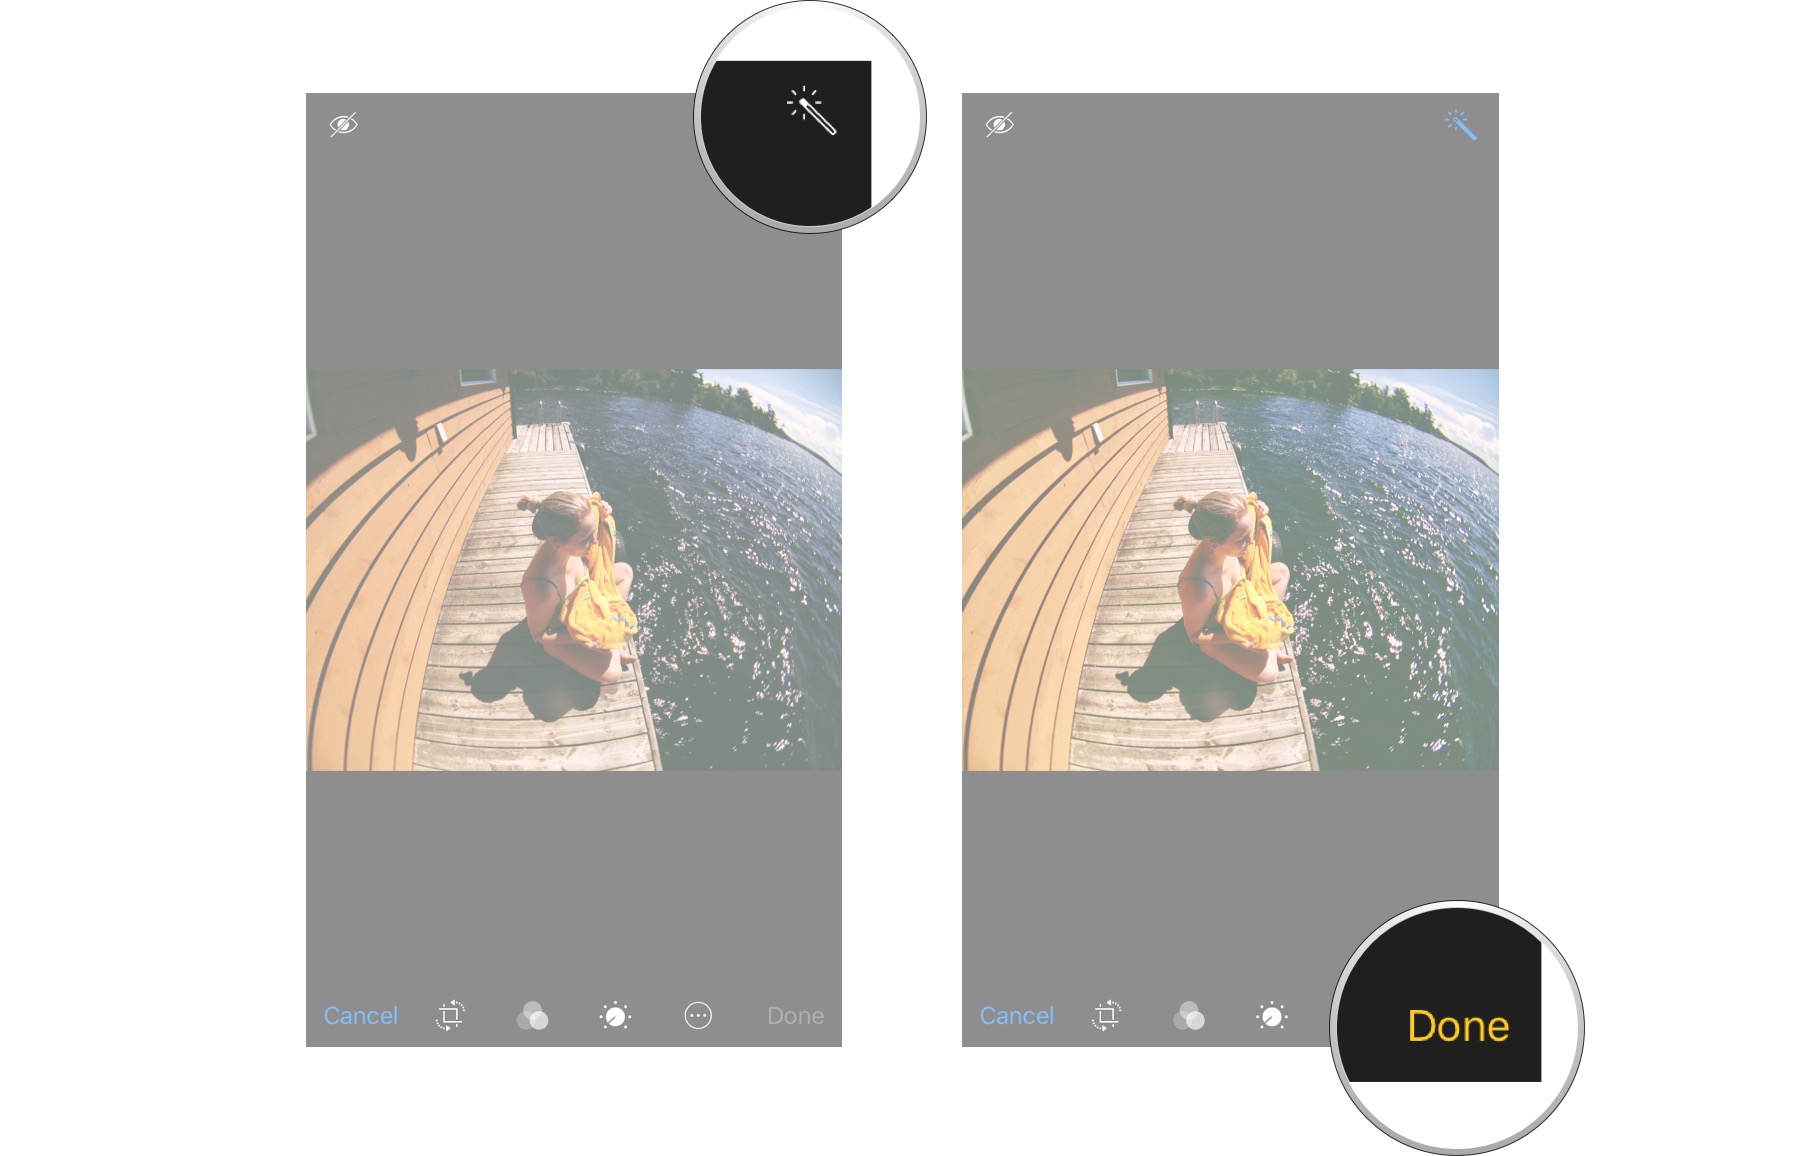
- Tap on the Auto-Enhance button — it looks like a magic wand.
- You can toggle between Auto-Enhance by tapping on it again. This gives you a good idea of before and after.
-
Tap on Done, If you like the improvements the Auto-Enhance feature made.
How to enhance images in Photos in iOS 13
Apple occasionally offers updates to iOS, watchOS, tvOS, and macOS as closed developer previews or public betas for iPhone, iPad, Apple TV and Mac (sadly, no public beta for the Apple Watch). While the betas contain new features, they also contain pre-release bugs that can prevent the normal use of your iPhone, iPad, Apple Watch, Apple TV, or Mac, and are not intended for everyday use on a primary device. That's why we strongly recommend staying away from developer previews unless you need them for software development, and using the public betas with caution. If you depend on your devices, wait for the final release.
- Launch Photos on your iPhone or iPad with iOS 13.
-
Find a photo you want to enhance and tap to open it.
- Tap Edit in the upper right corner.
-
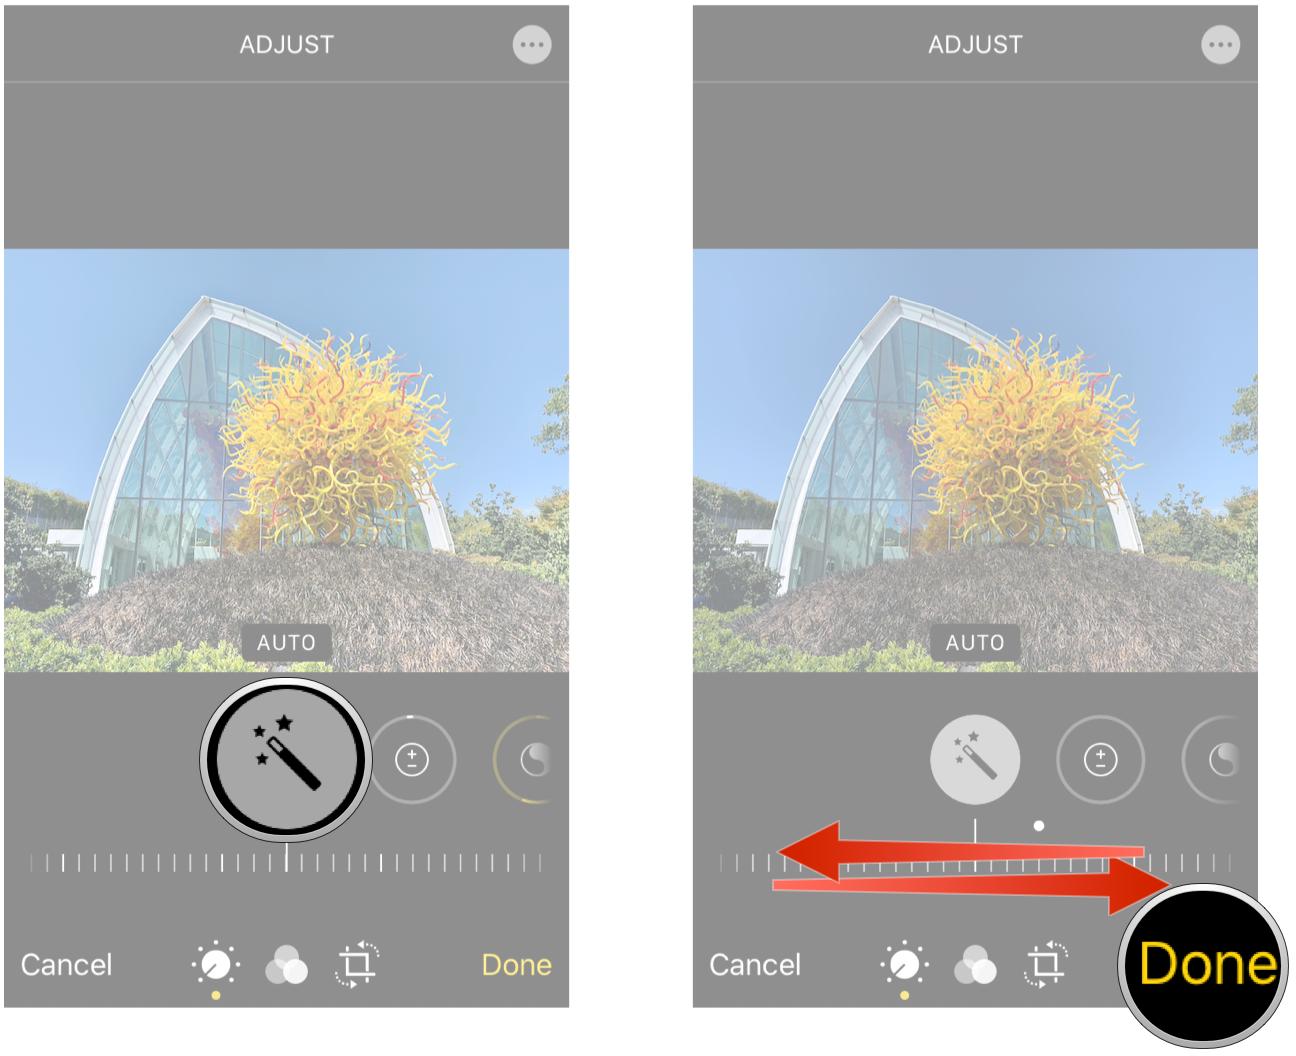
Make sure you're in the Lighting section (dial with dots around it) and then tap the Auto-Enhance button (it looks like a magic wand).

- You can slide the dial at the bottom to adjust the intensity of the Auto-Enhance feature. This adjusts other aspects automatically.
-
Tap Done in the bottom right corner once you are satisfied with your changes.
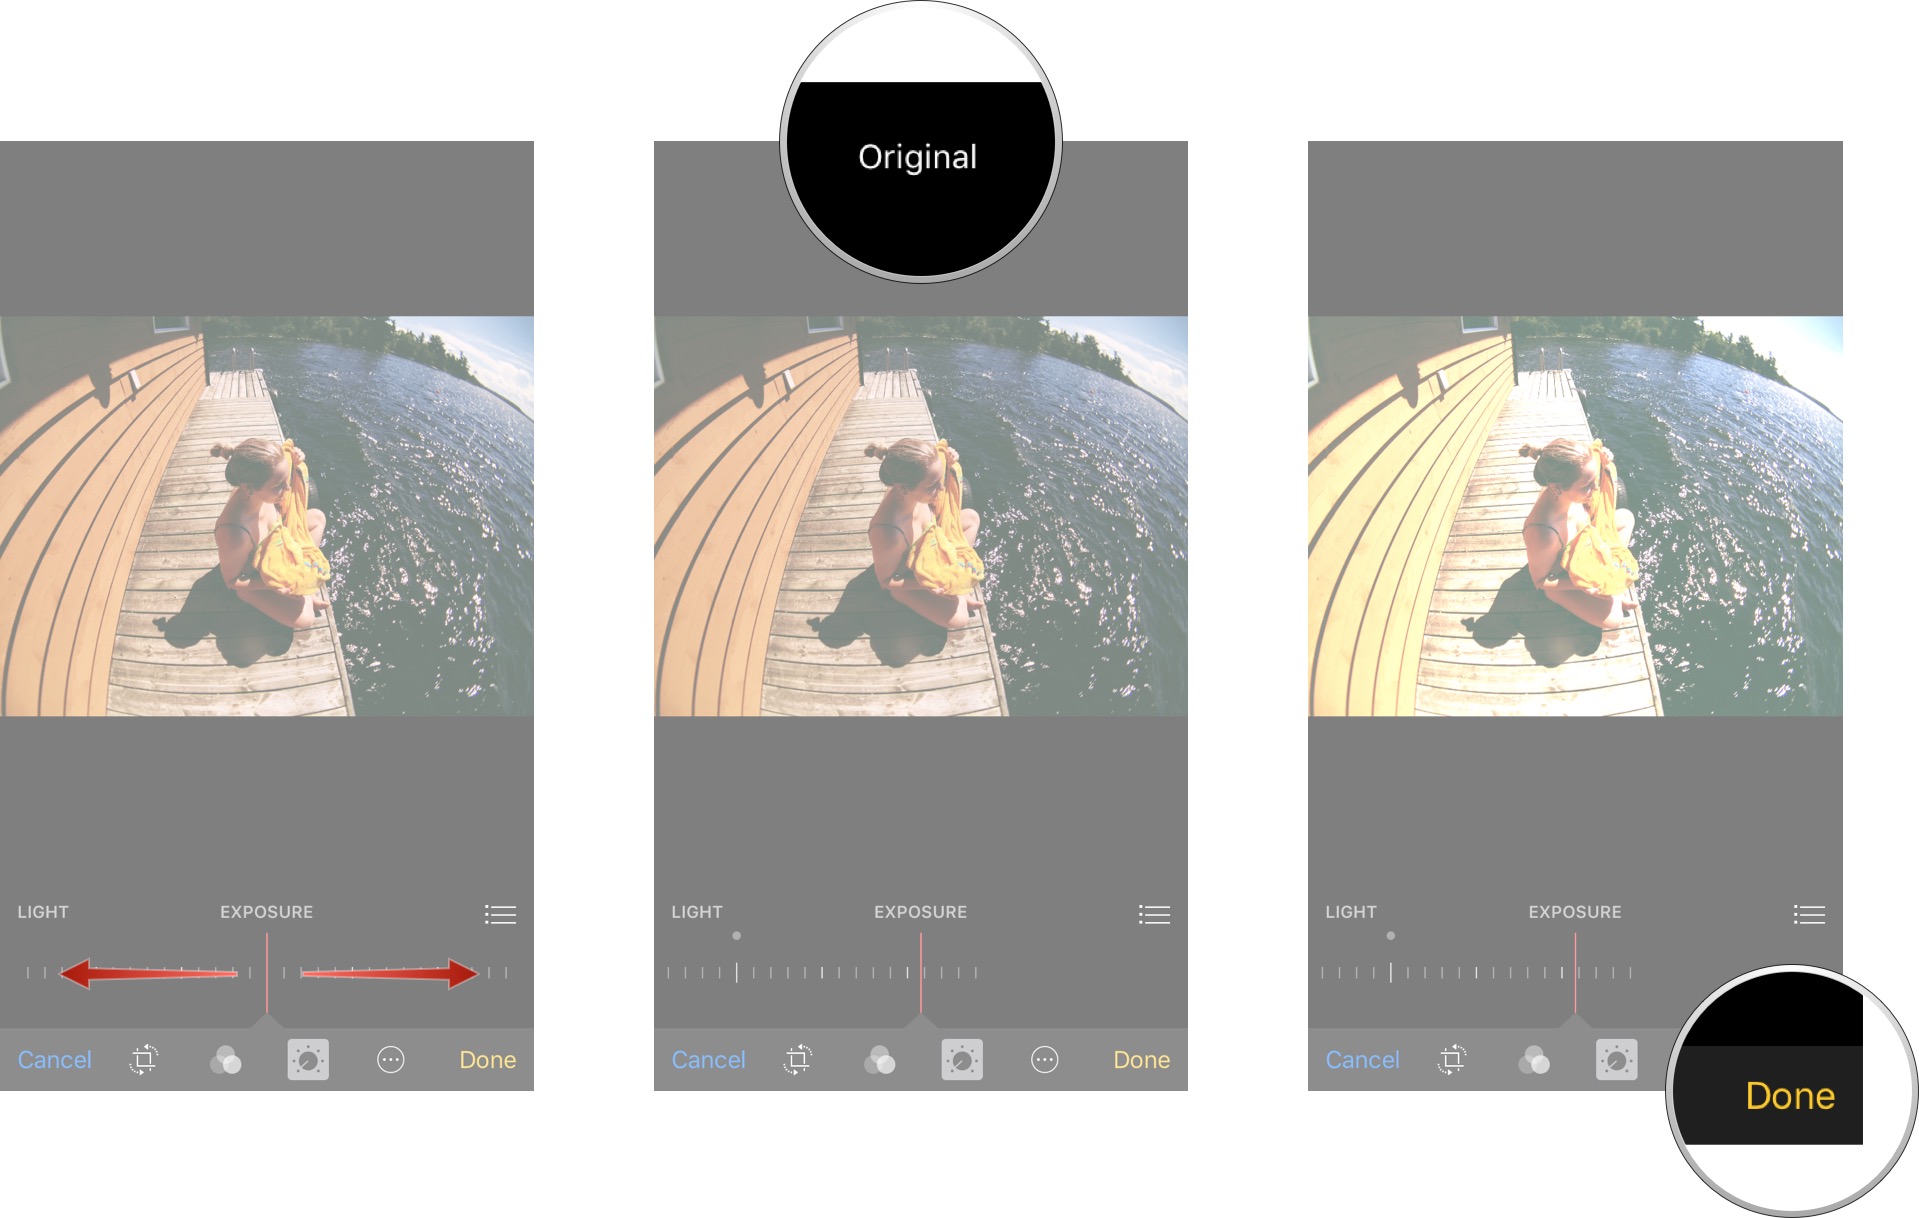
How to change lighting with smart adjustments in Photos
- Launch the Photos app on your iPhone or iPad.
- Find the photo you'd like to enhance and tap on it to open it.
- Tap on the Edit button in the upper right corner of the screen.
- Tap on the adjustments button in the bottom navigation — it looks like a dial with dots around it.
- Tap on Light.
-
Swipe left and right to move the slider to make changes to your photo. Lift up your finger when the photo looks as you would like it to.
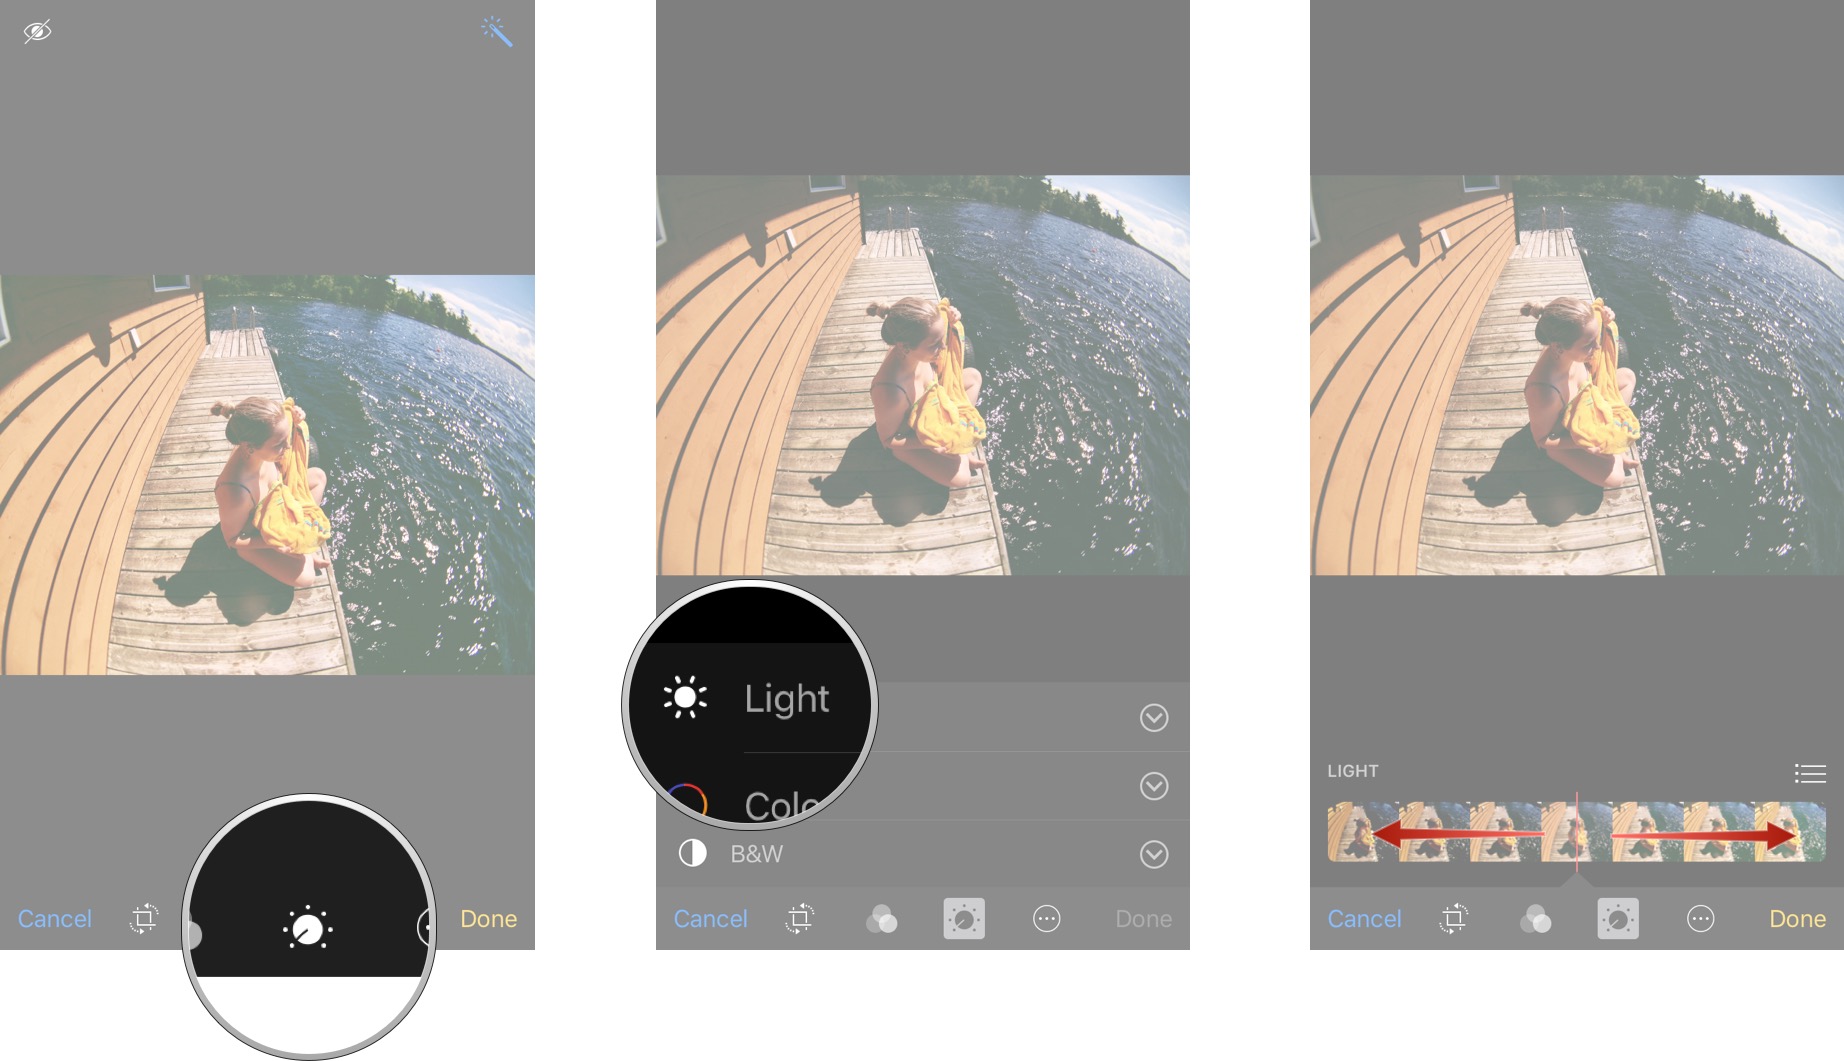
- Tap and hold on the photo to view the original in order to compare it to your edited version.
-
Tap on Done in the bottom right hand corner and your changes will be saved.
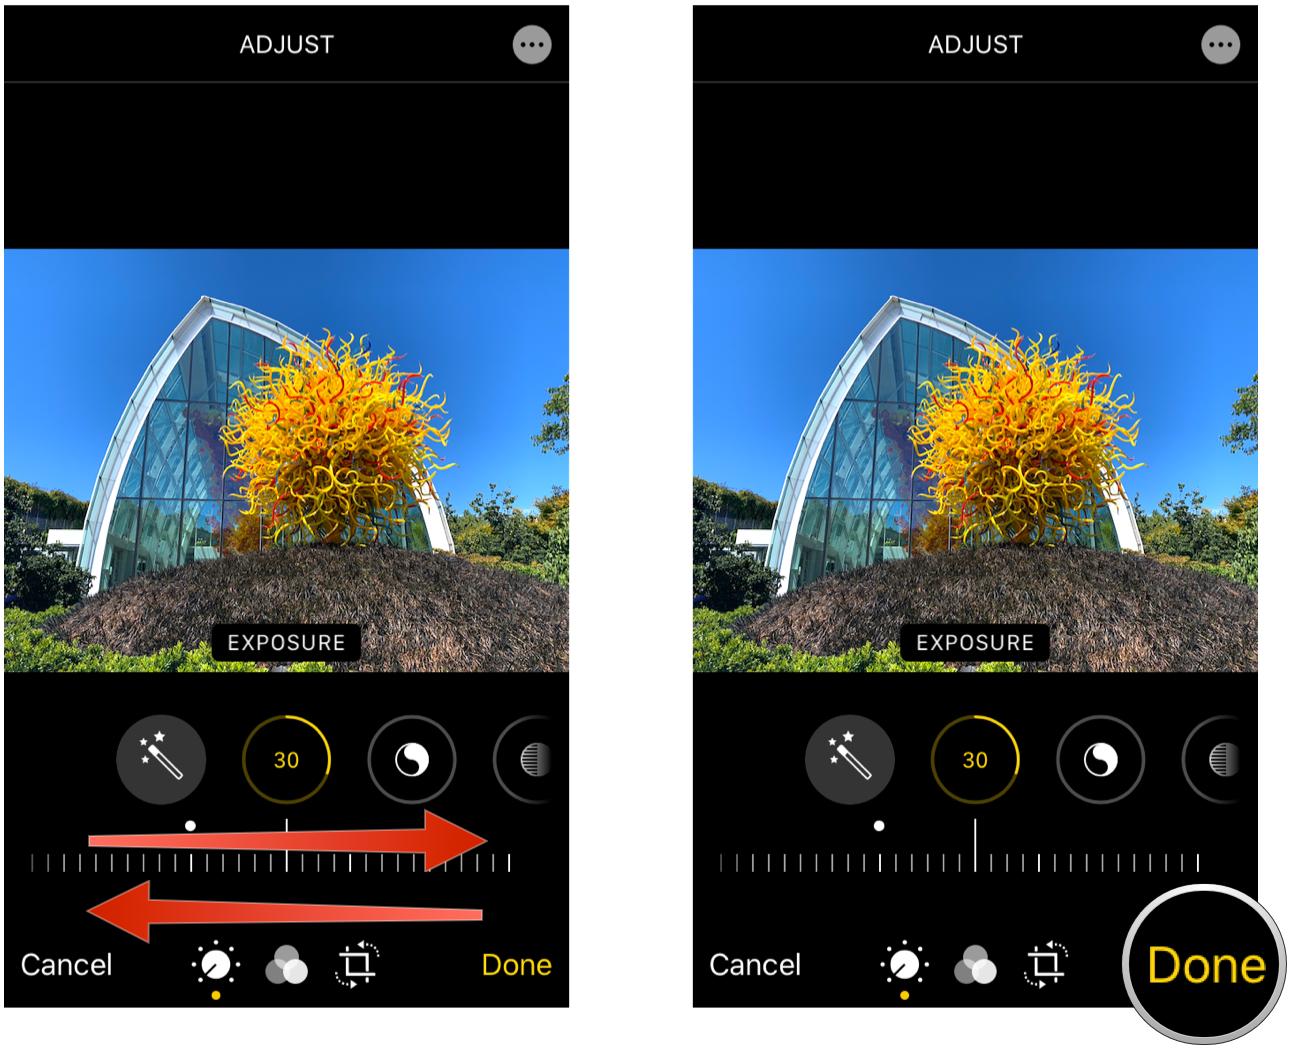
How to change the lighting in your photos in iOS 13
iOS 13 has removed the smart lighting feature from previous versions. However, you can manually adjust the lighting by adjusting individual elements under the Lighting category of editing tools.
Apple occasionally offers updates to iOS, watchOS, tvOS, and macOS as closed developer previews or public betas for iPhone, iPad, Apple TV and Mac (sadly, no public beta for the Apple Watch). While the betas contain new features, they also contain pre-release bugs that can prevent the normal use of your iPhone, iPad, Apple Watch, Apple TV, or Mac, and are not intended for everyday use on a primary device. That's why we strongly recommend staying away from developer previews unless you need them for software development, and using the public betas with caution. If you depend on your devices, wait for the final release.
- Launch Photos on your iPhone or iPad.
-
Find a photo and tap it to open it.
- Tap Edit in the upper right corner.
-
Tap the Lighting button in the bottom menu bar (it looks like a dial with dots around it).
-
Swipe horizontally through the different lighting aspect categories and tap the one you want to adjust.
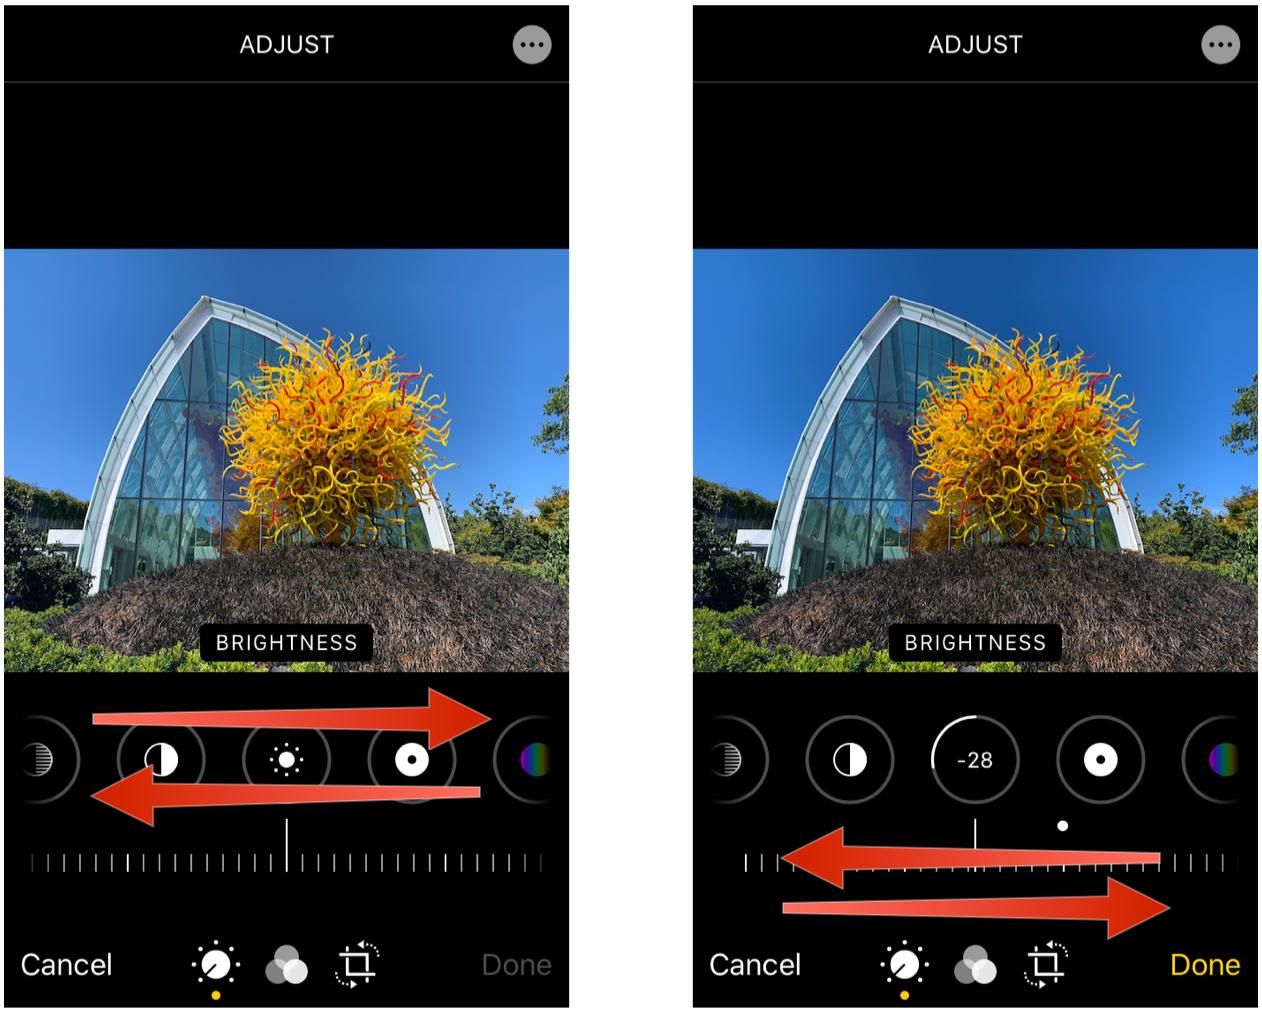
- For each adjustment you want to make, slide the dial at the bottom left to right for a weaker or stronger effect.
-
Tap Done in the bottom right corner to save your changes.
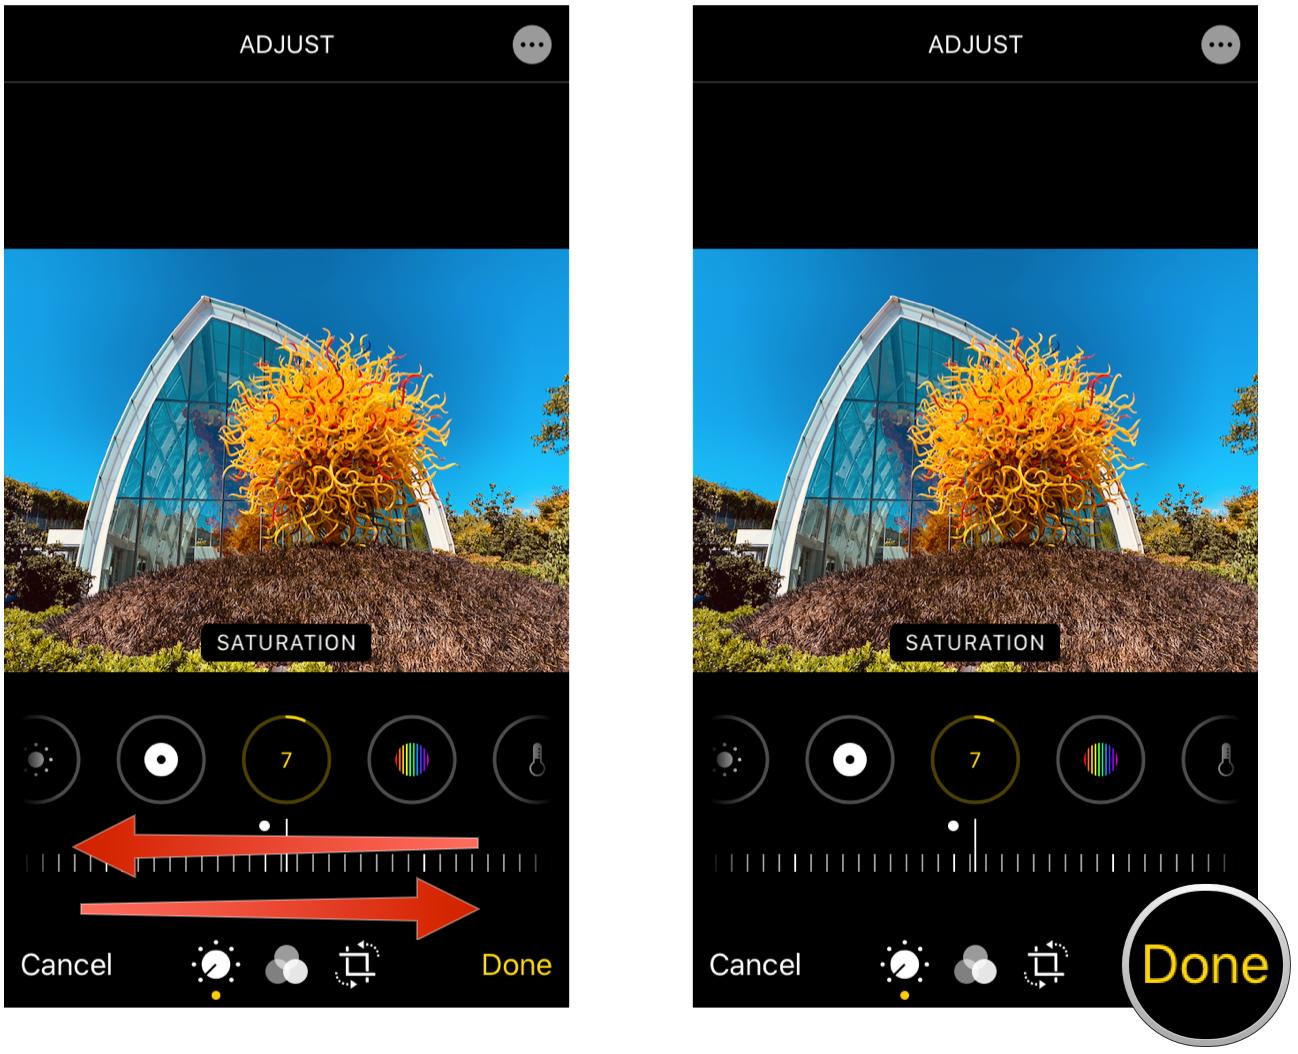
How to change color with smart adjustments in Photos
- Launch the Photos app on your iPhone or iPad.
- Find the photo you'd like to enhance and tap on it to open it.
- Tap on the Edit button in the upper right corner of the screen.
- Tap on the adjustments button in the bottom navigation — it looks like a dial with dots around it.
- Tap on Color.
-
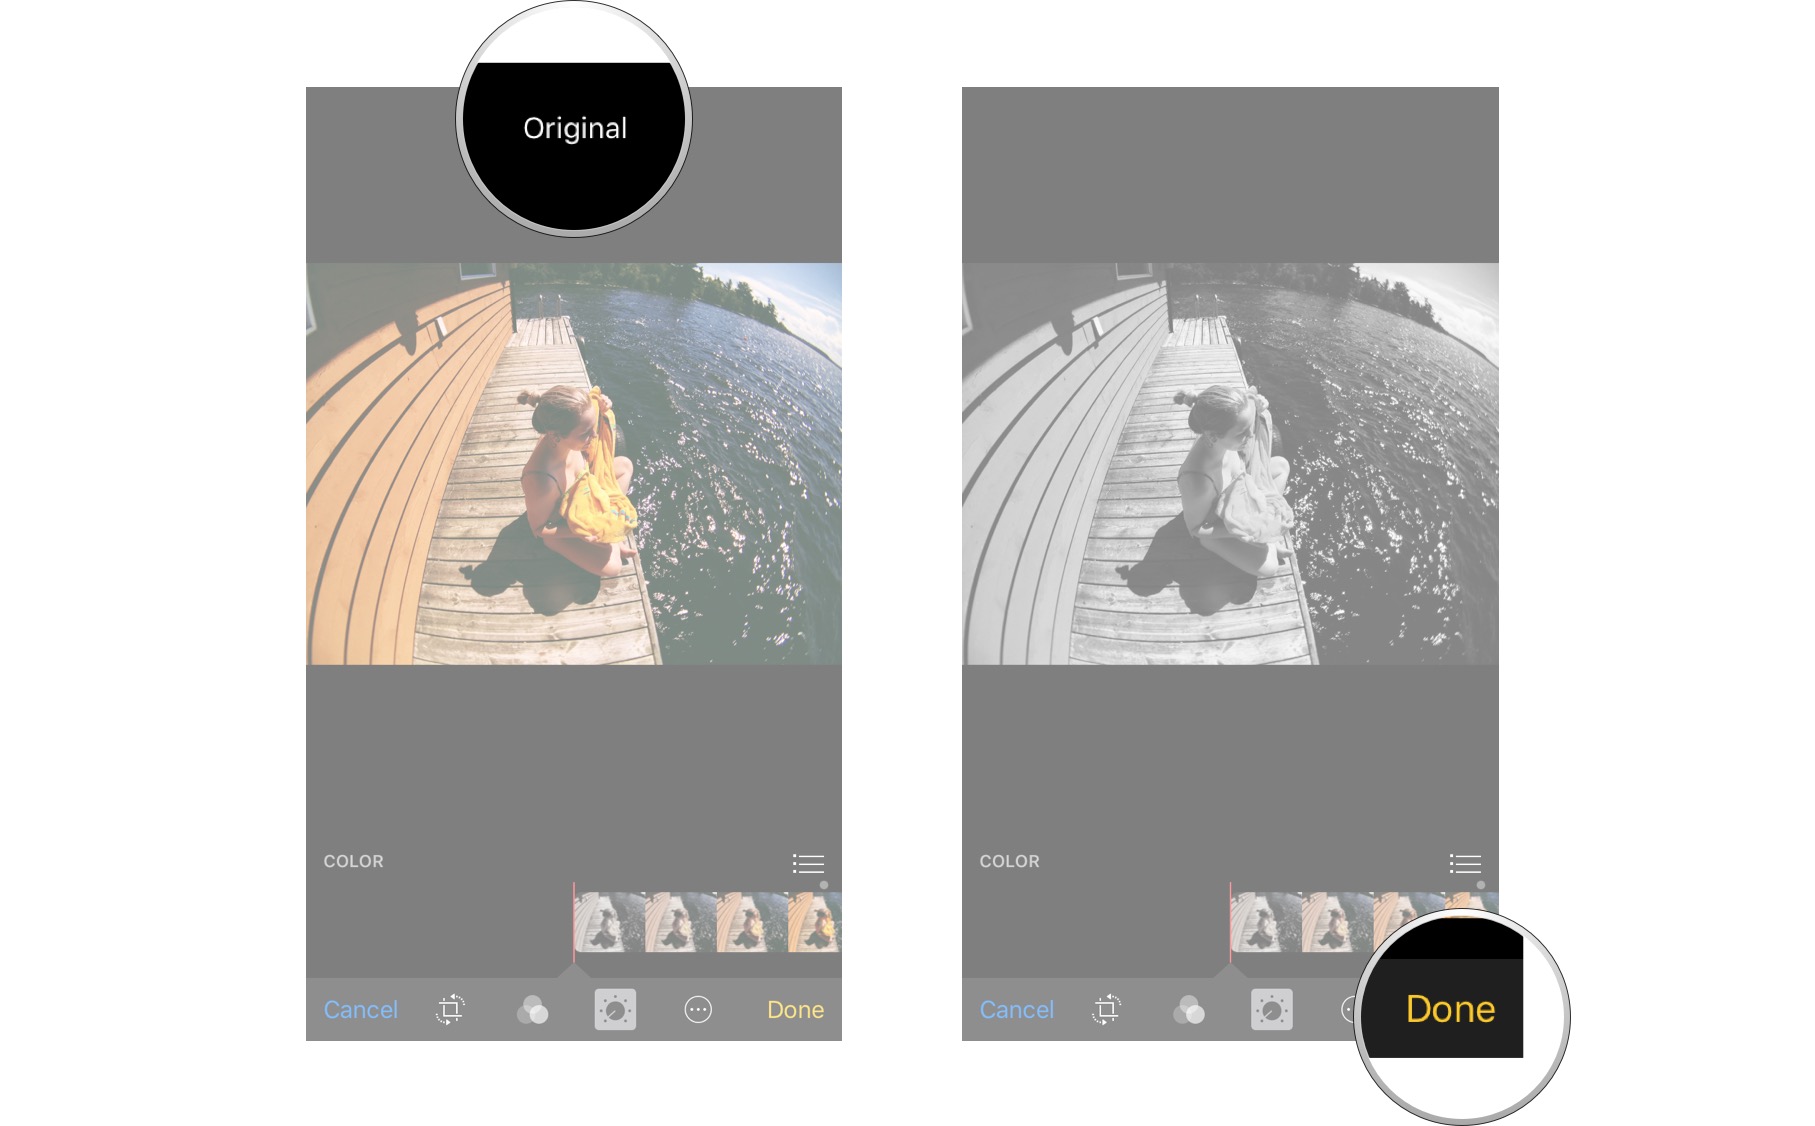
Swipe left and right on the slider to make changes to your photo. Lift up your finger when the photo looks as you would like it to.
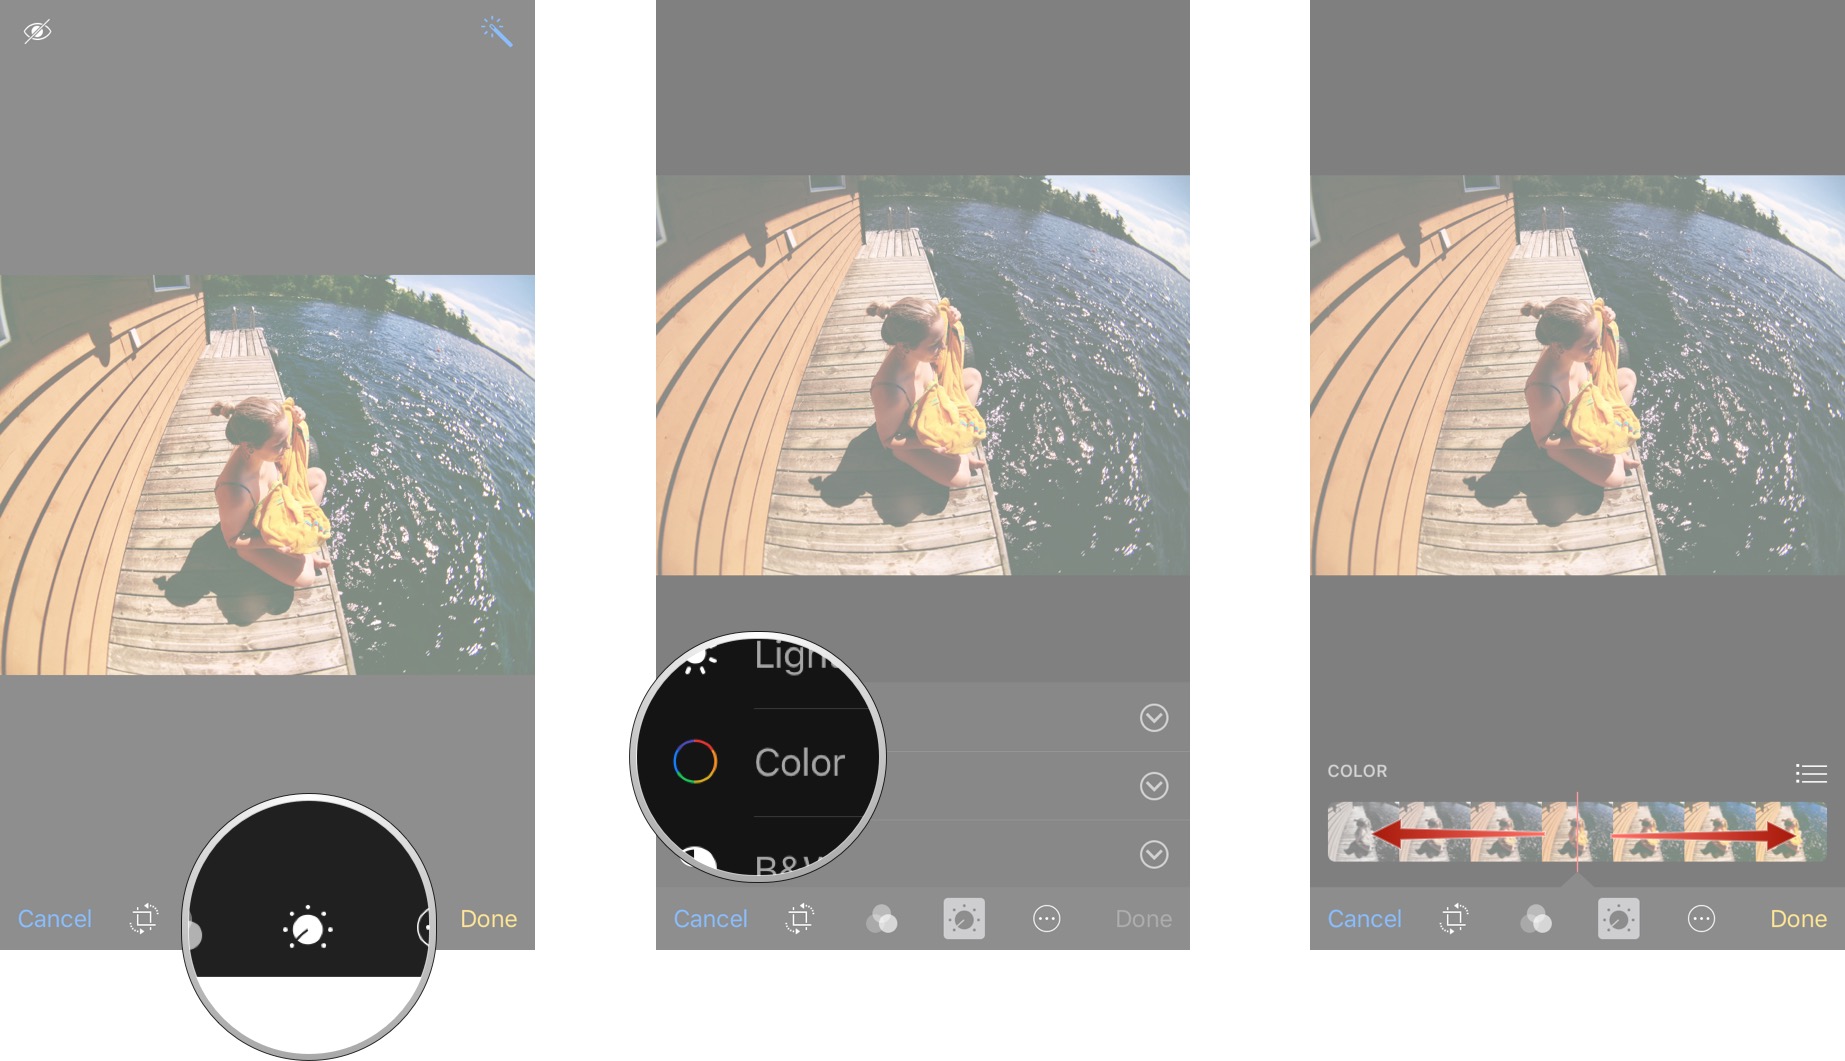
- Tap and hold on the photo to view the original in order to compare it to your edited version.
-
Tap on Done in the bottom right hand corner and your changes will be saved.
How to change color in your photos in iOS 13
Just like the smart lighting adjustment option, the ability to smartly change the color is no longer available in iOS 13. However, you can still adjust the color through different means in iOS 13.
Apple occasionally offers updates to iOS, watchOS, tvOS, and macOS as closed developer previews or public betas for iPhone, iPad, Apple TV and Mac (sadly, no public beta for the Apple Watch). While the betas contain new features, they also contain pre-release bugs that can prevent the normal use of your iPhone, iPad, Apple Watch, Apple TV, or Mac, and are not intended for everyday use on a primary device. That's why we strongly recommend staying away from developer previews unless you need them for software development, and using the public betas with caution. If you depend on your devices, wait for the final release.
- Launch Photos on your iPhone or iPad.
-
Find a photo and tap it to open it.
- Tap the Edit button.
- Tap the Color button in the middle of the bottom menu bar.
-
Swipe left and right to find a color filter that you like — it is applied on your image in real-time.
- If you want to make more adjustments to color, tap on the Lighting button (dial with dots around it) at the bottom menu bar.
-
Swipe until you find Saturation, Vibrance, Warmth, and Tint.
- Adjust the dial on these until you're satisfied.
-
Tap Done in the bottom right corner to save all changes.
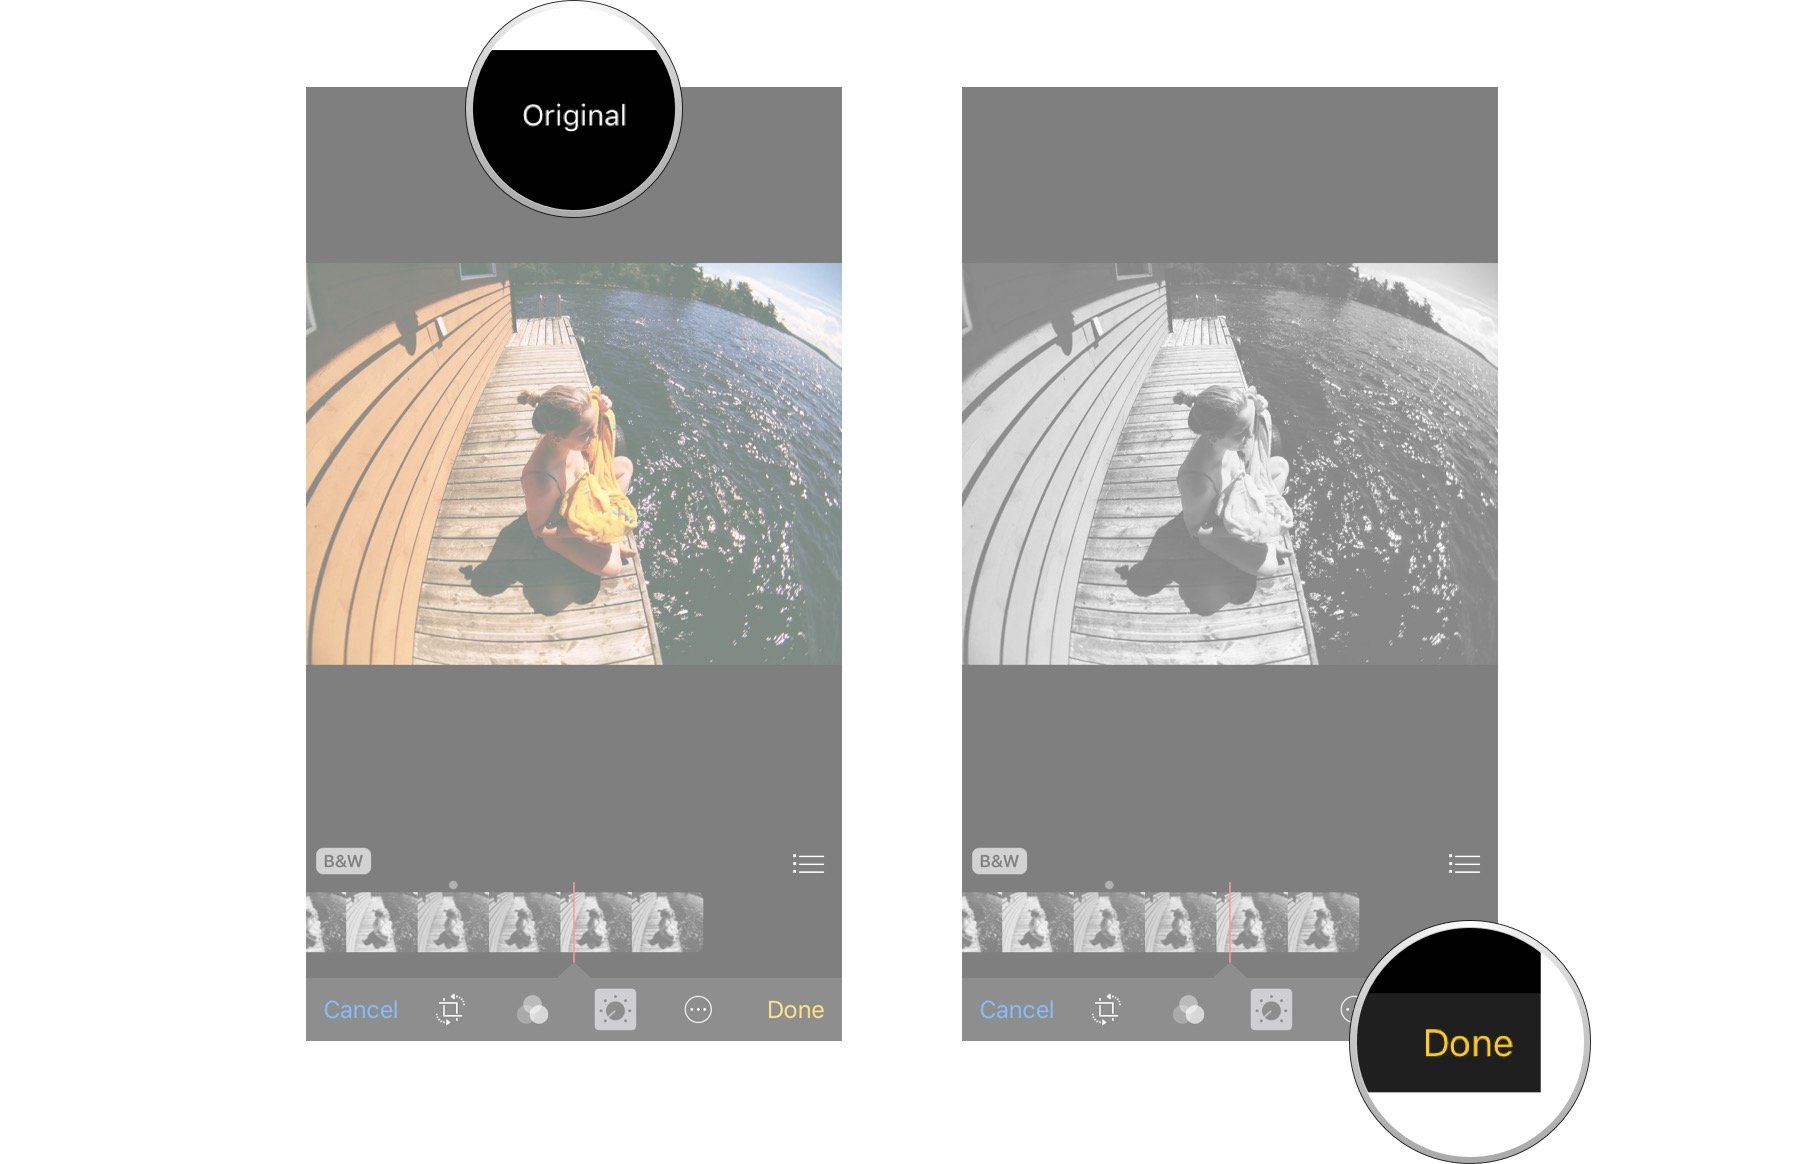
How to convert to black and white with smart adjustments in Photos
- Launch the Photos app on your iPhone or iPad.
- Find the photo you'd like to enhance and tap on it to open it.
- Tap on the Edit button in the upper right corner of the screen.
- Tap on the adjustments button in the bottom navigation — it looks like a dial with dots around it.
- Tap on B&W.
-
Swipe left and right on the slider to adjust the black and white. Lift up your finger when the photo looks as you would like it to.
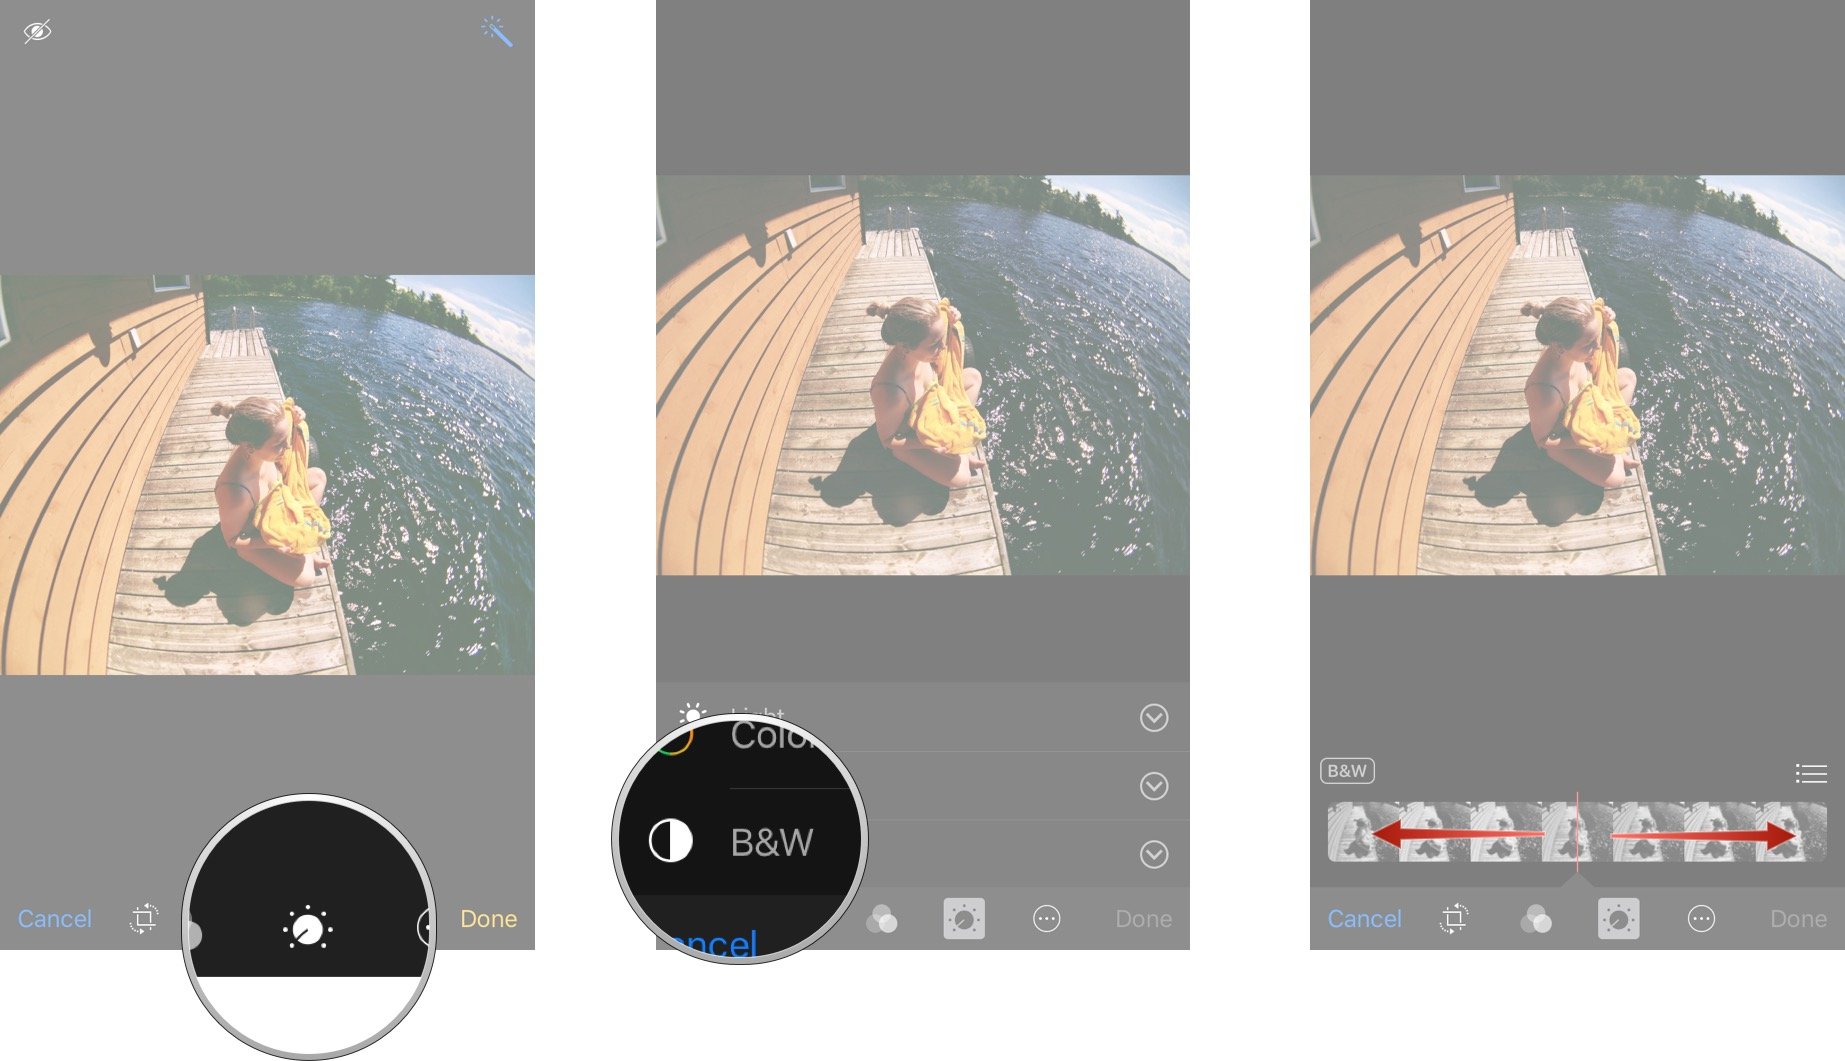
- Tap and hold on the photo to view the original in order to compare it to your edited version.
-
When you're happy with the results, tap on Done in the bottom right-hand corner and your changes will be saved.
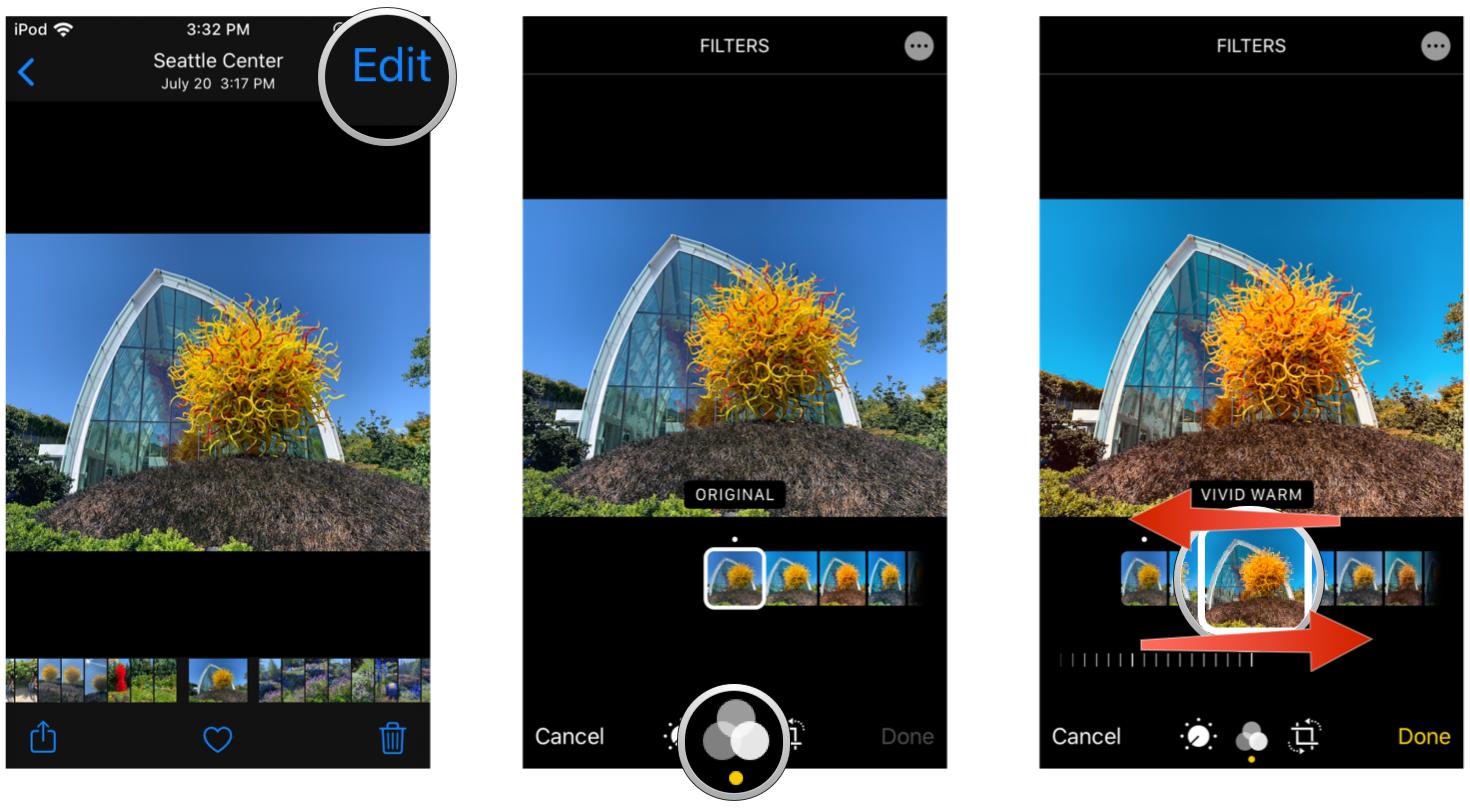
How to convert photos to black and white in iOS 13
Previously in iOS, there was an option to smartly convert your photo to black and white. Like the lighting and color smart adjustments, the black and white option is no longer available. However, you can change it to B&W through filters.
Apple occasionally offers updates to iOS, watchOS, tvOS, and macOS as closed developer previews or public betas for iPhone, iPad, Apple TV and Mac (sadly, no public beta for the Apple Watch). While the betas contain new features, they also contain pre-release bugs that can prevent the normal use of your iPhone, iPad, Apple Watch, Apple TV, or Mac, and are not intended for everyday use on a primary device. That's why we strongly recommend staying away from developer previews unless you need them for software development, and using the public betas with caution. If you depend on your devices, wait for the final release.
- Launch Photos on your iPhone or iPad.
-
Find a photo and tap it to open it.
- Tap the Edit button.
- Tap the Color button in the bottom menu bar.
-
Swipe through the filters until you get to the three black and white ones: Mono, Silvertone, and Noir. They're automatically applied to your photo as you browse.

- If you need to make adjustments, tap the Lighting button to make changes to individual lighting aspects.
-
Tap Done to save your changes.

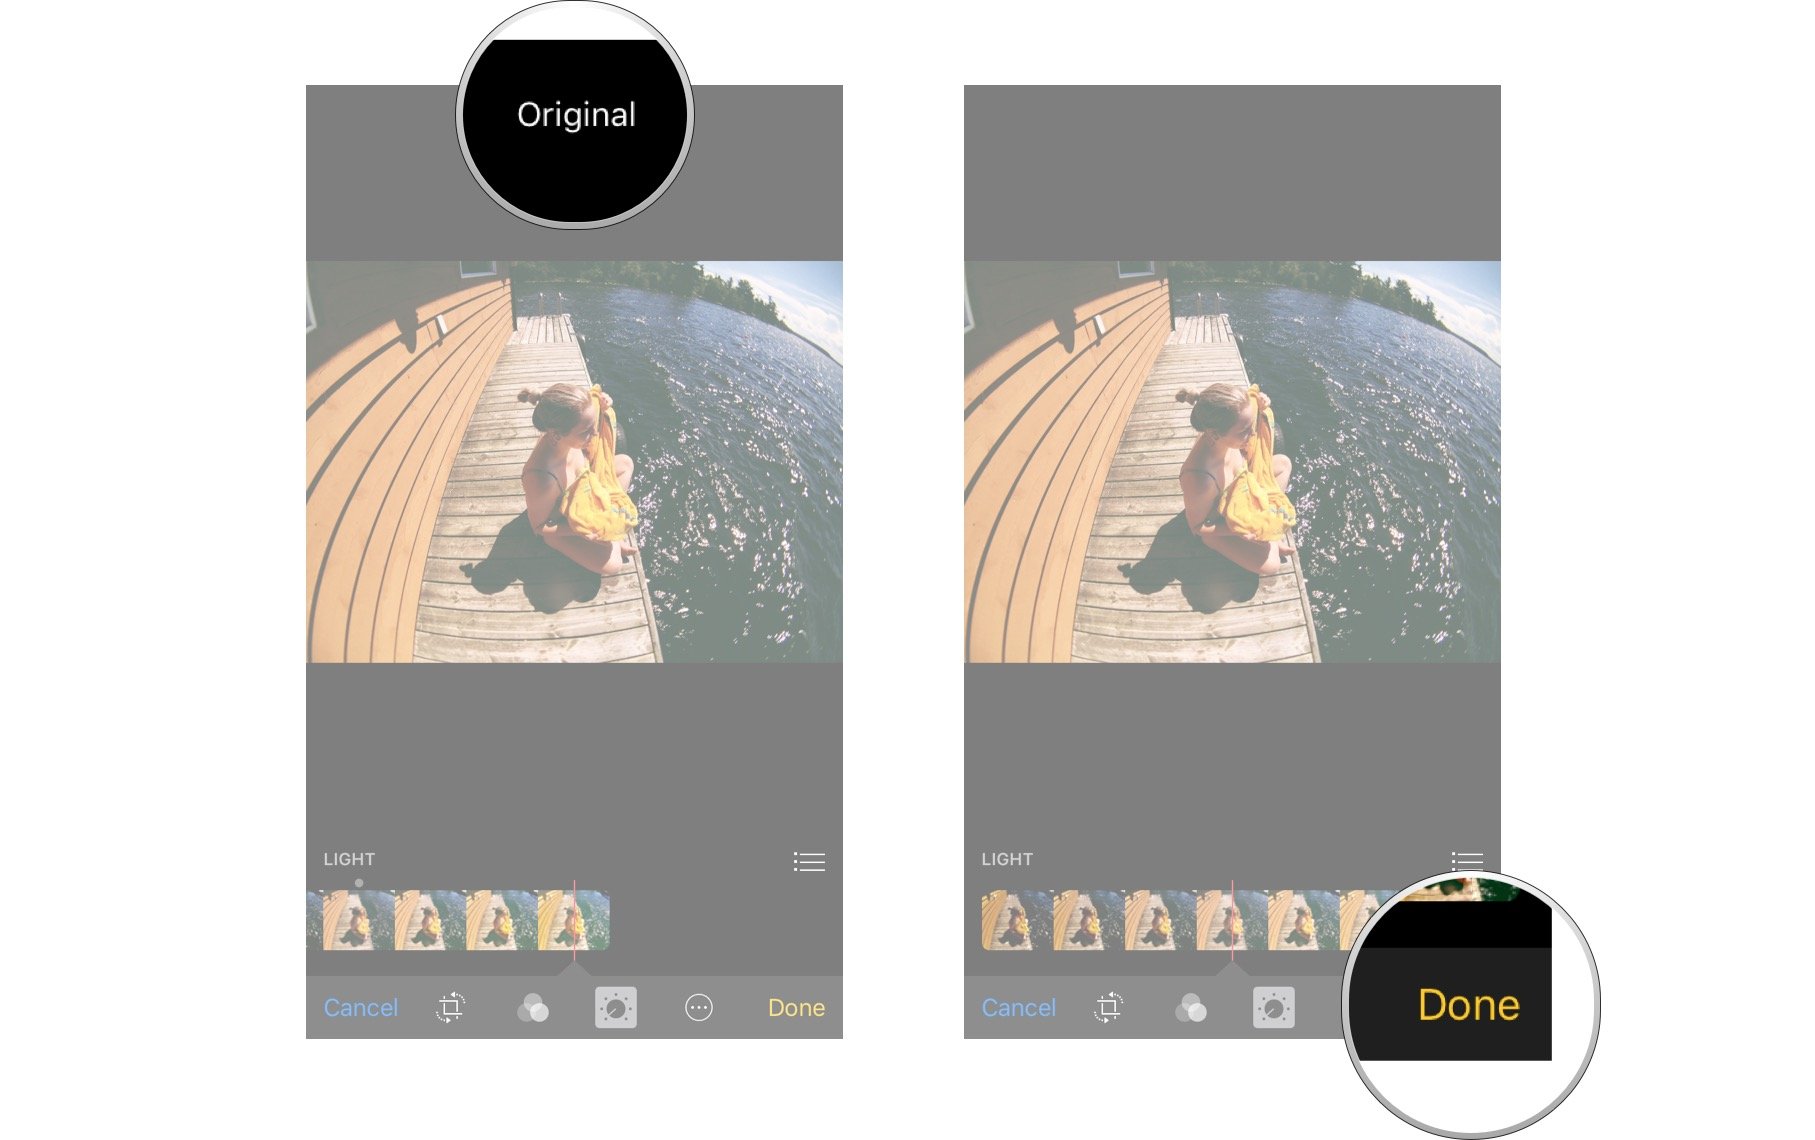
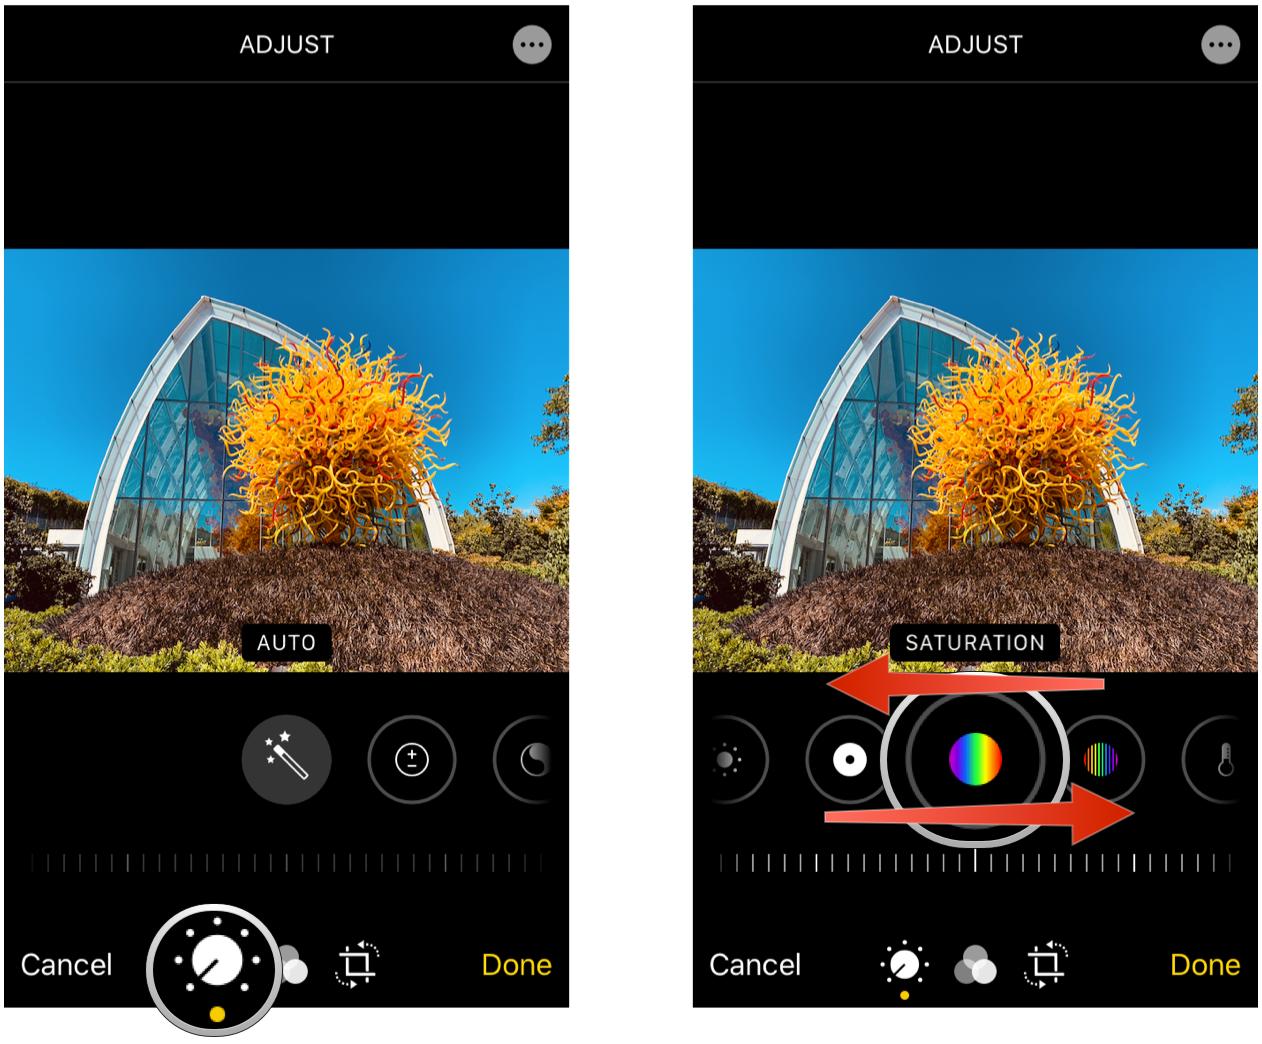
How to fine-tune with smart adjustments in Photos
- Launch the Photos app on your iPhone or iPad.
- Find the photo you'd like to enhance and tap on it to open it.
- Tap on the Edit button in the upper right corner of the screen.
- Tap on the adjustments button in the bottom navigation — it looks like a dial with dots around it.
- Tap on the dropdown arrow next to Color, Light, or B&W.
-
Tap on the name of the adjustment that you'd like to make.
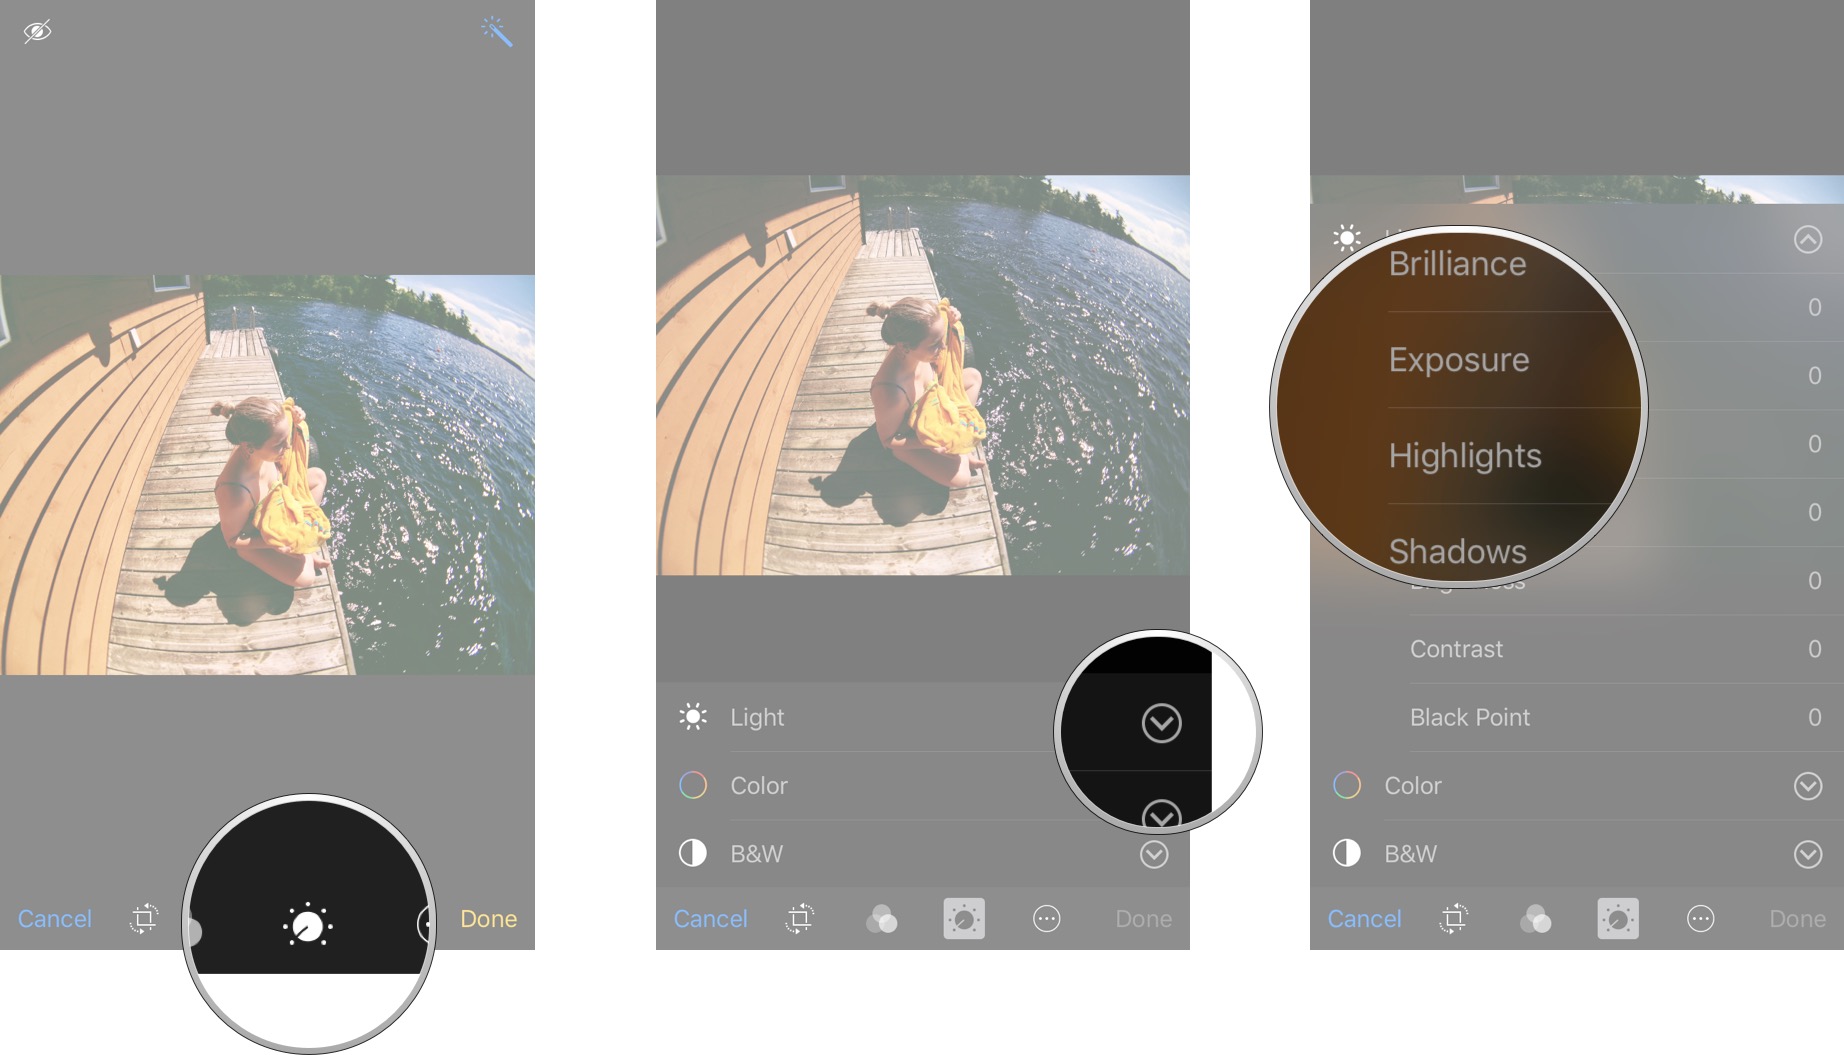
- Swipe left and right to move the slider from left to right in order to make an adjustment.
- Tap and hold on the photo to view the original in order to compare it to your edited version.
-
Tap on Done in the bottom right-hand corner and your changes will be saved.
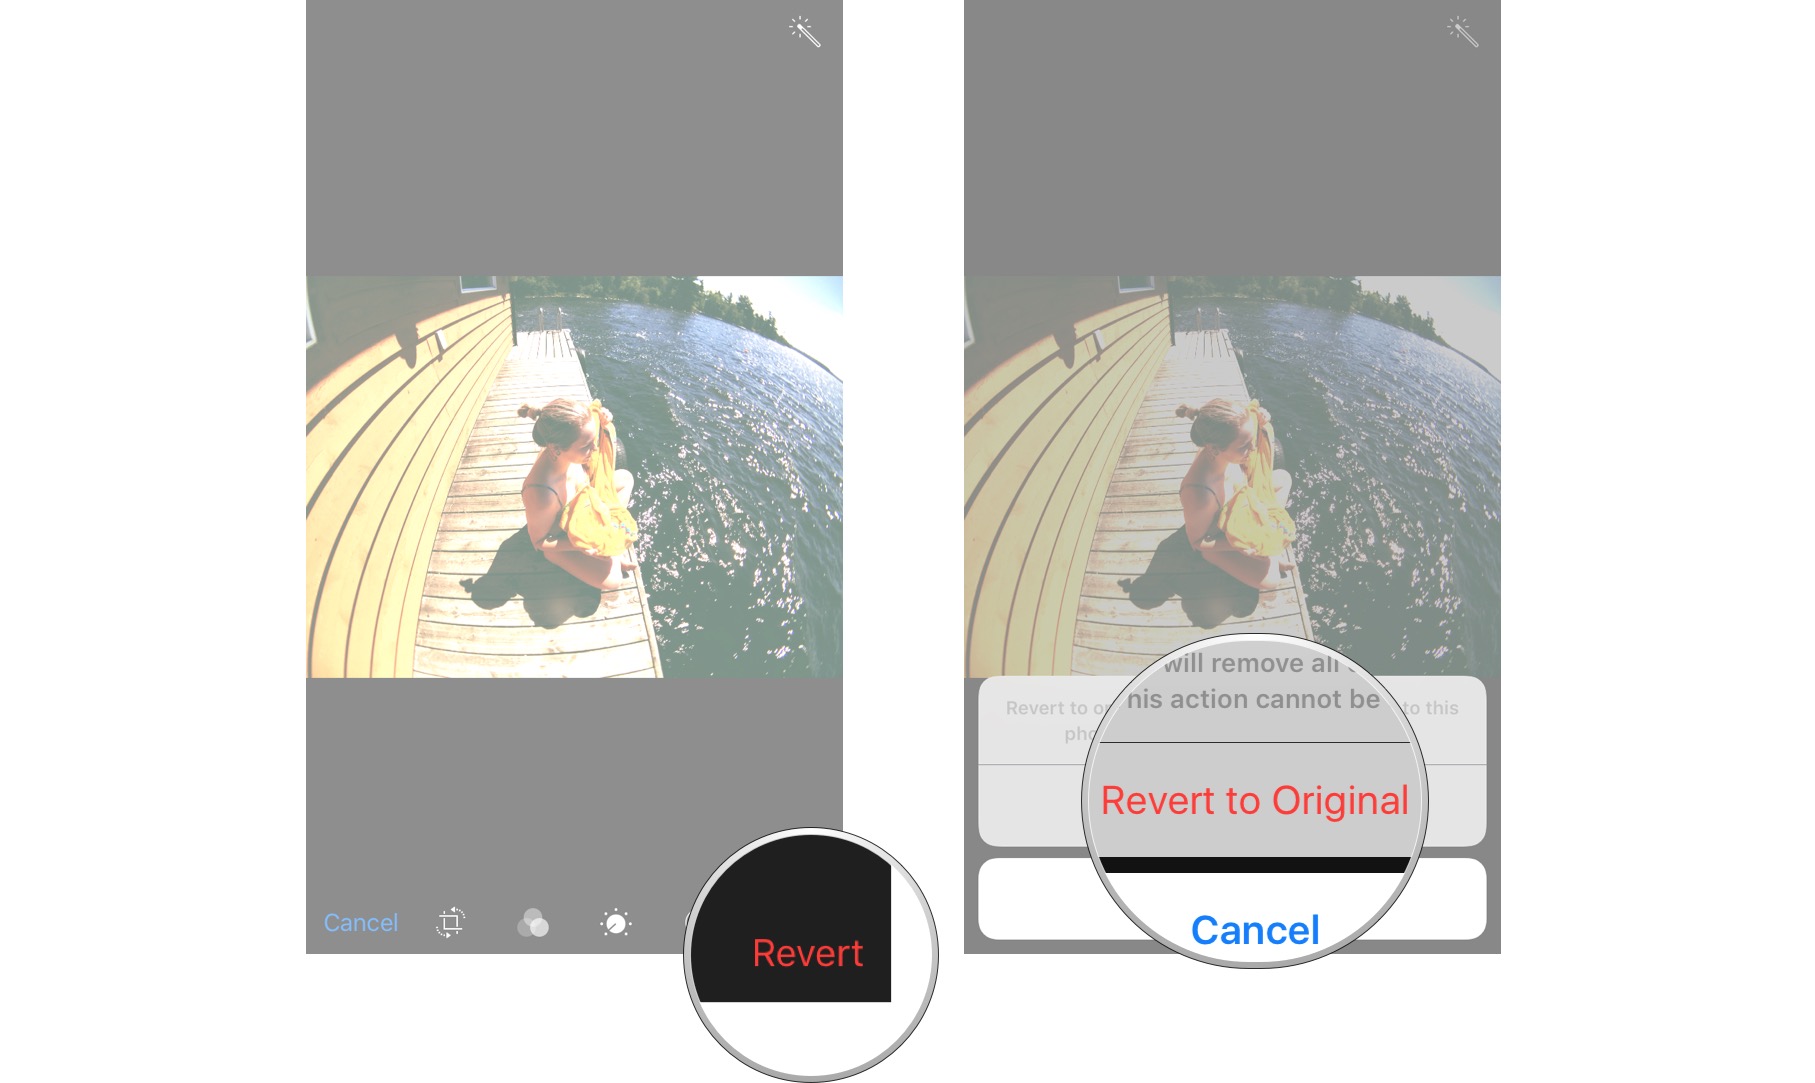
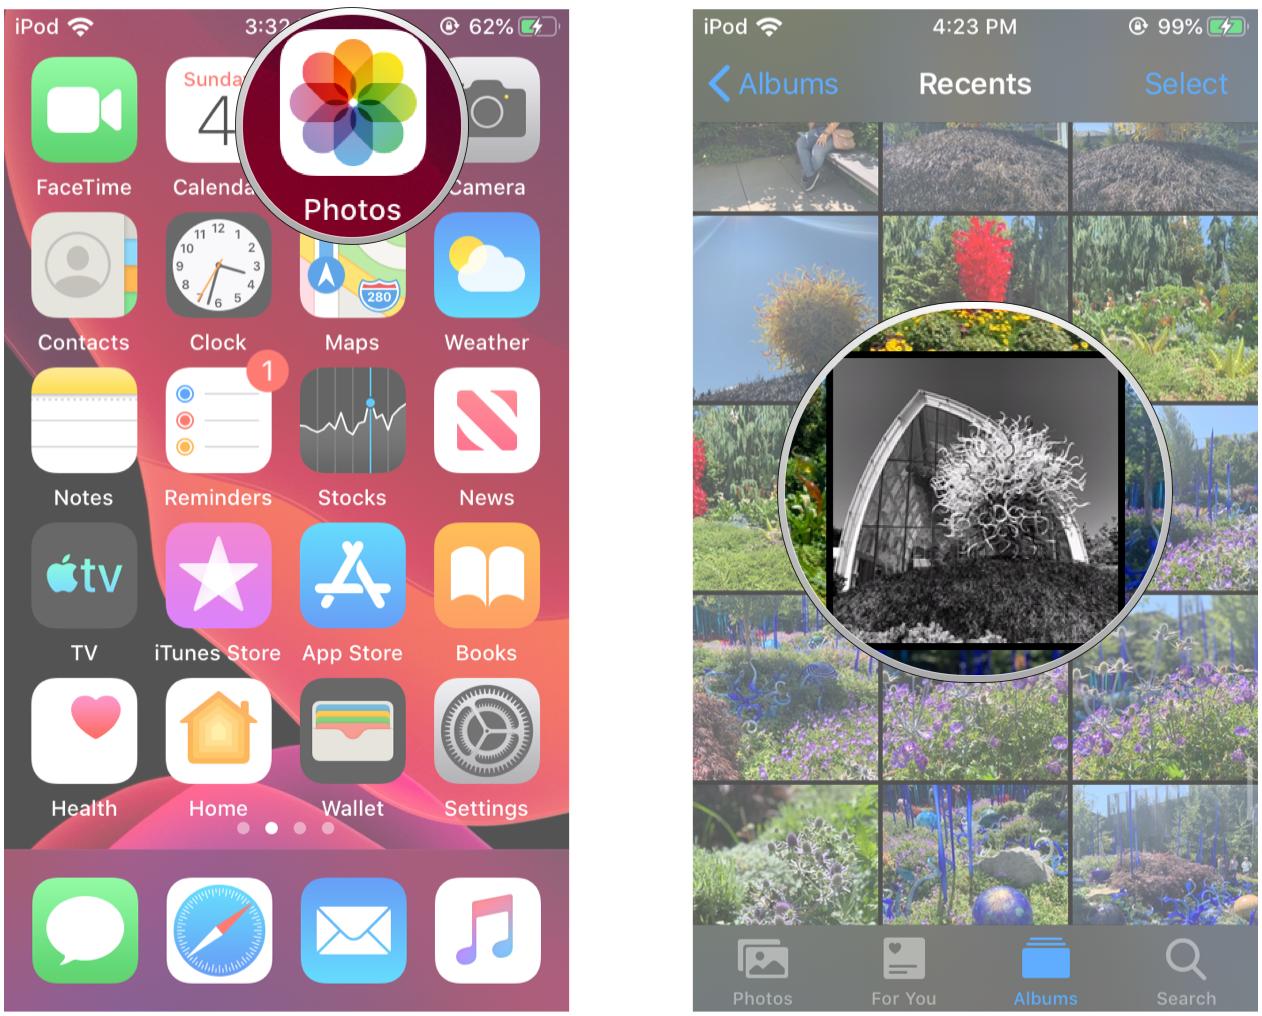
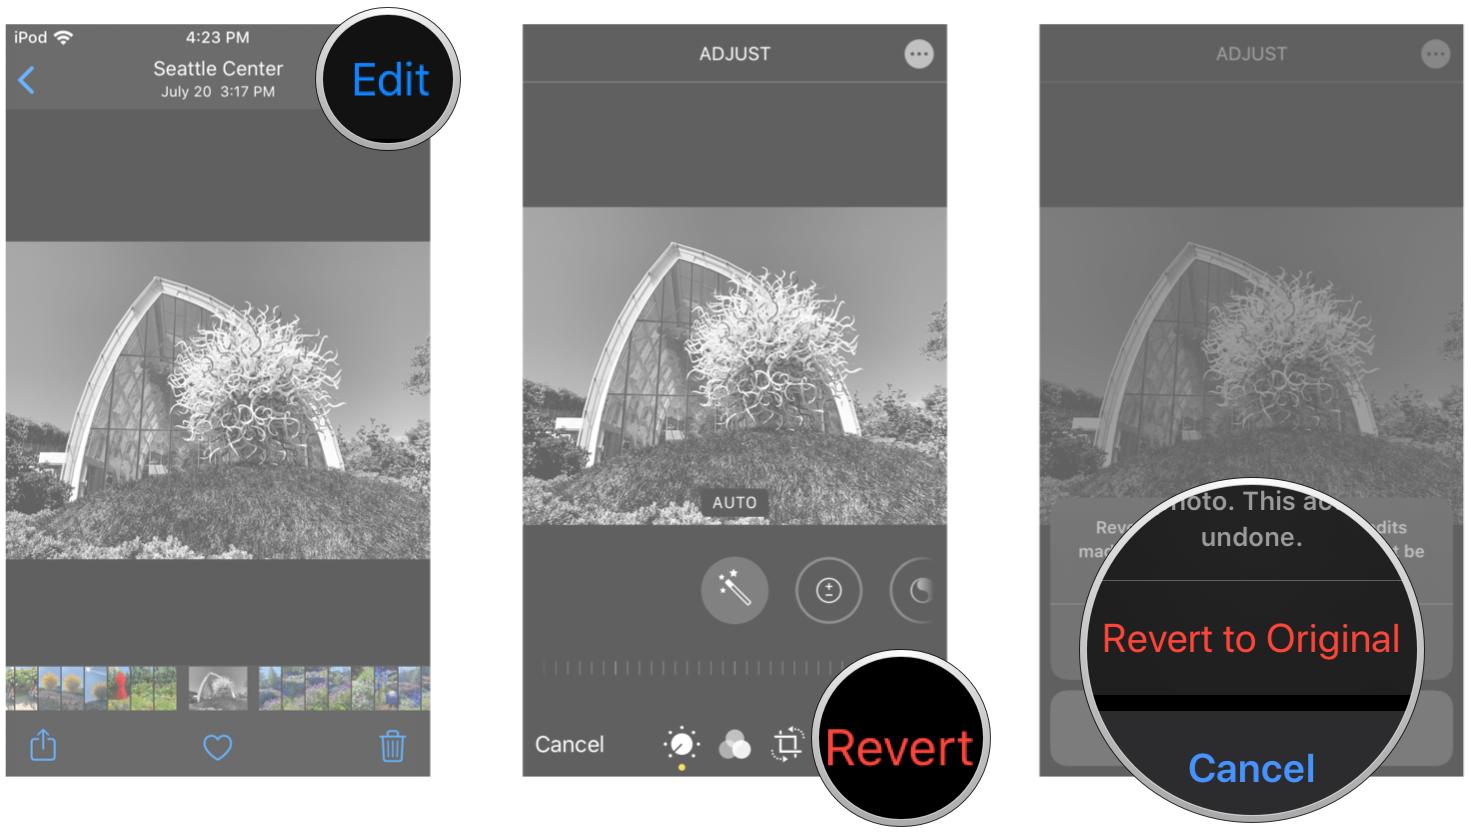
How to revert back to the original image in Photos
- Launch the Photos app on your iPhone or iPad.
- Find the photo you'd like to enhance and tap on it to open it.
- Tap on the Edit button in the upper right corner of the screen.
- Tap on Revert in the bottom right-hand corner.
-
Tap Revert to Original in the popup menu.
How to revert back to the original photo in iOS 13
Apple occasionally offers updates to iOS, watchOS, tvOS, and macOS as closed developer previews or public betas for iPhone, iPad, Apple TV and Mac (sadly, no public beta for the Apple Watch). While the betas contain new features, they also contain pre-release bugs that can prevent the normal use of your iPhone, iPad, Apple Watch, Apple TV, or Mac, and are not intended for everyday use on a primary device. That's why we strongly recommend staying away from developer previews unless you need them for software development, and using the public betas with caution. If you depend on your devices, wait for the final release.
- Launch Photos on your iPhone or iPad.
-
Find a photo that you edited through the Photos app.
- Tap Edit in the upper right corner.
- Tap Revert in the bottom right corner (where Done usually is).
-
Confirm that you want to revert the edited image back to it's original form.
Up your photography game
Moment Wide Lens for iPhone
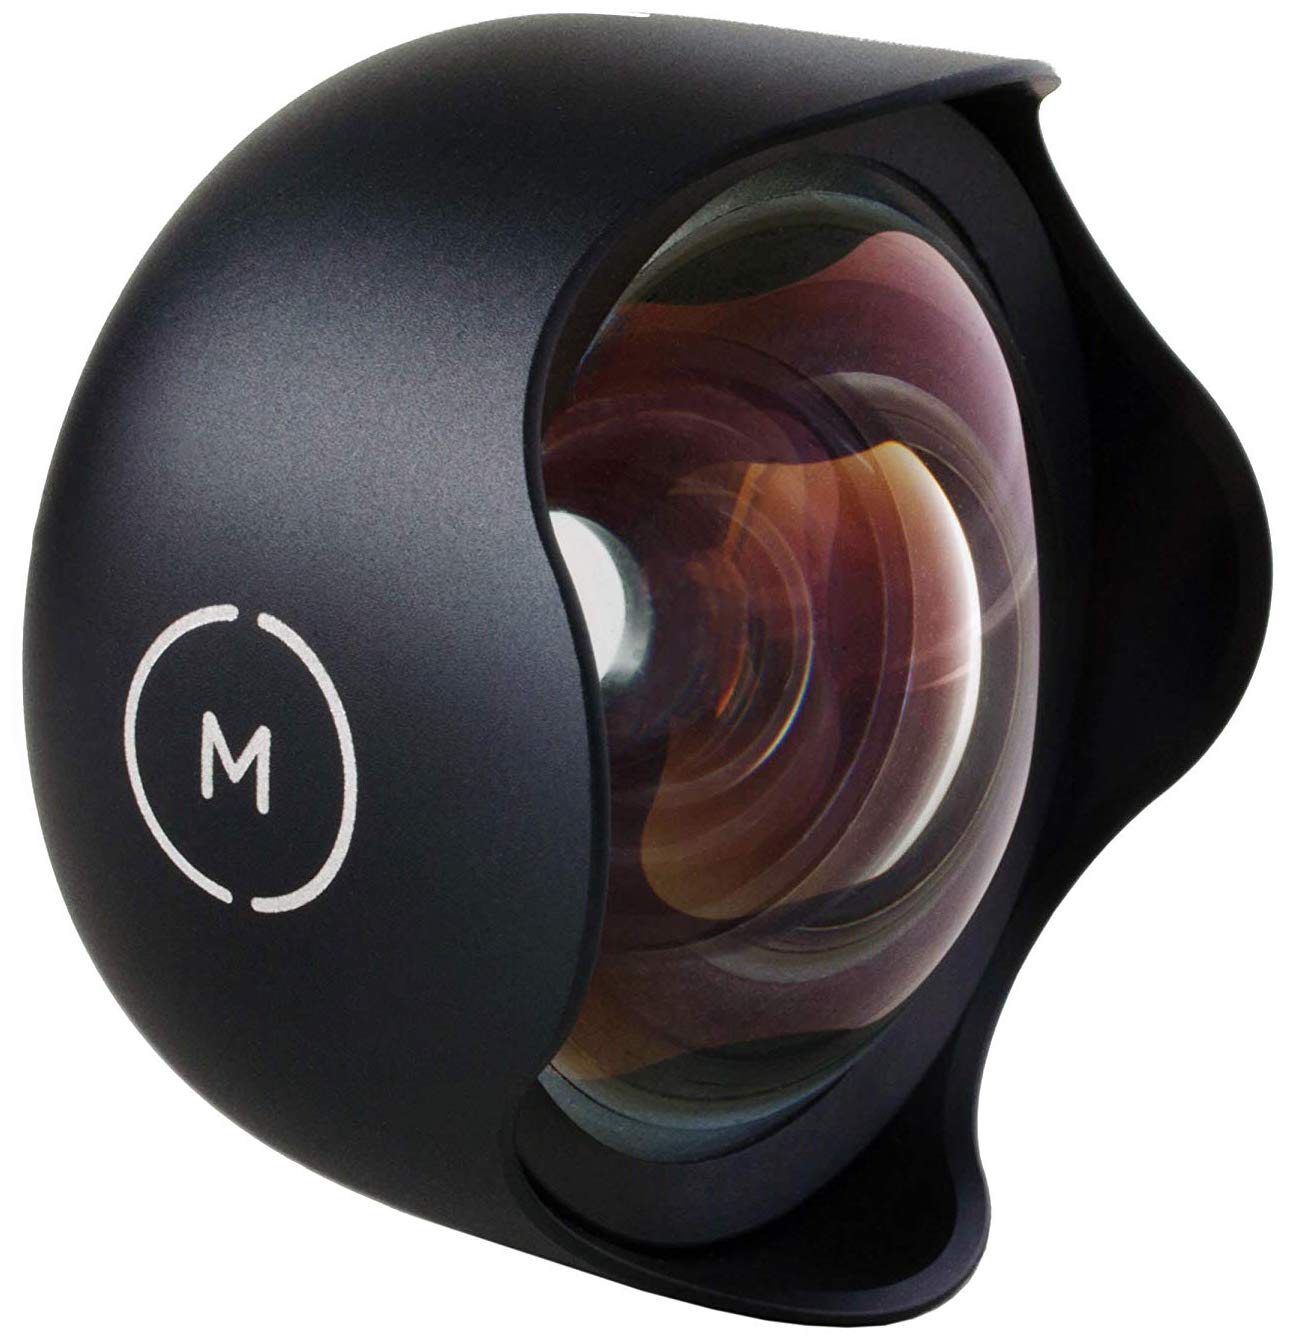
The Moment Wide Lens gives you 2x more picture with a multi-element glass design that provides edge-to-edge clarity. You will need a Moment M-Series Photo Case or Photo Battery Case to use this lens.
Moment iPhone XS Photo Case
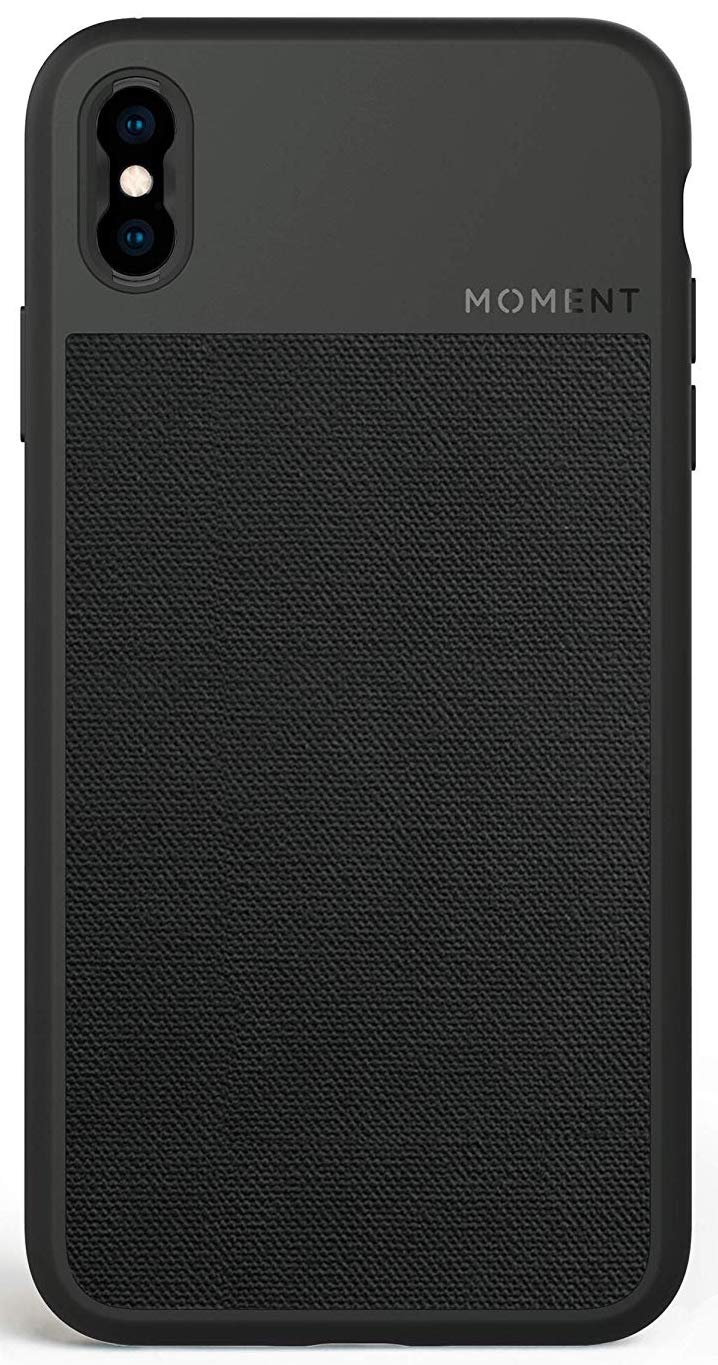
Moment's Photo Case gives you good protection for your device while also providing compatibility with all of the different Moment lenses that are available. Just insert and twist the lenses into the camera cutout area and you're good to go!
Olloclip Filmer's Kit for iPhone XS
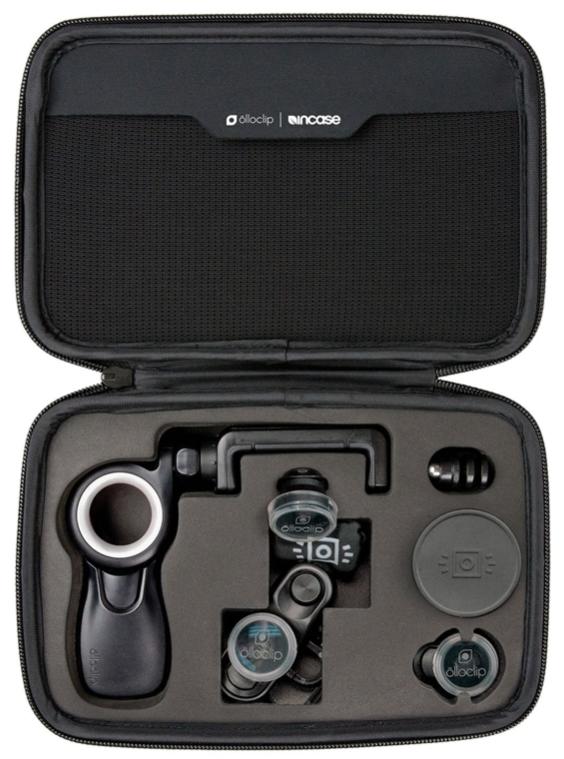
This Filmer's Kit from Olloclip has everything you'll ever need for your iPhone XS photography. It includes macro, 2x telephoto pro, fisheye, super-wide, and ultra-wide lenses. It also has the Pivot, Olloclip's mobile video grip. It's everything you will ever need to get the best photos and video!
Any questions?
If you have any questions about photo editing, let me know in the comments!
August 2019: Updated for iOS 13 beta.