
How to set up Amiibo on Nintendo Switch
- apr
- 05
Adding an Amiibo to your Nintendo Switch is a little bit of work.

If you are one of the many people that didn't own a Wii U, Amiibo are entirely new to you and don't do much on your Nintendo Switch right now. The good news is they're going to get a lot more interesting as more games are released for the Switch. The better news is they all look really cool, so you can start collecting the ones you like now and worry about how they will help your game later.
As you buy Amiibo, if you decide to take the figuring out of its packaging, make sure you add your account to the model so its ready to play when you are. Not sure what any of that means? Don't worry, this guide will walk you through everything!
How do Amiibo work?
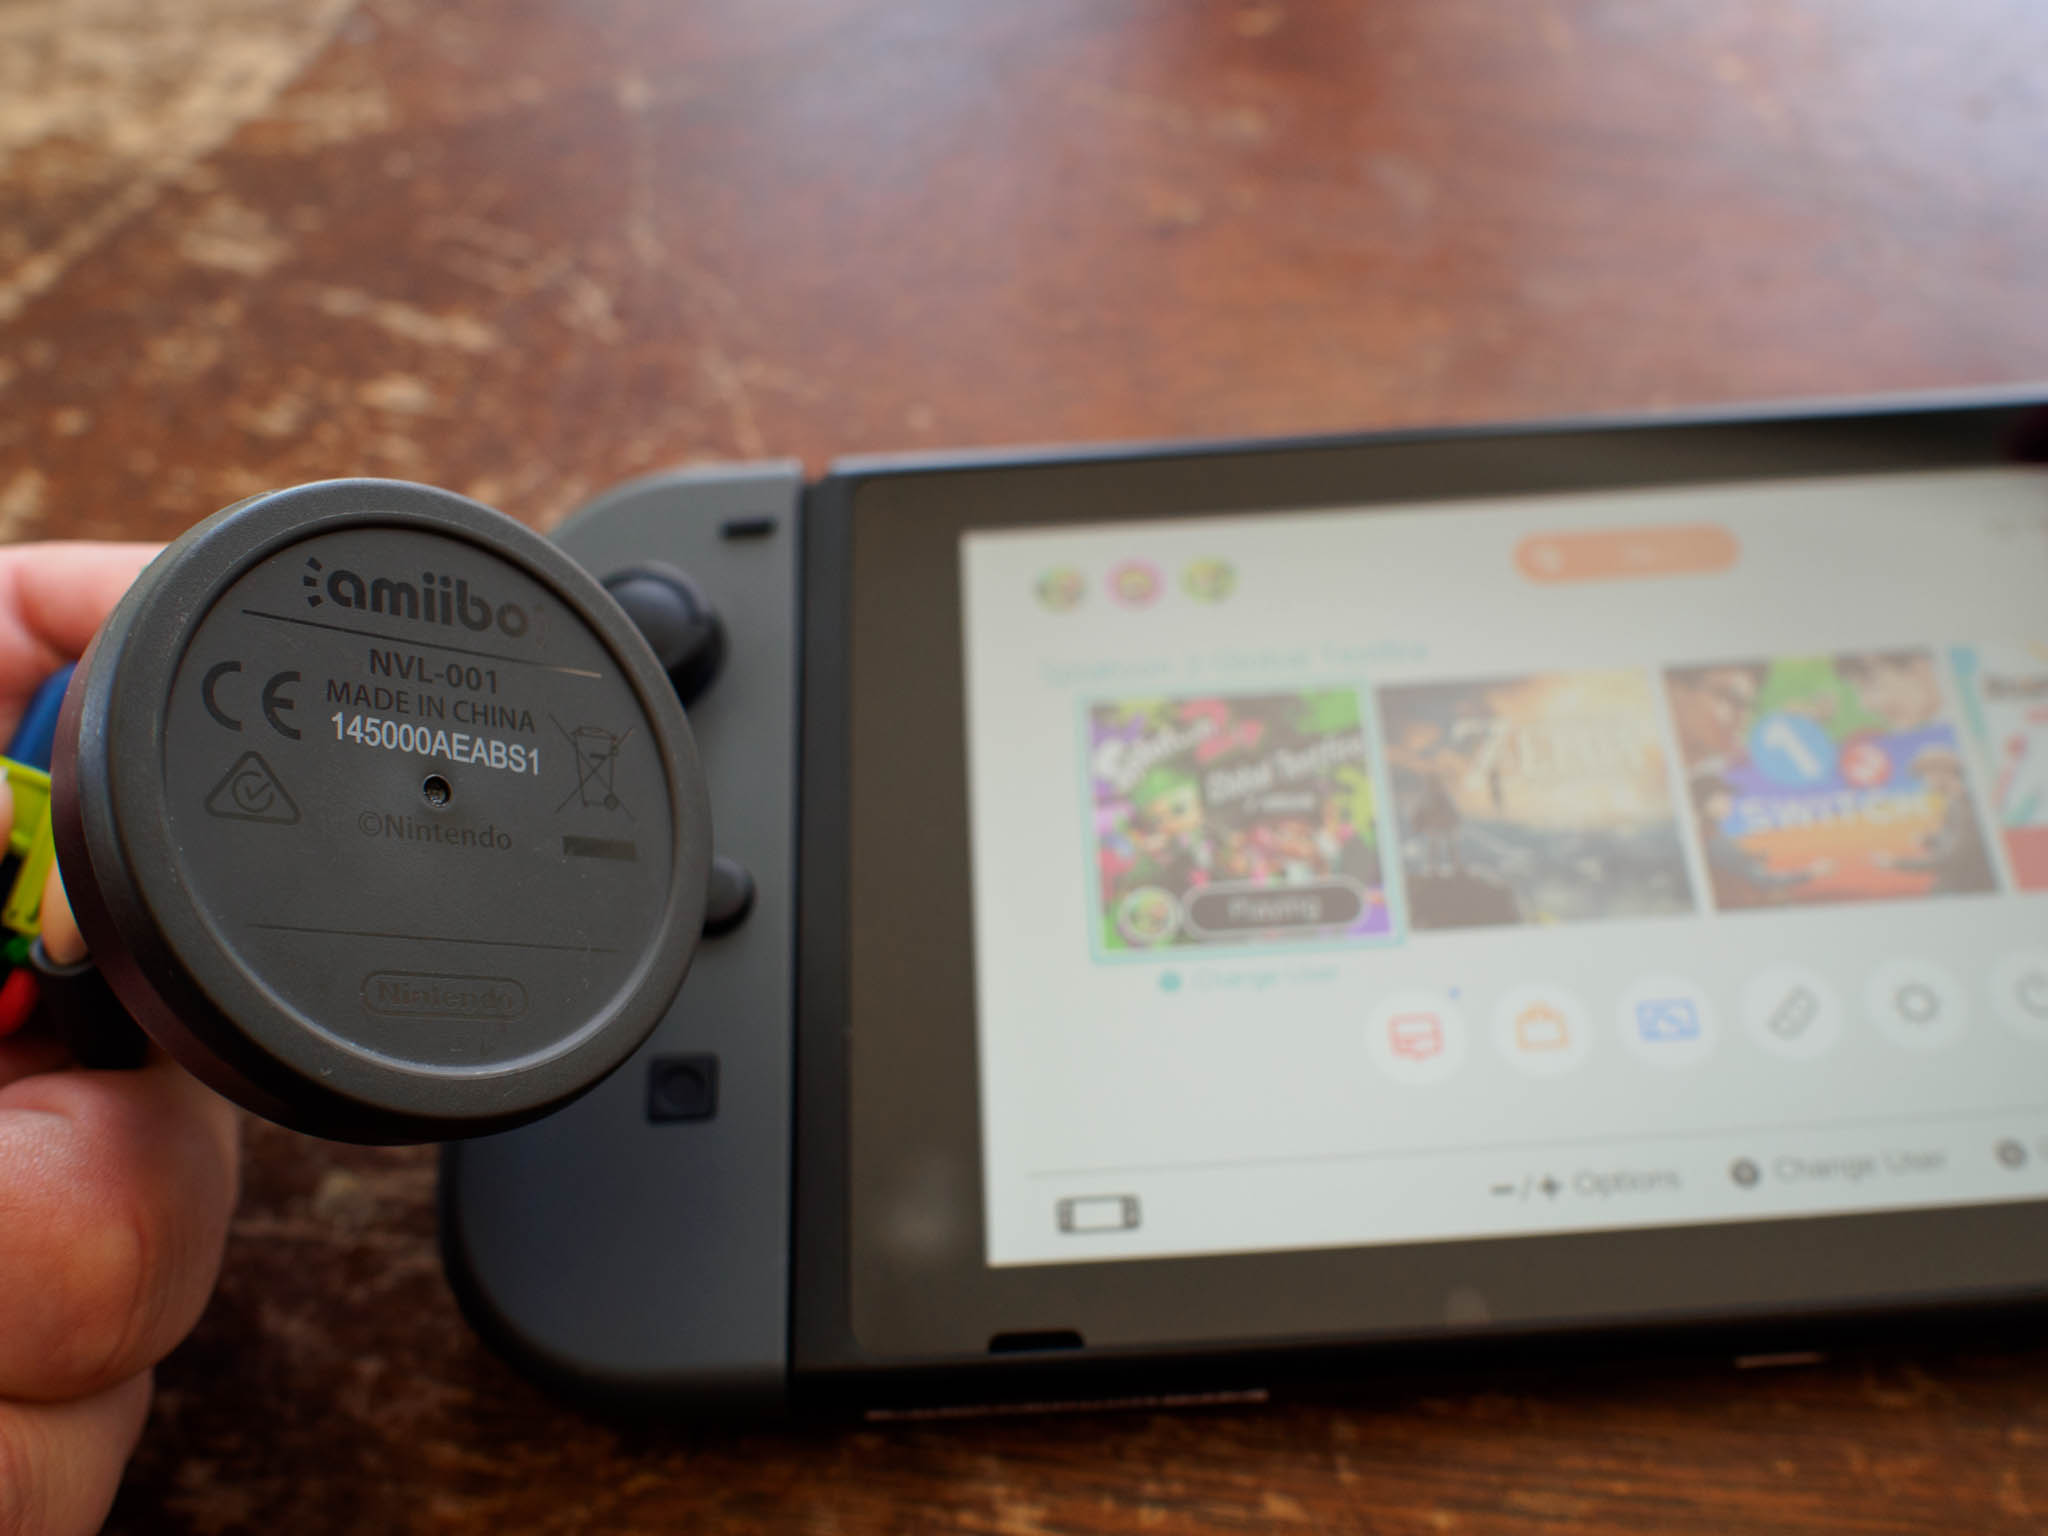
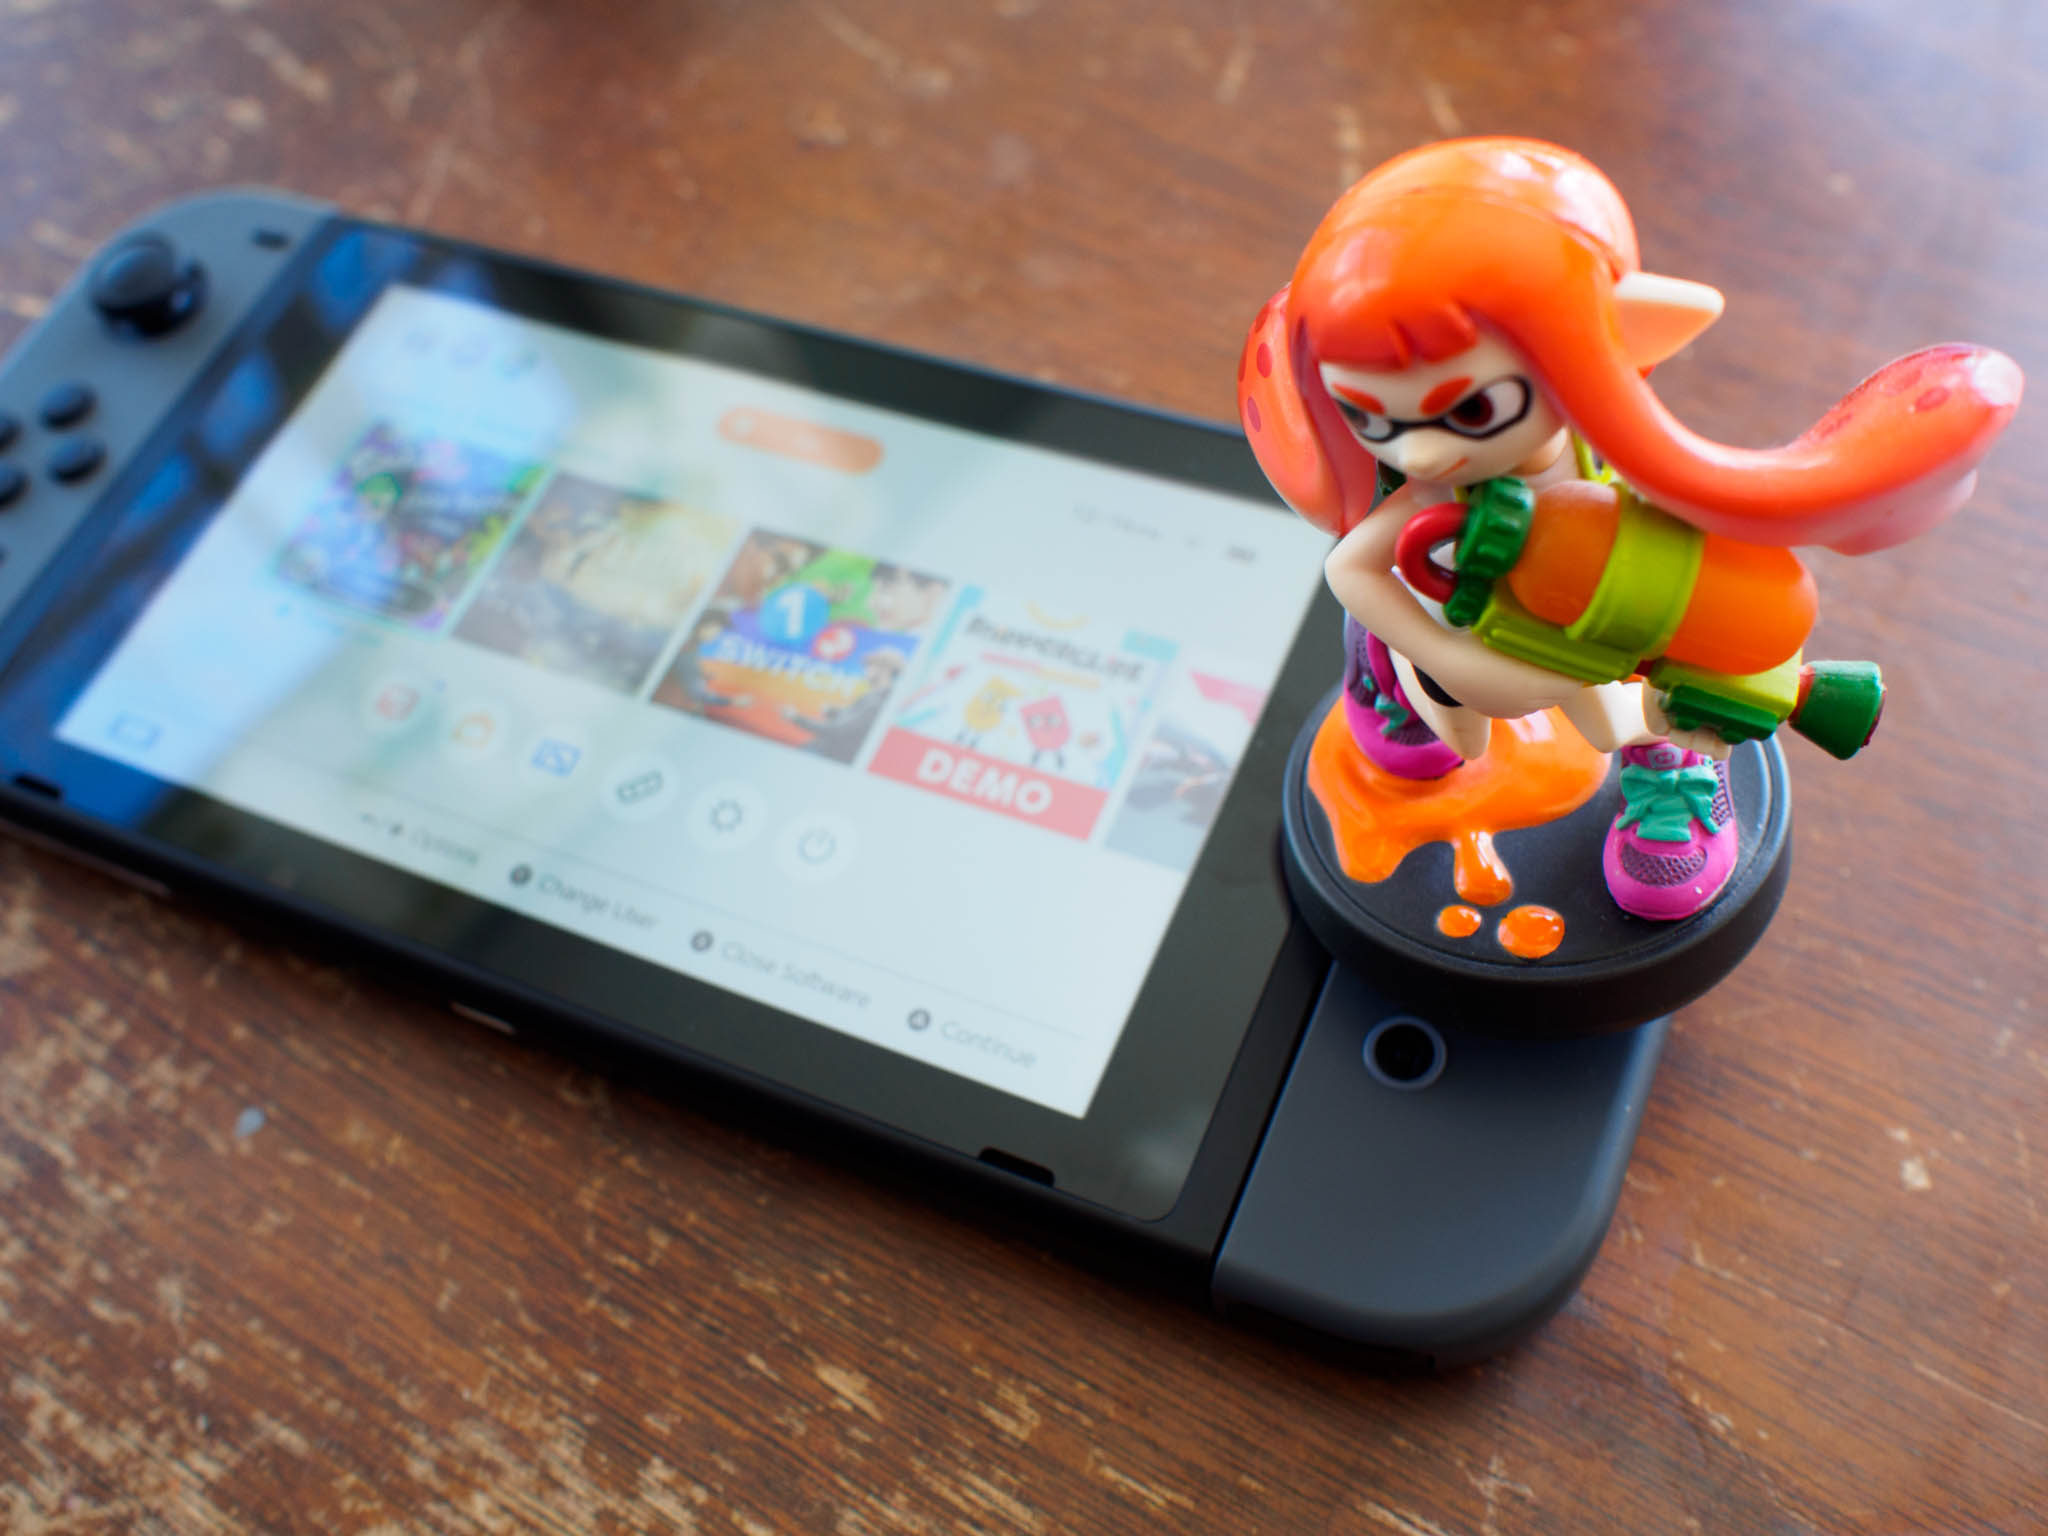
At the base of each Amiibo figurine there's a special chip that can be accessed wirelessly. When you place the figurine on the right Switch Joy-Con, it reads that chip and "sees" which one you have. Your Switch will relay this information to whatever game you are playing, which can unlock special content. For example, if you're playing Legend of Zelda: Breath of the Wild and you tap a Link figurine to the Joy-Con, special clothing you can only get through an Amiibo will appear in the game. Each Switch game treats Amiibo a little differently, unlocking different in-game things based on the Amiibo you tap to the Joy-Con.
In some cases, your Amiibo can also receive information from the Switch and save it to the chip on your Amiibo. The best example of this is in Super Smash Bros for the Wii U, which allows you to equip an AI fighter with special weapons and abilities for combat. You can level up an AI Mario and then save it to a Mario Amiibo, making that special AI fighter portable. You can take that fighter to someone else's Wii U, and see how your friends handle your particularly lethal AI fighter. In the not-too-distant future, versions of this feature will also exist for the Switch.
Need to buy some Amiibo? Get started with the Breath of the Wild series!
Adding an Amiibo to your Switch
When you remove an Amiibo from its packaging, the first thing you need to do is add your profile to the Amiibo to claim it as your own. This ensures no one can alter your Amiibo data without your account, and makes it so your Amiibo can only unlock special in-game items for you.
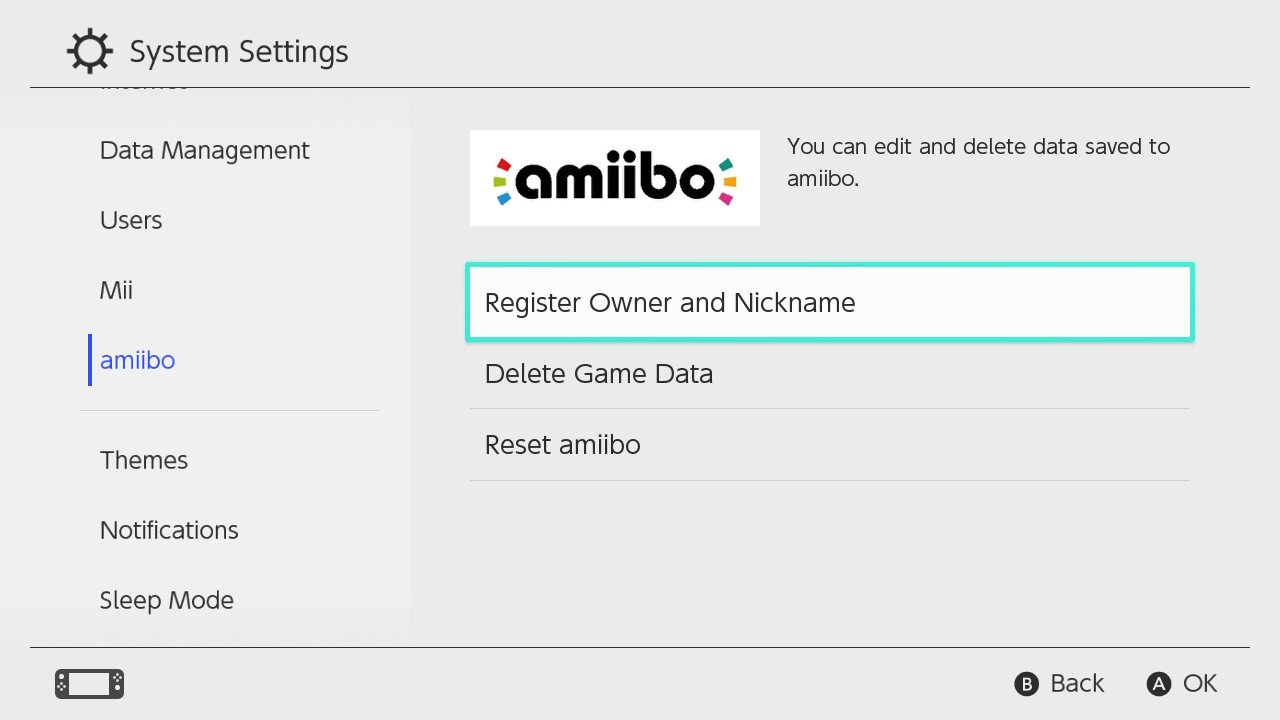
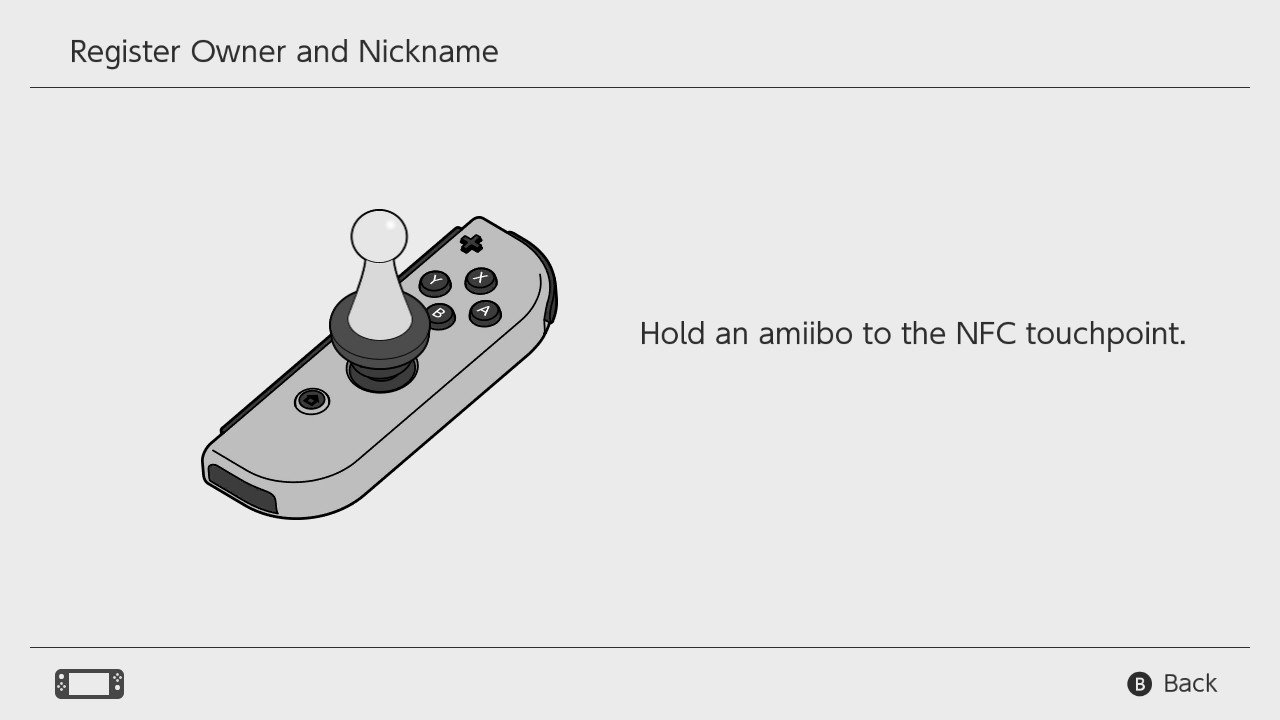
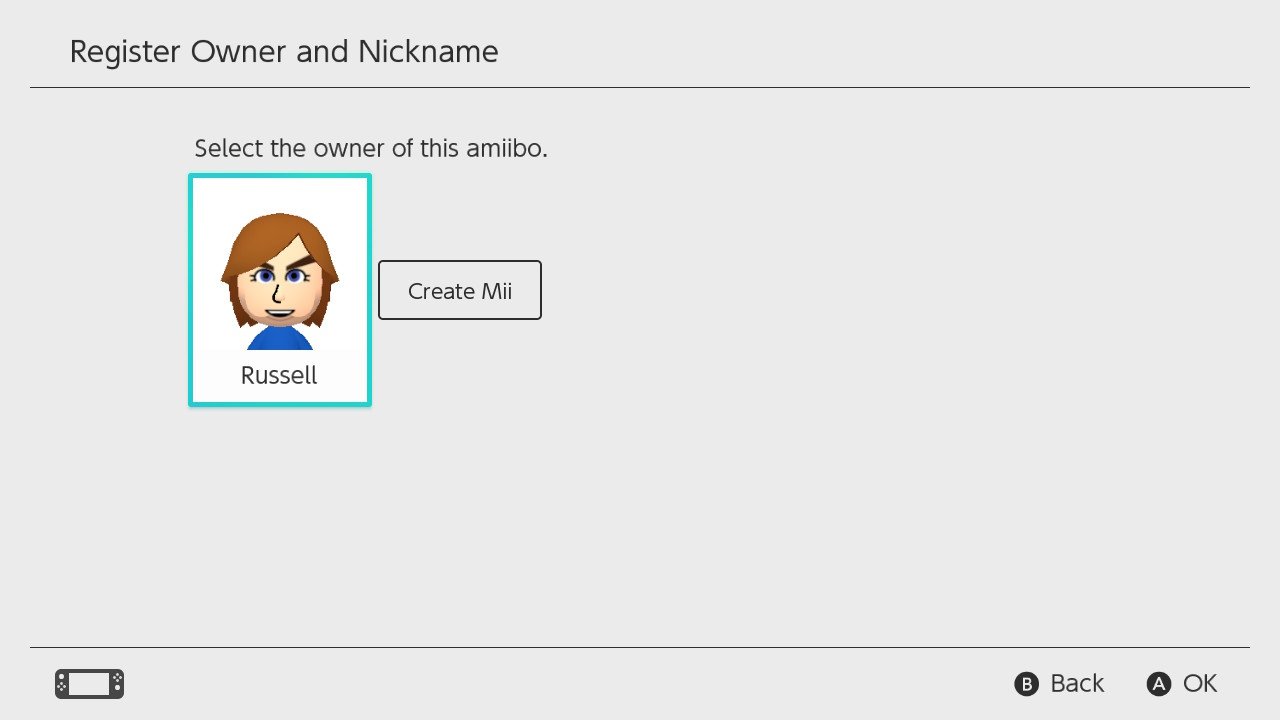
From the Nintendo Switch homescreen, head to Settings > Amiibo > Register Owner and Nickname and tap A. You'll be instructed to set the base of your Amiibo to the top of the joystick on your right Joy-Con. Hold it there until you see the screen change to ask which Mii you want to register to your Amiibo.
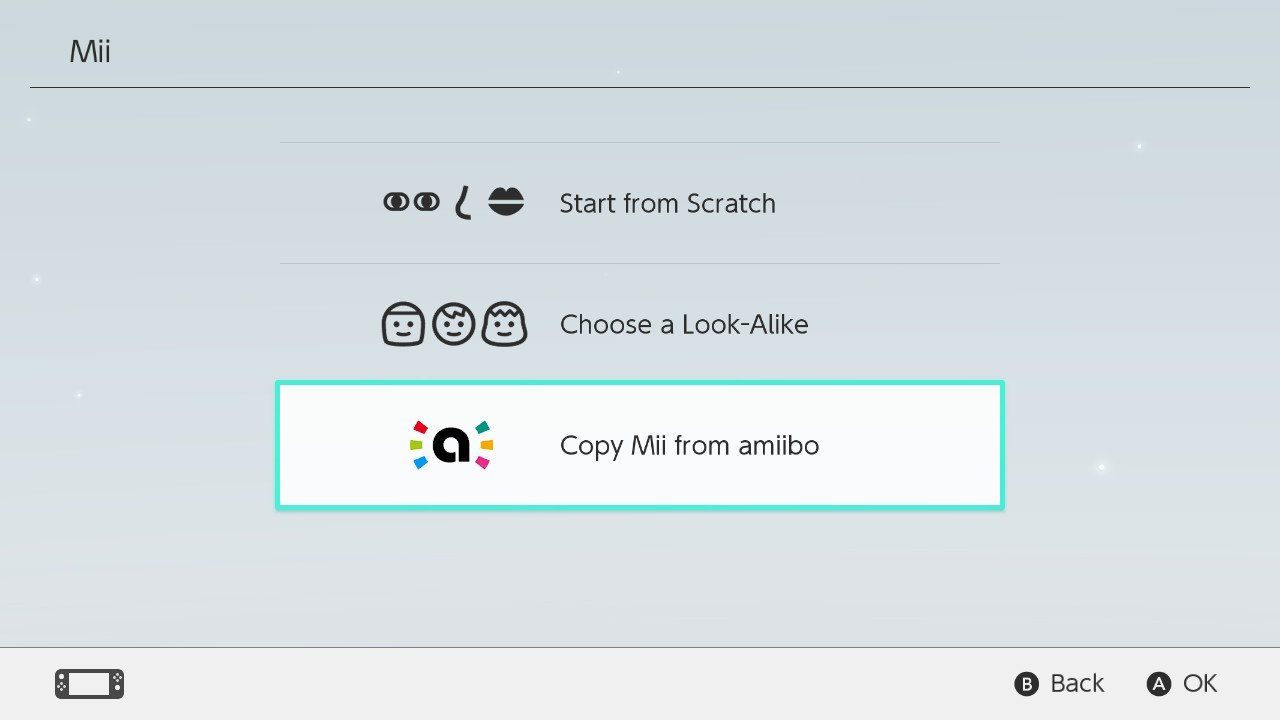

If you've never made a Mii on your Switch, you'll need to make one now. Follow the prompts to create a digital avatar to your liking, and save it to your Switch profile. Once you've created a Mii, you'll be able to choose it as your profile option for any other Amiibo you register in the future. If you are bringing this Amiibo to your Switch from your Wii U, it will be possible to import your Mii from the information already saved to your Amiibo.

Now that you have a Mii, you need to give this Amiibo a nickname. This is just in case you have more than one of the same figurine, but need to save different information to the Amiibo and need to be able to tell them apart. You can choose just about anything as a nickname for an Amiibo, but you're usually the only one who will see these names so don't get too excited about teasing your friends with clever nicknames.
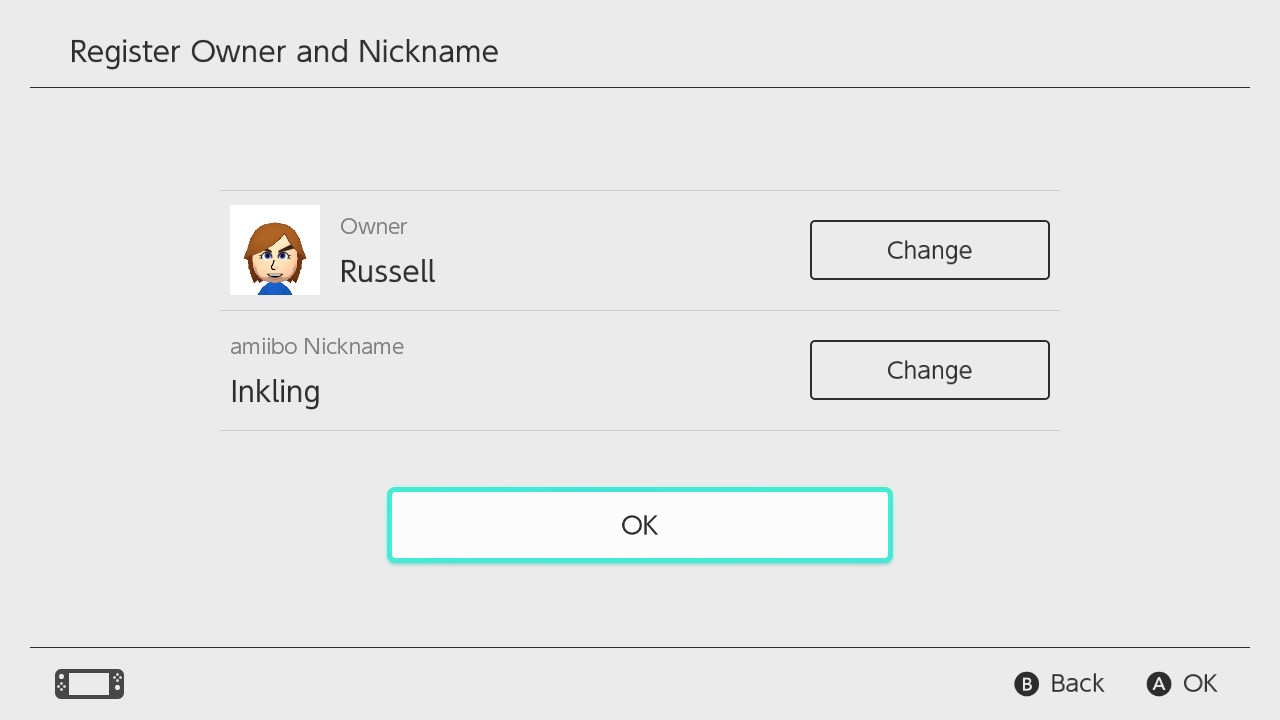
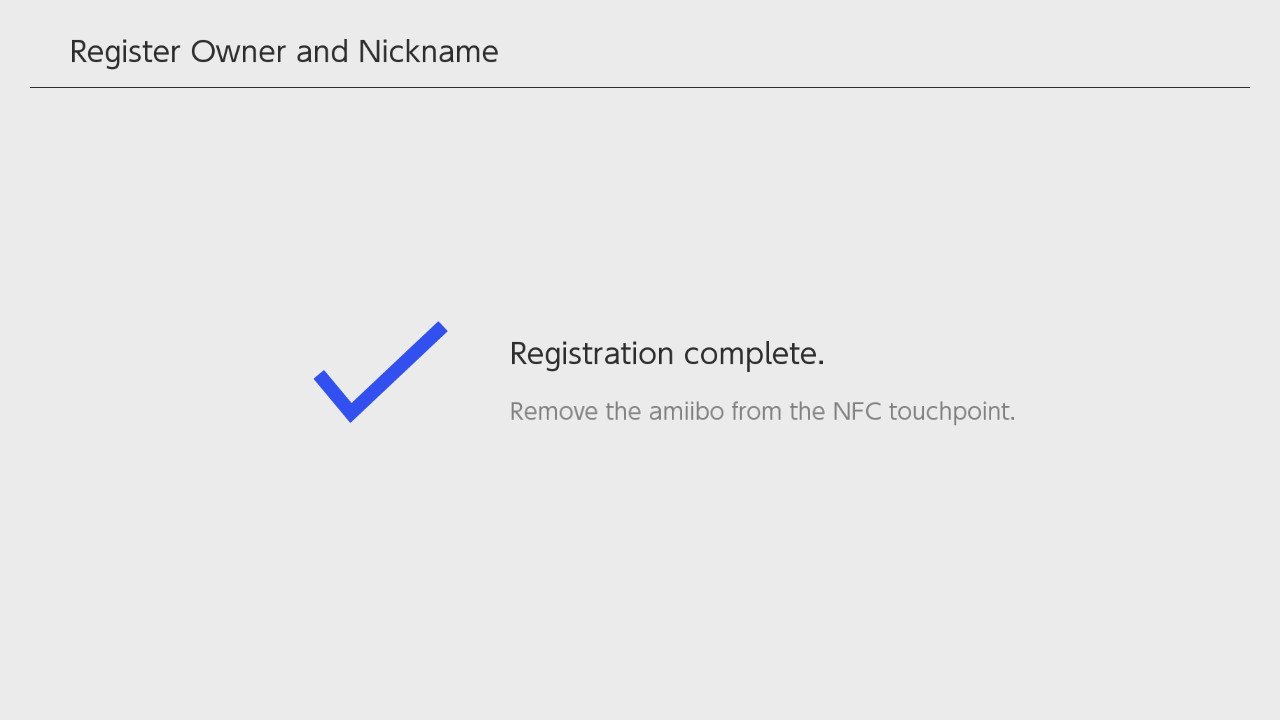
Once you have a nickname you're happy with, select OK on the confirmation screen and place your Amiibo back on the Joy-Con joystick. The registration information will be saved to your Amiibo, and you'll see a big friendly checkmark when it's all done.
From here, you can place your Amiibo on a shelf to look nice until you need it. When you're ready to use an Amiibo in a game, just tap it to the joystick and your game will react immediately.